
Overview
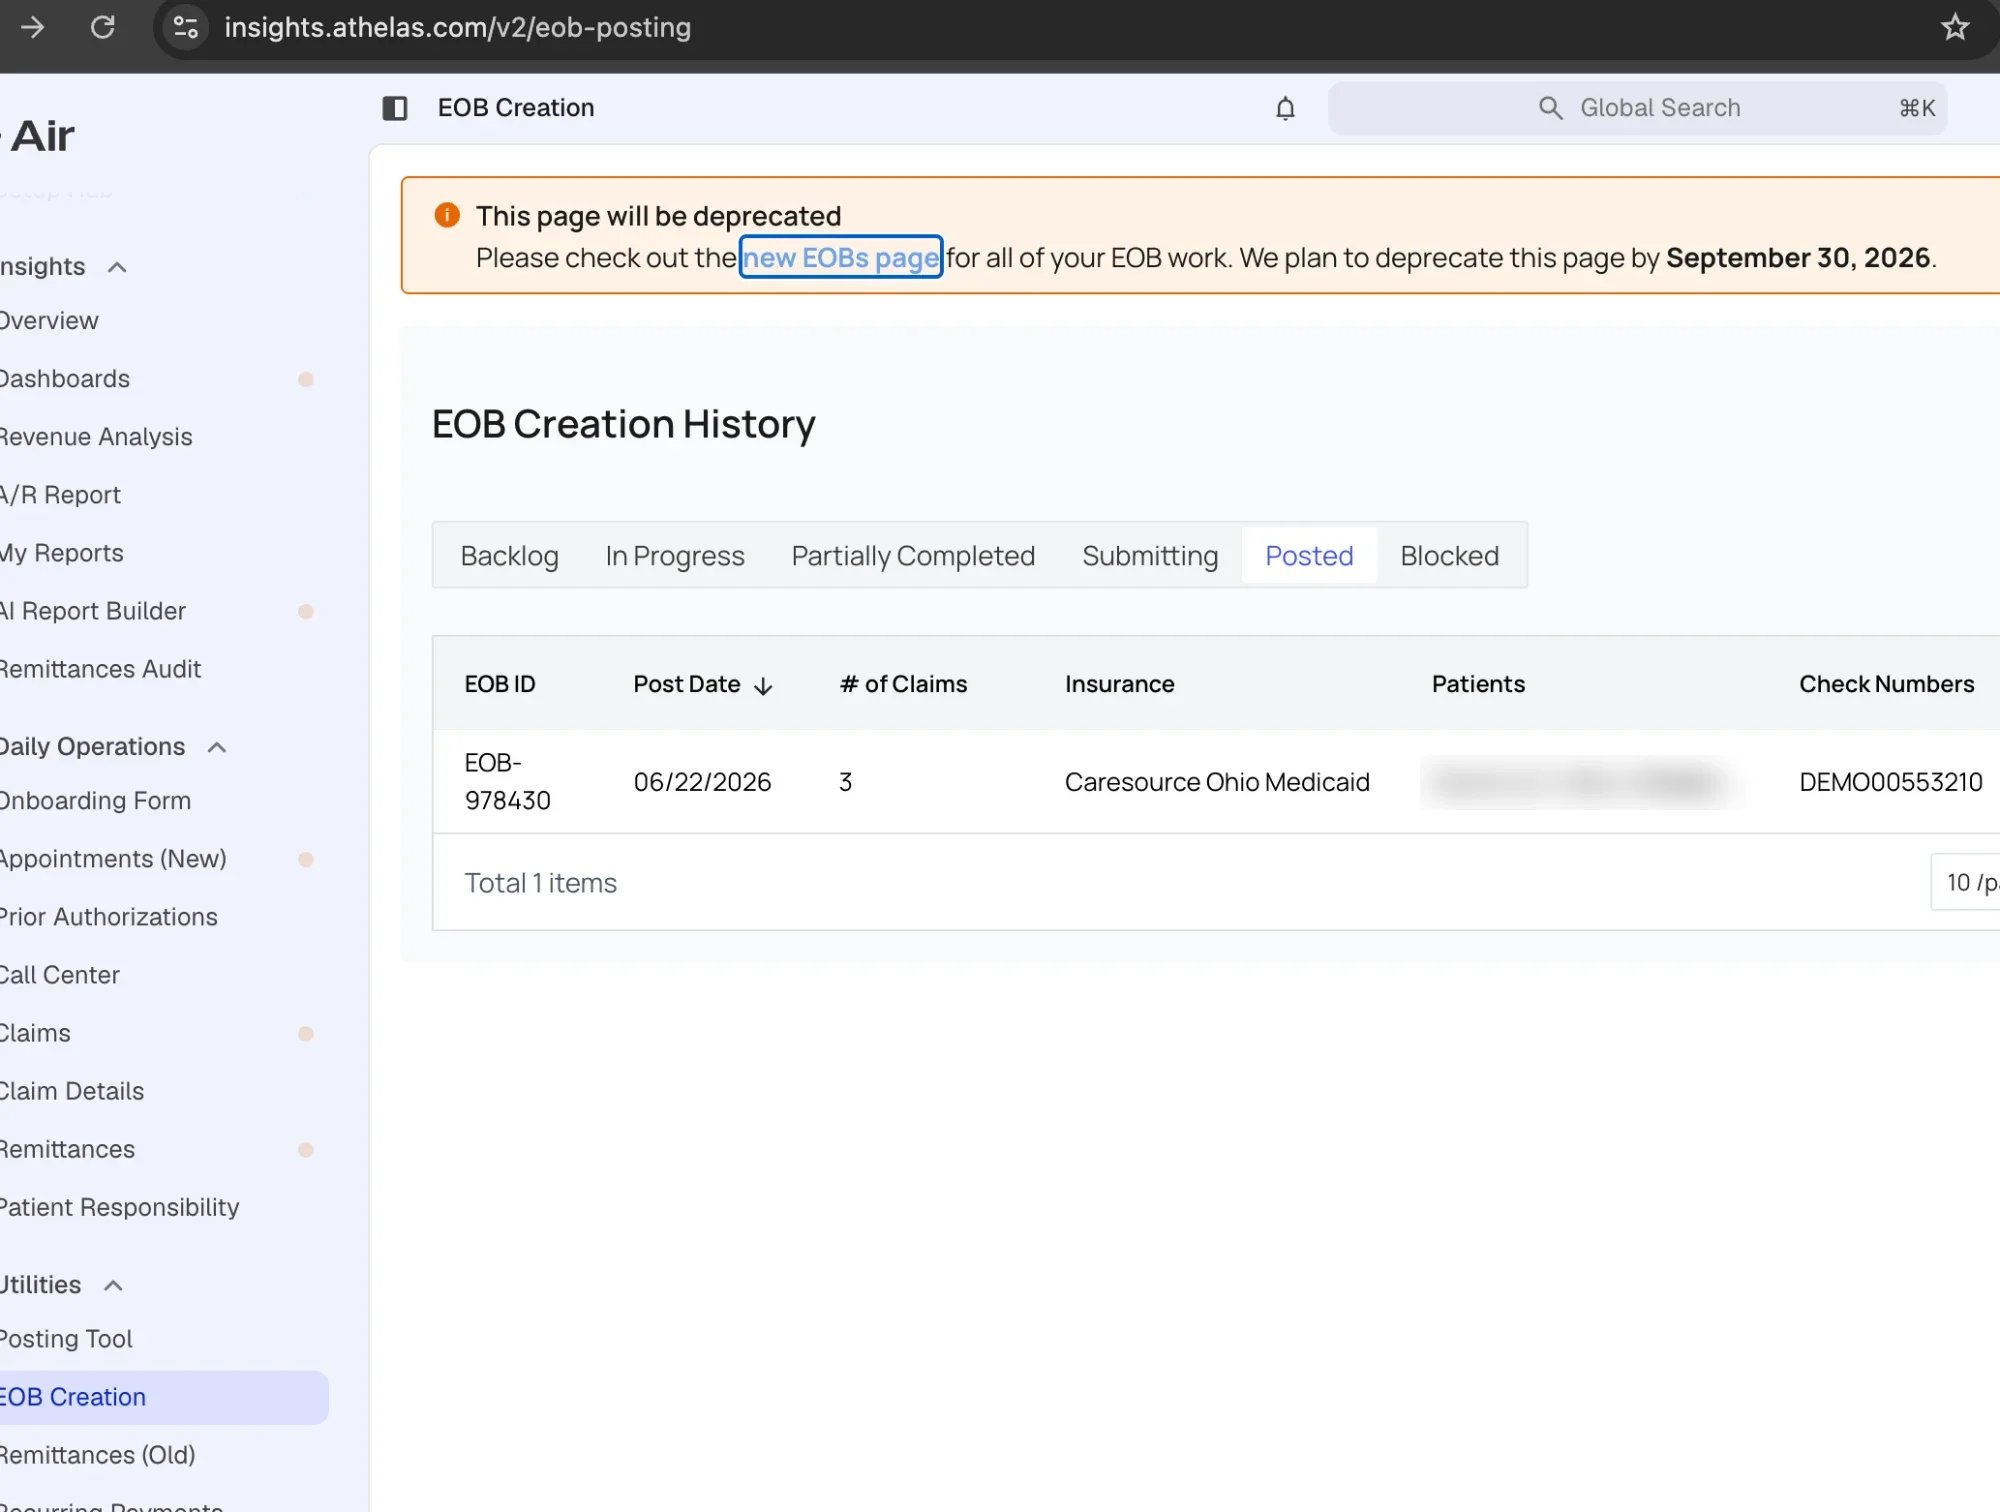
The EOBs tab on the Remittances page is where you upload Explanation of Benefits (EOB) files to Insights. It replaces the EOB Creation page and its Post a New EOB button, which were retired on September 30, 2026. This guide covers where to find the EOBs tab, how to upload one or several EOBs at once, and how to get access if you cannot see the page.Old bookmarks and saved links to the EOB Creation page no longer work. Update them to https://insights.athelas.com/remittances/eobs.
Find the EOBs tab
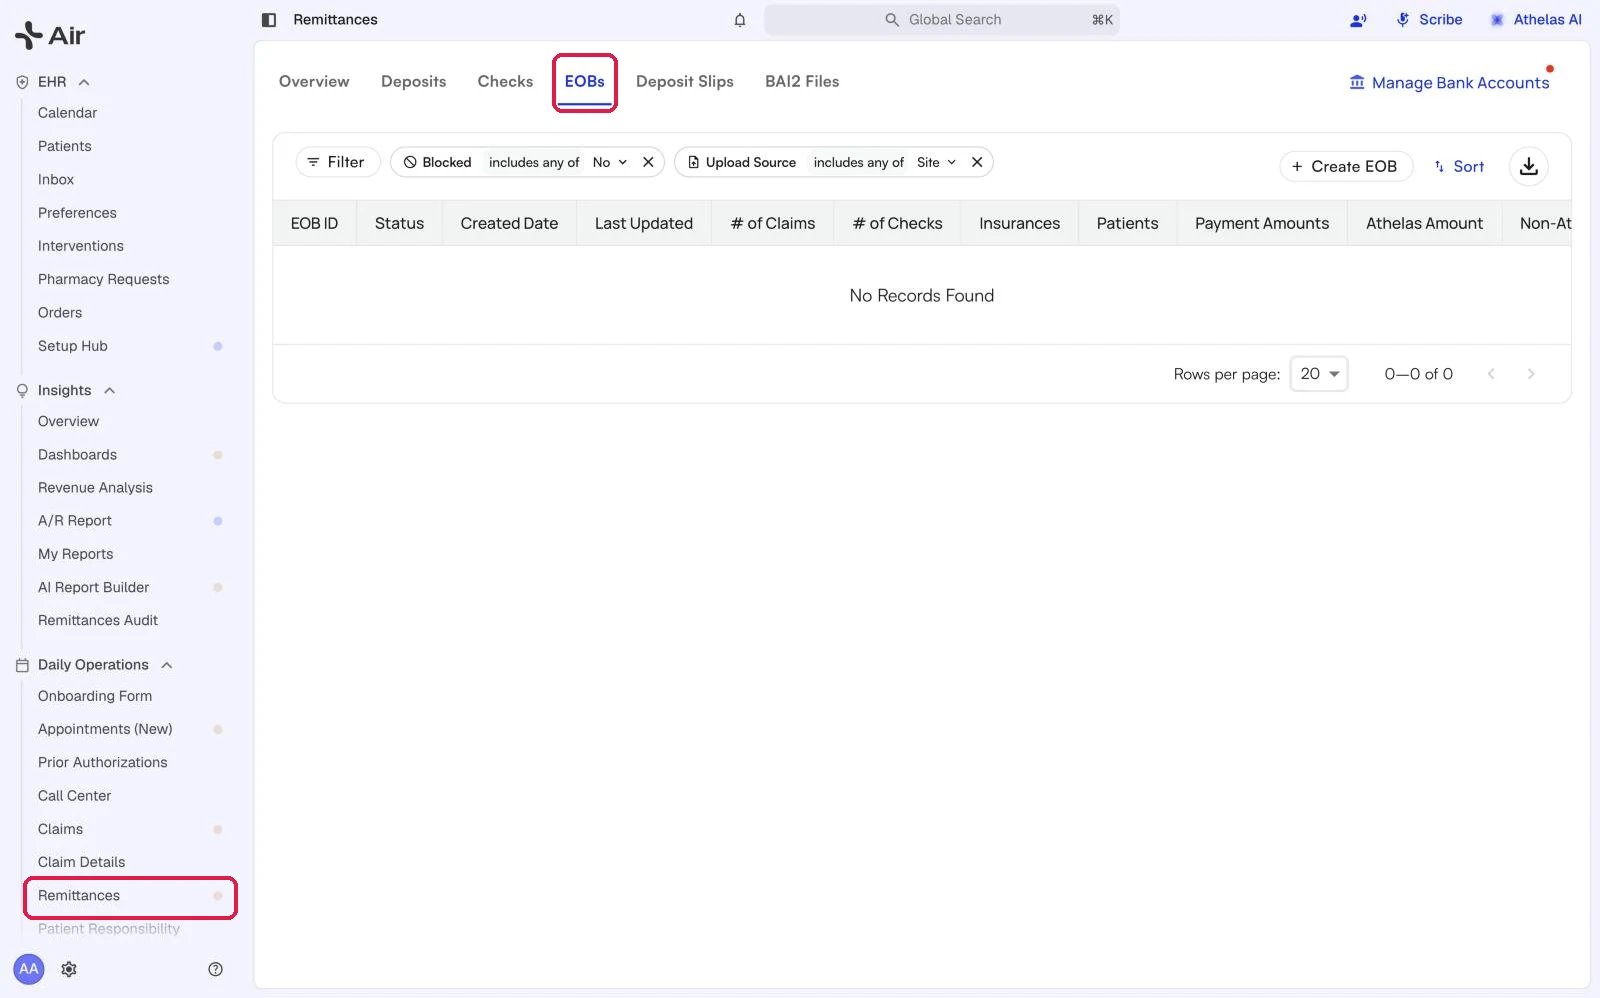
- In the left navigation menu, open Daily Operations.
- Select Remittances.
- Click the EOBs tab at the top of the Remittances page.
Upload EOBs
Upload a single EOB
-
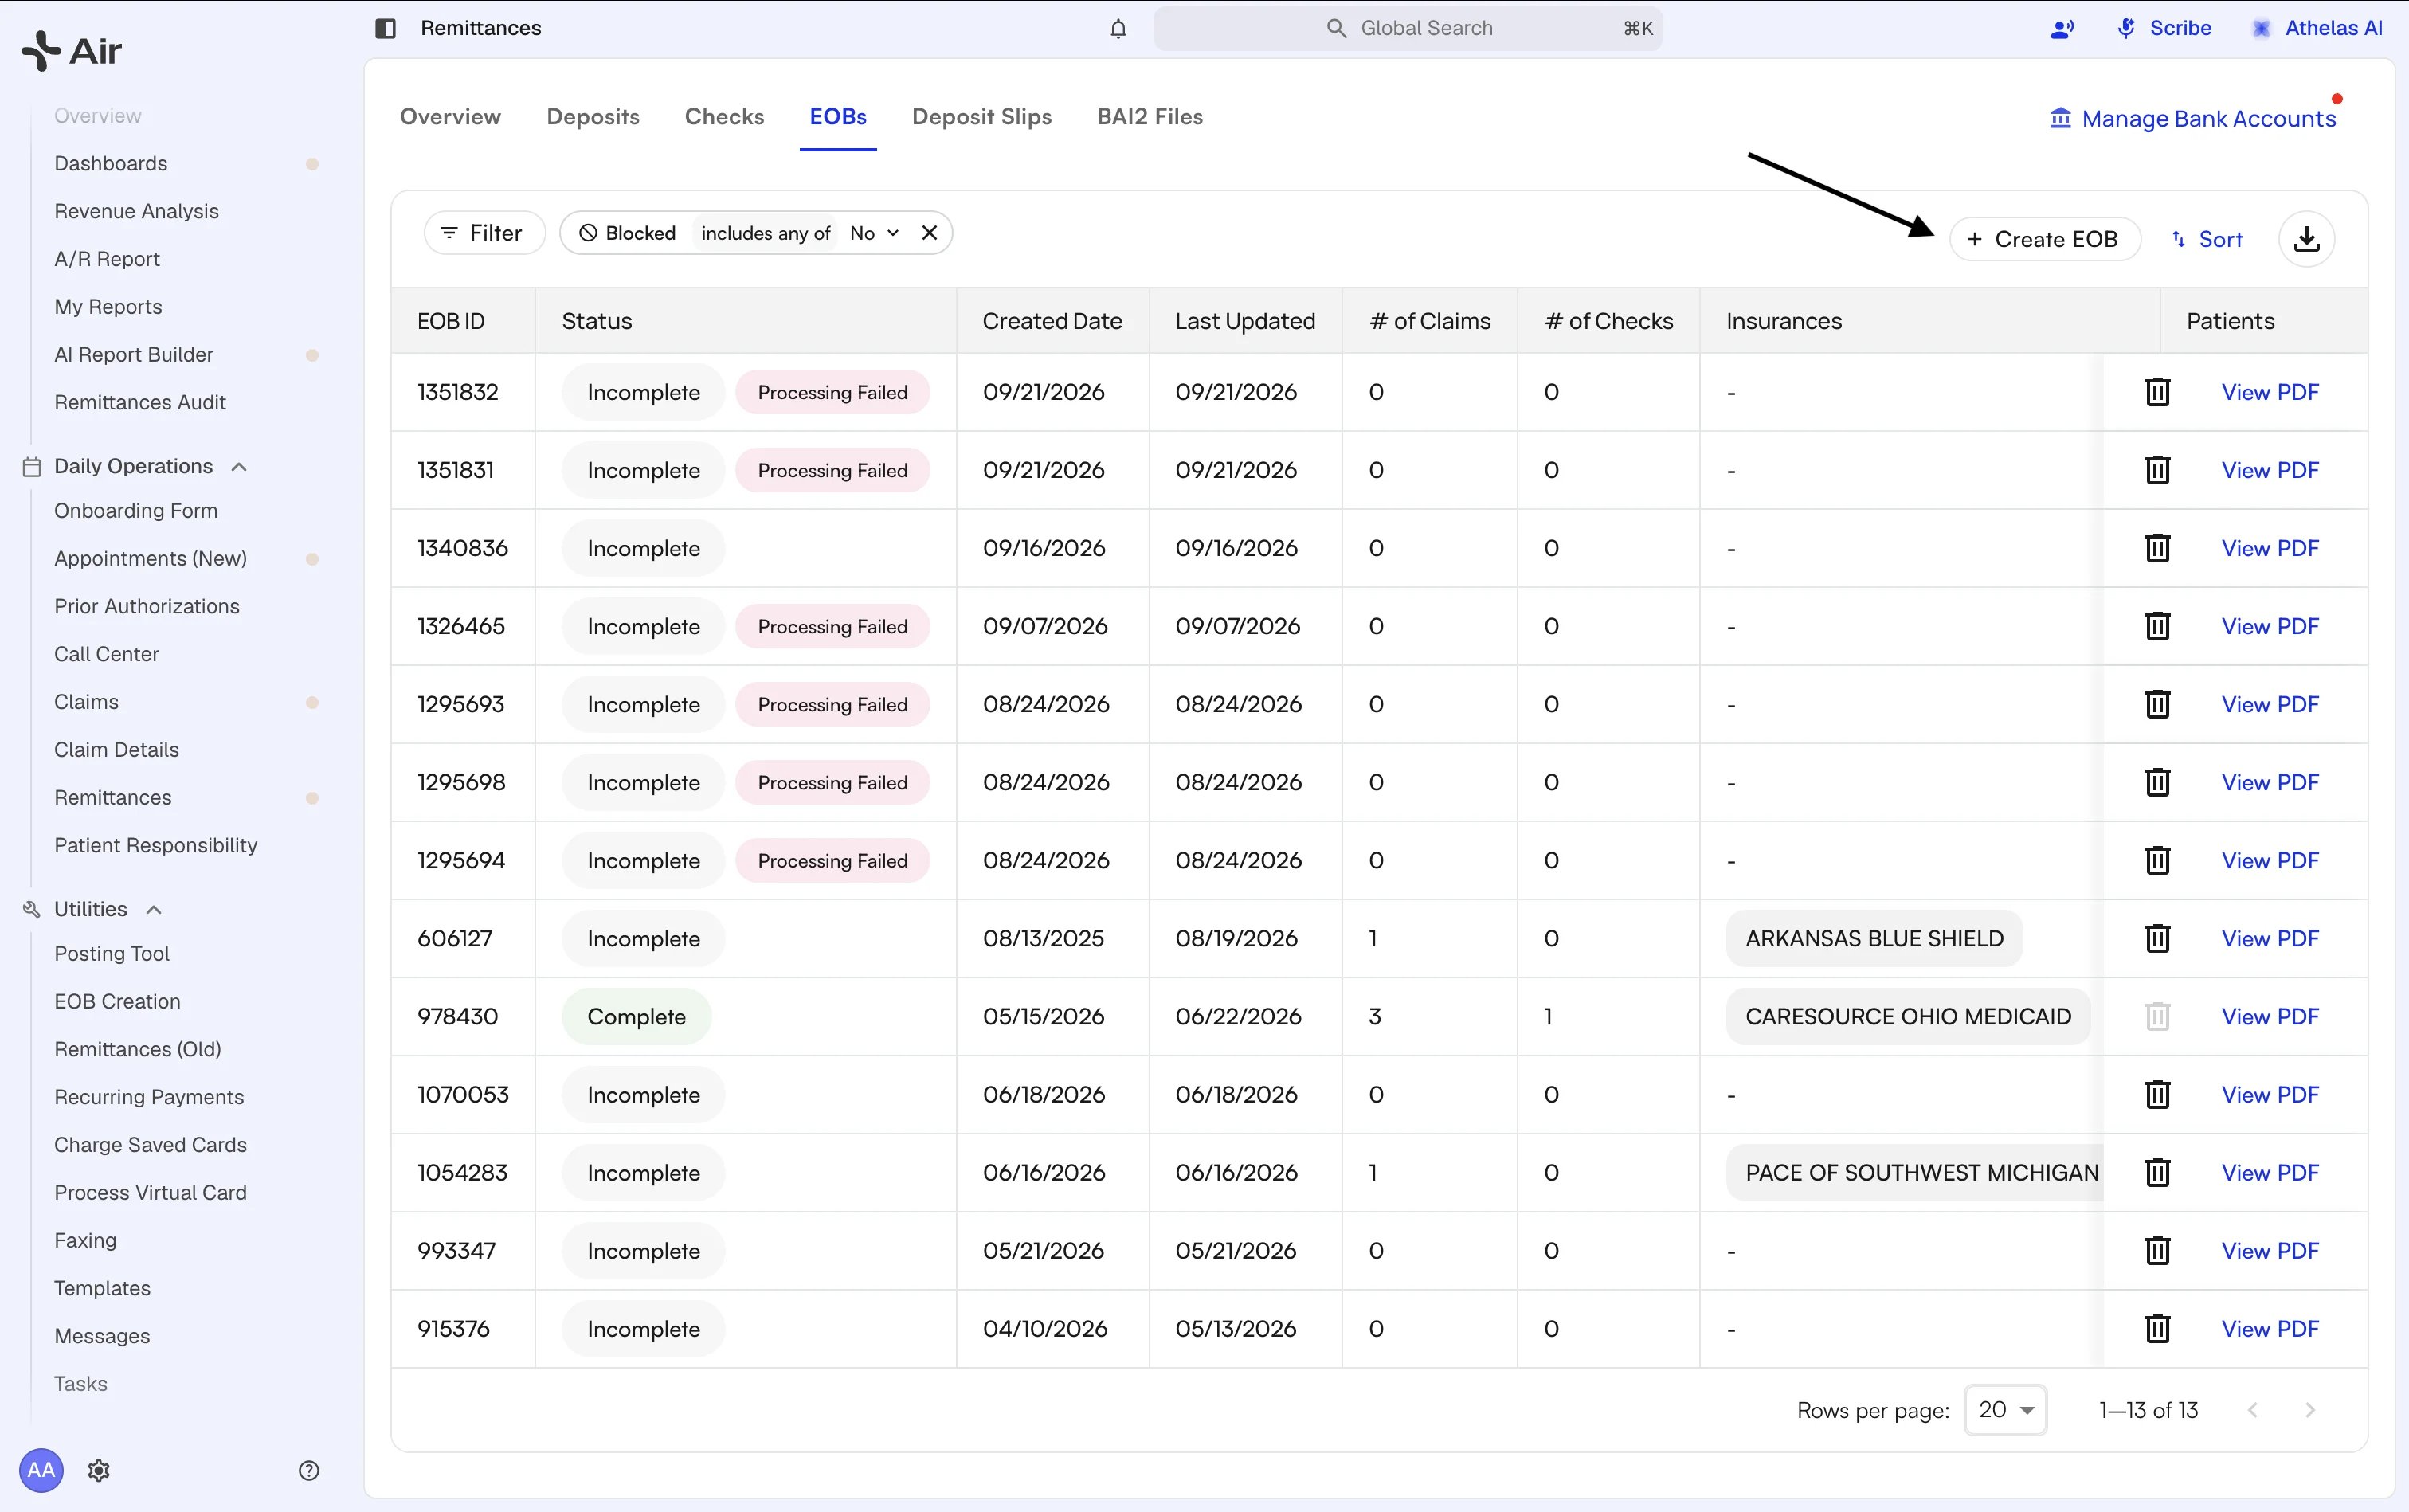
Open the EOBs tab and click Create EOB.
-
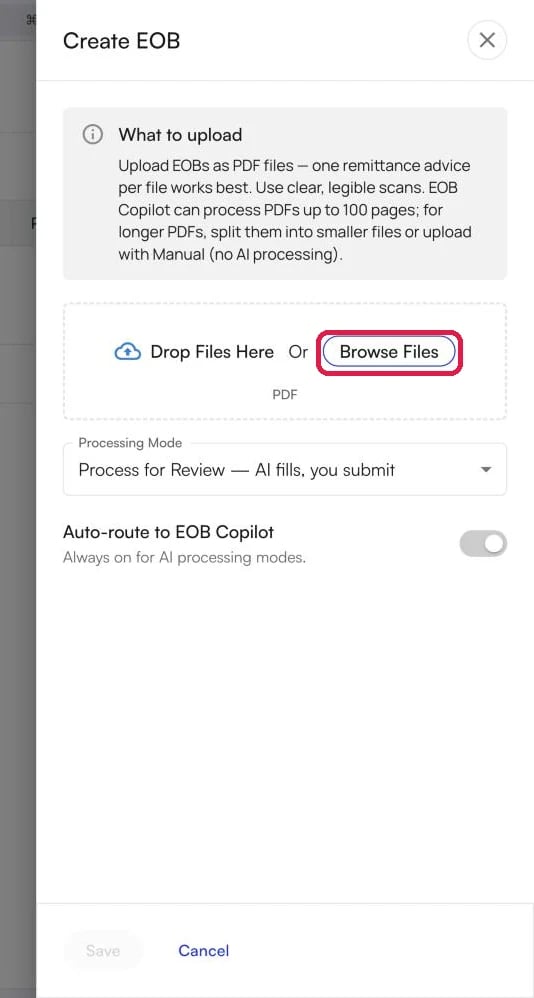
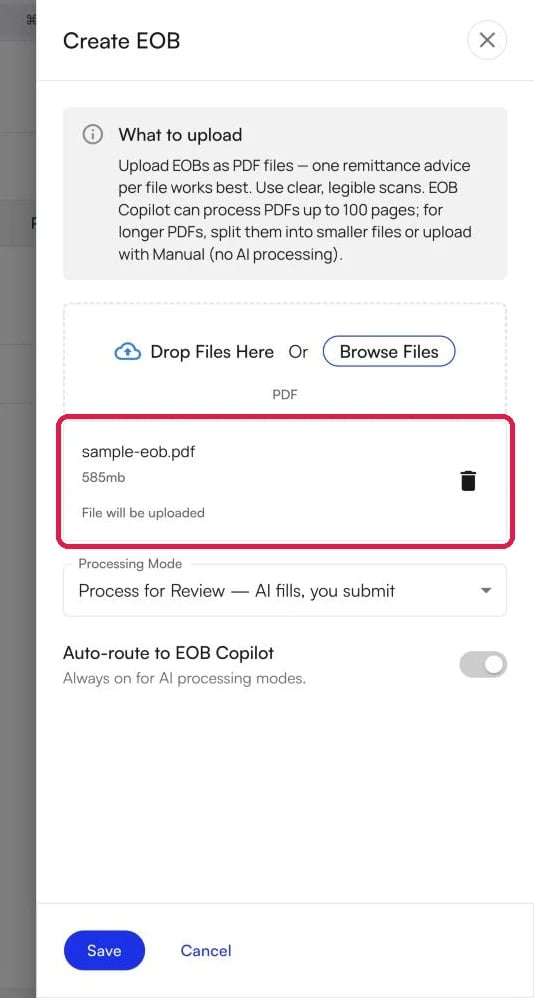
Click Browse Files and select the EOB PDF from your computer. You can also drag the file into Drop Files Here.
-
Check that the file appears in the list under the upload area.
-
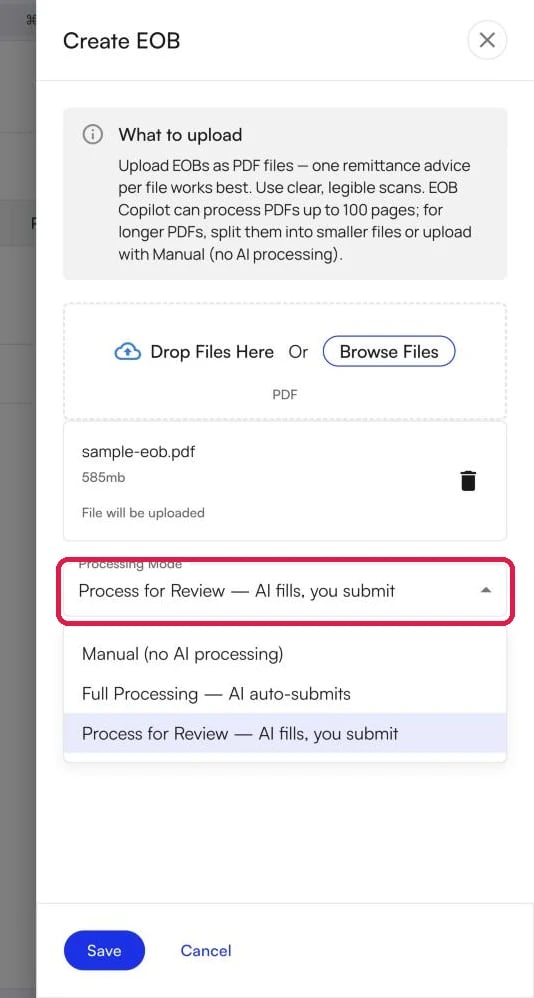
Click the Processing Mode dropdown to open it.
-
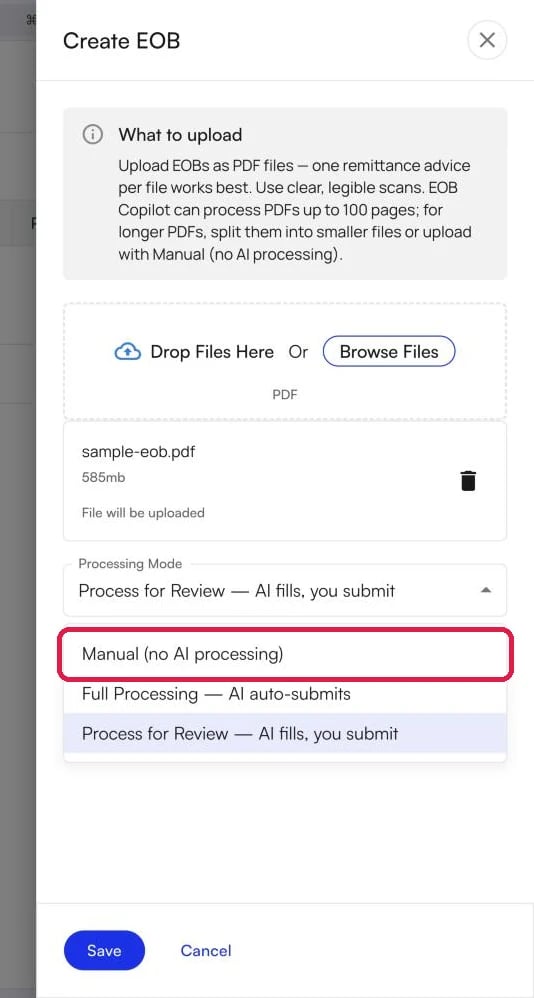
Select Manual (no AI processing).
Note: Select Manual (no AI processing) unless you know which of the other modes you need. With Manual, you can work the EOB yourself, or leave it and your Athelas team processes it for you. To learn what each processing mode does, see the EOB Copilot Upload Guide.
-
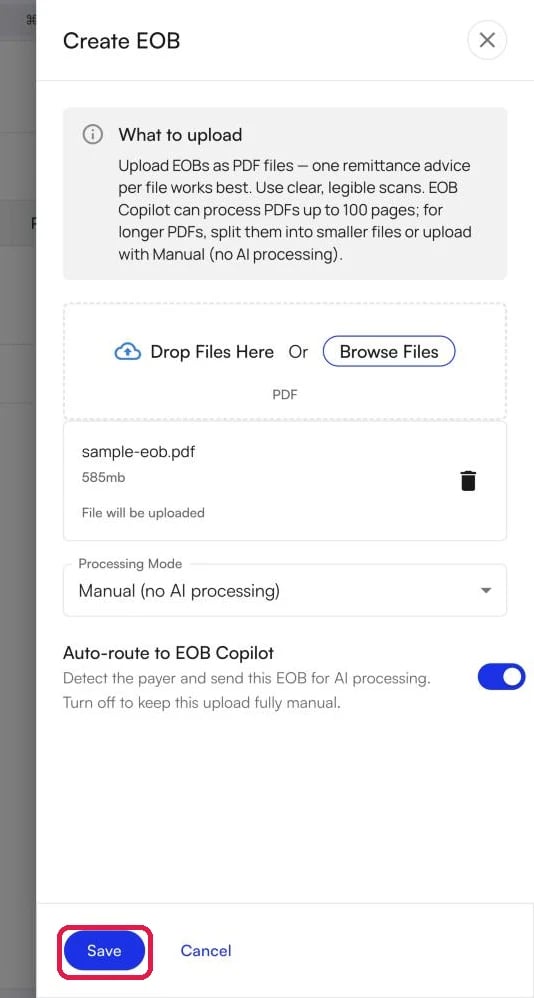
Click Save.
Upload multiple EOBs at once
You can upload several EOB files in one go. This is the replacement for bulk upload on the old EOB Creation page. The steps are the same as for a single EOB. In step 2, select all of the files at once. Each file appears in the list before you save. An Upload EOBs panel shows the progress of each file. Each uploaded file appears as a new row on the EOBs tab.Get access to the Remittances page
Access to the Remittances page, including the EOBs tab, is controlled by the Remittances page permission. Permissions come from roles: if any role assigned to a user includes Remittances, that user has access. A user without the permission does not see Remittances in the navigation menu, and opening the EOBs link sends that user to the Home page. If you are not an administrator, ask an administrator at your practice to follow the steps below for your user.Grant access (administrators)
First, make sure a role includes the Remittances permission. The Administrator role includes it. To add it to another role:- Go to Settings → My Practice → Team Members.
- In the Roles sidebar, hover over the role and click the Edit (pencil) icon.
- In the permission tree, select Remittances.
- Click Save.
- On the Team Members page, find the user and click the Edit icon at the end of the row.
- In Permission Roles, add the role.
- Click Save.
FAQ
How do I bulk upload EOBs like before?
How do I bulk upload EOBs like before?
Click Create EOB on the EOBs tab and select all of the files you want to upload. Multiple EOB files can be uploaded in one go.
Why does the EOBs link take me to the Home page?
Why does the EOBs link take me to the Home page?
Your user does not have the Remittances page permission. Ask an administrator at your practice to assign you a role that includes it, then refresh the page. See Get access to the Remittances page.
I had access to EOB Creation. Why can't I see the new page?
I had access to EOB Creation. Why can't I see the new page?
The old EOB Creation permission does not carry over to the new page. The EOBs tab requires the Remittances permission. See Get access to the Remittances page.