
Overview
The Additional Context feature allows healthcare providers to enhance AI-generated documentation by adding supplementary information to scribe notes. You can provide context in two ways:- Audio Recording – Capture additional conversation or dictate details
- Text Input – Type additional context or patient details Adding context helps improve the accuracy and completeness of documentation.
Accessing the Additional Context Feature
Location
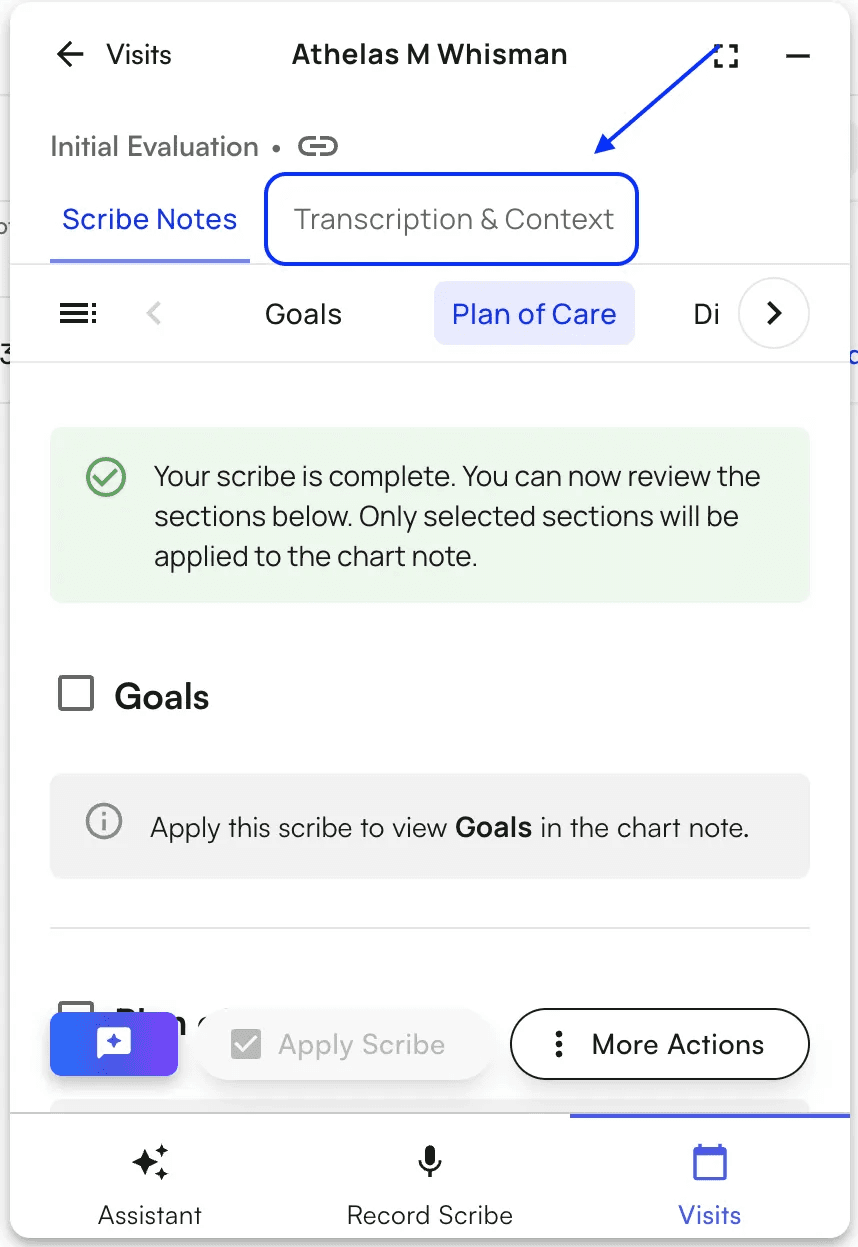
The feature is available on the Completed Scribe Page after a scribe session is completed.How to Use
- Navigate to a completed scribe session
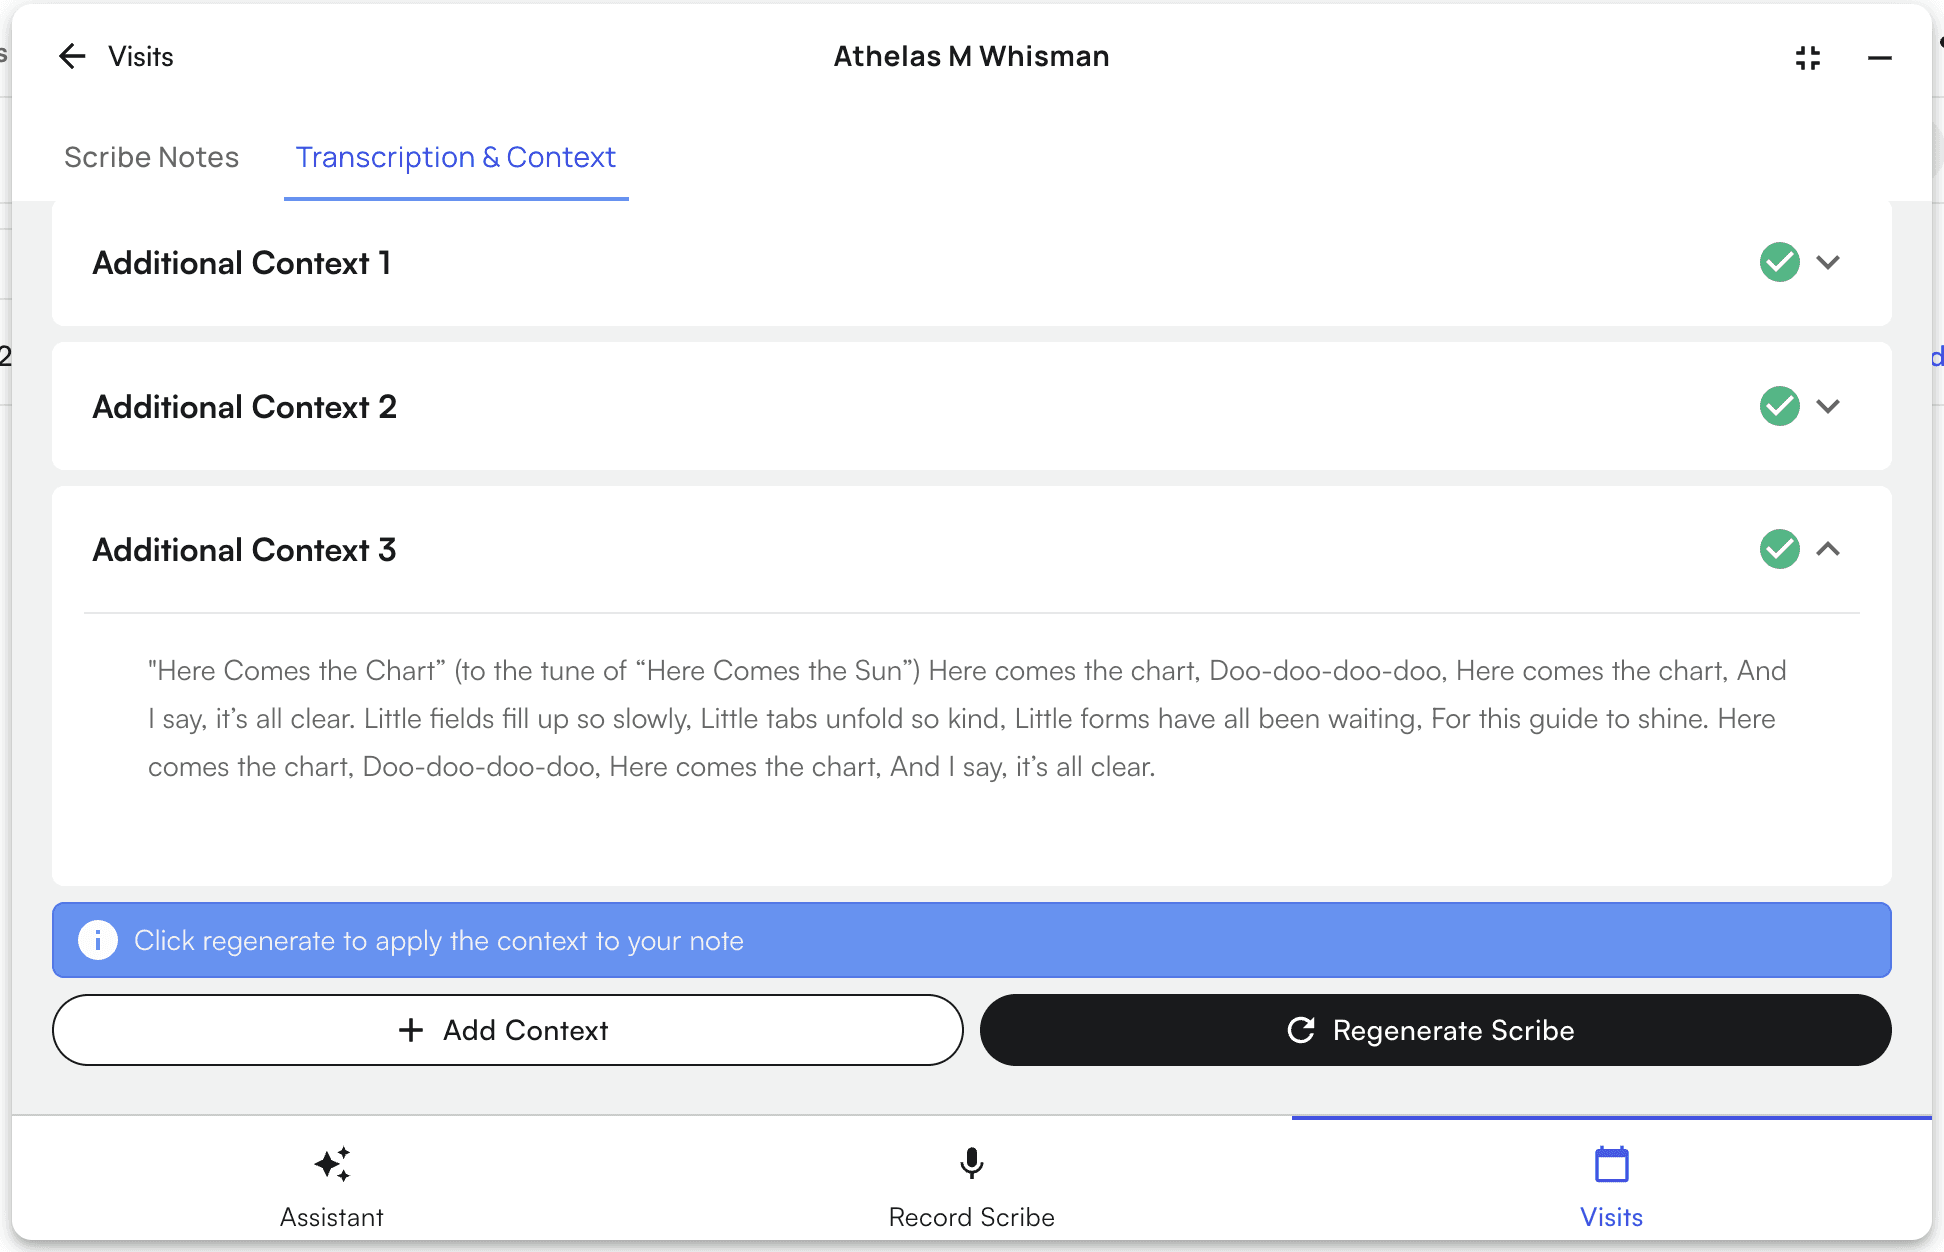
- Click on the new “Transcription & Context” Tab
- Click “Add Context”
- The Additional Context dialog will open
- Add context via text or audio (click the drop-downs below ↓ for specific details on both methods)
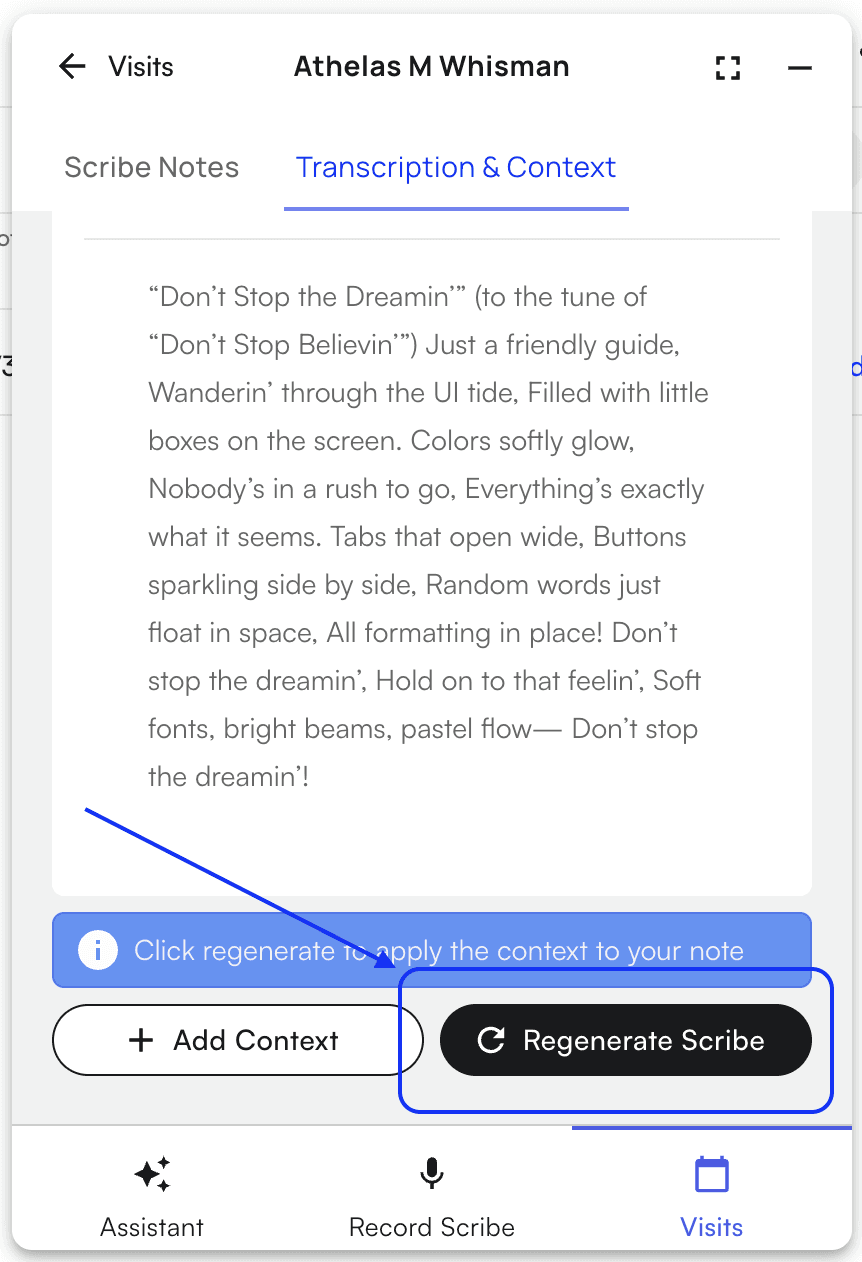
- Click regenerate scribe after adding all relevant context
Using Audio Mode 🎙️
When to Use
Use audio when you want to:- Capture additional patient conversation (such as a multi-part appointment)
- Capture lab or test results after the initial recording
- Longer additions
- Add context while multitasking
Steps to Use
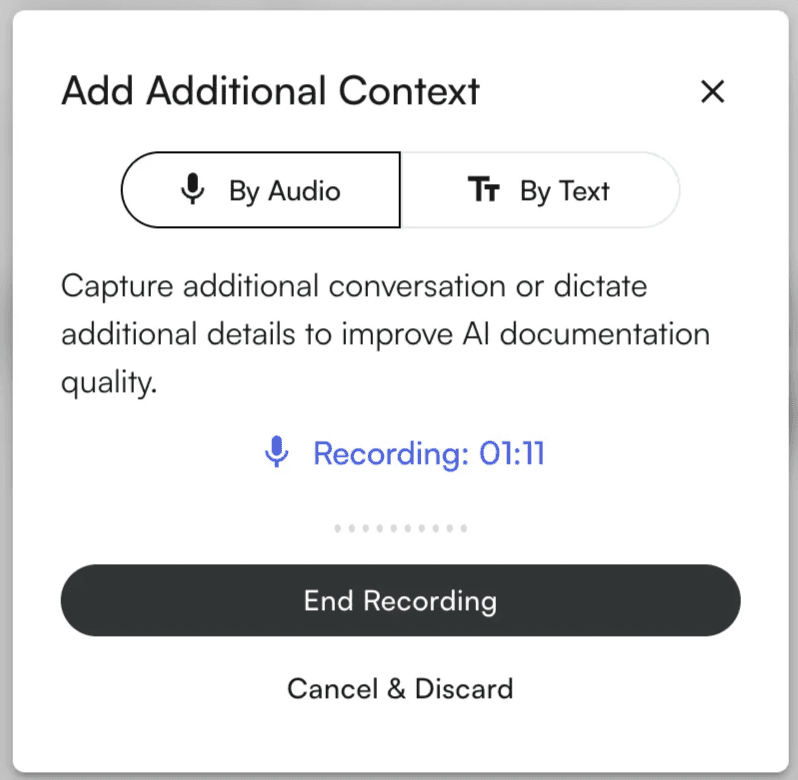
- Click the “Add Context” button
- “By Audio” is selected by default
- Start Recording
- Click “Record Audio”
- Grant microphone permissions if prompted
- Recording begins immediately
- End Recording
- Click “End Recording”
- Audio uploads automatically
- Upload progress bar shows percentage
- Completion
- Success notification appears
- Dialog closes automatically
- Audio context begins processing
Recording Controls
- End Recording → Saves and uploads
- Cancel & Discard → Stops recording without saving
Tips For Audio Recording
- Record in a quiet environment
- Use a good quality microphone
- Check the mic level indicator
- Speak clearly and at a moderate pace
Using Text Mode 💬
When to Use
Use text input for:- Specific patient details
- Structured or concise information
- Quick additions
Steps to Use
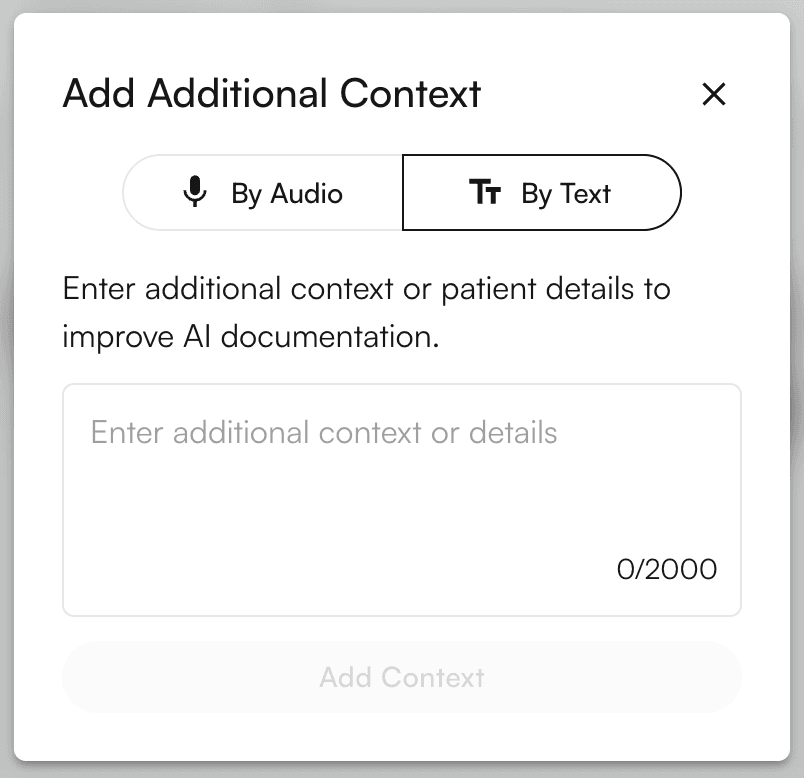
- Click the “Add Context” button
- Switch to Text Mode
- Click “By Text”
- Enter Context
- Type additional information (max 2,000 characters)
- Submit Context
- Click “Add Context”
- Context is added
- Dialog closes automatically
Tips For Text Input
- Be clear and concise
- Organize logically
- Include relevant terminology
- Use abbreviations when appropriate
- Monitor character counter
Troubleshooting
Audio Recording Issues 🎙️
- Problem: “Failed to start recording”
- Click the lock icon in your browser
- Allow microphone access
- Refresh the page and try again
- Problem: Low audio levels
- Check microphone connection
- Adjust input settings
- Ensure correct microphone is selected
- Problem: Upload fails
- Check your internet connection
- Retry recording
- Contact support if issue persists
Text Input Issues 💬
- Problem: “Add Context” button disabled
- Type at least one character (not just spaces)
- Problem: Reached character limit
- Remove unnecessary text
- Or submit current entry and start a new one
What Happens Next ⏭️
- Click “Regenerate Scribe”
- The AI processes a new scribe with your existing transcript along with your additional context
- Check the “Scribe Notes” tab to see your scribe progress
- Updated scribe appears with new context applied
Multiple Context Entries 📚
- You can add multiple entries (audio or text)
- All added context is used during regeneration
Reminders❕
- Be Specific — Include precise missed details
- Ensure Completeness — Add all info before regenerating
- Review Before Regenerating
- Prioritize Quality — Relevant and accurate over length If issues persist:
- Contact your system administrator
- Submit a support ticket
- Report bugs or feature requests to the dev team