
At a Glance
When a payer denies a claim, you can build the appeal packet yourself from the Claims Page and send it without leaving Insights. A packet has three parts: a cover letter, the payer’s appeal form, and your supporting documents. Insights drafts the cover letter and fills in the payer form from the claim, so most of your time goes into checking them.Beta: The self-serve appeal packet is in beta. If you don’t see the steps below when you click Send documents, ask your Athelas team to turn the feature on for your site.
Before You Start
- The claim needs a denied or partially denied submission. That submission is the one you appeal.
- Have your supporting documents ready, such as chart notes or medical records. You can pick files already on the claim or upload new PDFs (up to 100 MB each).
Build and Send the Packet
Open the denied claim, click Actions, and choose Send documents. The flow has four steps, shown at the top right of the page (for example, 1 of 4: Select Materials).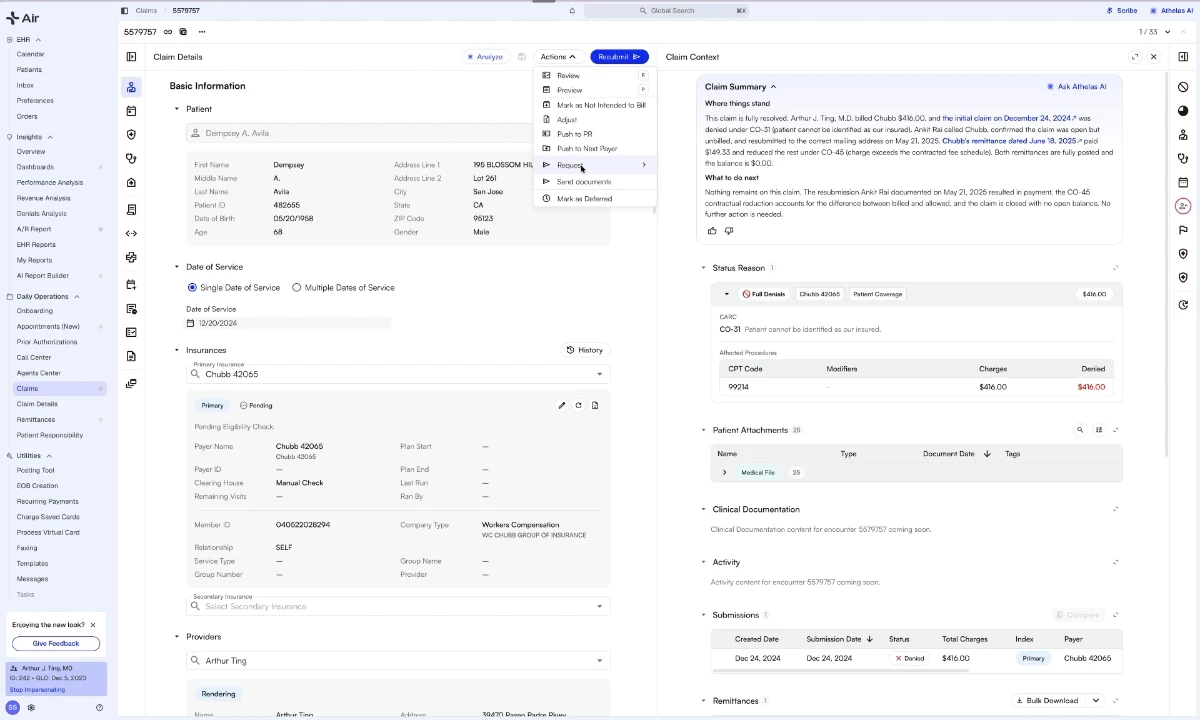
1
Select materials
Under Type of Appeal, choose Full appeal packet to send a letter, a form and documents. Check the Submission you are appealing and the denied procedures under Procedures on this submission. Then select the supporting files under Documentation, or drag new ones in. Click Continue.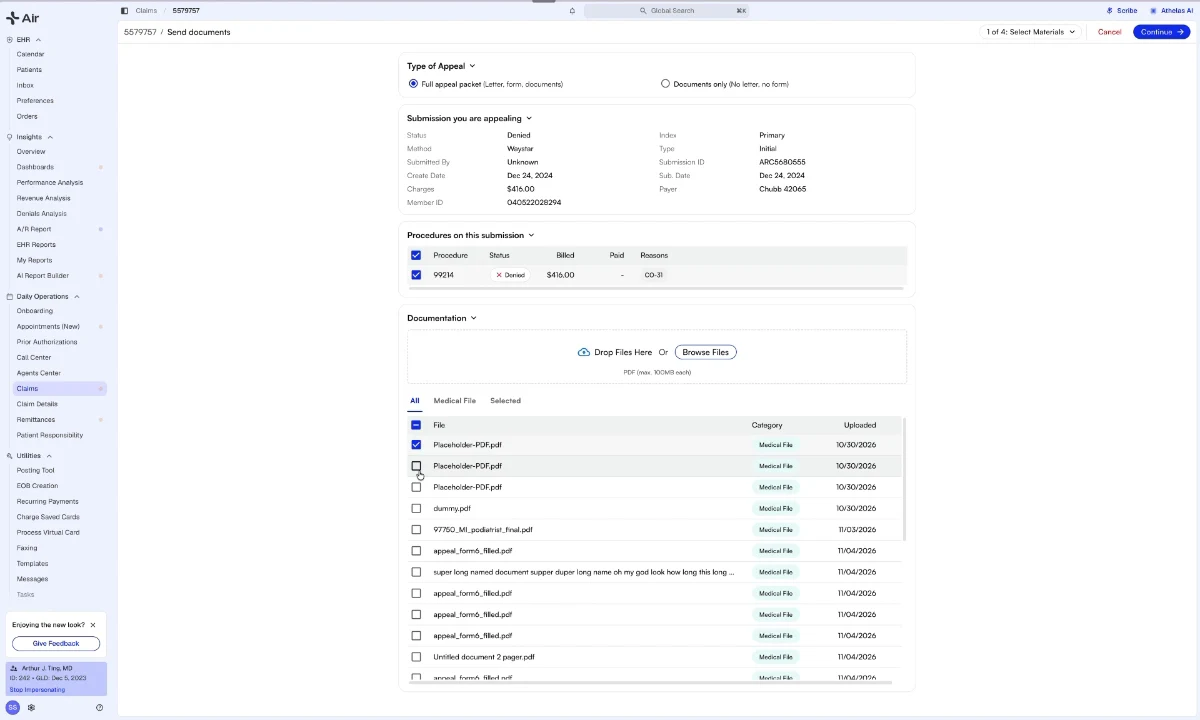
2
Review the cover letter
Insights drafts the cover letter from the claim and the denial reason. The left side holds the Claim and Denial Values (patient, member ID, date of service, billed amount, payer) and the Appeal Reasoning. The letter preview is on the right. Edit any value or the reasoning text, and the preview updates. Click Continue, or Skip if you don’t need a cover letter.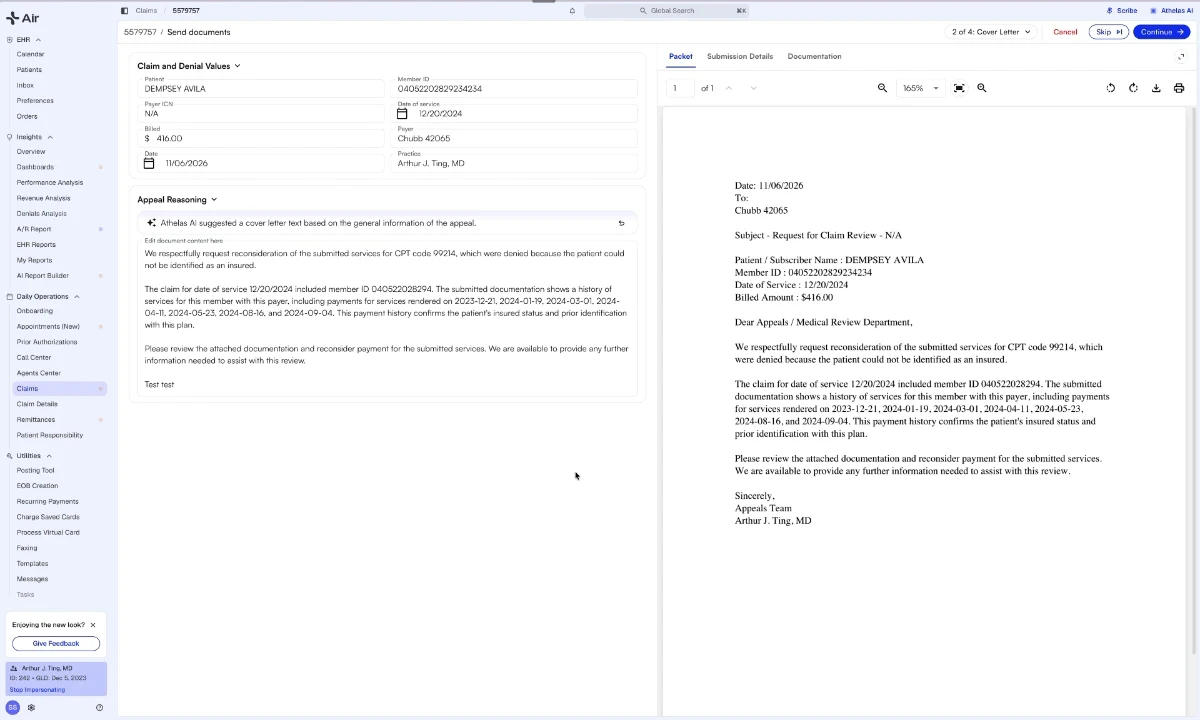
3
Review the payer form
Insights fills in the payer’s appeal form from the claim and your cover letter. Check each field under Payer form fields against the preview, and correct anything that’s wrong. Click Continue, or Skip if the payer doesn’t need a form.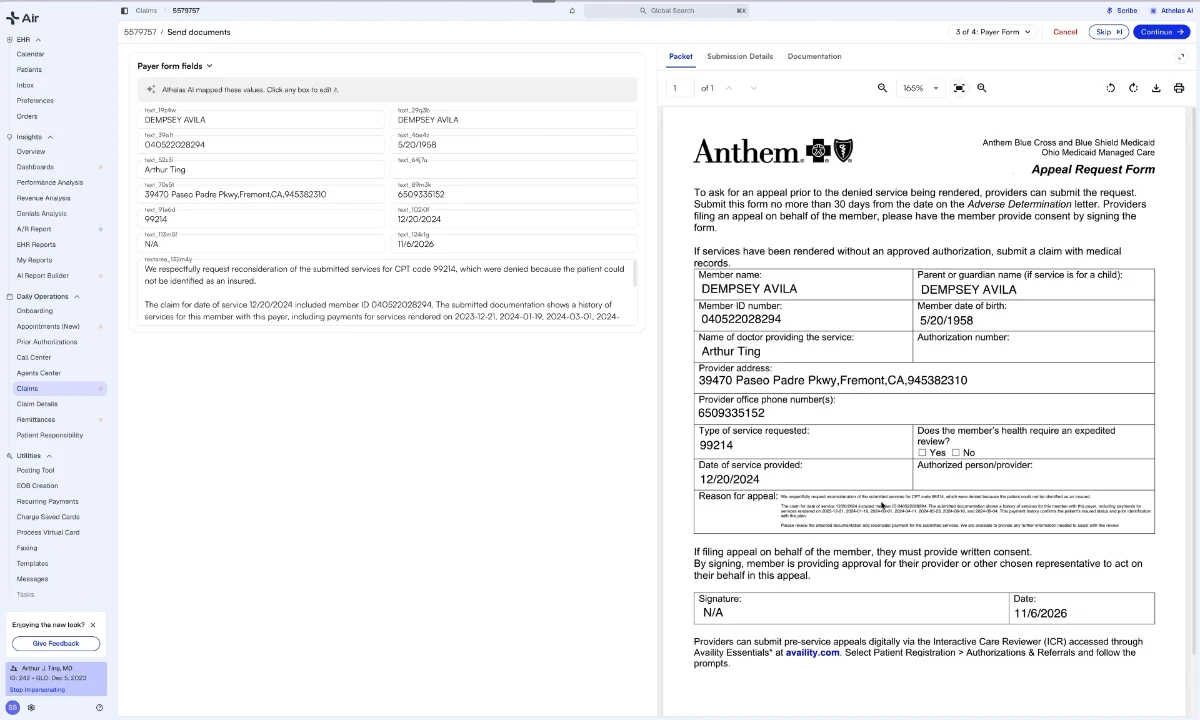
4
Review and submit
Under Address, choose how the packet goes out and enter where it goes. Under Packet order, drag files into the order the payer should read them, or add more files. Use the Packet tab to page through the whole packet. When it looks right, click the send button at the top right, for example Send By Mail.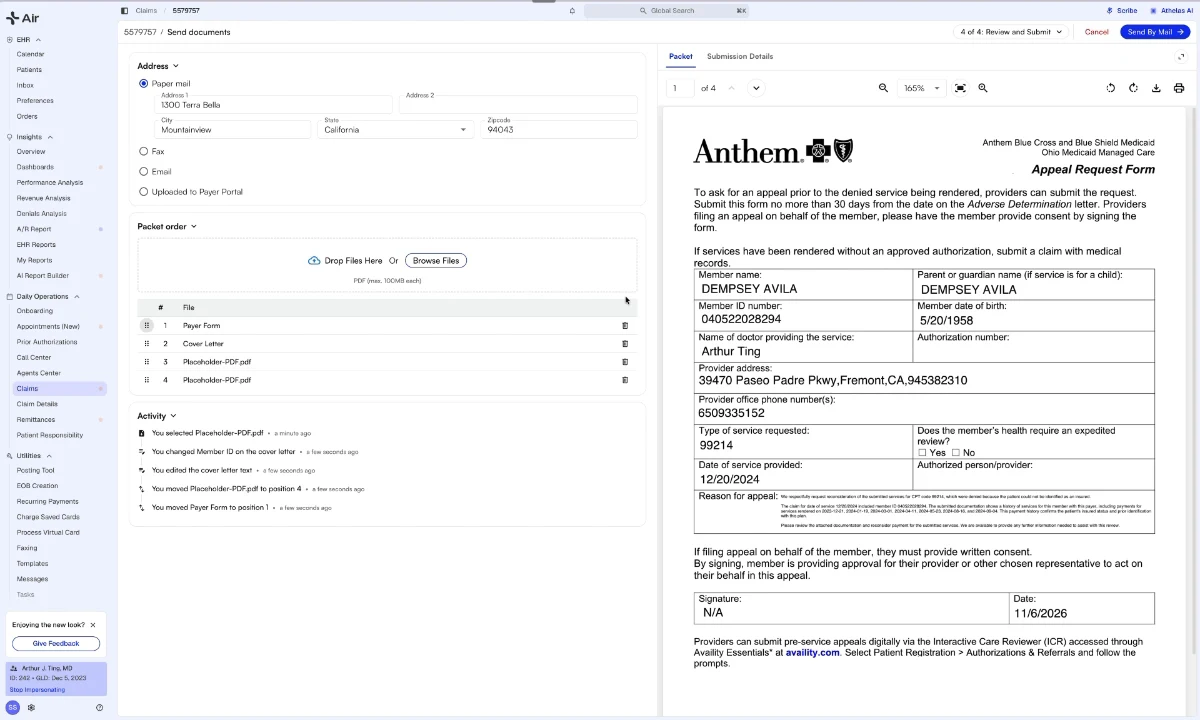
Choose How the Packet Is Sent
Note: Check the payer’s appeal address, fax or email before you send. Payers often use a different destination for appeals than for claims, and the destination can differ between first and second level appeals.
Track Your Changes
The Activity section on the last step lists what you did to the packet, such as the files you selected, the values you changed on the cover letter, and the files you moved in the packet order.FAQ
Can I send documents without a cover letter or payer form?
Can I send documents without a cover letter or payer form?
Yes. In step 1, choose Documents only under Type of Appeal. This works well when the payer only asks for medical records. You can also click Skip on the cover letter or payer form step.
Can I rewrite the appeal reasoning?
Can I rewrite the appeal reasoning?
Yes. The draft is a starting point. Edit the Appeal Reasoning text in step 2 as much as you need, and the letter preview updates as you type.
Which submission does the packet appeal?
Which submission does the packet appeal?
The denied submission shown under Submission you are appealing in step 1. A claim can have several submissions, so check the submission ID and date before you continue.
How is this different from Request Appeal?
How is this different from Request Appeal?
Request Appeal, where your plan includes that service, asks the Athelas team to build the packet for you. Send documents lets you build and send the packet yourself, right away, and choose exactly what goes in.