
At a Glance
The Claims Page can hold thousands of claims at once, so the difference between a slow day and a productive one is how well you organize the list. This guide covers the tools that turn the full claim list into a focused, prioritized worklist: views, grouping, display settings, selection, and filters. For the basics of creating a view, see Getting Started with the Claims Page. To act on many claims at once from a group, see the bulk actions in How to Resubmit Claims in Bulk.Start from a Built-in View
Views appear as tabs across the top of the Claims Page. Every user starts with three built-in views, and the selected view shows how many claims it holds.
Workable Claims brings submission errors, rejections, denials, and the other statuses that need a person into one list, so you can see which bucket holds the most claims or the most dollars instead of switching between pages.
Working with Your Own Views
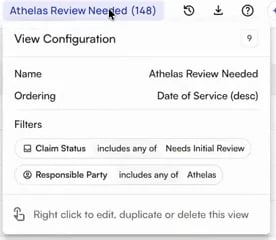
Your saved views appear to the right of the built-in views, after a divider. They are personal: no one else at your practice sees them. Views follow you across sessions, devices, and sites, so the filters you set up this morning are still there tomorrow.- See what a view does by hovering over its tab. The View Configuration card lists the view’s name, ordering, grouping, and filters.
- Edit, duplicate, or delete a view by right-clicking its tab.
- Reorder your views by dragging their tabs.
- Jump to a view with the number keys.
4through0open your first seven saved views.
Updating a View
When you change the filters on a view, Reset and Save appear next to the filter bar.- Reset returns the view to its saved filters.
- On one of your own views, Save offers Save to this view (update it) or Create new view (keep the original and save a copy).
- On a built-in view, Save always creates a new view, because the built-in views can’t be changed.
Grouping Claims
Grouping breaks a long, flat list into collapsible buckets so you can see the shape of your work and attack it in order. Open the Display button to choose a Grouping and a Group Ordering.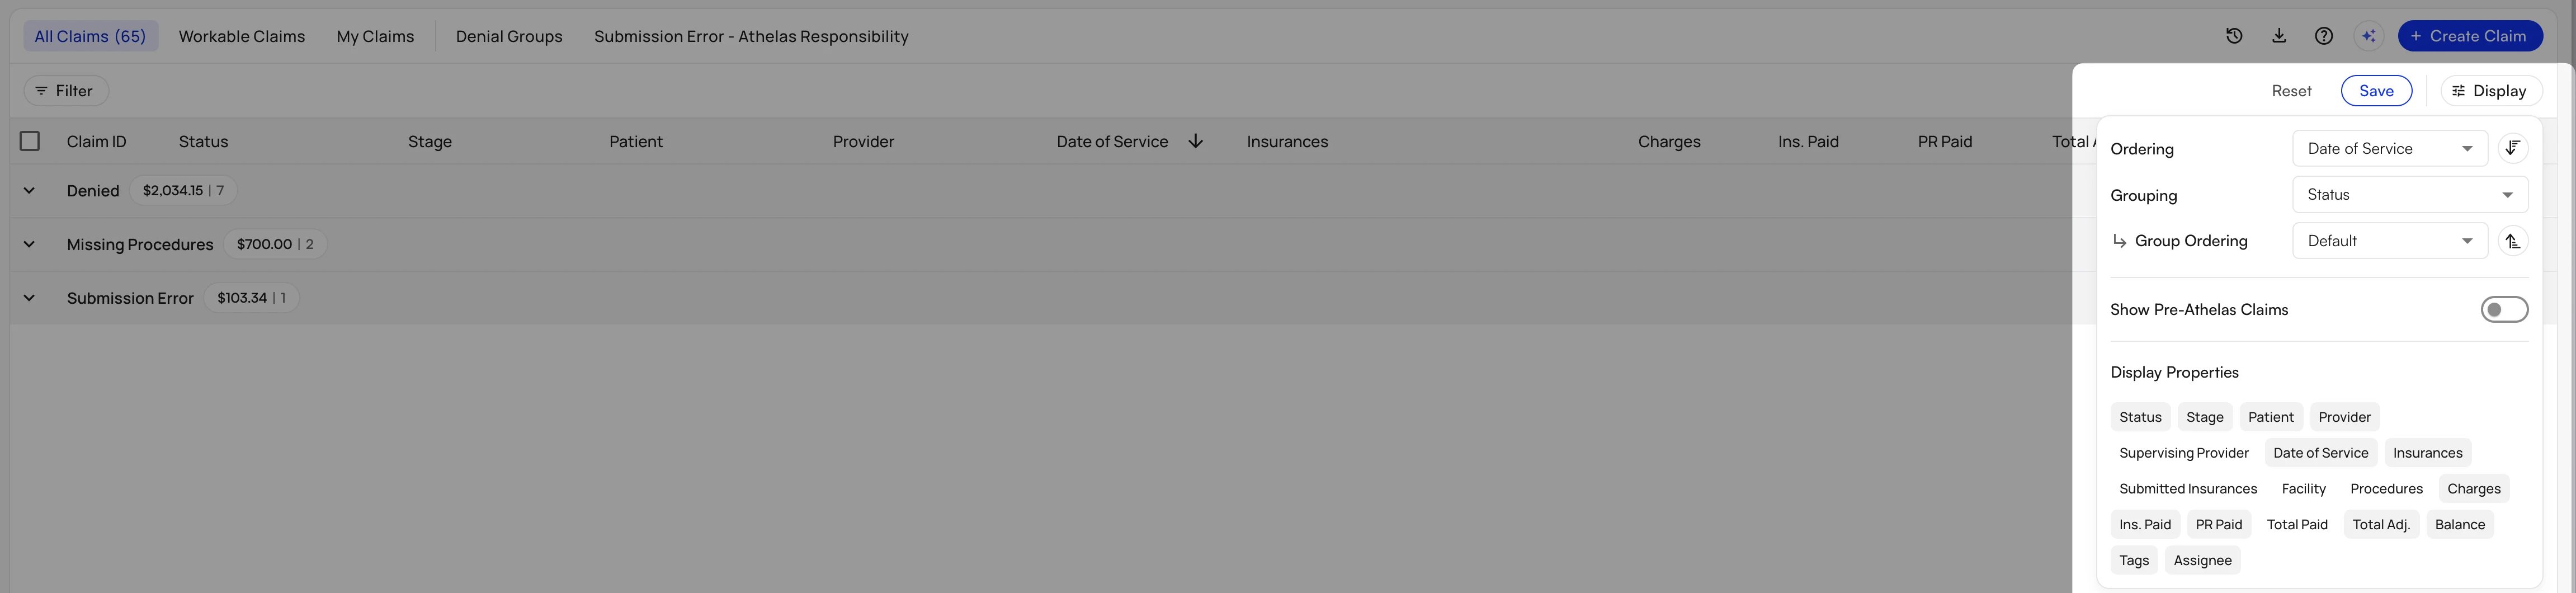
- Order groups by count or balance with Group Ordering. Sort by balance to work the biggest-dollar buckets first.
- Collapse a group by right-clicking its header row. Choose Collapse, or Collapse all to scan every bucket at a glance.
Acting on a Whole Group
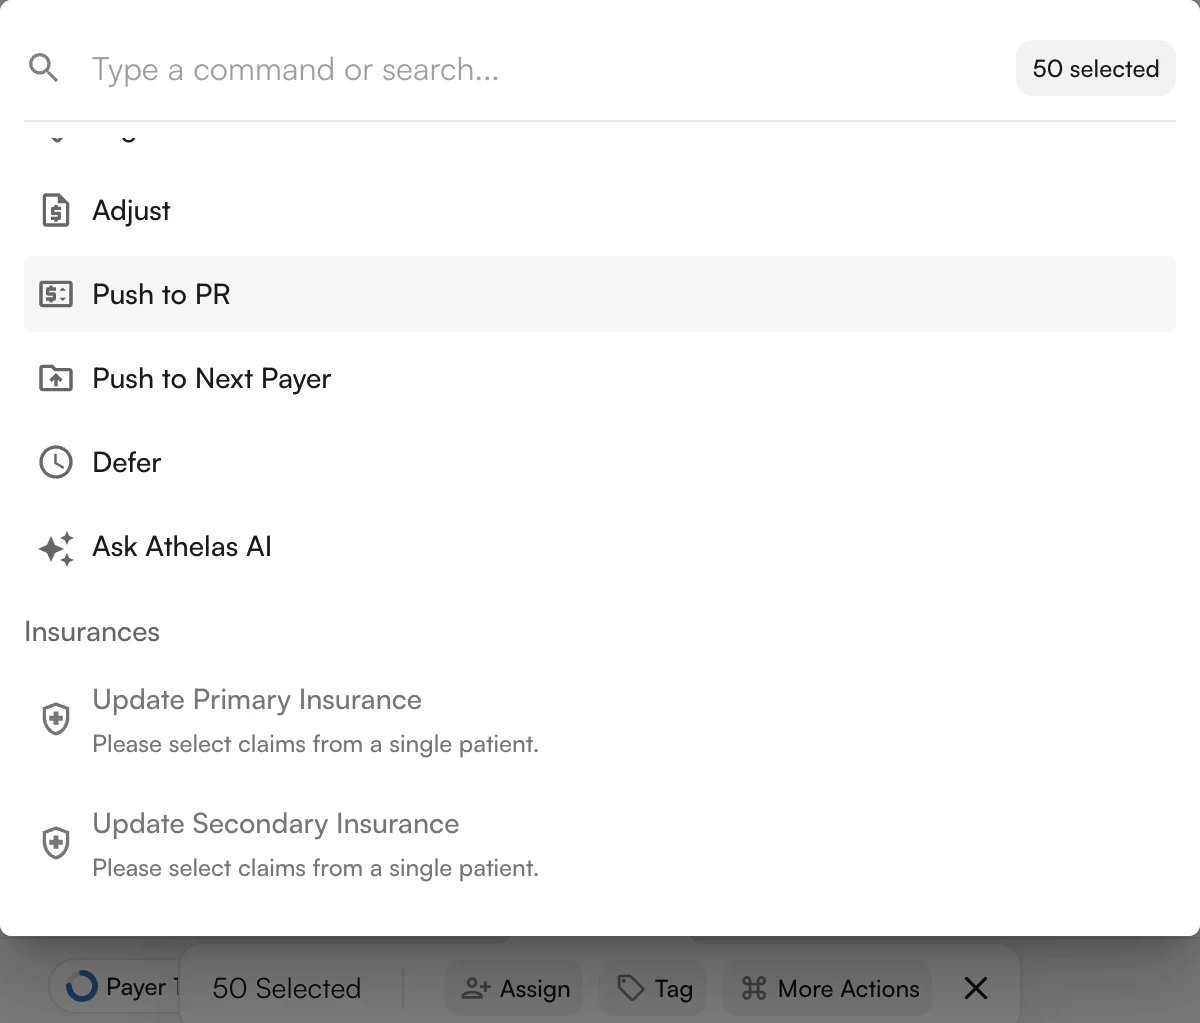
Once a bucket is worth a repeatable action, you can act on the whole group at once:- Right-click the group’s header row and choose Select all in group.
- Open More Actions at the bottom of the screen.
- Choose the action — for example, update insurance, submit, or edit prior authorization — to apply it to every selected claim.
Choosing Which Columns to Show
Not every column matters for every workflow. Someone working initial charge capture may want Charges but not Ins. Paid or PR Paid, while someone working A/R wants the payment columns. In the Display panel, click a column under Display Properties to show or hide it, and drag a column’s header in the table to move the column. These columns are hidden by default:- Time in Status
- Supervising Provider
- Submitted Insurances
- Facility
- Procedures
- Site, available when your site has child sites, so you can tell which child site each claim belongs to.
Finding Stuck Claims with Time in Status
Time in Status shows how long each claim has been in its current status. Turn it on under Display Properties, then click the column header to sort. The first sort puts the claims that have waited longest at the top.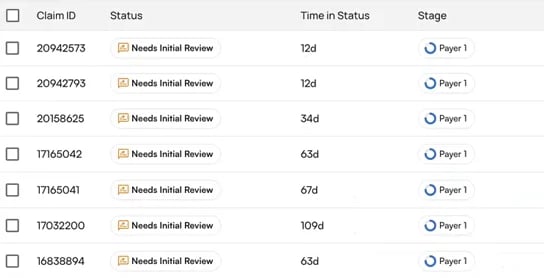
Selecting Claims
Select claims with the checkboxes on the left. The header checkbox, orCMD + A on Mac (CTRL + A on Windows), selects every claim that is currently loaded, and Esc clears the selection.
The list loads 50 claims at a time as you scroll. To work a larger bucket, scroll down to load more rows first, then select. Most bulk actions work on up to 500 claims at once.
Filtering by Date
When your list grows into the thousands, date filters are the fastest way to zero in on a specific window. Click Filter (or pressF) and open Dates:
Filtering with AI
If you don’t know which filter to use, describe what you want instead. Click Filter, choose AI filter, type a request such as “unsubmitted claims from the last week”, and click Apply filter. You can also type a request into the filter search and choose Ask AI to run it as an AI filter. The AI filter applies ordinary filters, so the filter bar shows exactly what it applied. You can adjust those filters and save the result as a view.FAQ
Why did my view change when I changed the grouping?
Why did my view change when I changed the grouping?
Grouping, ordering, and column choices are display settings, and they apply to the view you’re on. On one of your own views, click Save in the Display panel to keep the new layout, or Reset to go back to the saved one.
Why isn't a claim in Workable Claims?
Why isn't a claim in Workable Claims?
A claim leaves Workable Claims when it is Athelas’ responsibility, when its status doesn’t need work right now (for example, it is submitted and waiting on the payer), or when it is deferred. Check All Claims to find it.