
Applying filters to the calendar view
You can easily click the < > icons to move through different days, weeks or months depending on the current schedule view.
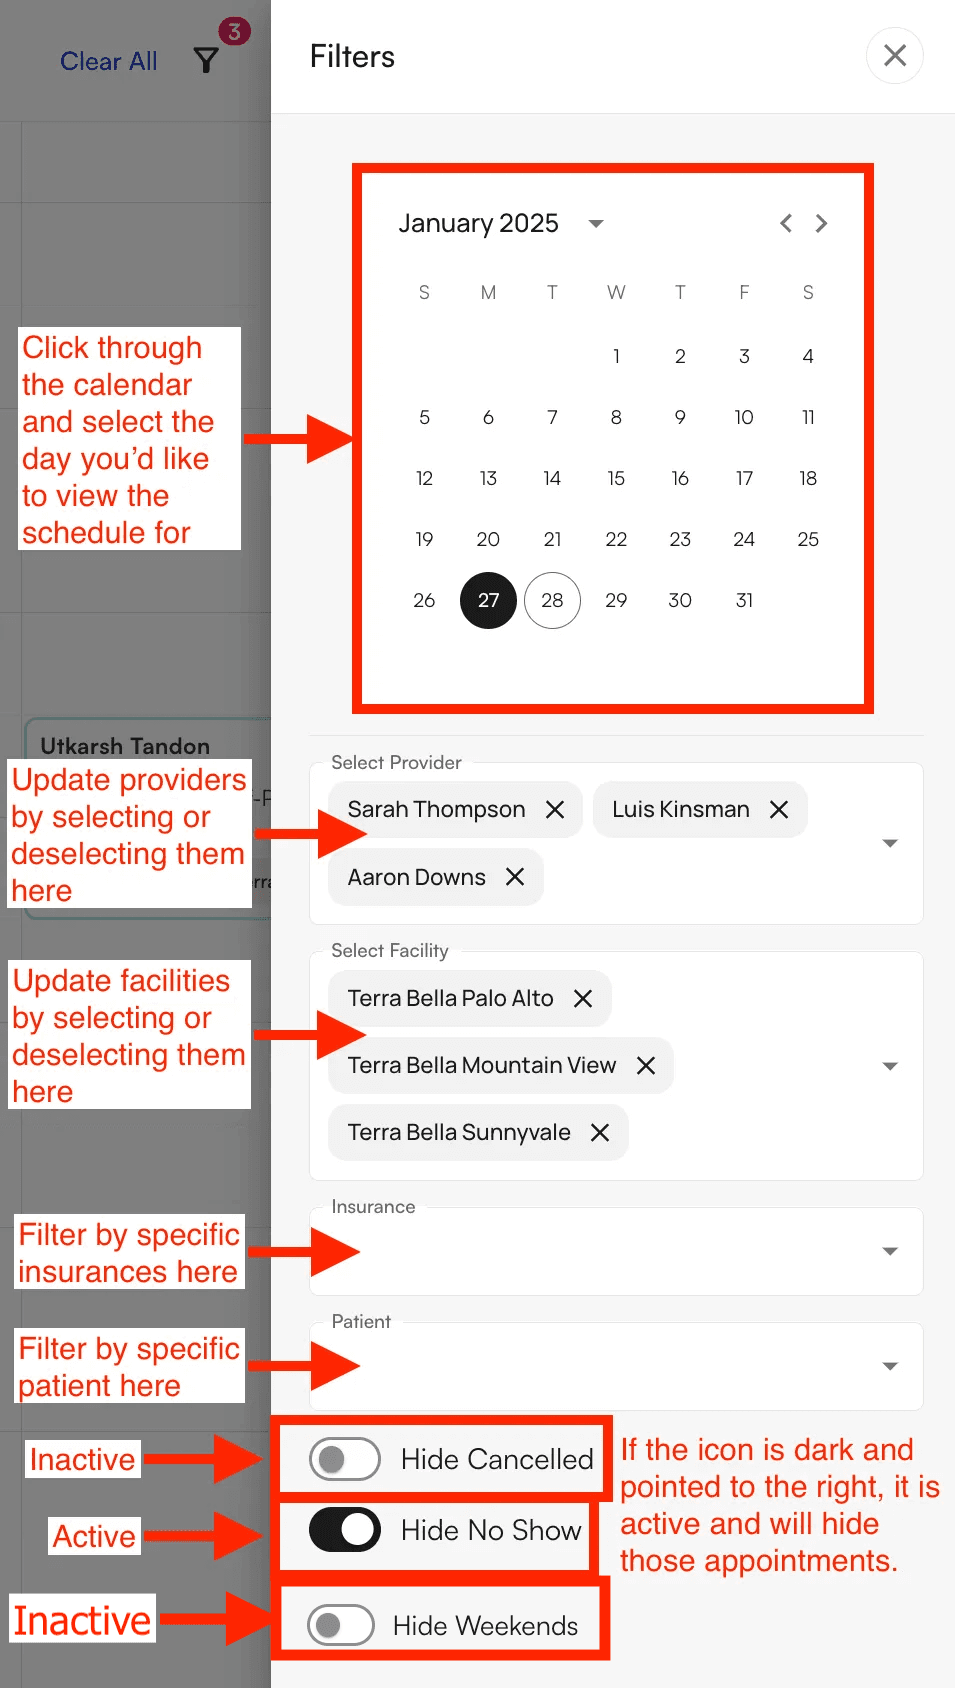
How to use each filter
**Filtering by provider **allows you to decide which providers you do and don’t want to see on your calendar. When more than one provider is selected, each provider is displayed as a column on the calendar view. **Filtering by facility **allows you to pick facilities you do and don’t want to see in the calendar view. When more than one facility is selected, each will appear as a tab along the top of the calendar view. **Filtering by Insurance **shows only appointments with patients whose insurance provider matches your selection. Filtering by Patient shows only appointments with specific patients you select. Filtering out cancelations will hide appointments that have the “Cancelled” status. Filtering out “No Shows” will hide all appointments that have the “No Show” status. Filtering out weekends will hide Saturdays and Sundays from your calendar view. This will be applied to all of the 1 day, week, and month views. All filters can be cleared at once by clicking the “Clear All” at the top of the calendar.