
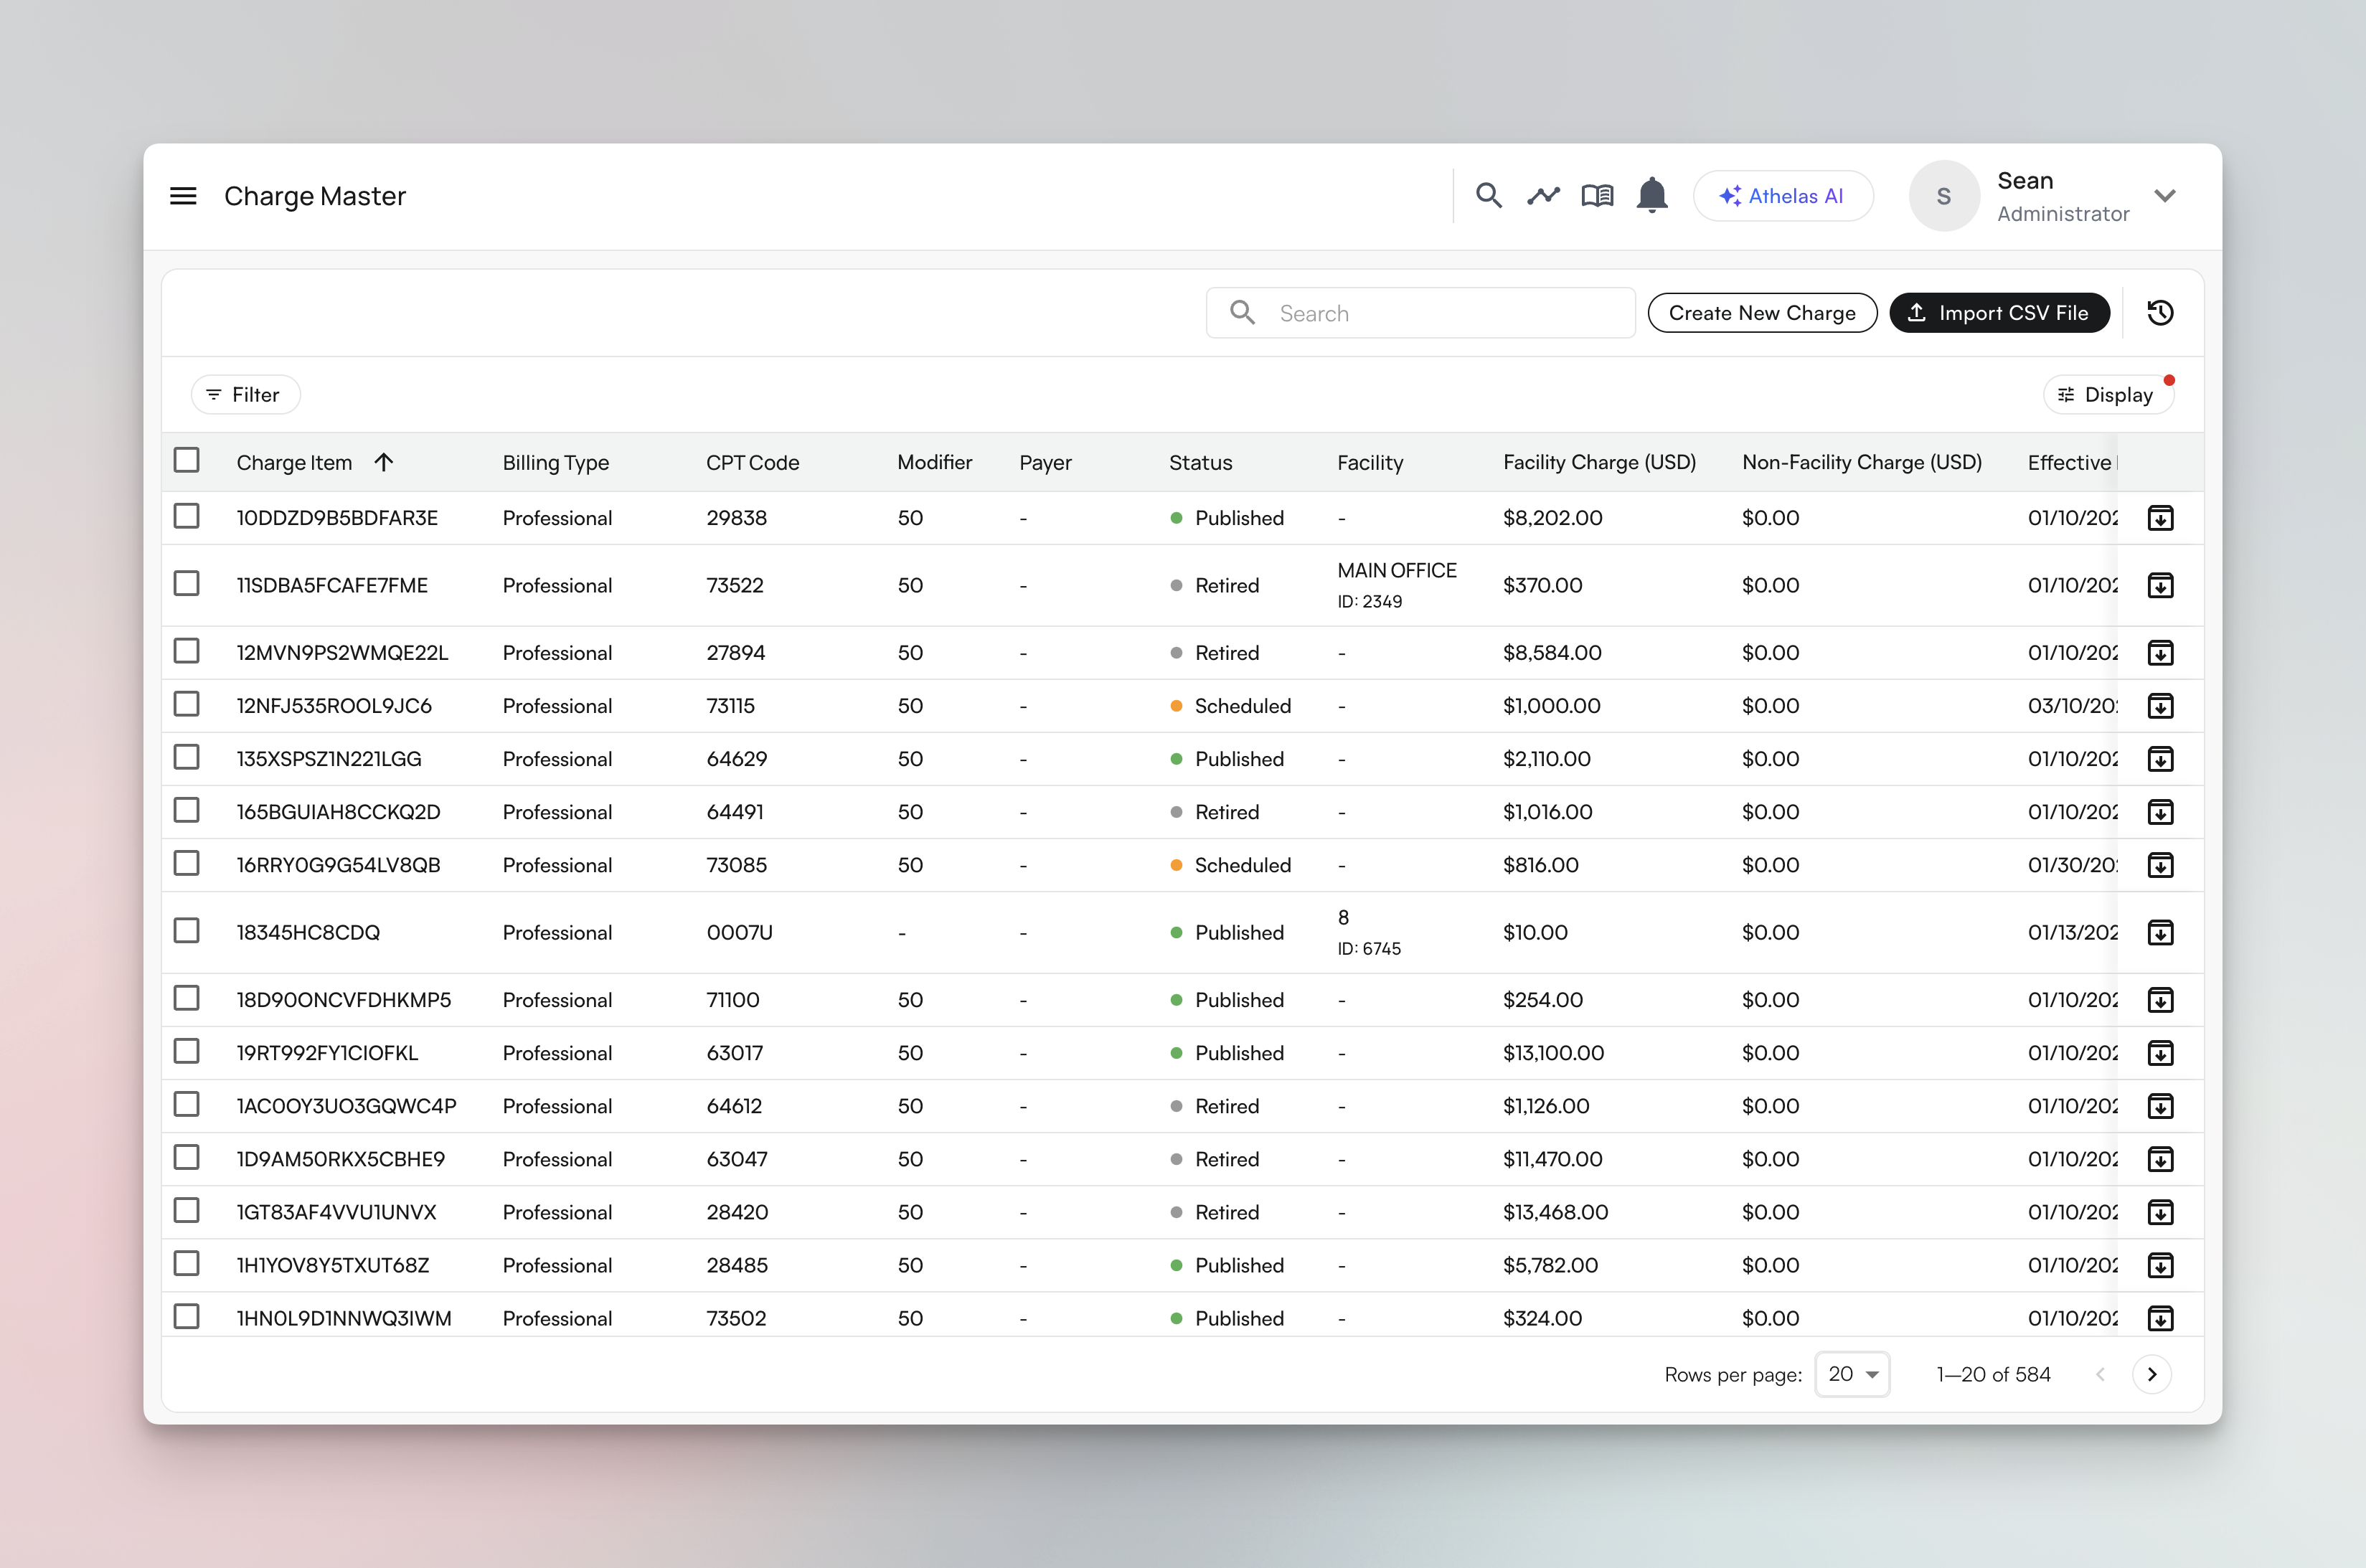
Charge Master expands standard fee schedules by combining codes, payer rules, pricing, dates, and facility-level variations so your team can manage billing logic from one source of truth.
Quick Start
Access Charge Master
Navigate to the Automation section in the Insights sidebar and open Charge Master.
What is Charge Master?
Charge Master replaces manual fee schedule lookups with a table you can filter, group, edit, and track over time. Key capabilities:- Store all billing configurations in one place
- Know exact charges by payer, modifier, and facility
- Add future effective dates for scheduled changes
- Track updates through row-level and global history
- Manage many rows at once with bulk tools
Understanding Key Concepts
Status: Published, Retired, and Scheduled
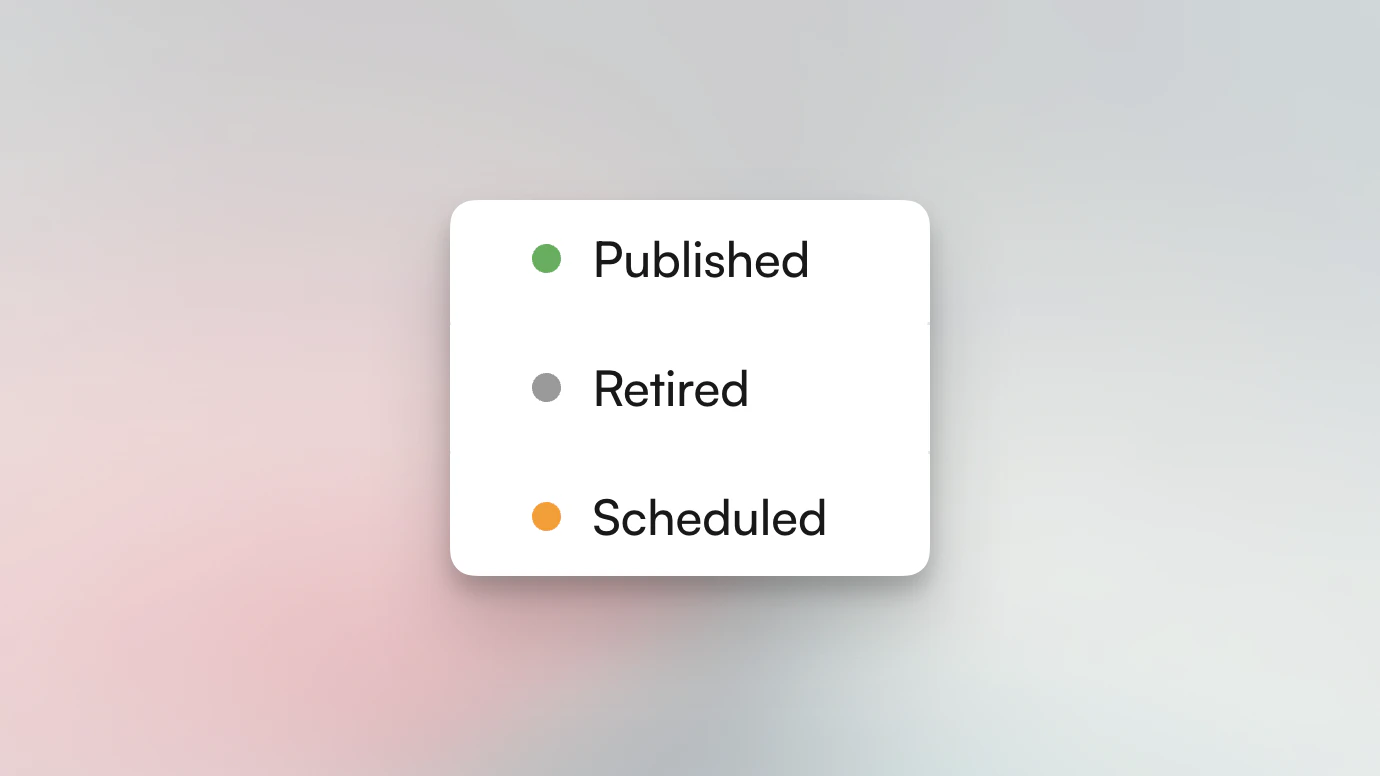
| Status | Description | Use Case |
|---|---|---|
| Published | Currently active and used for billing | Live charge in production |
| Retired | Archived and no longer active | Old configuration kept for history |
| Scheduled | Set to activate in the future | Future-dated charge becomes Published later |
Getting Started with Charge Master
If your practice already uploaded fee schedules, Charge Master may open with rows already populated.First-Time Setup
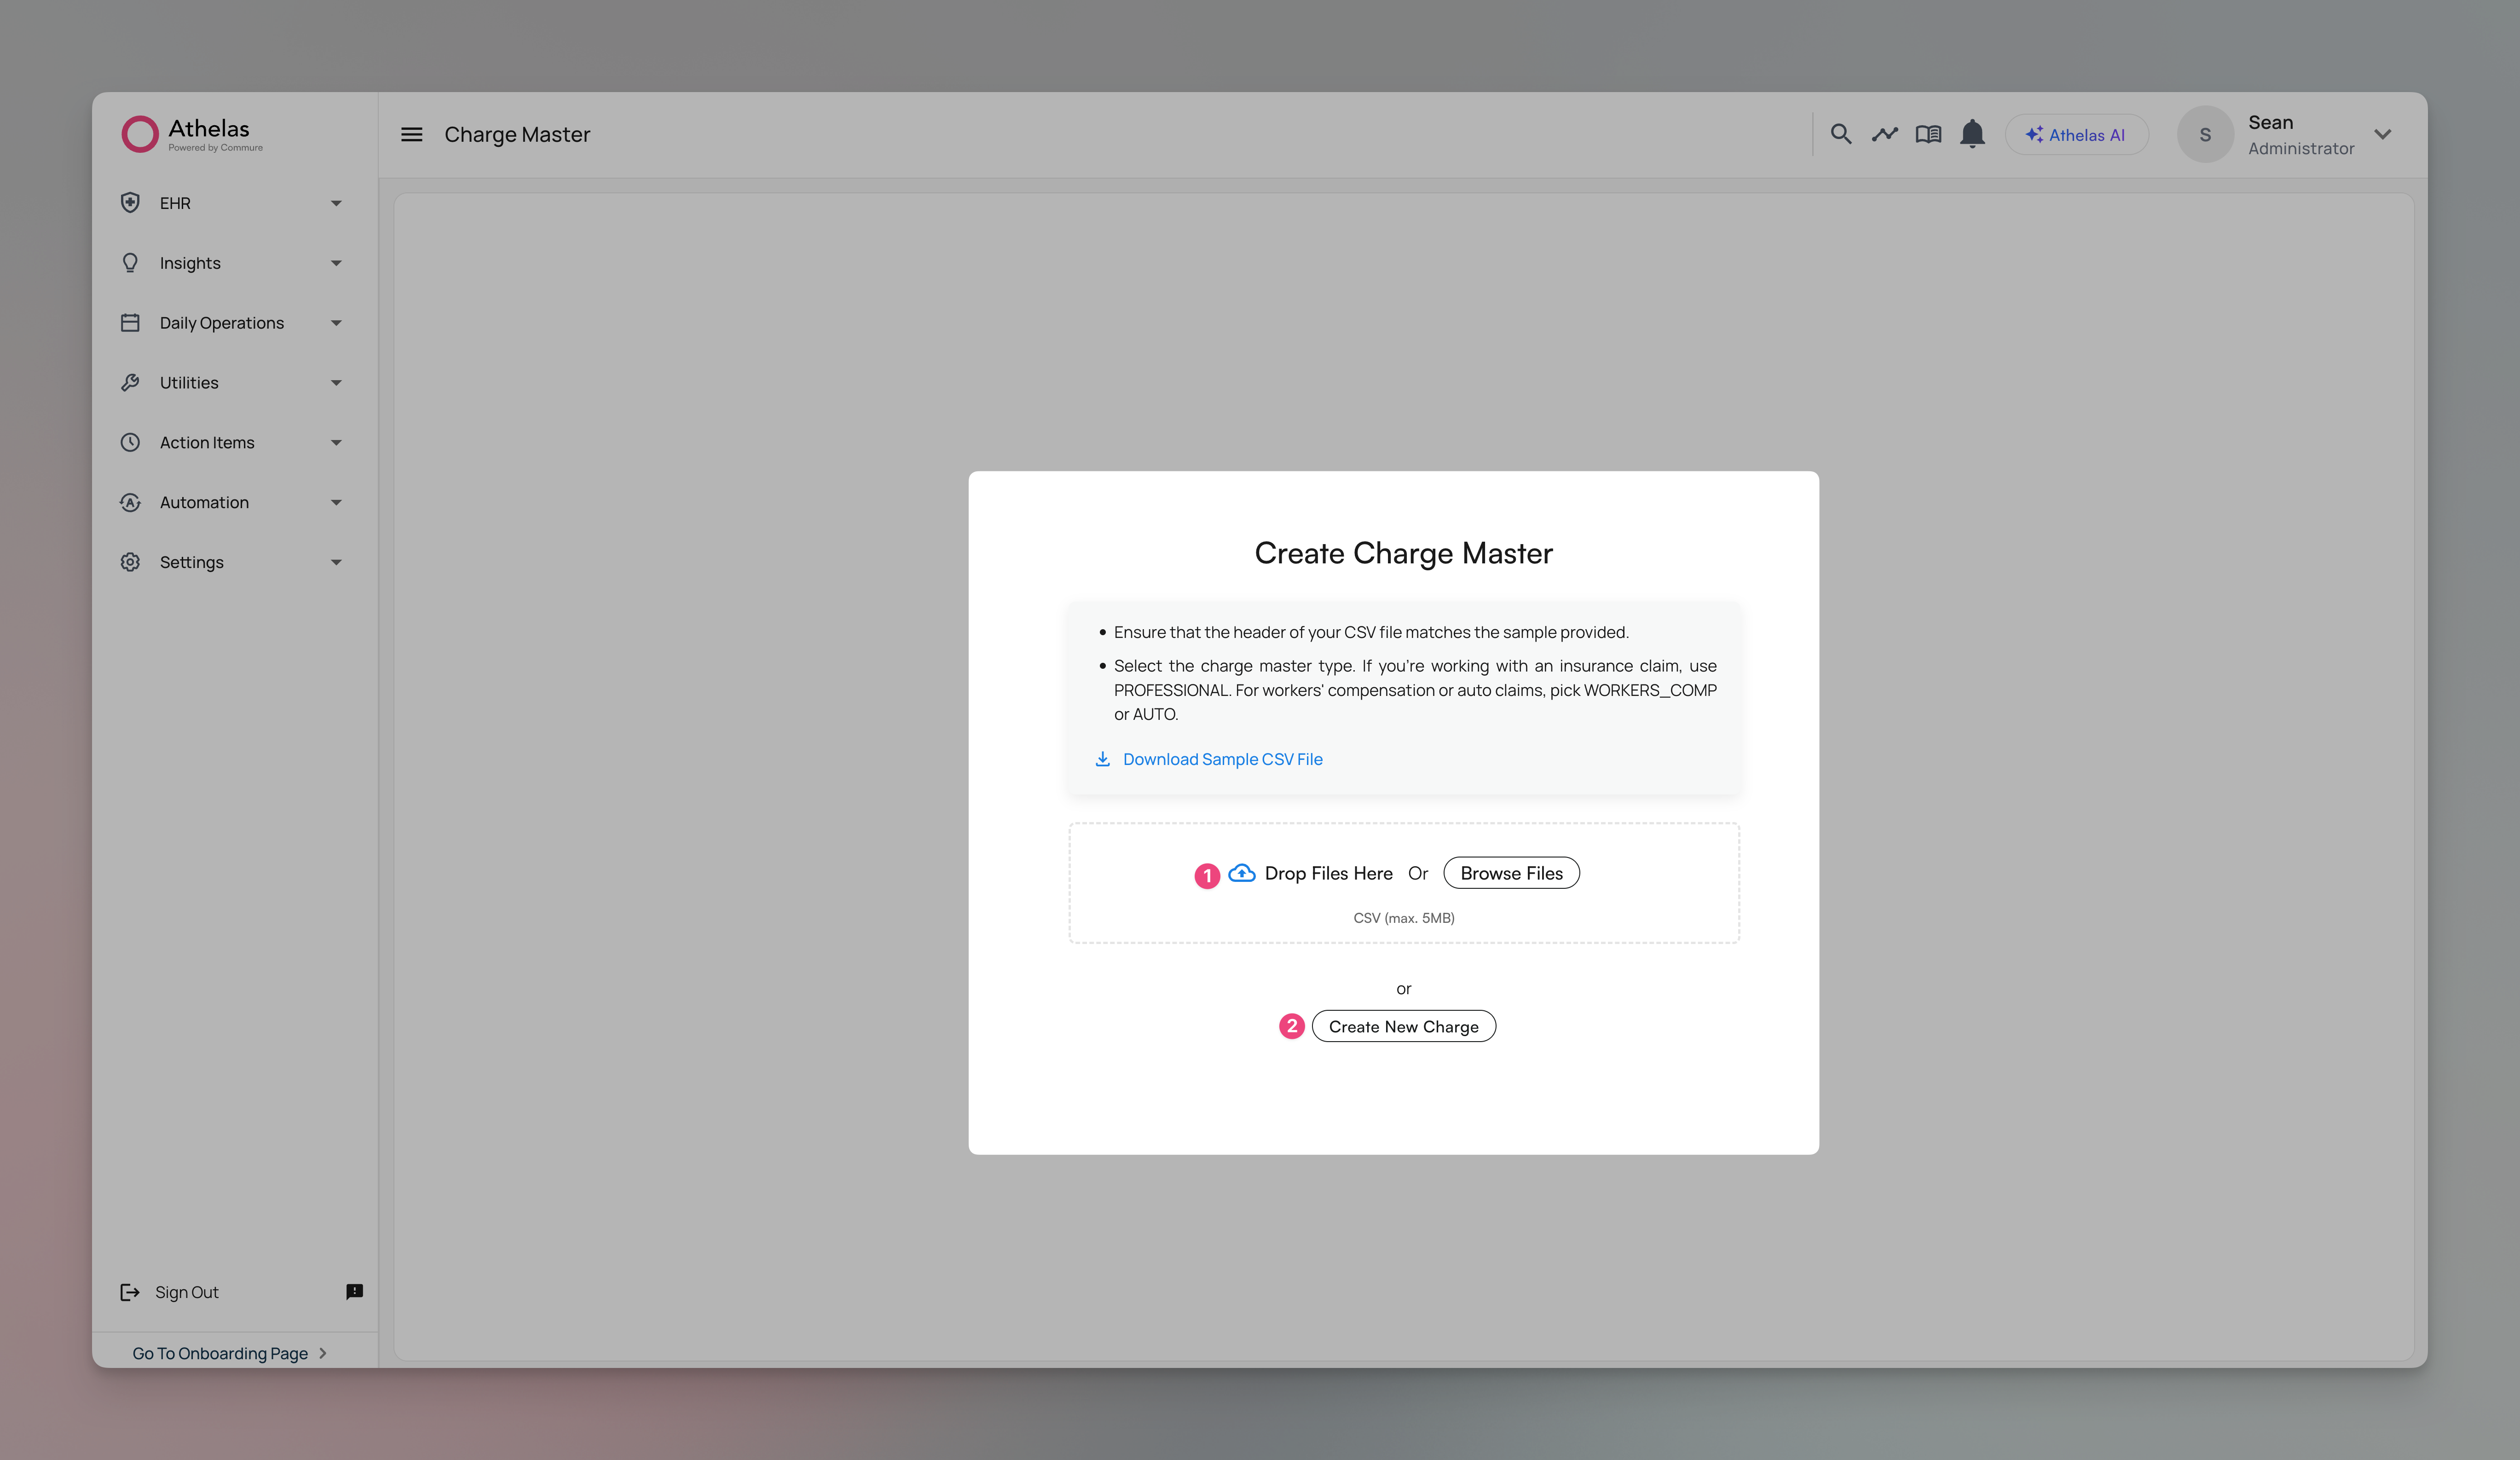
- Import from CSV (recommended for bulk setup)
- Manual entry (one row at a time)
Importing Your Data
During mapping, Charge Master can show row impact (for example, how many rows are ready to be added) and highlight required fields that still need mapping.
Understanding File Processing
Large first-time imports can take longer while the system validates entries, checks duplicates, and verifies relationships across payer/facility data.CSV uploads are additive. They add new rows and do not automatically remove existing rows.
Resolving Import Issues
After processing, you’ll get a summary of any issues that need action.Types of Duplicate Charges
- Same charge, different price - Same identifiers but different price than an existing row.
- Exact duplicate - Matches an existing row exactly.
Payer Mapping Issues
If your file includes a payer value that is not recognized, Charge Master prompts you to map it during import. You can choose either:- One-time mapping for this import flow (do not persist for future imports), or
- Remember/save mapping for future imports.
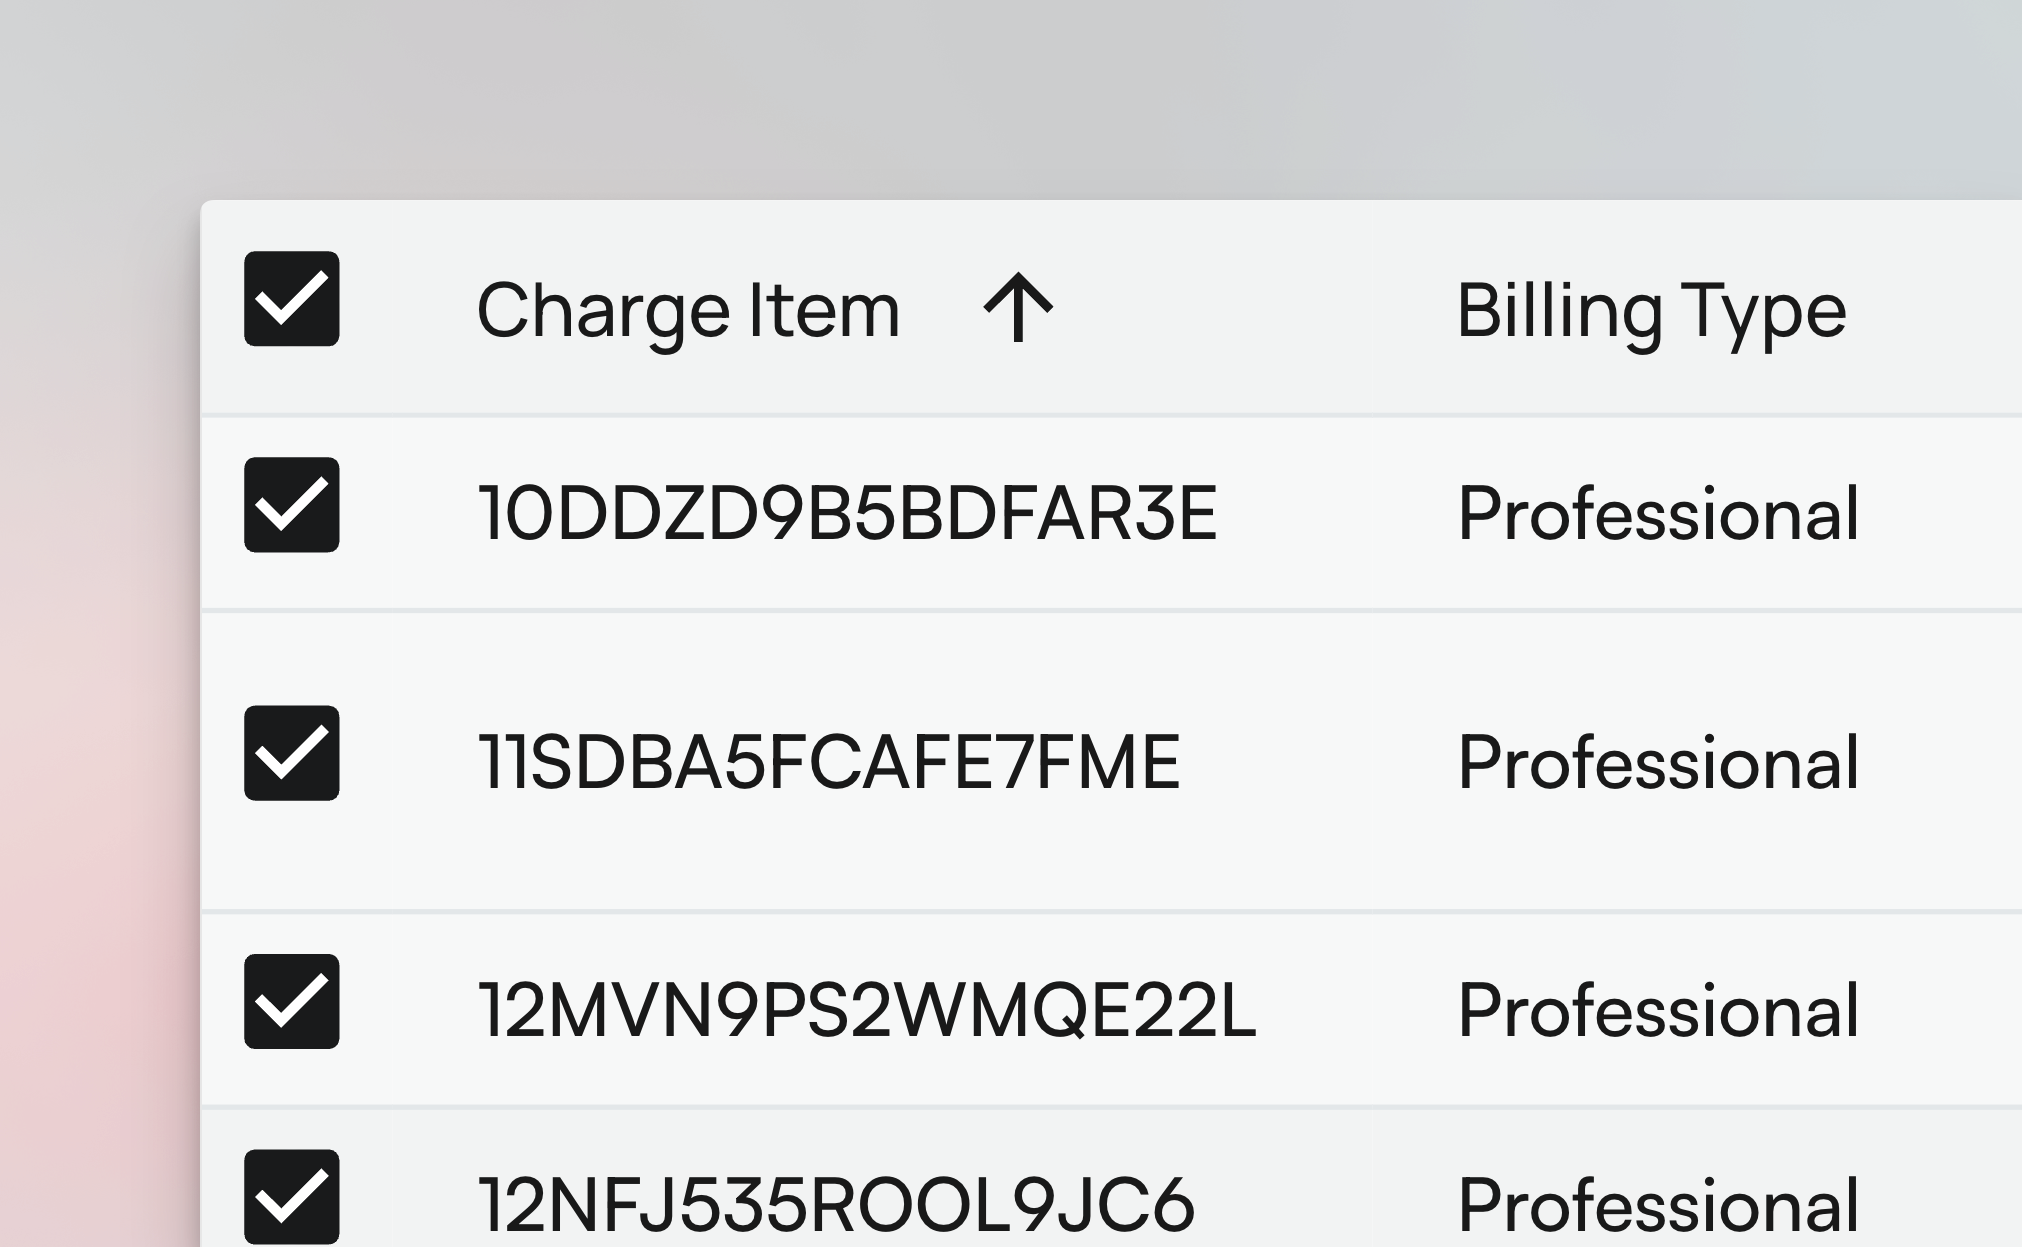
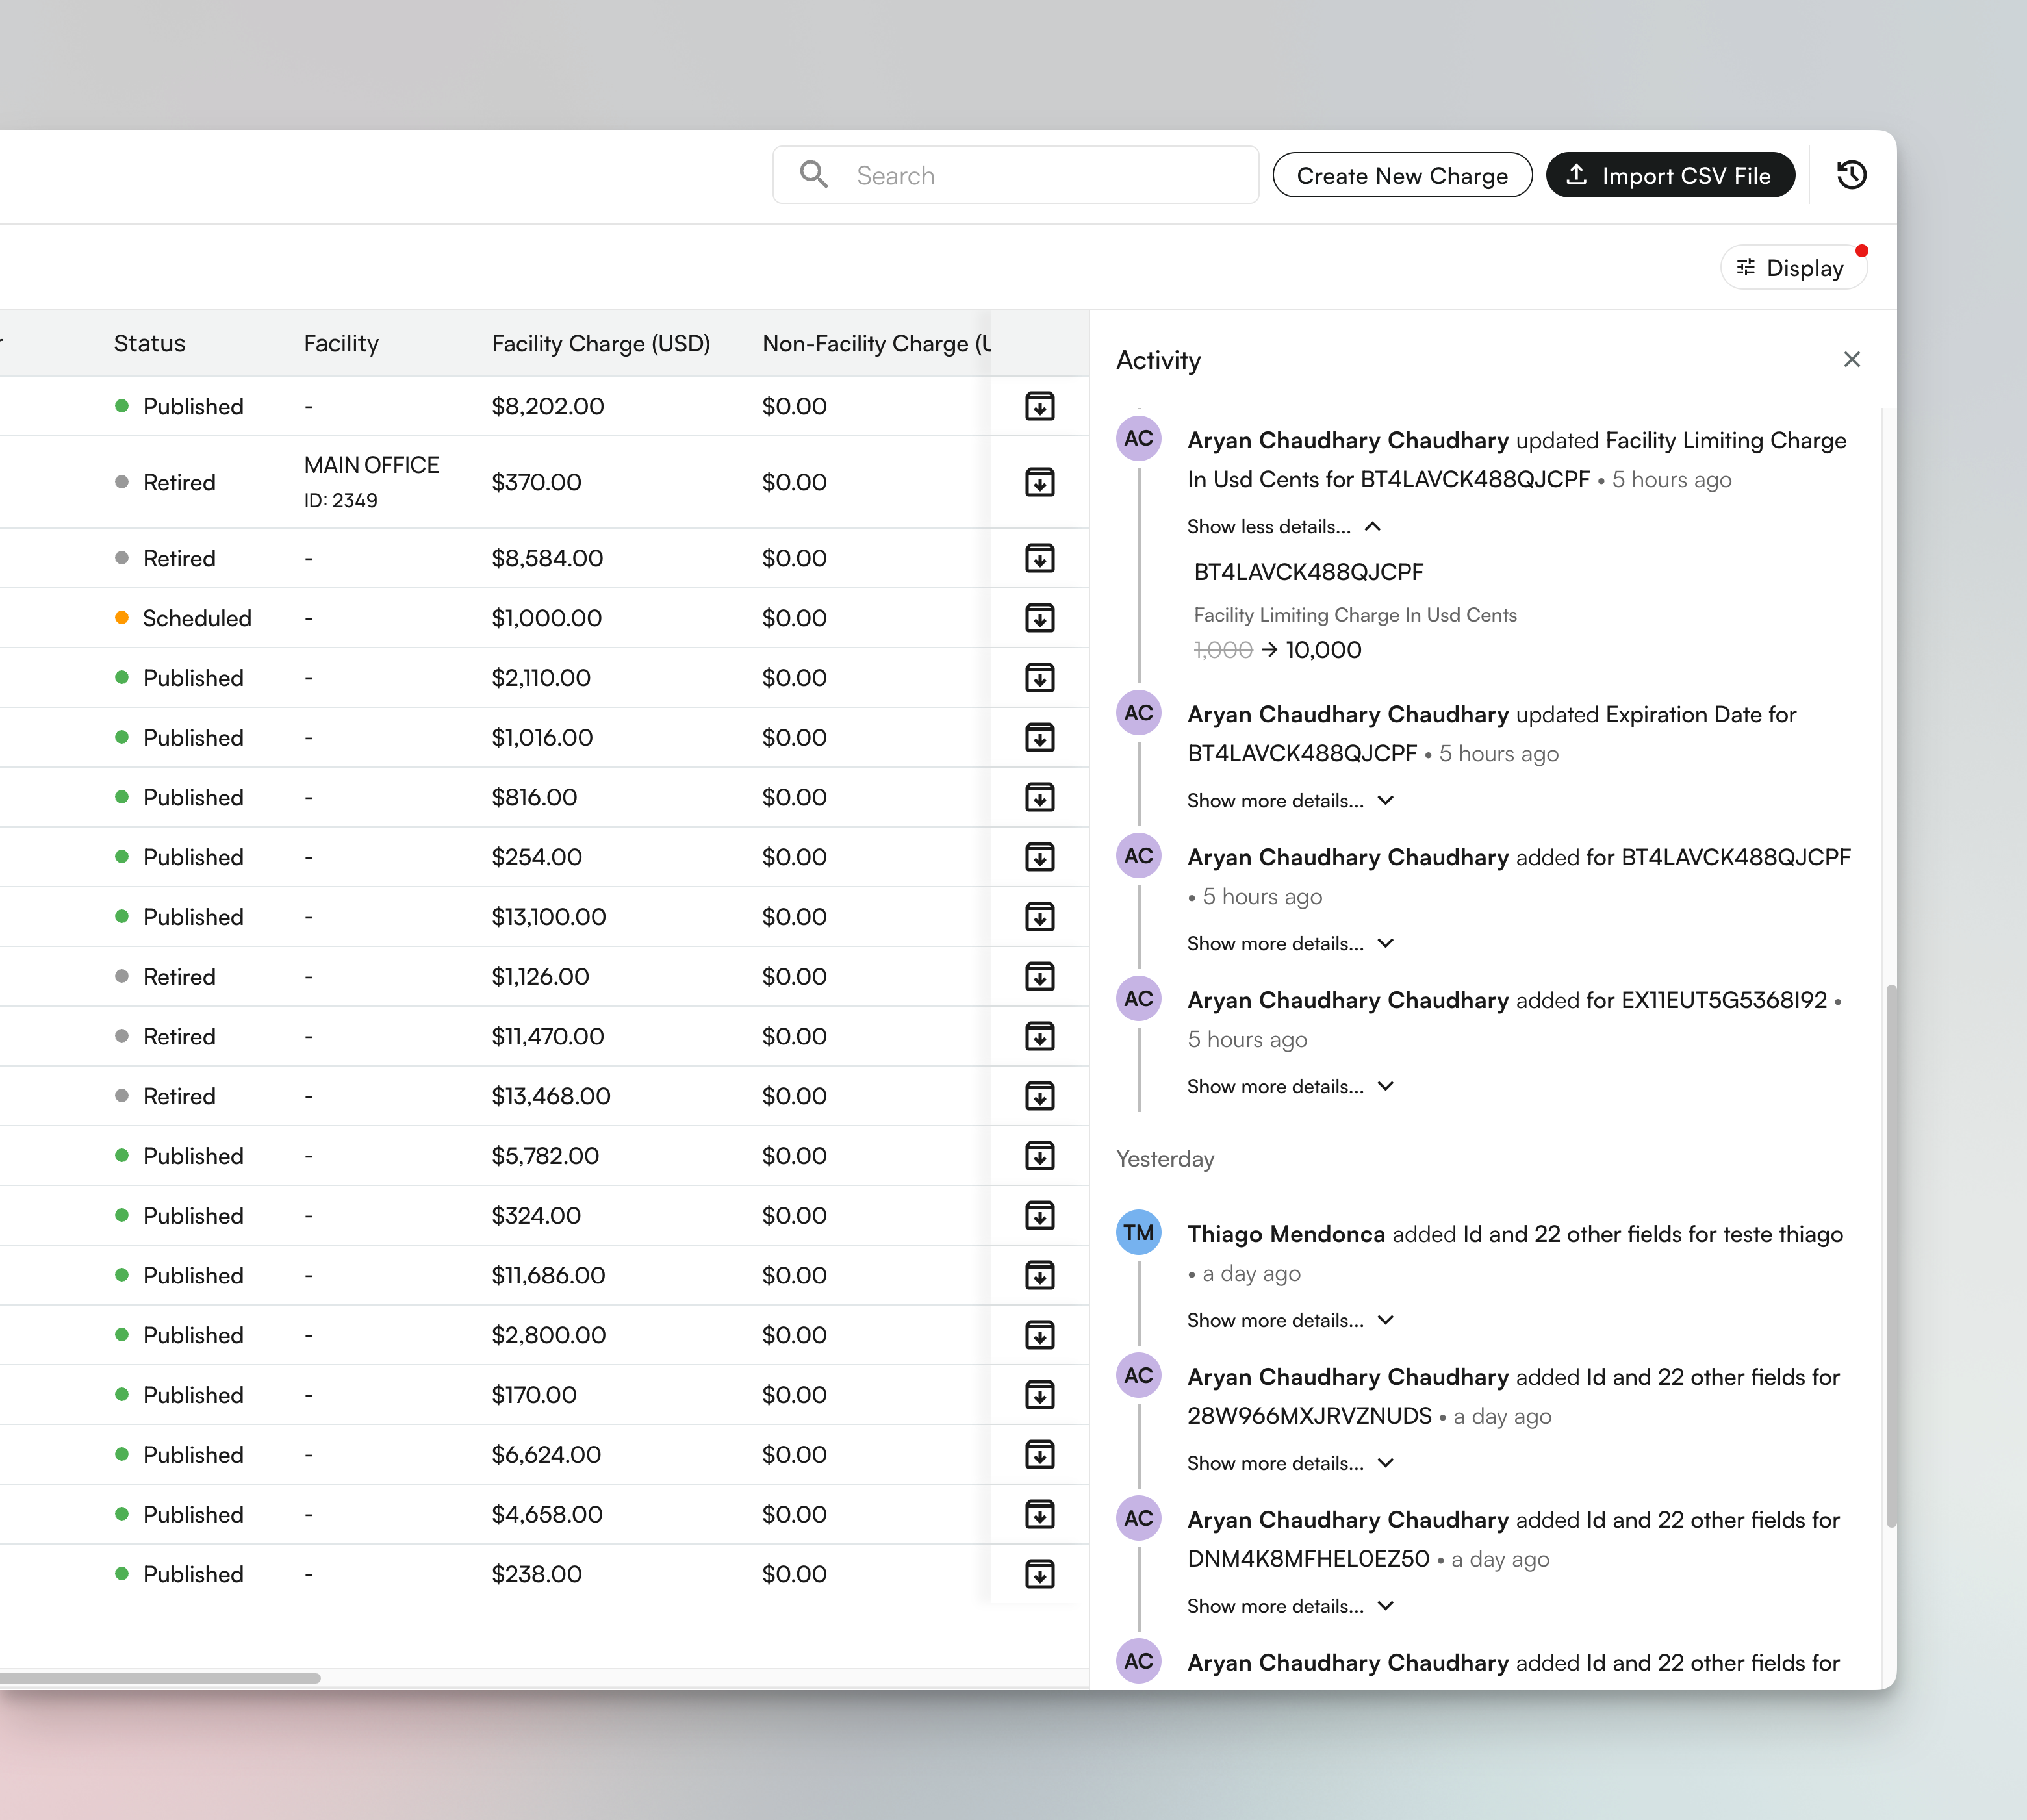
Viewing Your Charges
Working with Your Charges
Filtering Charges
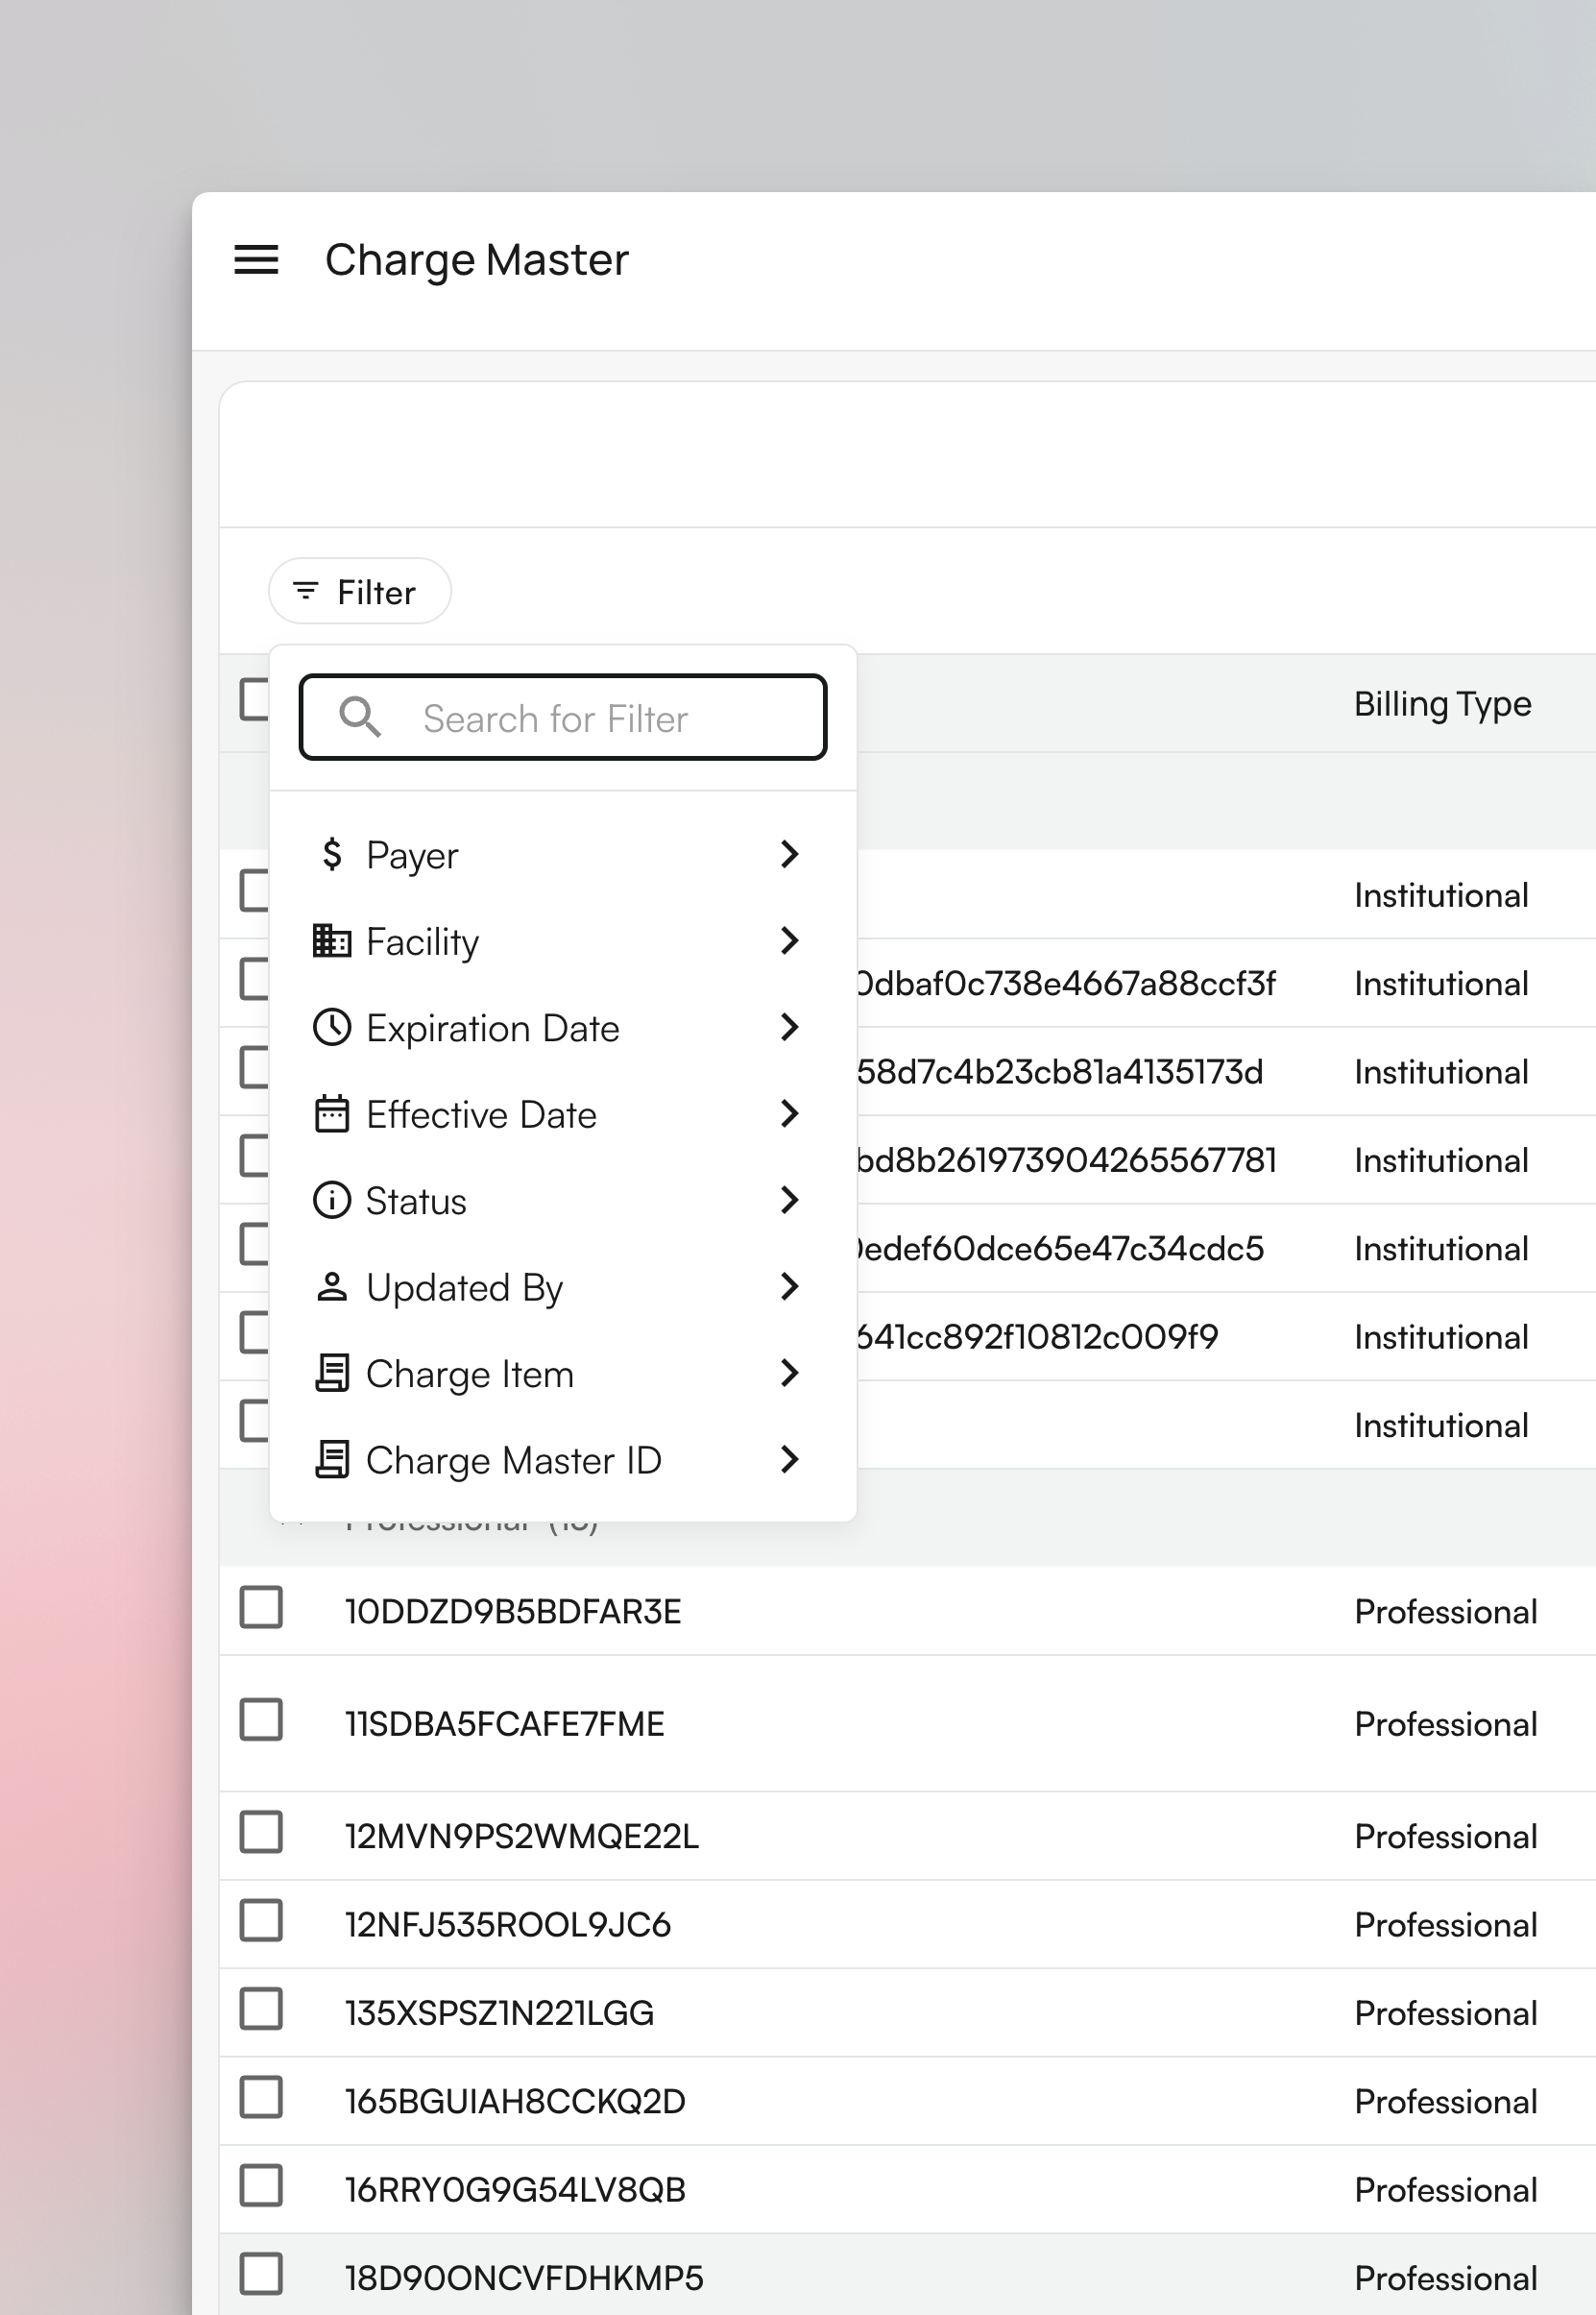
- Payer
- Facility
- Status
- CPT code
- Revenue code
- Modifier
- Effective date
- Expiration date
Customizing Column Visibility
Use display settings to show or hide columns in your table view. This is helpful if you need to temporarily reveal additional fields (for example, payer or facility columns) while troubleshooting.Grouping Charges
Common grouping choices:- CPT code
- Facility
- Payer
- Modifier
Editing and Updating Charges
Edit a Single Charge
To edit a specific row:- Click into the charge row first.
- Use the row-level Edit action.
- Update supported fields such as effective date(s) and facility/non-facility pricing.
- Save changes.
On smaller displays, some row actions may be off-screen. Horizontally scroll the table to reveal all actions.
Smart Edit for Multi-Row Updates
Select multiple rows, then open Smart Edit for AI-assisted bulk updates. Smart Edit uses the selected rows as context and can help with tasks like:- Bulk updating facility/non-facility charges
- Copying selected configurations across facilities
- Updating effective dates across a selected set
Bulk Selection
Bulk Archive (Retire)
Use bulk archive when retiring outdated rows.- Filter to your target set
- Select rows
- Click Bulk Actions > Archive
- Confirm
Bulk Transfer to Another Facility
Copy selected rows to another facility and optionally apply:- Absolute price adjustment
- Percentage adjustment
Downloading Your Charge Master
You can download the full Charge Master report from the page so your team can review the current configuration offline.Use exports for validation, handoff reviews, or quick spot checks before larger bulk updates.
Tracking Changes & Compliance
Individual Charge History
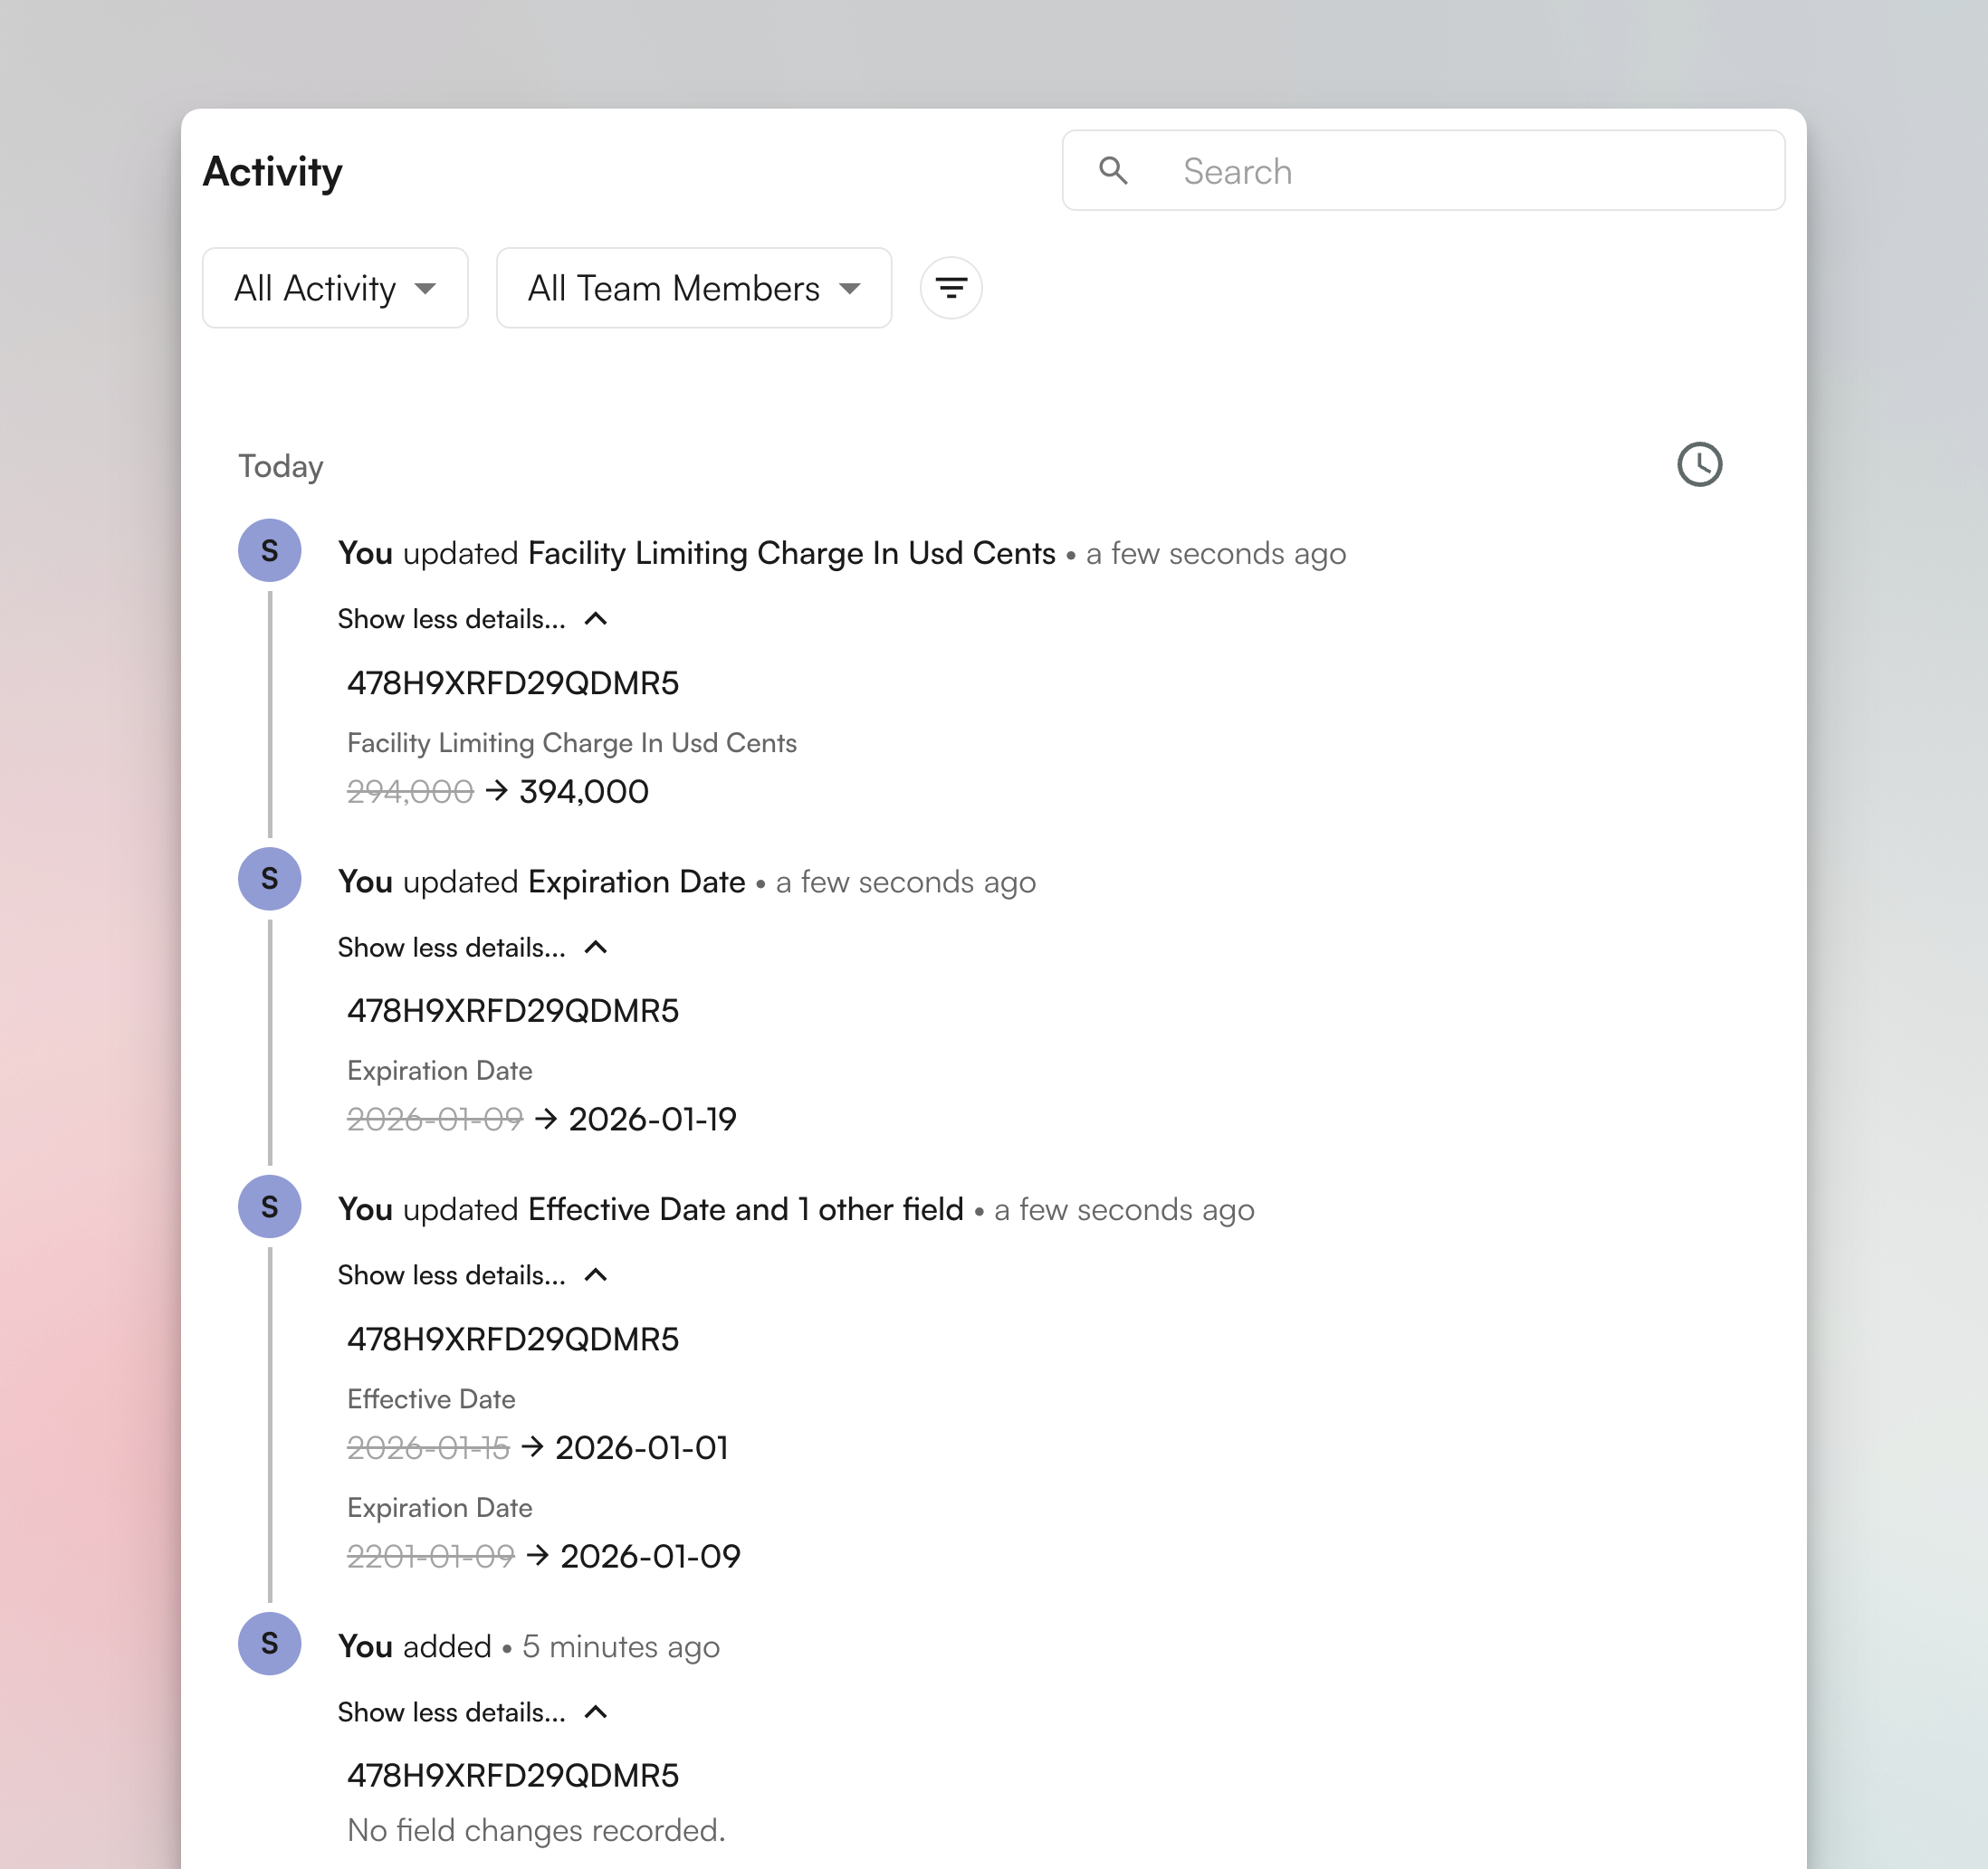
Global Activity History
UI labels and control placement may vary slightly as Charge Master evolves. If you do not see an option exactly as shown, use search, filters, or display settings to surface it.