
At a Glance
When a new team member needs access to Athelas Insights, add them from Settings -> My Practice -> Team Setting. During setup, choose the user role and adjust feature/page permissions as needed for your workflow.Here’s How to Do It
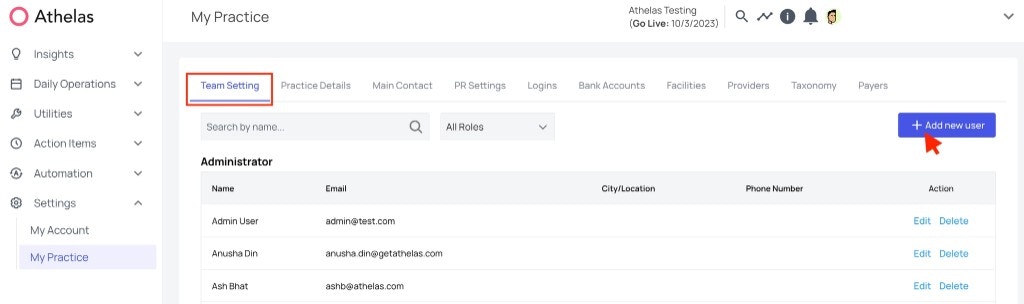
- Go to My Practice, open the Team Setting tab, and click + Add new user.
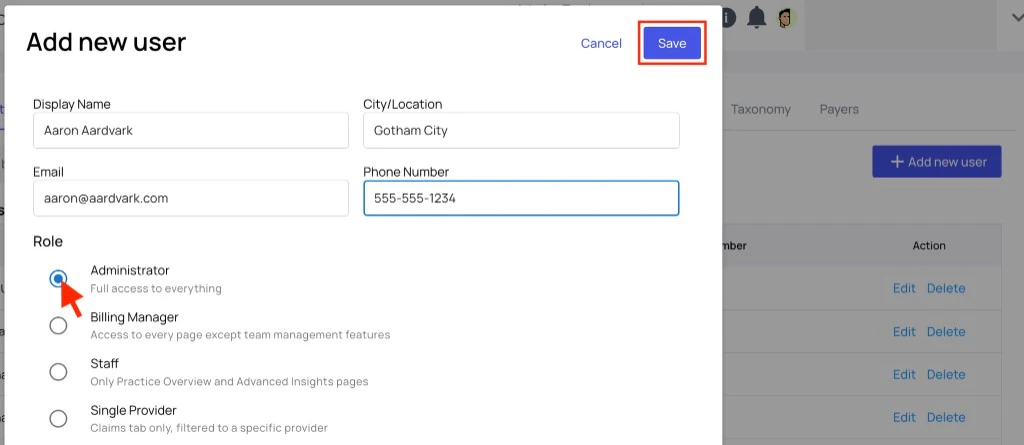
- Enter the new user’s basic details (display name, email, location, and phone number), then choose the appropriate role.
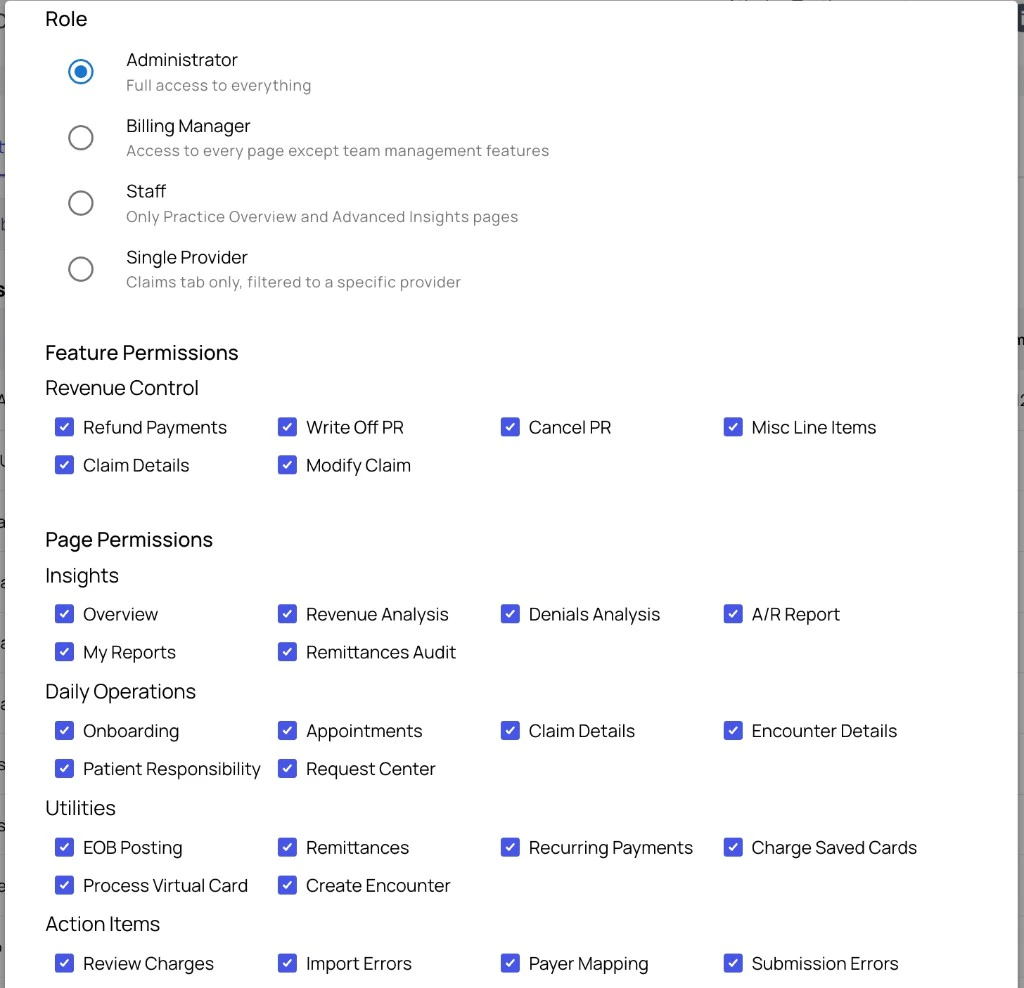
- Review role-based access defaults and update Feature Permissions and Page Permissions as needed.
- Click Save to create the account.
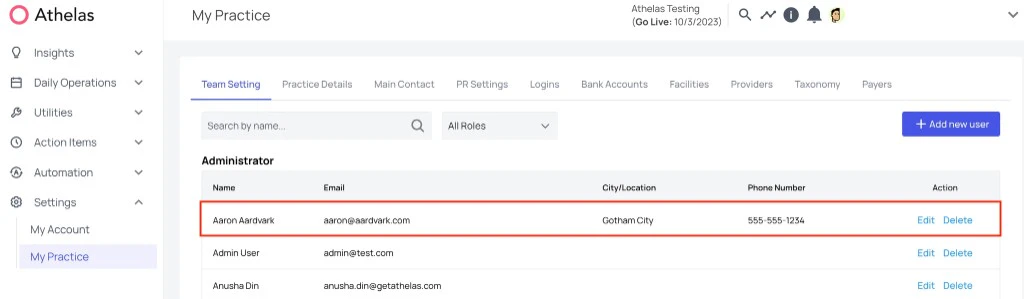
- Confirm the new user appears in the Team Setting list under the selected role.
Further Assistance
Need help with role design or permission setup? Reach out to support@getathelas.com and our team can walk you through best practices.FAQ
Which role should I choose for a new user?
Which role should I choose for a new user?
Start with the role that most closely matches the user’s day-to-day responsibilities:
- Administrator for broad access and configuration ownership
- Billing Manager for revenue workflow ownership with limited team-management scope
- Staff for operational access
- Single Provider for provider-scoped claims workflows
Can I customize permissions after selecting a role?
Can I customize permissions after selecting a role?
Yes. Role selection applies defaults, but you can toggle both Feature Permissions and Page Permissions before you save.
Where can I confirm the user was added successfully?
Where can I confirm the user was added successfully?
Return to the Team Setting tab in My Practice. The new user will appear in the team list under their assigned role, where you can also edit or delete the account later.