
Navigate your Chart Note
Opening a Chart Note
✨Smart Tip: Ask Athelas AI to navigate you to the relevant Chart Note. You can also use Voice Mode.
- Open the Calendar.
- Select the desired Appointment.
- Click View Note in the top-right corner.
- Once opened, patient details appear in the top bar, with Chart Note sections listed in the left sidebar.
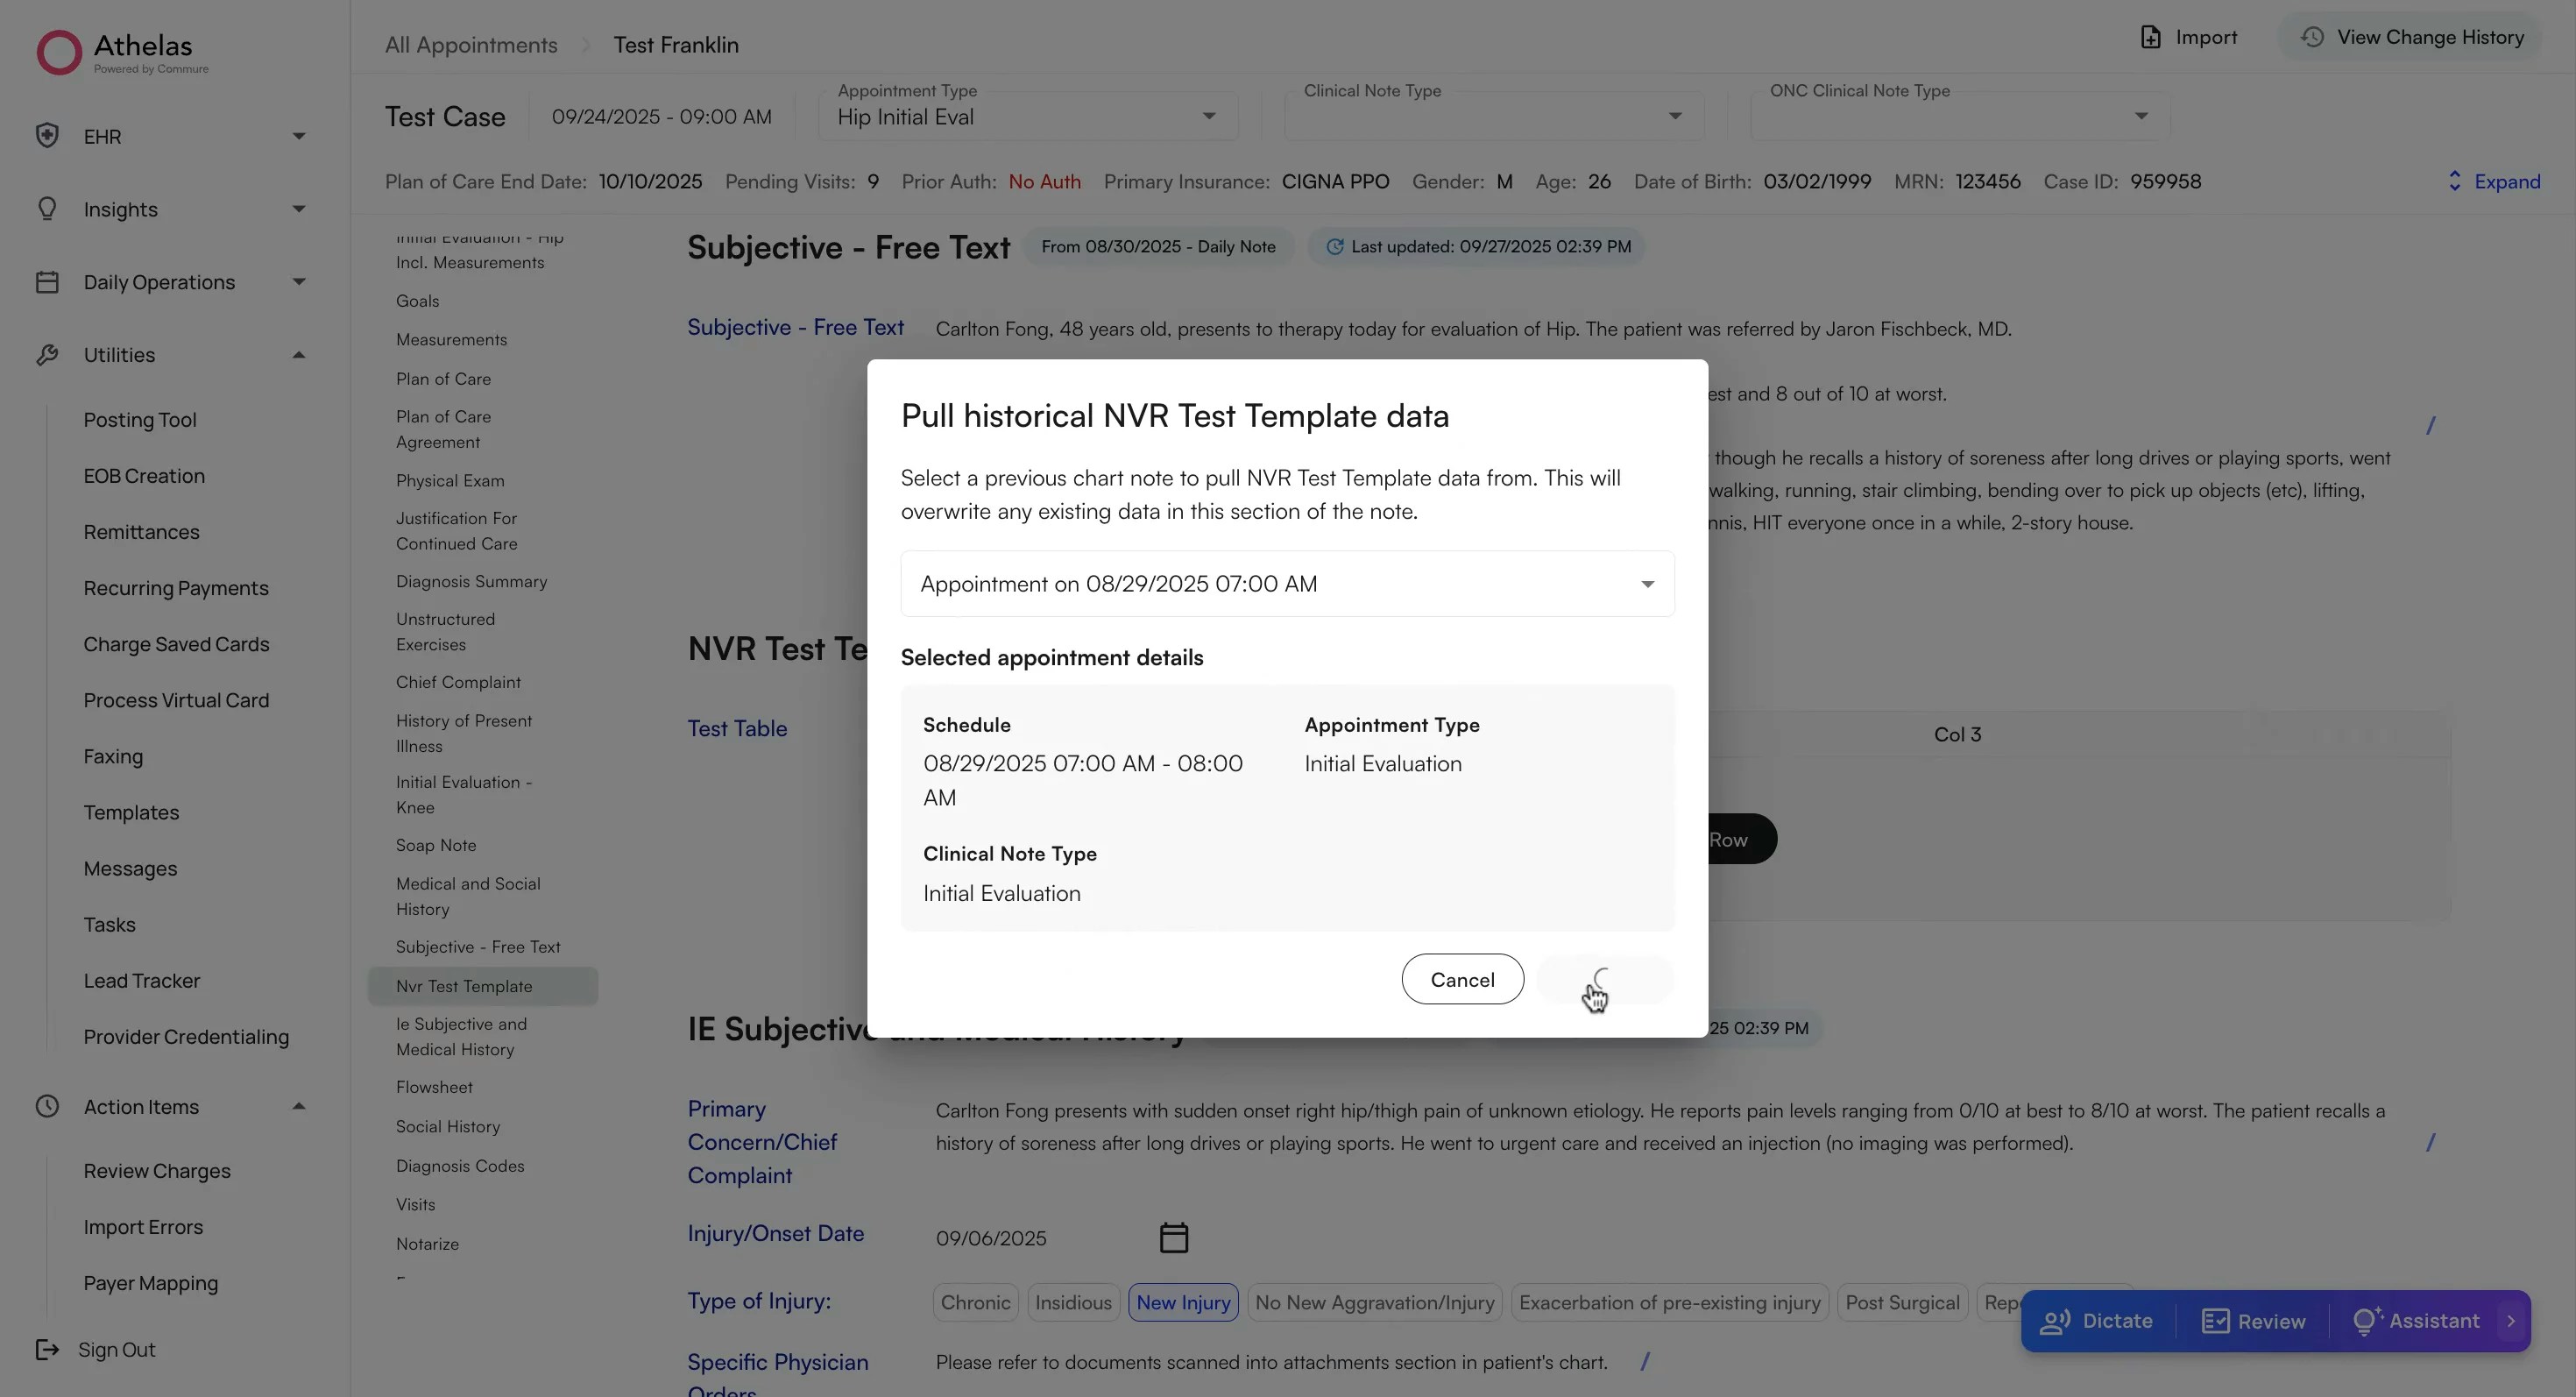
View the Pre-Visit Summary
Plan of Care
When selecting Plan of Care, you will be prompted to enter: Start Date and End Date,Frequency & Units, Duration & Units, Visit Count.The visit count will auto-count down every session and be available to review in the Calendar and Chart Note.
✨ Smart Tip: If you enter a Start Date, Frequency, and Duration, the system will automatically calculate the End Date and Visit Count.
Diagnosis Codes
Diagnosis Codes will be auto-populated through Scribe, however, you are recommended to review them in detail before submitting the chart note.To manually add a **Diagnosis Code: **Select ICD-10 codes from the drop down. Click on the Reorder List button to review the code list and drag codes to reorder them.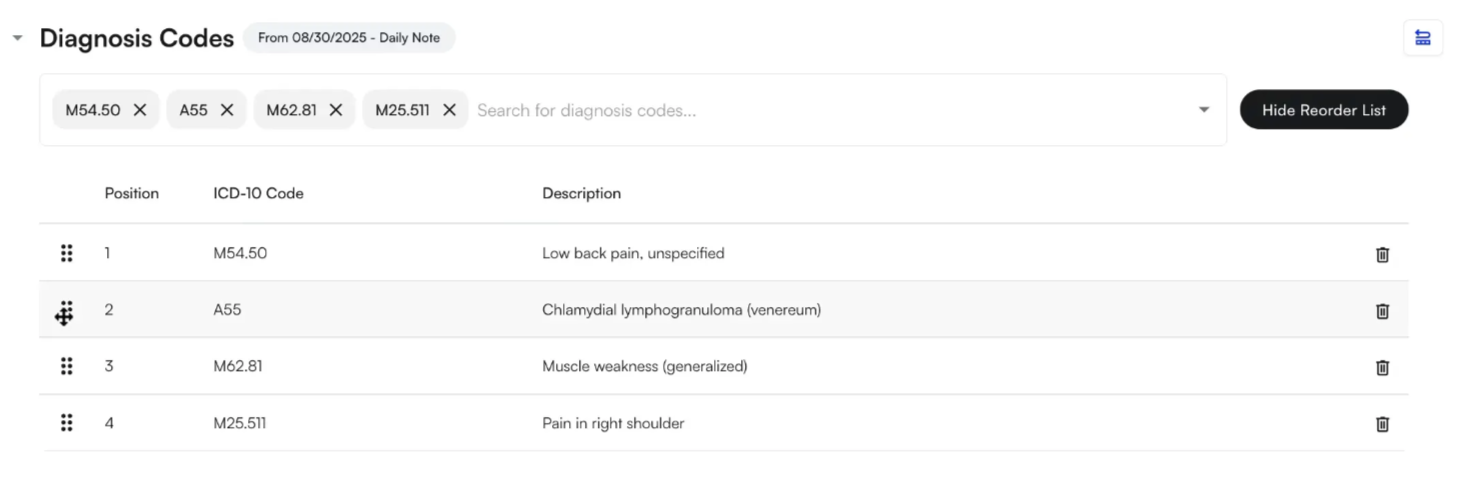
Other sections in the Chart Note
In addition to the Plan of Care and Diagnosis sections, you can view other sections such as:
- Goals
- Treatments
- Visits
- Medications, Medication Order Set, and Prescriber Agents
- Flowsheets
- Measurements
- Functional Outcome Measurements
Sign & Submit
Compliance Checks with Athelas AI
Compliance checkmarks ensure that specific details required for compliance are captured in the Chart Note.
- If the detail is missing, the checkmark appears grey.
- Once the detail is documented, the checkmark turns green.
- You will get a compliance score out of 100
- Additional recommendations to ensure no billing compliance issues related to the Chart Note.
Sign a Note
The signature section compiles all compliance validations for review. Here, the rendering provider and any co-signers can sign the note.**Note: **If you do not need a supervising provider’s signature you can amend the preferences from the Providers Tab within Preferences.
- To fax the encounter to a referring provider, select their name from the dropdown, enter their fax number, and check Fax note to referring provider. To send the note to several people at once — a primary care physician, an attorney, a case manager, or a whole facility — see Care Team Communications.
- You may also include a signature request section if needed.
Streamline Patient Care with AIR Assistant
Preview Chart Note
Navigate to Notarize within the Chart Note and select Preview Billing PDF (next to Fax to Ref. Provider).
Submit Encounter
- Sign the note under Notarize and click Submit.
- If the patient has future appointments scheduled, you can choose to update them with the completed note.
- Next, you’ll be asked if you’d like to review the appointment in RCM/Billing. Click View Encounter Details or View Claim Details, or simply click Complete.
Post Submission
Once you sign & submit a Chart Note, you can:
View and download updated Note
View and download updated Note
Once a Chart Note is completed, it becomes visible in the Appointments section of the Patient’s Profile.
Fax a Chart Note
Fax a Chart Note
To fax a completed chart note, click “+Create Fax” at the bottom of the note. A side panel will open where you can choose the fax type.Three fax types are available:
- Provider: Select from a dropdown of referring providers within Air. If a fax number is saved for the provider, it will auto-populate.
- Individual Fax Number: Enter any fax number manually to send the completed chart note.
- Imaging Request: Sends the chart note along with an imaging request. This includes diagnosis codes, procedure codes, rule-out information, result medium, attachments, and imaging facility details.
Discharge your Patient
Discharge your Patient
- If the patient is in-office: Change your Chart Note to a Discharge Note to automatically adjust the template and included sections.
- **If the patient does not visit the office: **Discharge the patient from the case table within the Patient Profile
FAQs
I can’t see my patient’s past chart notes from my old EHR
Import Records for Past AppointmentsContext:
- Plan of Care details may not be migrated from the old EHR into Athelas Air.
- For returning patients seen in Air for the first time, providers will need to reference their previous documentation and set up the Plan of Care in Air.
- This is a one-time step: once entered, the Plan of Care will automatically carry forward from note to note.
- Go to the Patient’s Profile → **Appointments **and locate the **date of service **of the latest Progress note / Initial Eval appointment for the case.
- Go to Attachments, search for the date of service corresponding to the note from which you want to carry forward the measurements.
- Click the eye icon to view the PDF, then download the PDF to your device.
- Go back to the **Appointments **Tab
- Click the + icon to the right of the appointment → Set Up Chart Note.
- Select the right Case, Appointment Type, and Clinical Note Type [Progress Note, Initial Evaluation, etc.]
- Select For Documentation Only. This option ensures the imported chart note is not billable.
- Select Set-up. This will open the chart note on a new screen
- Click on **Import **at the top right → Upload the attachment → Scribe processes the PDF.
- Track progress by clicking into **Athelas AI → **Select the sections you would like to pull and **Apply Scribe **to desired sections once complete.
- Review, edit if needed, and exit (auto-saves, no signature required). This information should then start pulling into all future notes made on Air.