
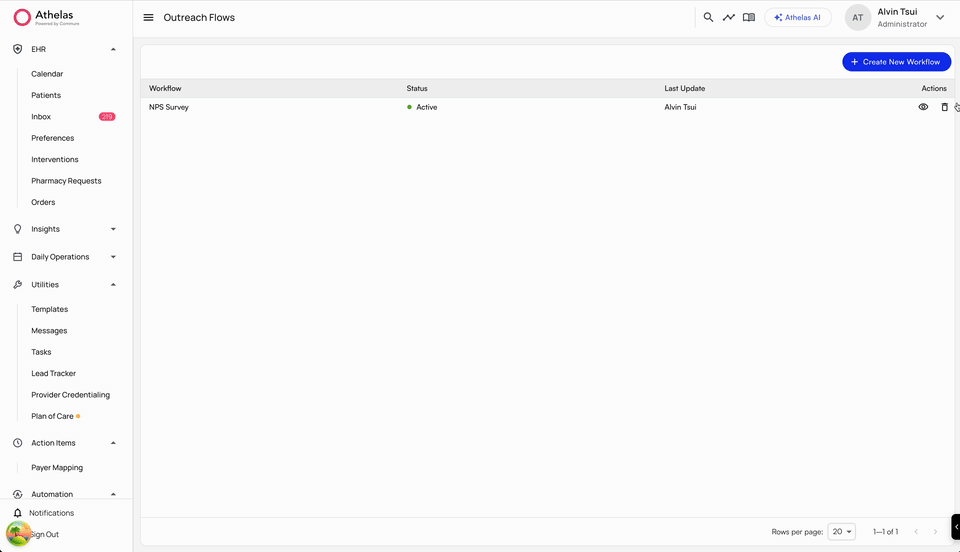
Outreach Flows general guide
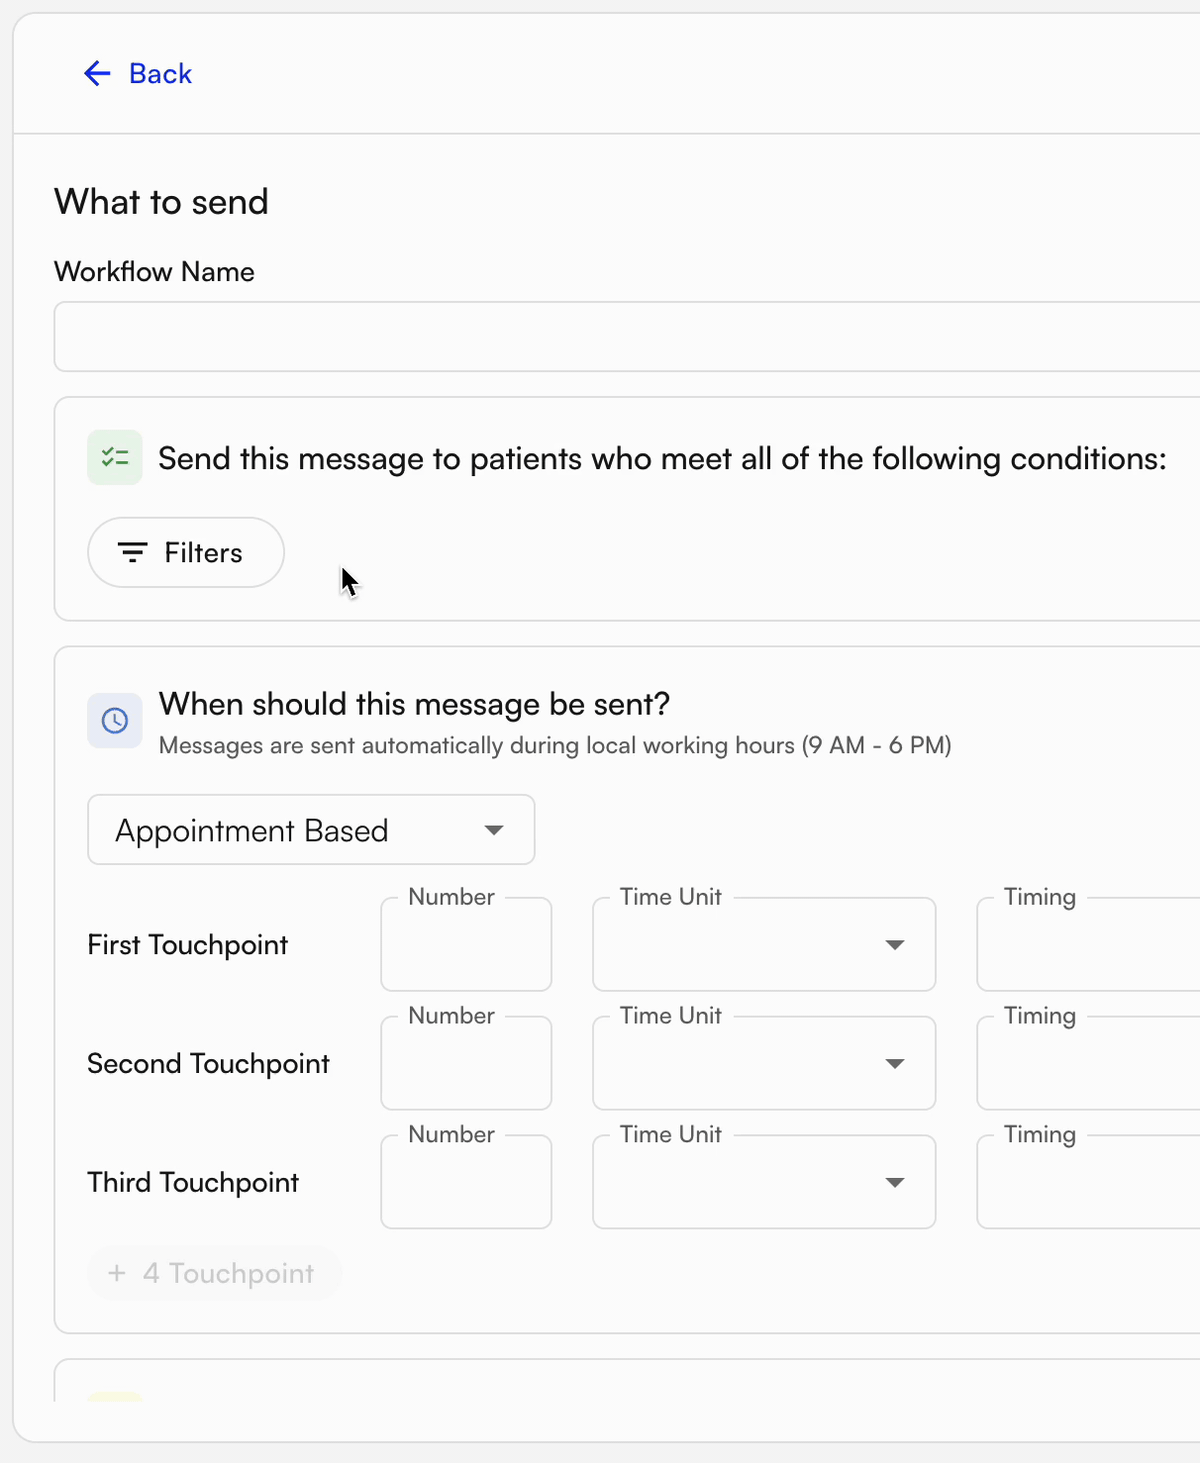
To access the Outreach Flows section, navigate to the Outreach Flows tab in the sidebar, under Automation.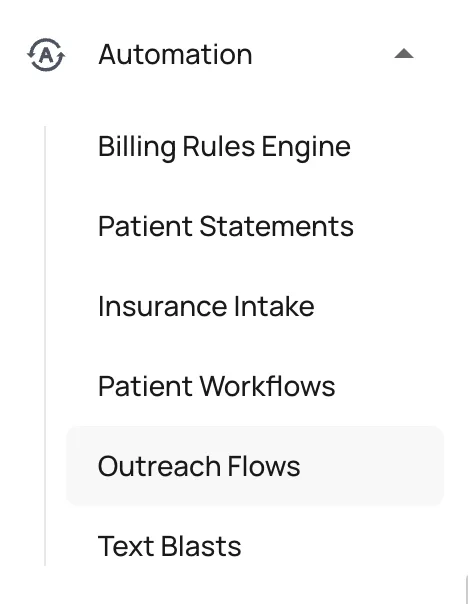
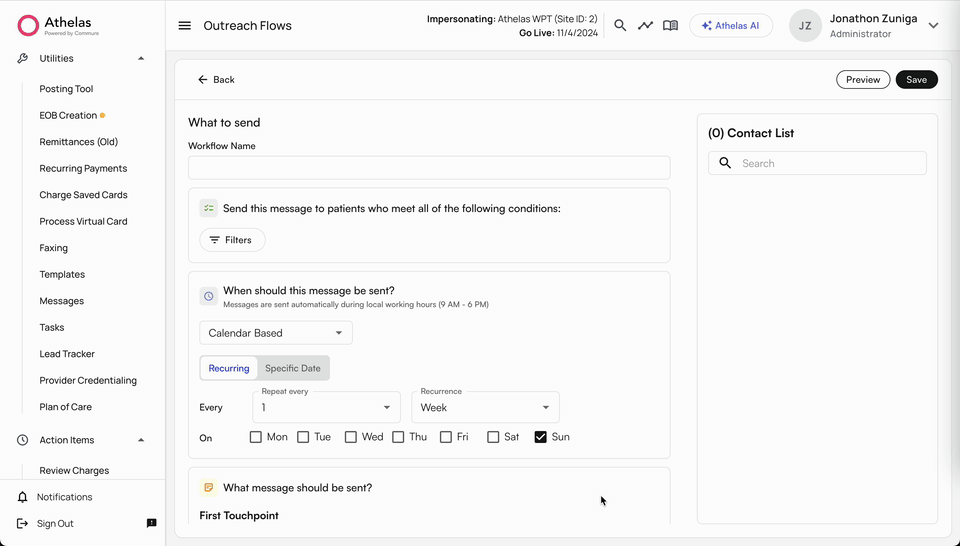
- Timing or triggers for sending
- Which patients to message
- Content and type of message to send
- Forms to include in the message
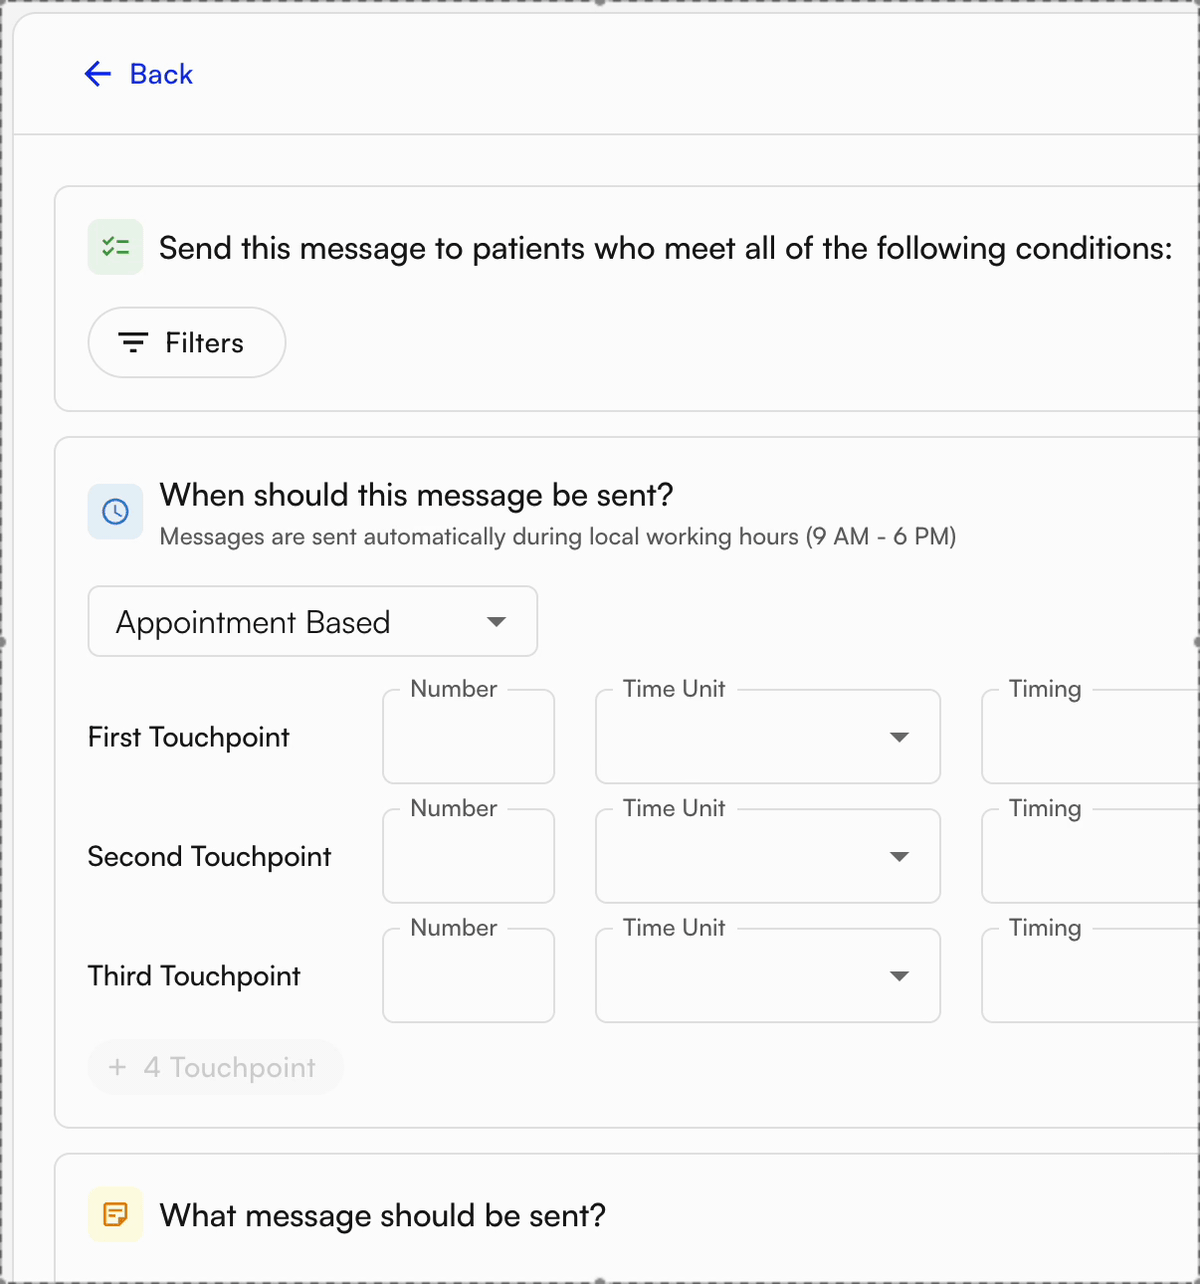
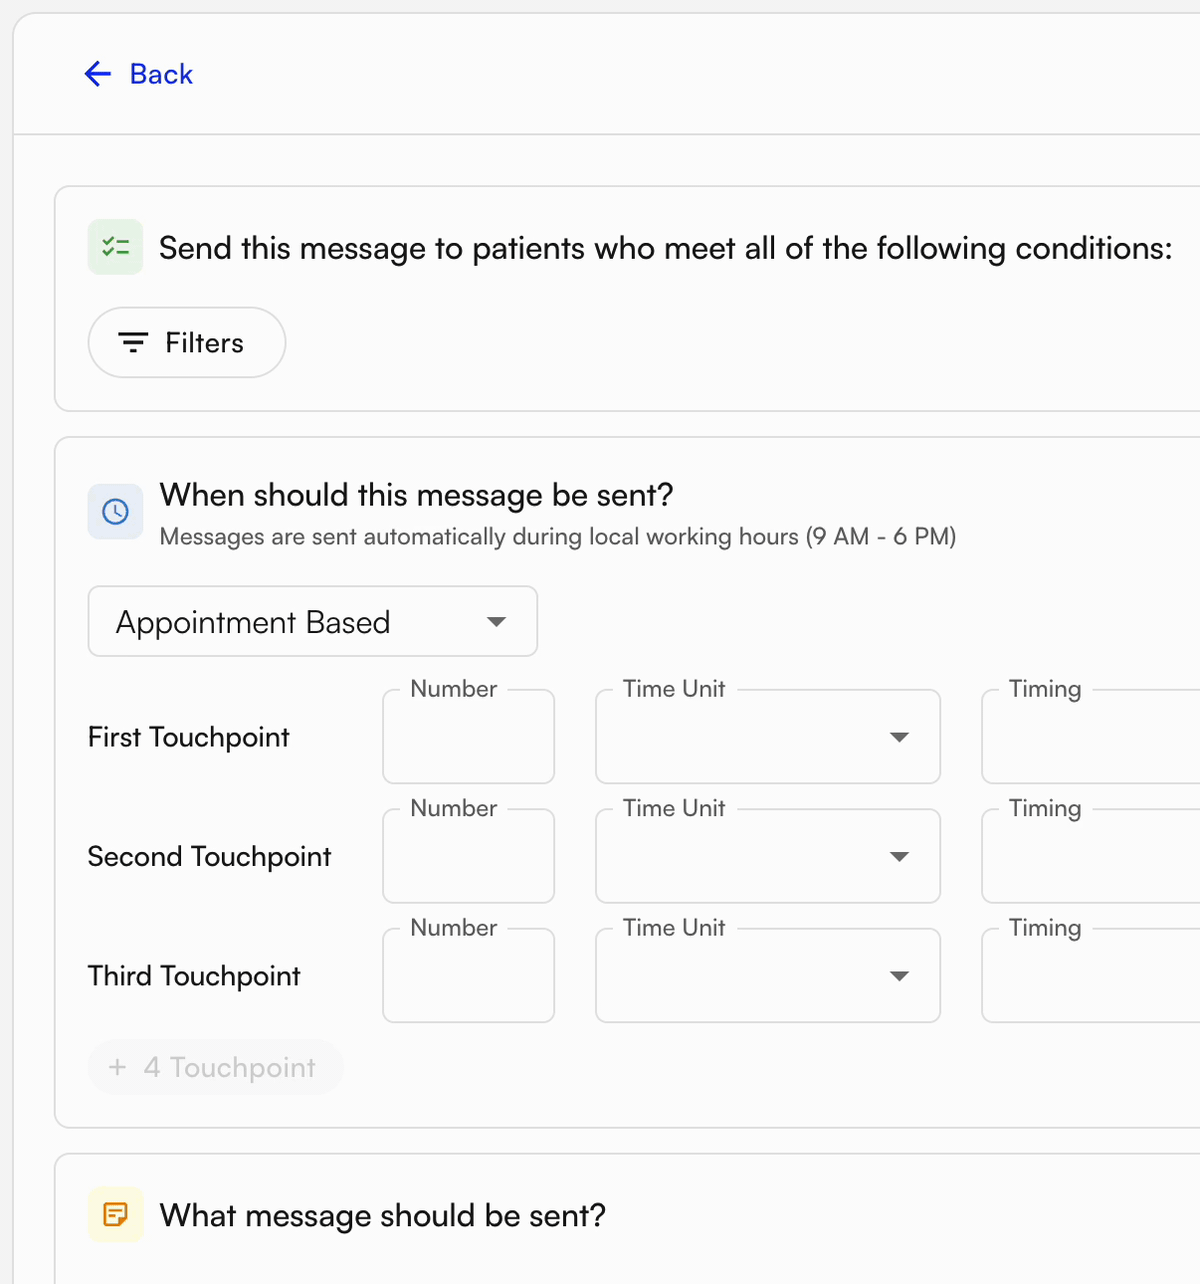
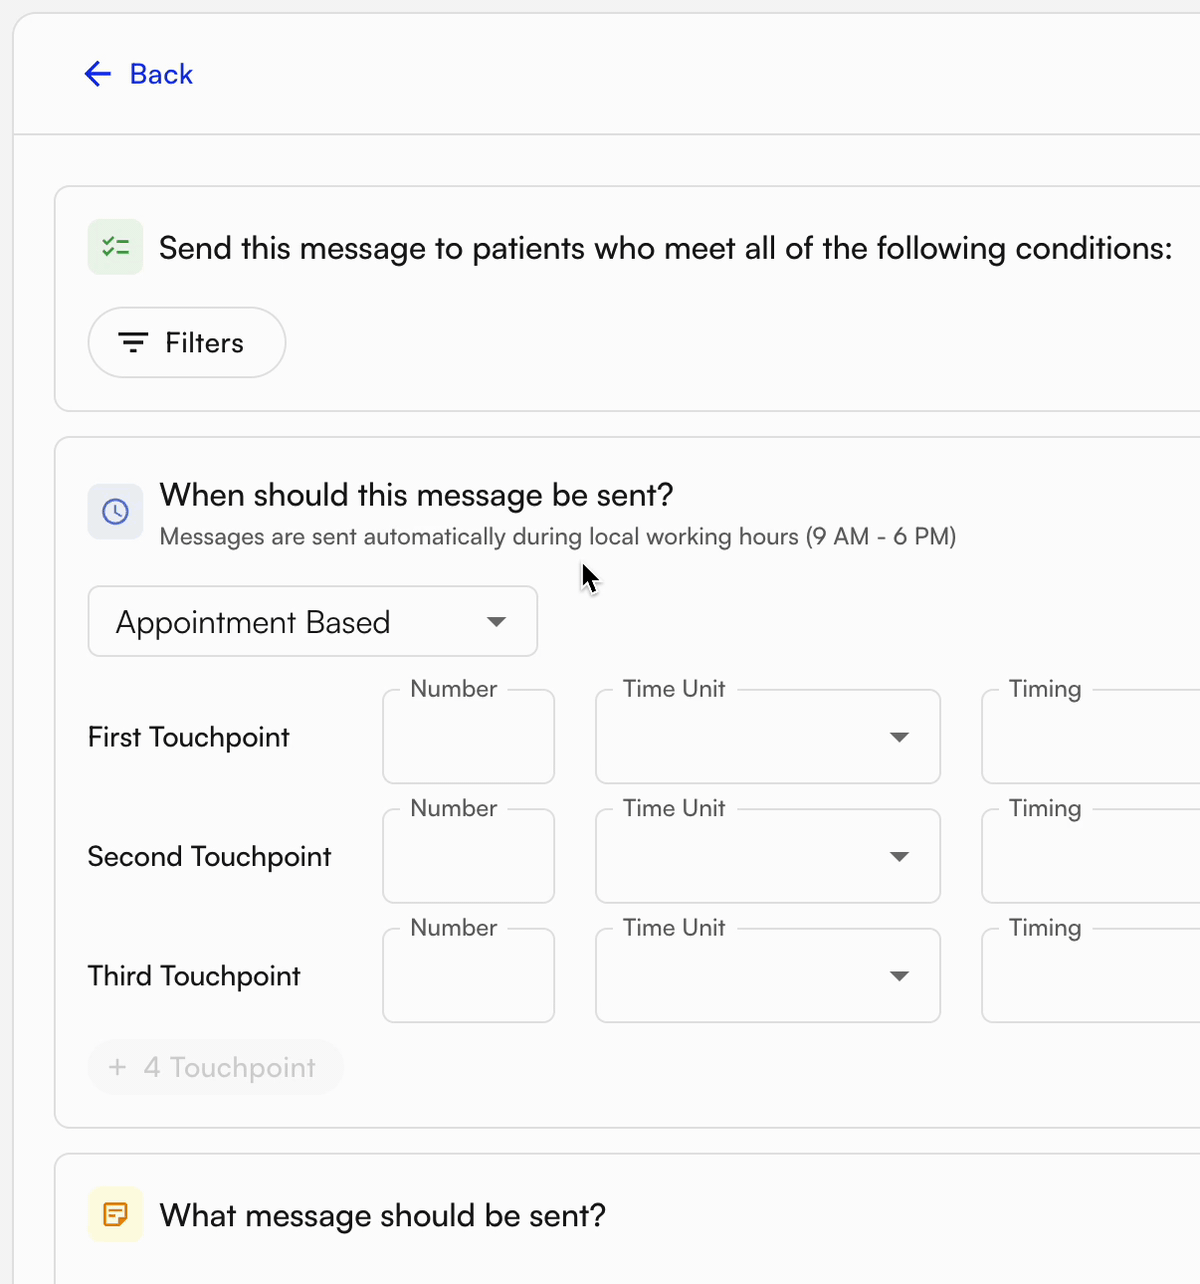
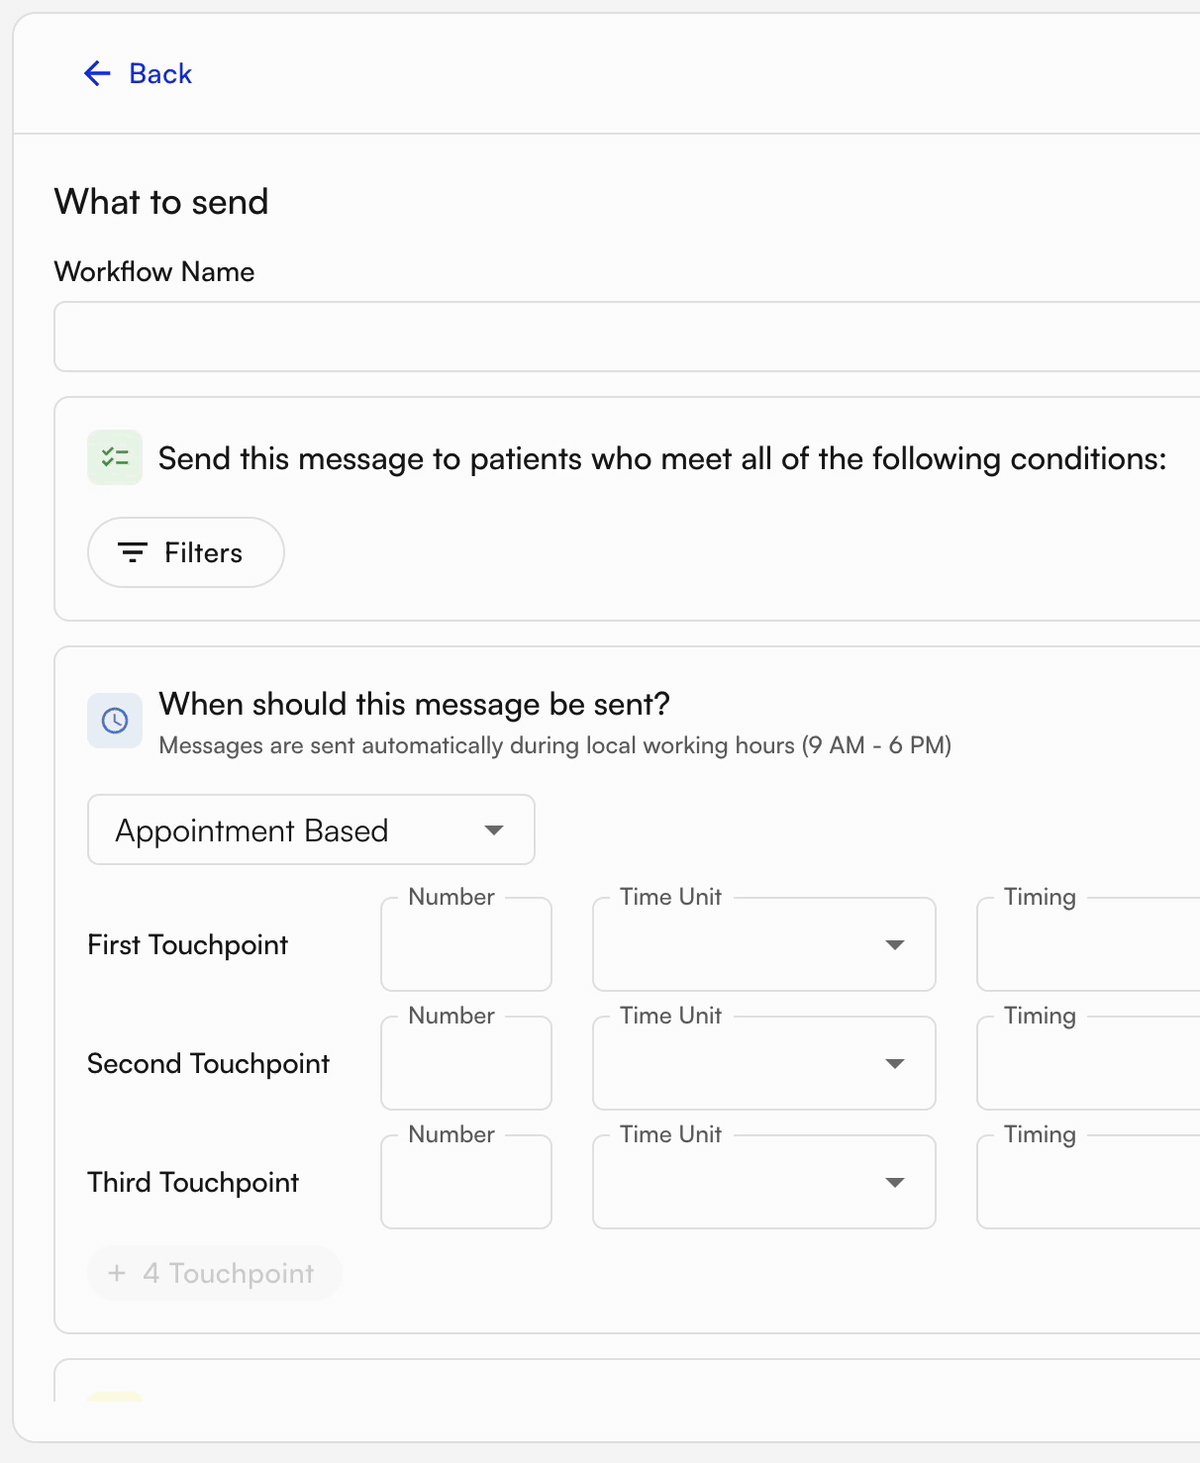
Timing or triggers for sending
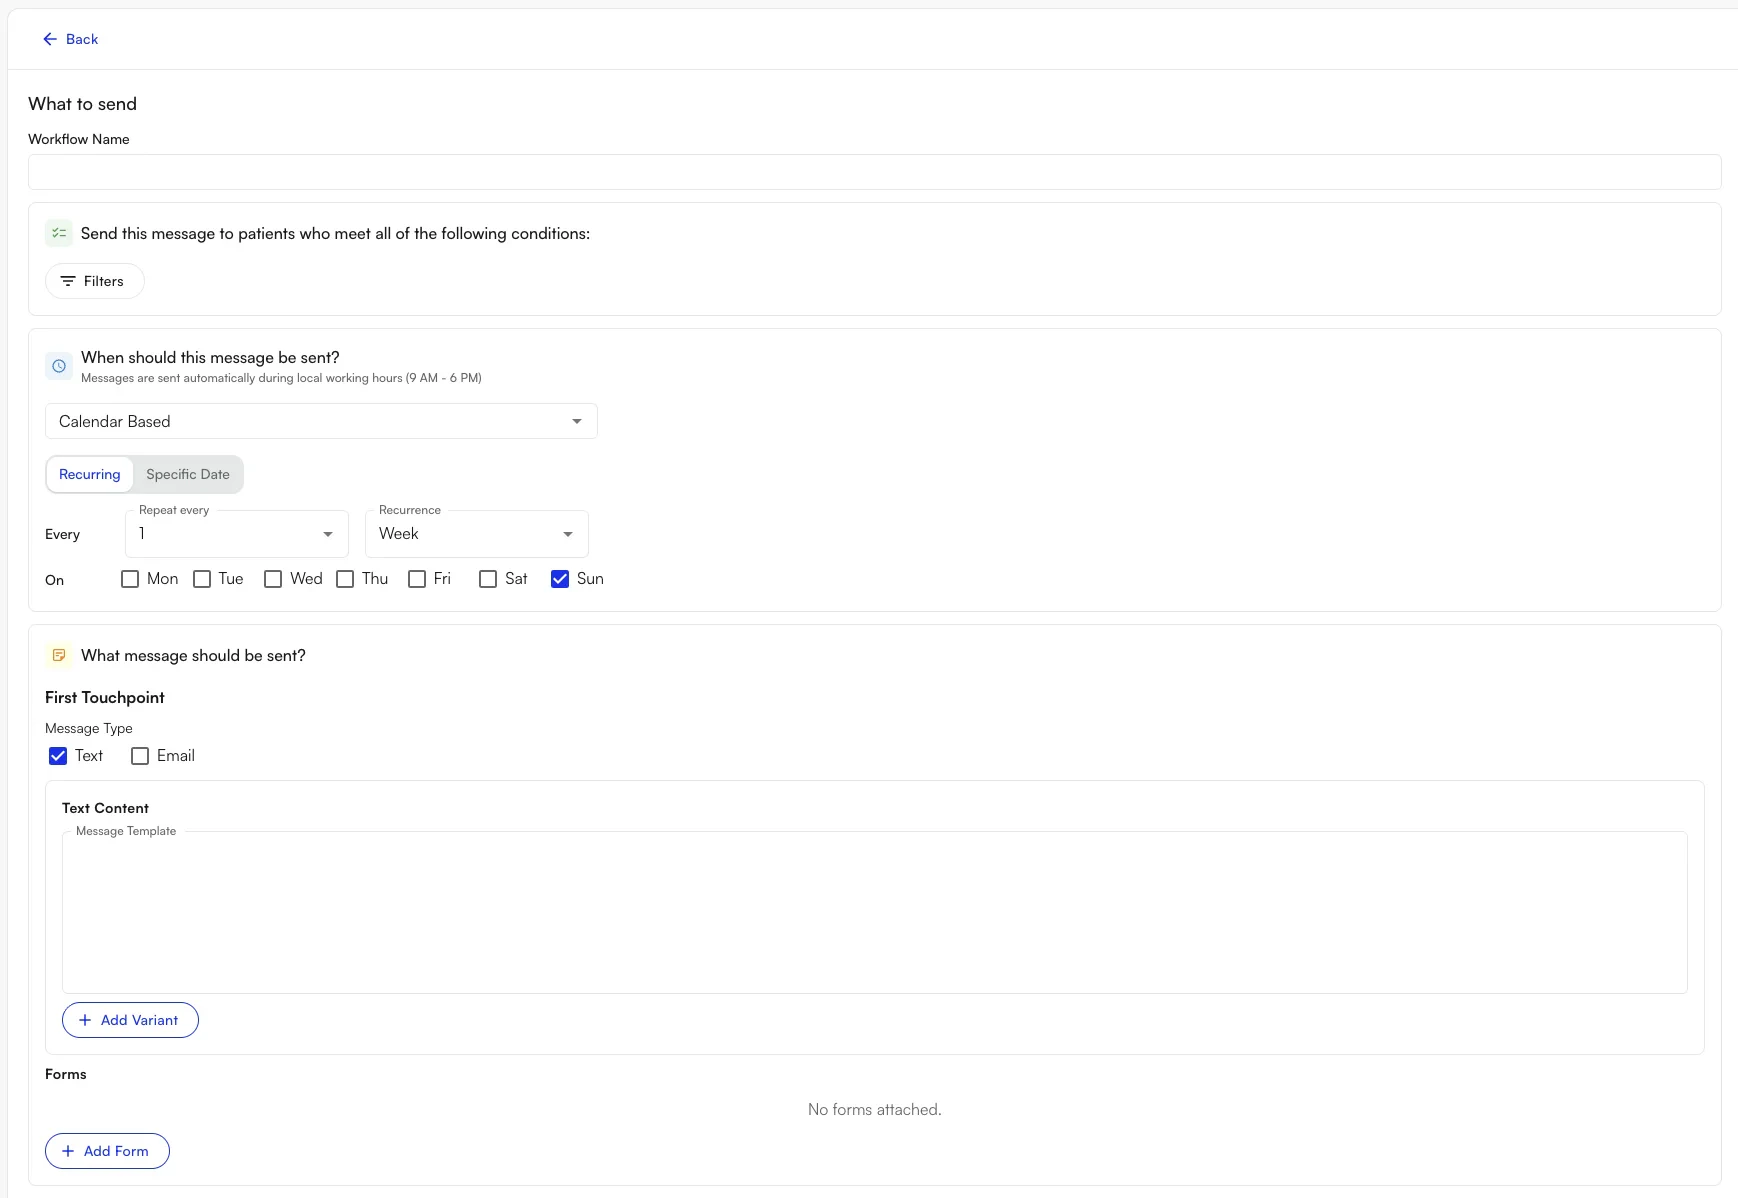
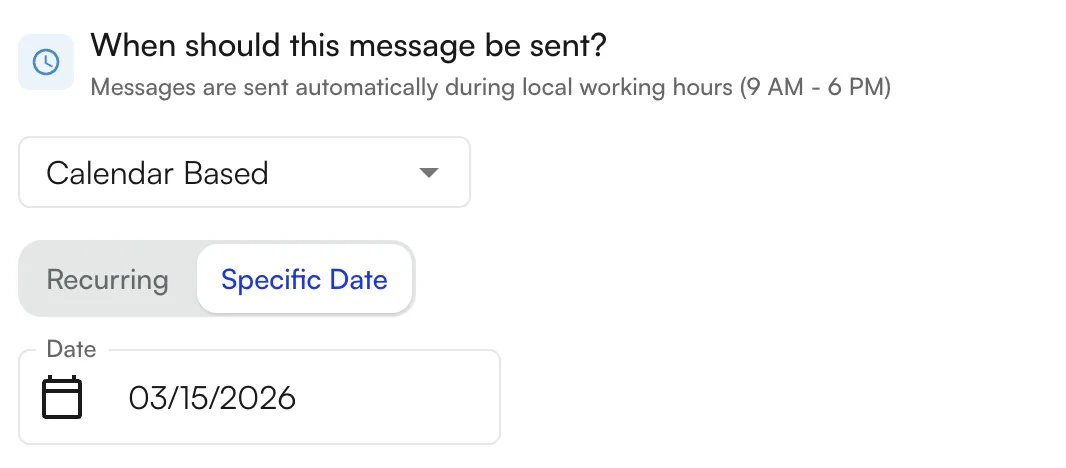
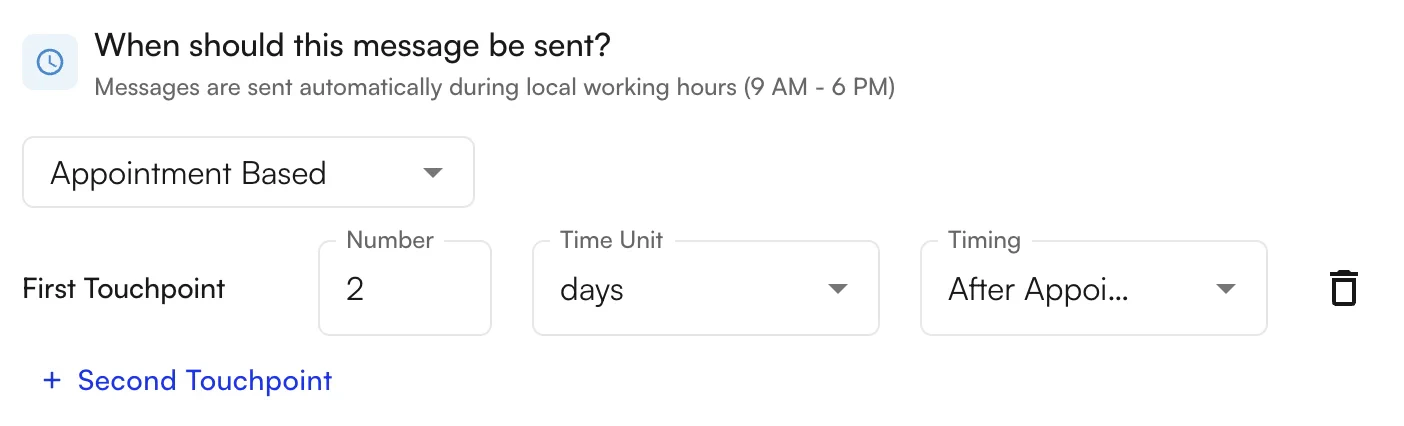
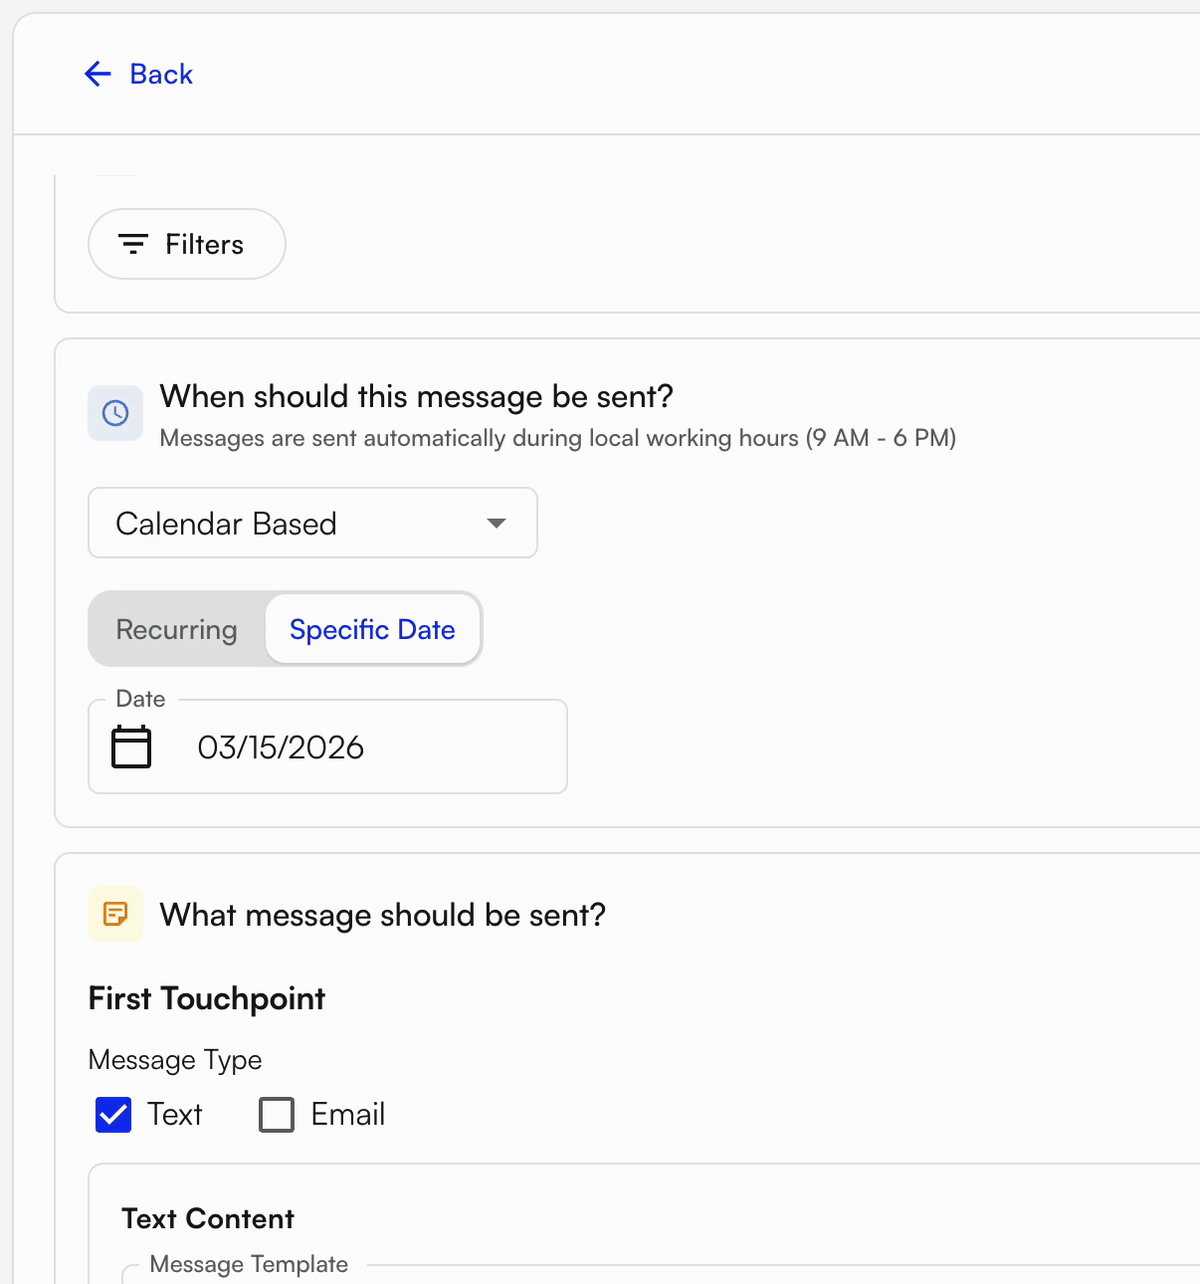
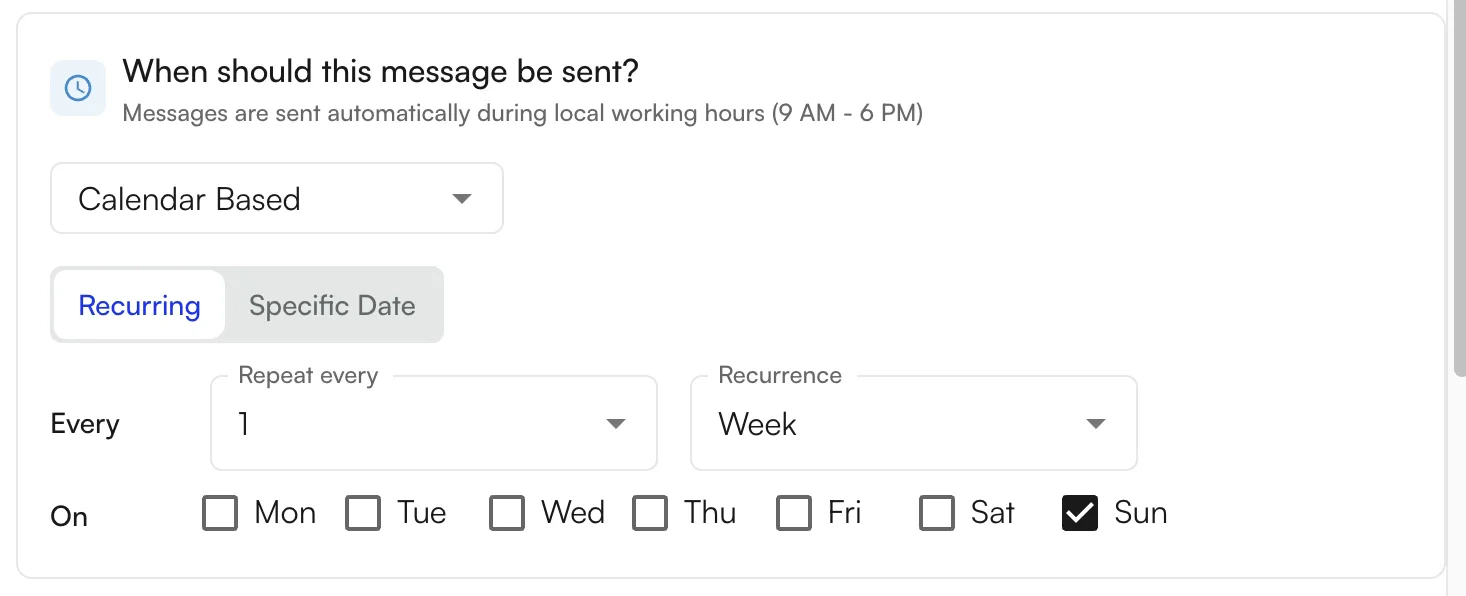
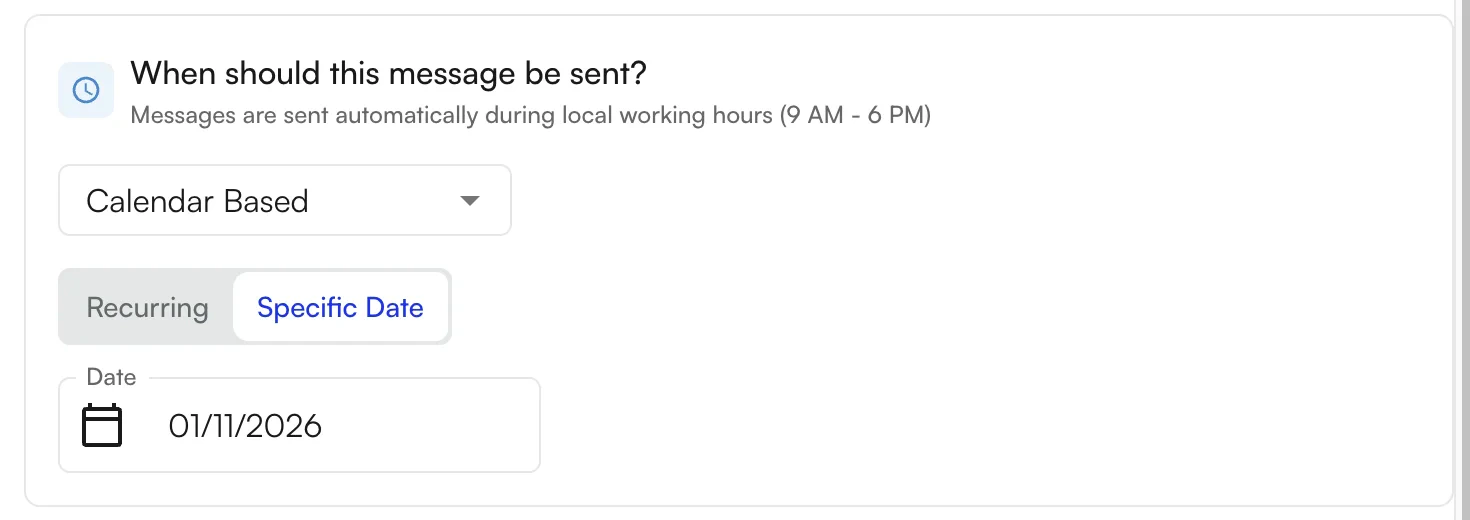
There are two main types of timing: Calendar-Based and Appointment-Based. Calendar-Based messages send either on a recurring basis or on a specific date. Recurring messages can repeat daily, or weekly on set days of the week.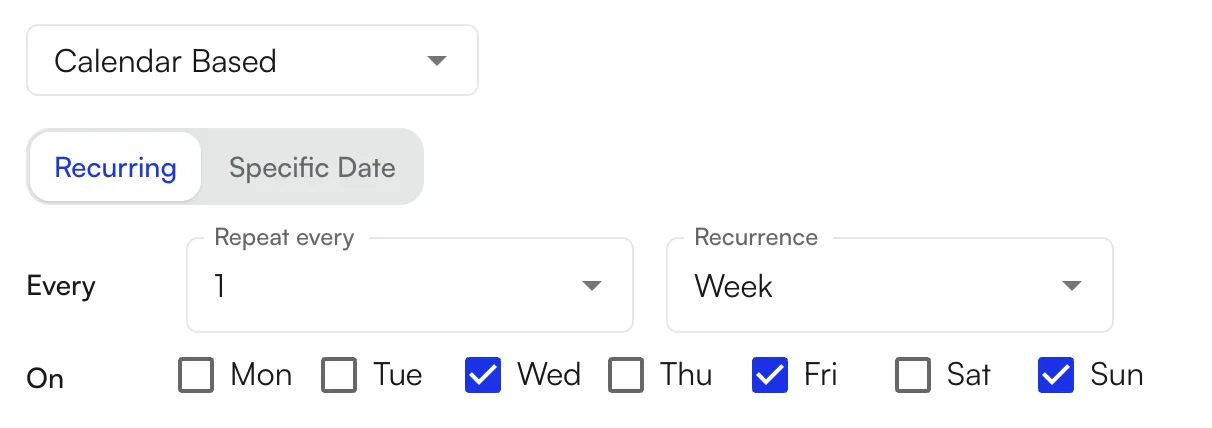

Which patients to message
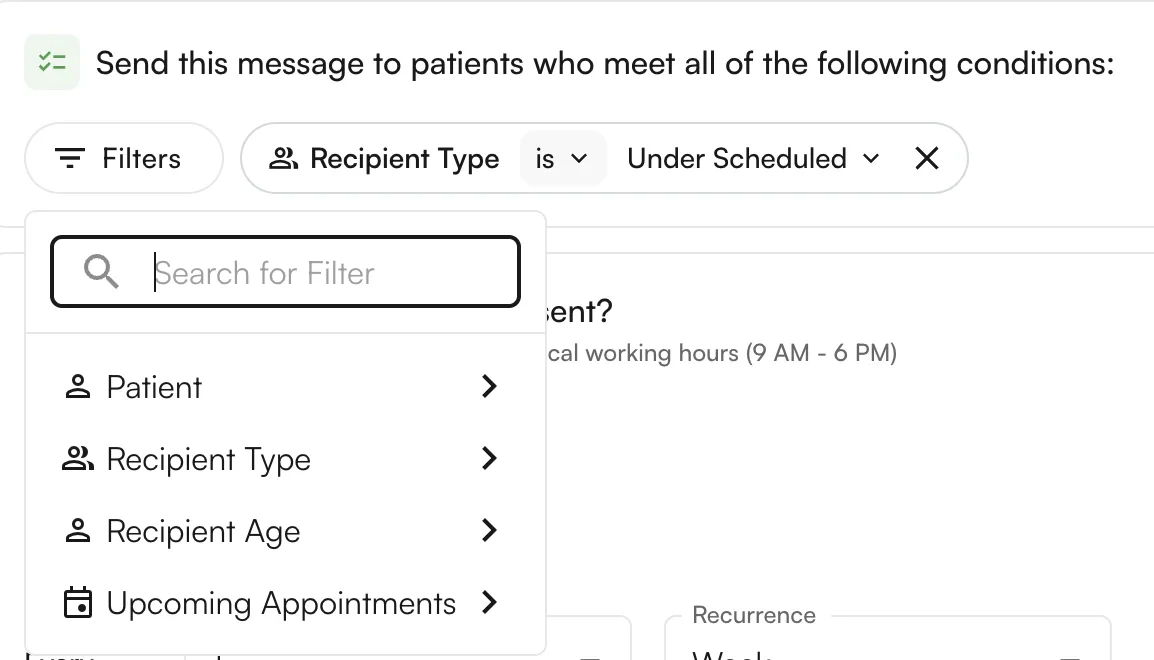
Several filters determine which patients are sent the message. Some filters are only available for Appointment-Based messaging, since they refer to the underlying appointment. Available filters include:-
Patient — send to (or exclude) one or more specific patients.
-
Recipient Type — send to (or exclude) categorized patients. Currently includes Underscheduled Patients and Lead/Referral (present in Lead Tracker).

-
Recipient Age — send to patients within a specific age range, or above/below a certain age.
-
Upcoming Appointments — send to patients with more or fewer than a certain number of upcoming appointments, or a range.
-
Appointment Count — send to patients with more or fewer than a certain number of appointments over a specific time period.
- Facility — send to (or exclude) patients who have ever had an appointment at a specific facility.
- Rendering Provider — send to (or exclude) patients who have ever had an appointment with a specific rendering provider.
- Insurance — send to (or exclude) patients with a specific insurance.
- Supervising Provider (Appointment-Based only) — send to (or exclude) patients whose appointment is tied to a specific supervising provider.
- Referring Provider (Appointment-Based only) — send to (or exclude) patients whose appointment is tied to a specific referring provider.
-
Appointment Status (Appointment-Based only) — send to (or exclude) patients whose appointment has a specific status.
-
Appointment Type (Appointment-Based only) — send to (or exclude) patients whose appointment is a specific type.
- Appointment Number (Appointment-Based only) — send to (or exclude) patients on a specific appointment number, either overall or within a case.
Content and type of message to send
There are two forms of communication: text and email. Text messages only require a body; email messages also allow you to set the subject line.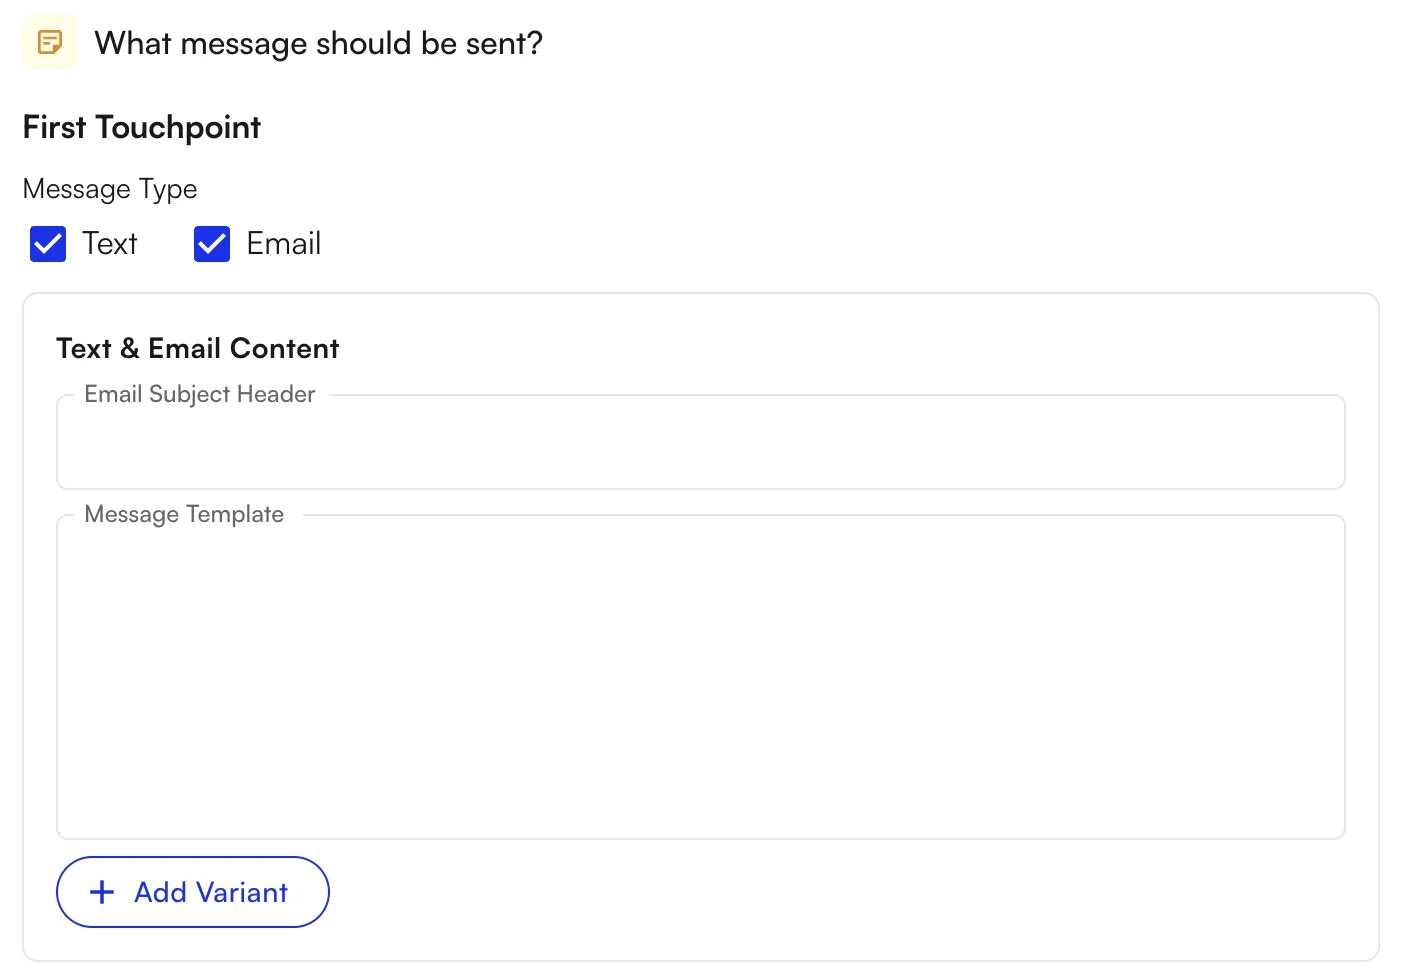
- Appointment Start Date (e.g., “Monday, February 16, 2026”)
- Appointment Start Datetime (e.g., “Monday, February 16, 2026 at 2:30 PM”)
- Facility Address
- Facility Name
- Facility Phone Number
- Link To Forms (required if sending forms with the message)
- Patient Portal Link
- Recipient Name
- Referring Provider Name
- Rendering Provider Name
- Site Name
- Supervising Provider Name
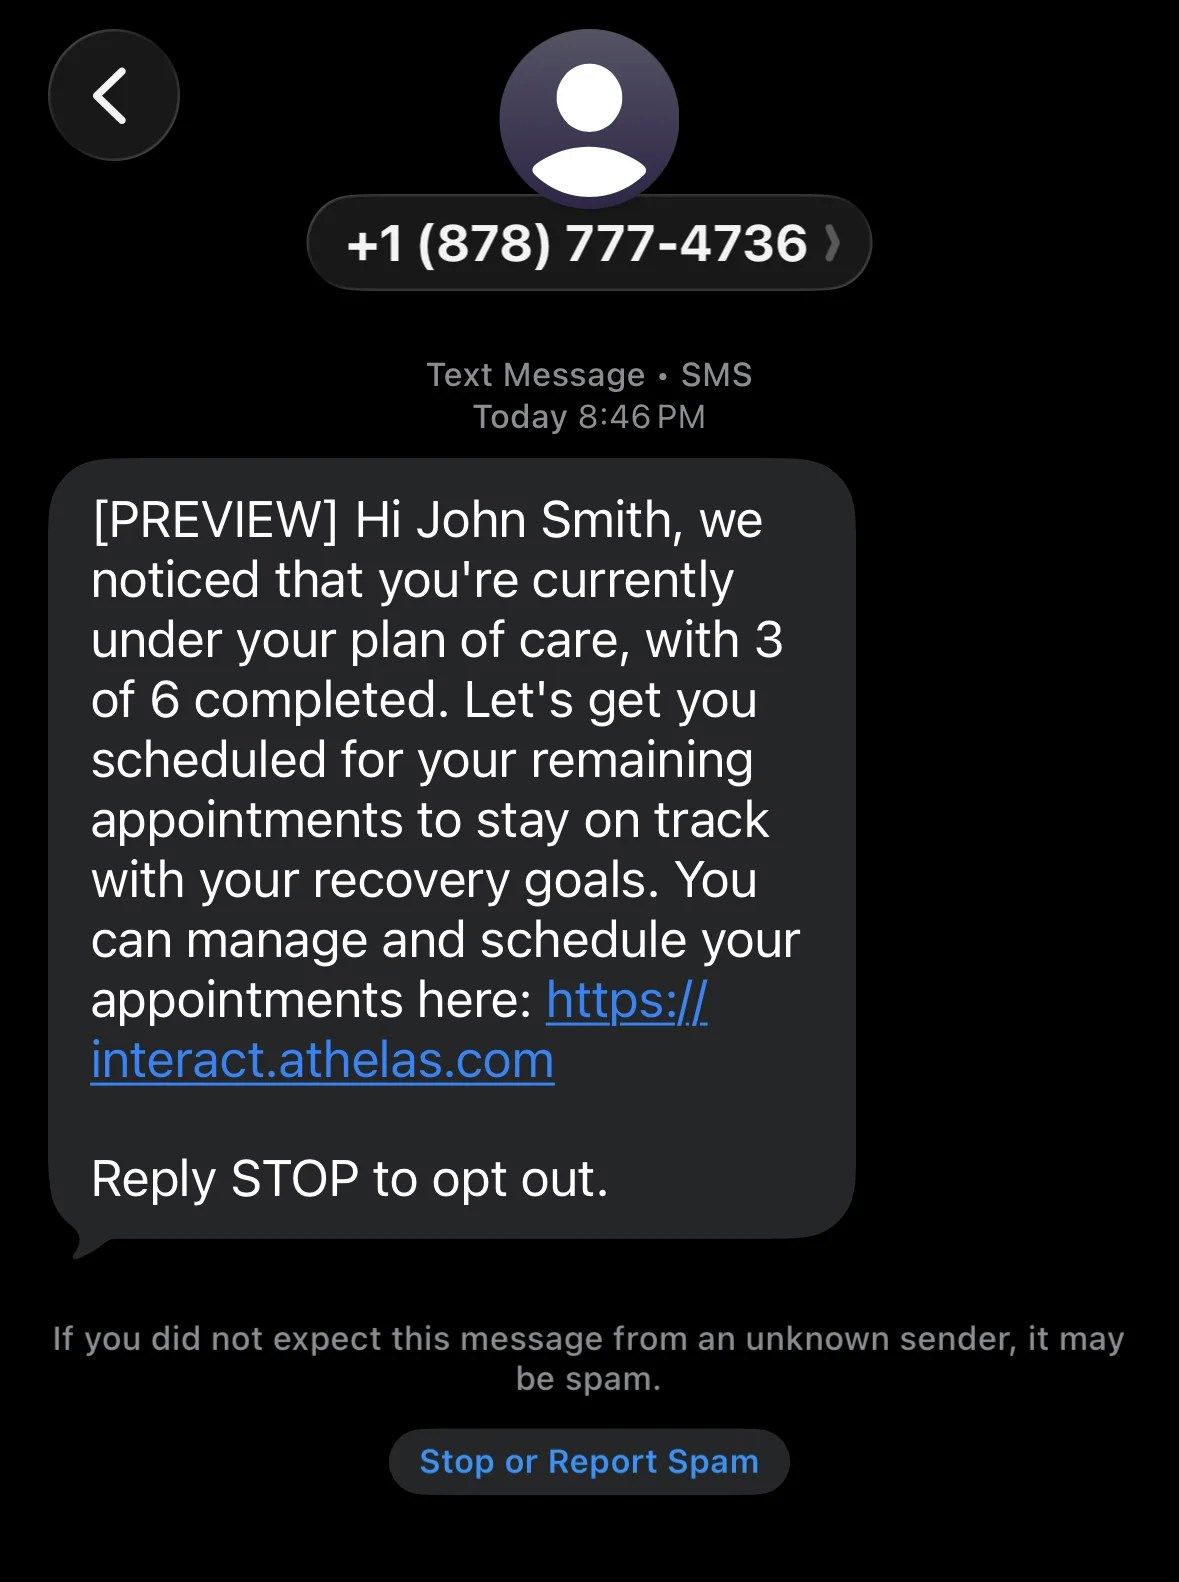
- Under Scheduled Count (e.g., “3 of 6” based on next calendar week’s Plan of Care)
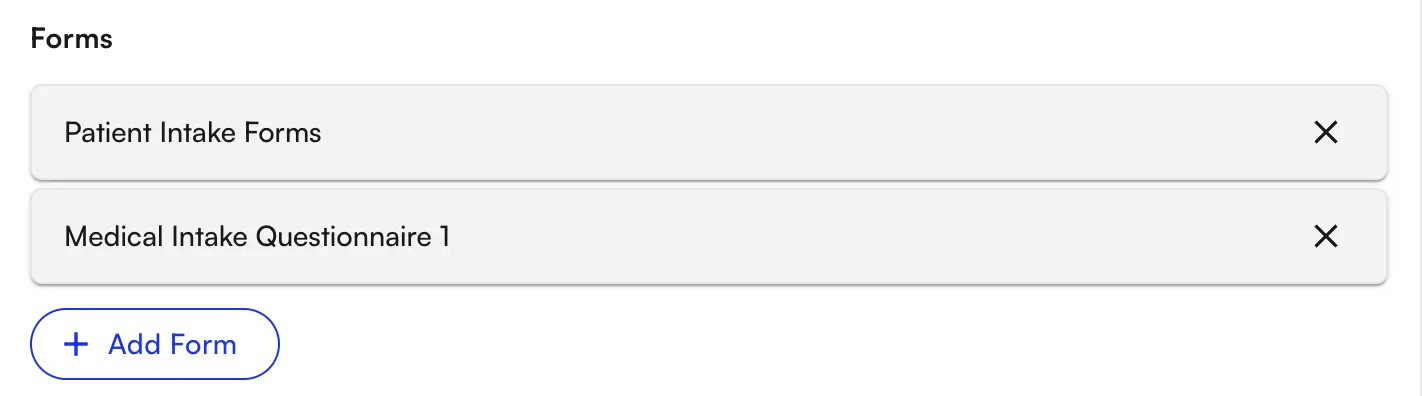
Forms to include in the message
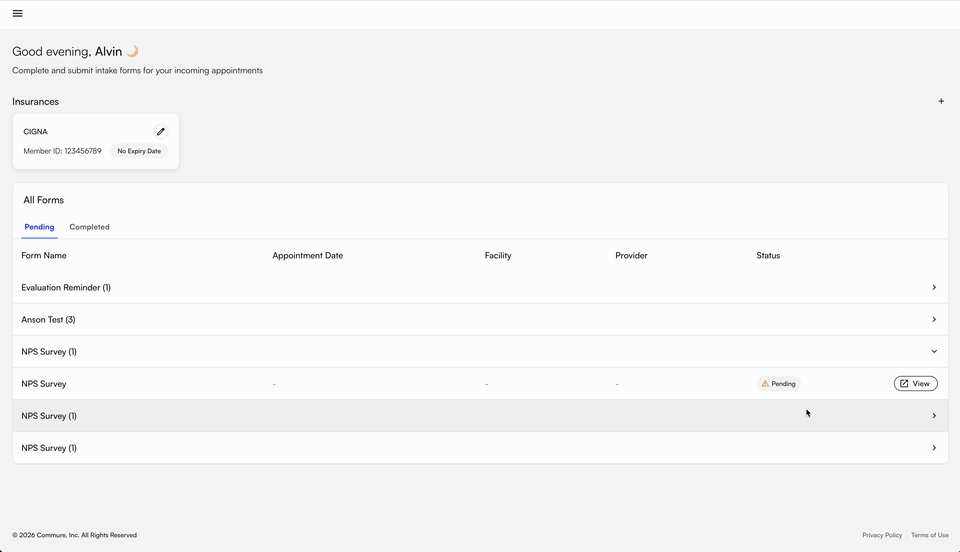
You can also send forms along with the message — such as intake forms prior to a visit, or post-visit forms like NPS Surveys.
Underscheduled Patients
Underscheduled Patients is a pre-built workflow that targets patients who have fewer appointments scheduled in the following calendar week than prescribed by their active Plan of Care. They receive a text or email with a link to schedule additional appointments via the Patient Portal.Defining underscheduled patients
A patient is considered underscheduled when they have fewer appointments scheduled in the following calendar week than prescribed by their active POC.Creating the workflow
- Navigate to Outreach Flows in the sidebar, under Automation.
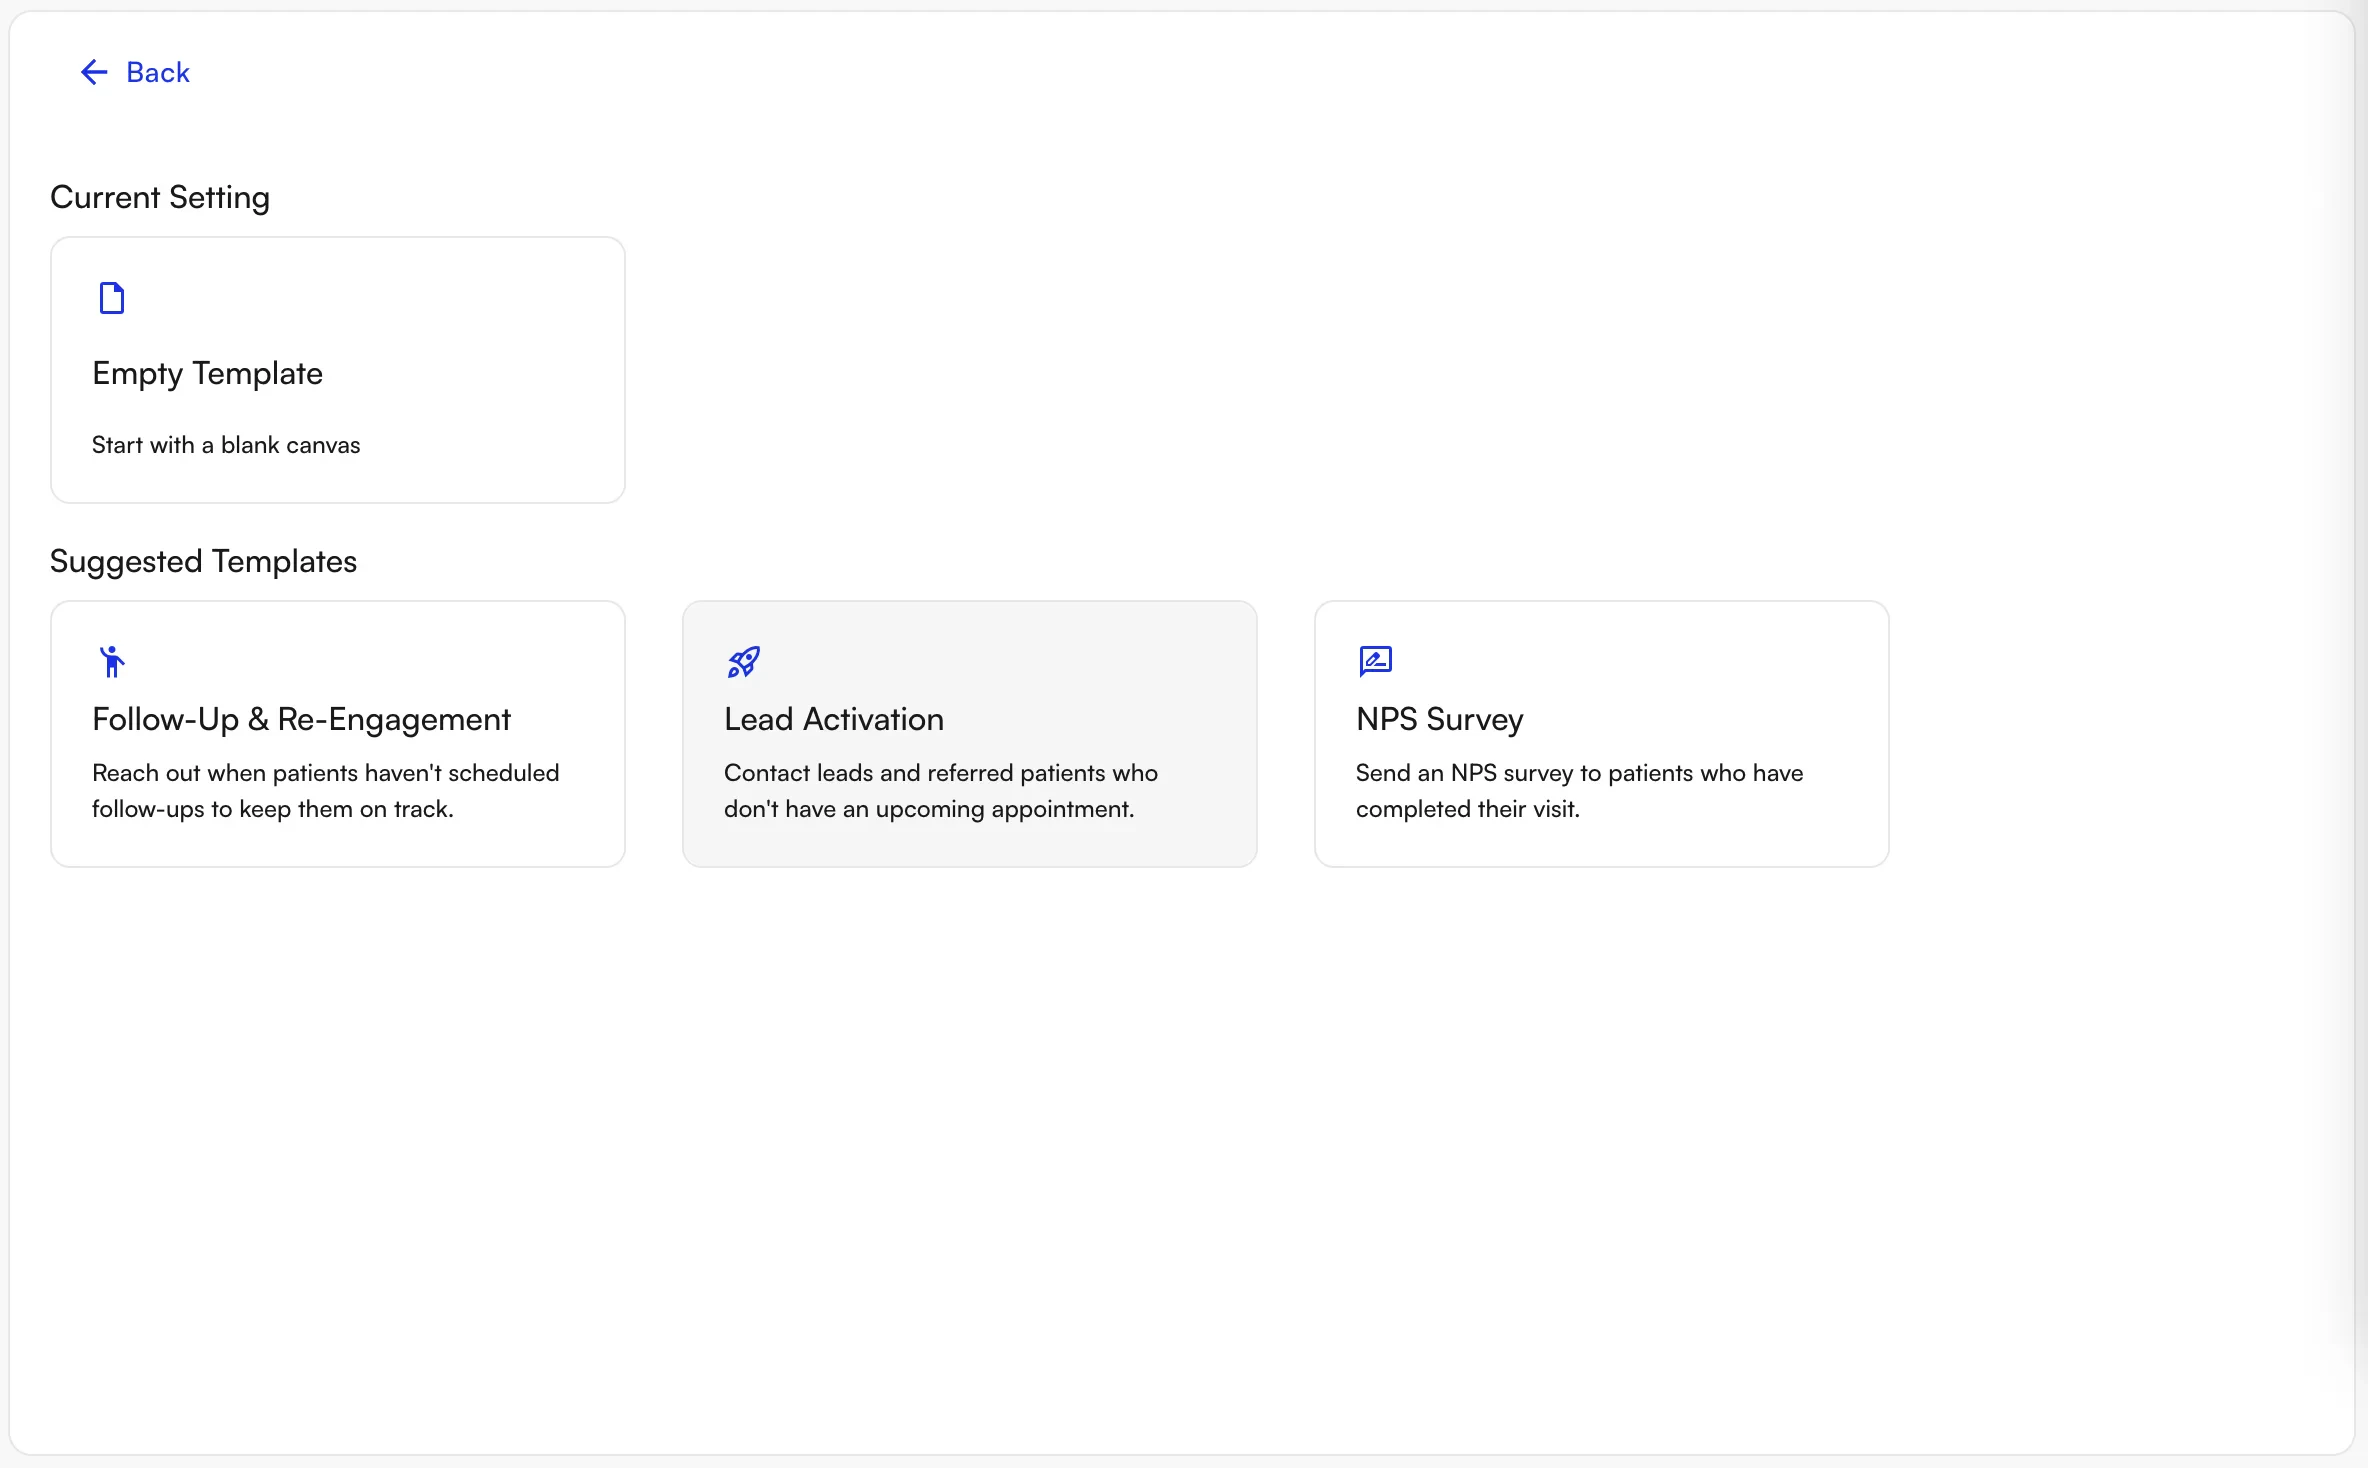
- Click + Create New Workflow and select the Follow-Up and Re-Engagement suggested template.
-
Set desired configurations for the workflow:
- Workflow Name
-
Filters to select desired patients:
- Patient — specific patients by Name & DOB
- Recipient Type —
Under Scheduled
-
Timing to run workflow:
- Calendar-Based — run on a recurring schedule or specific date.
-
Recurring — select frequency (every 1, every 2, etc.) and unit of time (Day, Week). If Week is selected, choose days of the week.
-
Specific Date — run on a single date once.
-
Message content / format:
- Message Type → Text or Email
- Text Content — insert variables unique to each patient, including:
- Patient Portal Link — specialized link to sign up for additional appointments
- Recipient Name
- Site Name — based on existing appointments in the POC
- Under Scheduled Count (e.g., “3 of 6 completed”)

-
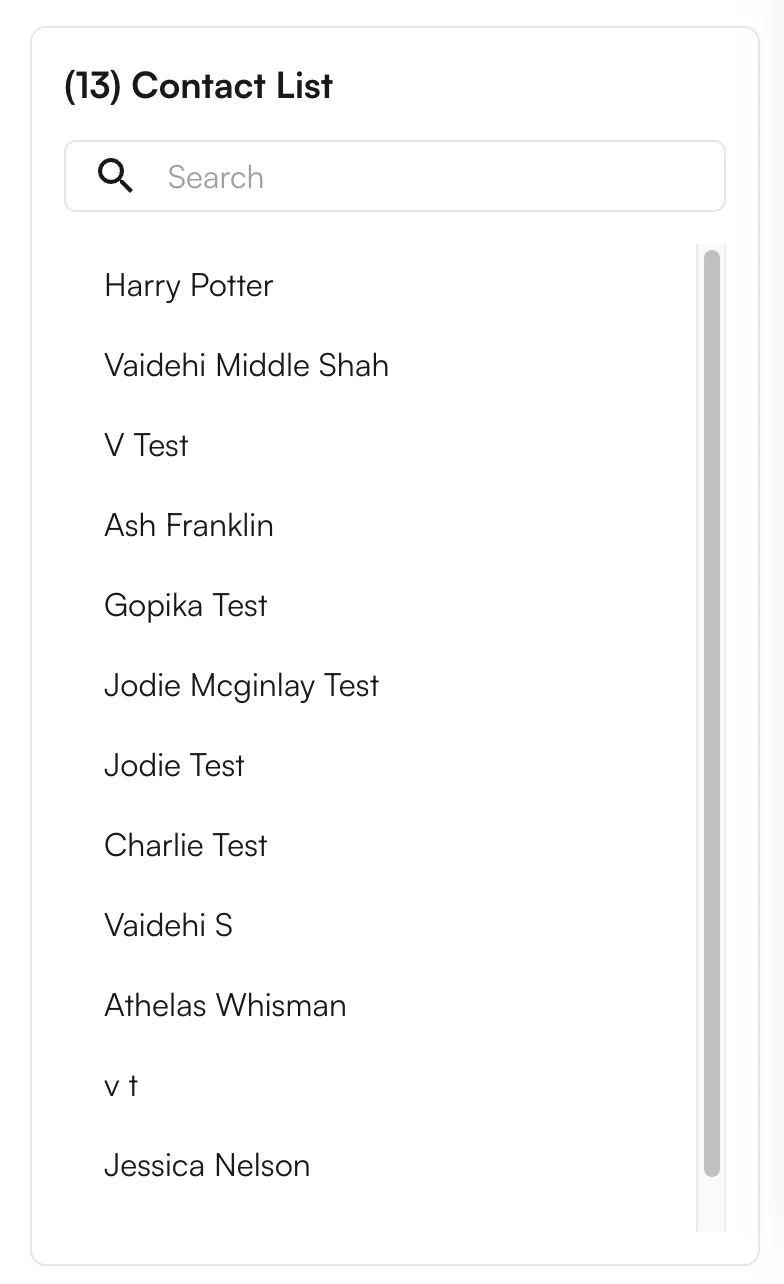
View filtered patient recipient list. Upon setting filters, the Contact List automatically updates with the recipients who will receive the message. Scroll to view the full list or filter for a specific patient to confirm inclusion.
- Save and view the workflow. You can also view scheduled upcoming messages and any previously sent messages — showing the method used to contact each patient, and whether it was successful.
-
Messages are sent. After the workflow is created, messages go out as scheduled. Patients receive either text or email (or both) with the desired content and links.
NPS Surveys
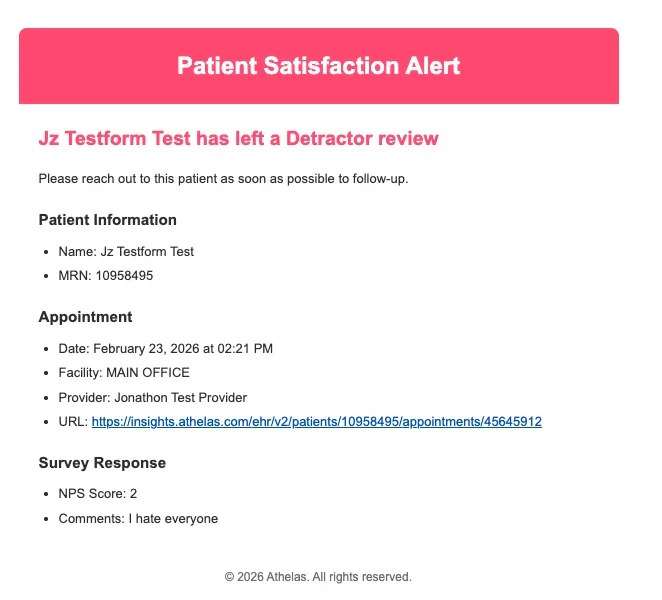
The NPS Survey workflow collects patient feedback after a visit and automatically routes follow-up actions based on the response. An NPS survey form can be added to a post-visit Outreach Flow, prompting patients to submit feedback via text or email. Promoters can be directed to leave public reviews on sites like Google or Yelp, while detractor responses trigger automated email notifications to internal stakeholders for follow-up.Creating an NPS Survey workflow
To create an NPS survey workflow, navigate to the Outreach Flows tab under Automation. Use the existing NPS survey suggested template, or create your own. The suggested template is pre-populated with filters for:- Appointment status =
Completed - Send = 2 days after appointment
- Text message with pre-populated content
NPS Survey functionality
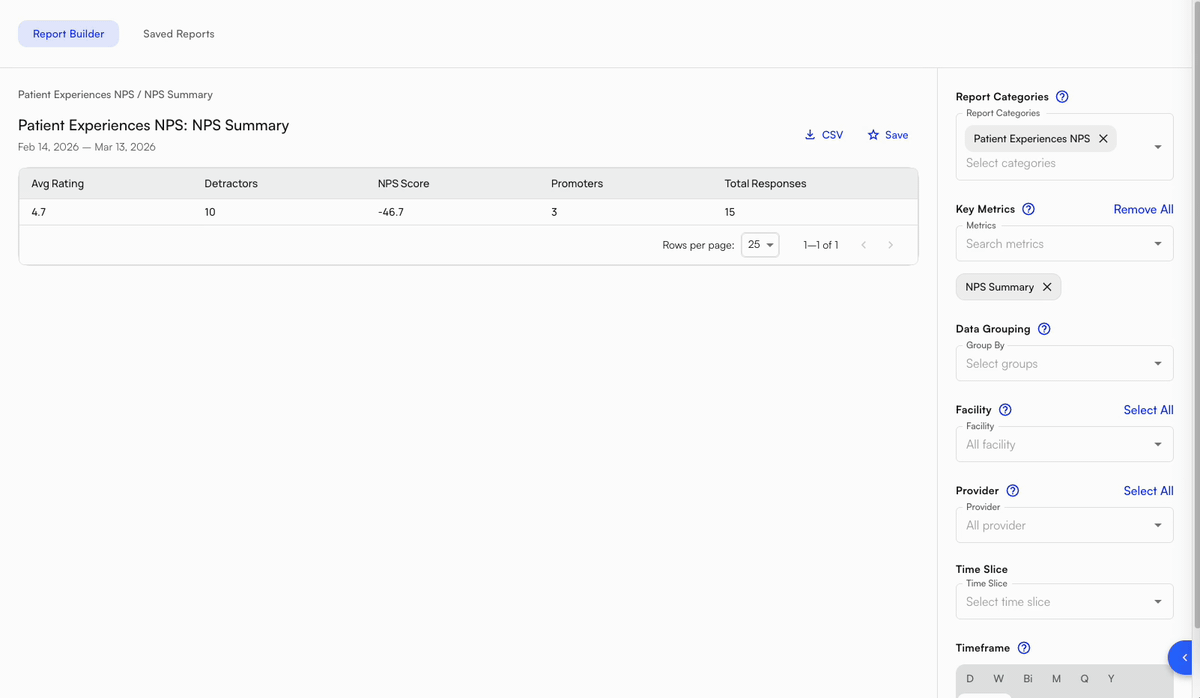
NPS surveys let recipients rate their experience after an appointment. They are prompted to rate “How likely are you to recommend to a friend or colleague?” from0–10, and a freeform text box to explain their score.
-
For patients who rate 0–6 (detractors), sites can add email addresses for key stakeholders to receive an email explaining the patient submitted a lower score.
-
For patients who rate 9–10 (promoters), sites can embed a review link to any desired review website — Google, Yelp, Zocdoc, etc. Patients are directed to leave an additional review on that site.
Promoter review links and detractor notification emails are configured per facility in EHR Preferences → Marketing. See Adding promoter review links and detractor notification emails below.
Adding promoter review links and detractor notification emails
To update the promoter review links and the email recipients for detractor notifications:- Navigate to EHR Preferences → Marketing.
- Select one or multiple facilities from the facility picker.
- Edit the desired review links and email addresses for the selected facilities.
- Click Save.
NPS reporting and review
After patients complete NPS surveys, their rating and explanation are stored as a PDF in the patient’s Attachments, alongside other form responses.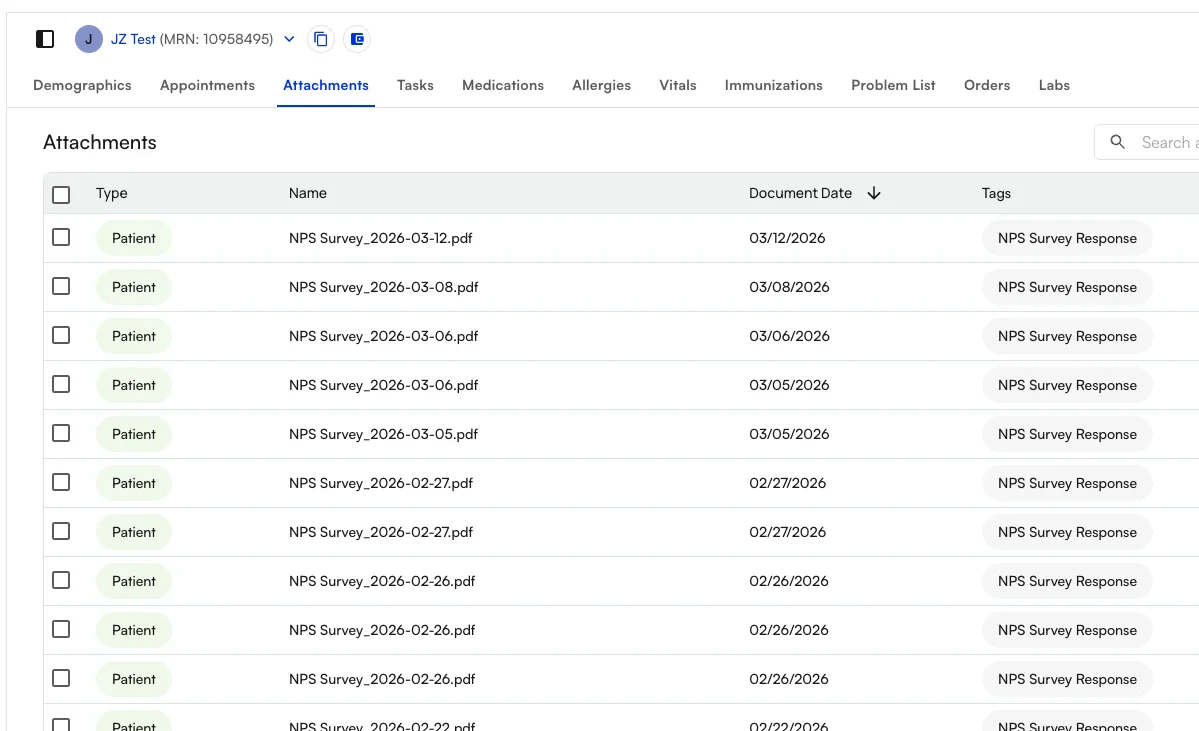
Example workflows
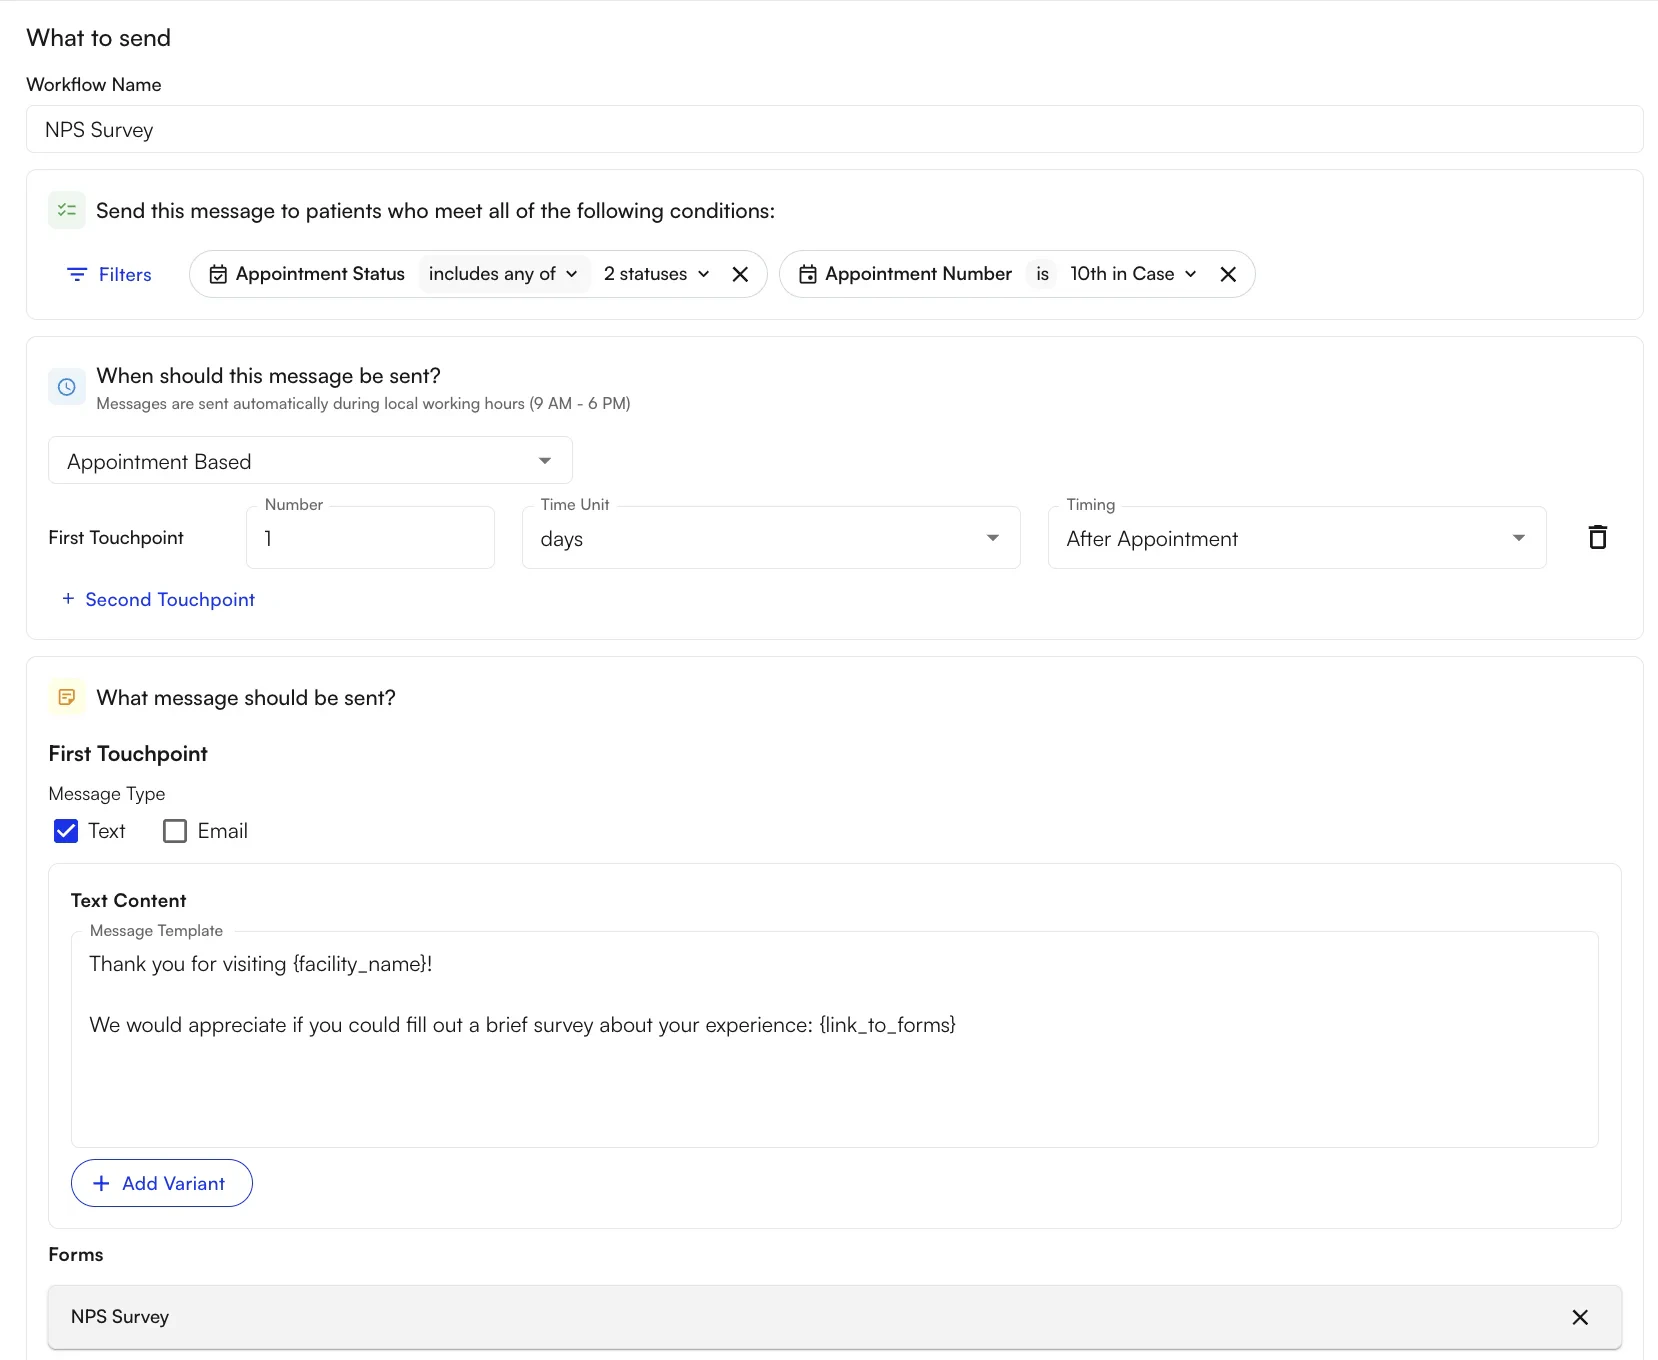
Send an NPS survey to all patients after their 10th completed appointment This configuration sends an NPS survey to any patient who has completed their 10th appointment.- Filters:
- Appointment Status includes
Checked inandCompleted(to include patients whose visit notes are not yet signed/submitted) - Appointment Number is
10th within Case(to send an NPS to patients who have come to the practice before, but have a new case / chief complaint)
- Appointment Status includes
- Timing / Triggers:
- Message is set to Appointment-Based to trigger off an appointment event
- First touchpoint is set to 1 day after appointment to send the day after
FAQ
What's the difference between Calendar-Based and Appointment-Based timing?
What's the difference between Calendar-Based and Appointment-Based timing?
Calendar-Based fires on a schedule independent of appointments — recurring weekly, or on a specific date. Appointment-Based fires relative to an appointment (e.g., “1 day before,” “2 days after”). Use Appointment-Based for pre-visit reminders and post-visit surveys; Calendar-Based for ongoing campaigns like underscheduled reactivation.
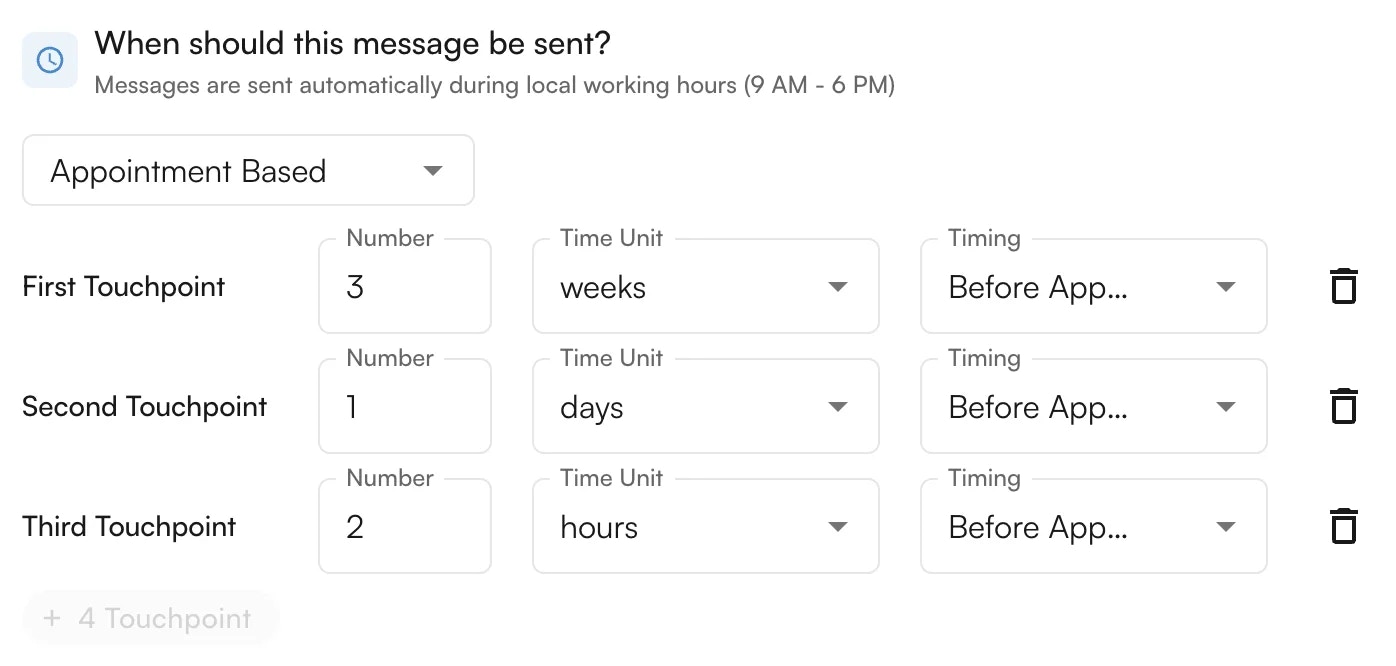
Can a single workflow send multiple messages?
Can a single workflow send multiple messages?
Yes — add touchpoints within the same workflow. Each touchpoint can have its own timing and content, so you can follow up a pre-visit reminder with a day-of reminder without building separate workflows.
How do I target patients who are behind on their Plan of Care?
How do I target patients who are behind on their Plan of Care?
Use the Recipient Type filter and select
Under Scheduled. Combined with a Calendar-Based recurring schedule, this is the built-in reactivation workflow — patients who have fewer scheduled appointments next week than their POC prescribes will receive the message.What happens if I insert Link To Forms without adding any forms?
What happens if I insert Link To Forms without adding any forms?
The variant won’t resolve — the message will send with a broken form link. Always add forms in the Forms section first if you insert
Link To Forms in the body.Who gets notified when an NPS detractor submits a low score?
Who gets notified when an NPS detractor submits a low score?
Email recipients for detractor alerts are configured per facility in EHR Preferences → Marketing. Add or update the email addresses there, select the facilities you want the change applied to, and save — no Athelas representative needed.
How do I change the review site (Google, Yelp, etc.) that promoters are sent to?
How do I change the review site (Google, Yelp, etc.) that promoters are sent to?
Update the promoter review link in EHR Preferences → Marketing. You can set a different link per facility, so each location can route promoters to its own Google Business Profile or alternate review platform.