
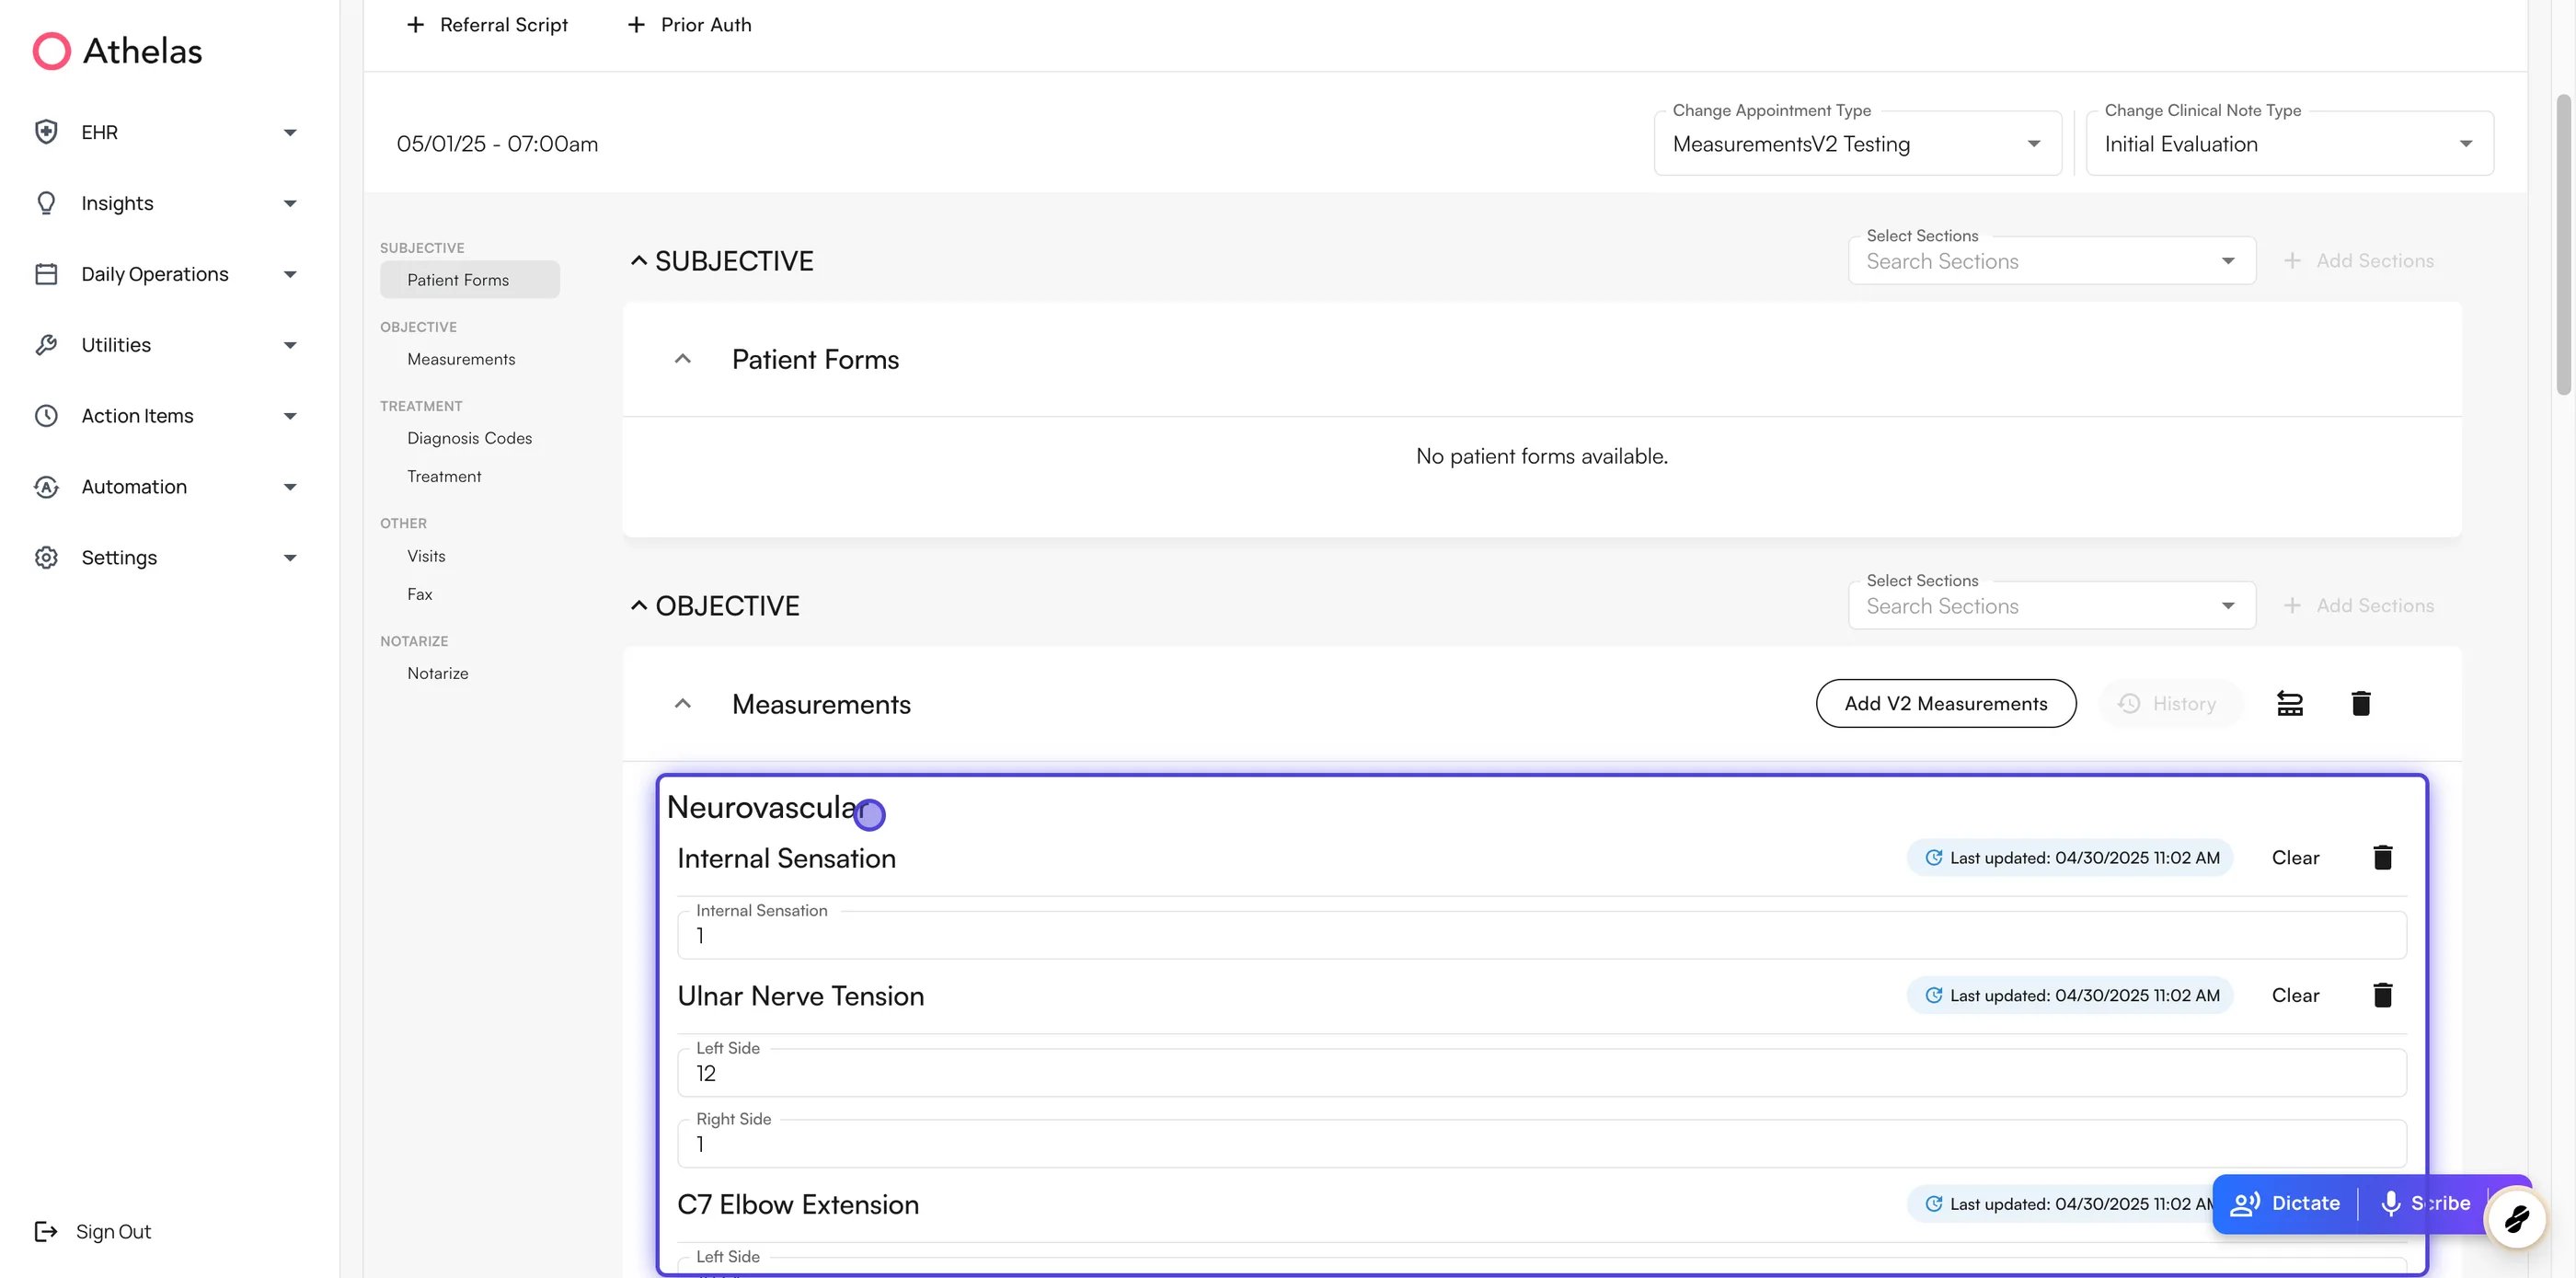
What measurements give you
Key concepts
How measurements are organized
Each measurement sits in three overlapping structures, and you can browse from whichever one fits how you think:- By category — Range of Motion, Strength, Inspection, and the other clinical classifications.
- By body part — Knee, Ankle And Foot, Shoulder, and so on.
- By group — default groups plus the custom groups your site builds, such as Knee ROM.
- Name — for example, Hip Flexion
- Category — for example, Range of Motion
- Body part — for example, Knee
- Group — for example, Knee Strength
Documenting measurements in a chart note
To add measurements to a note:- Open the Measurements section of the chart note — it sits under Objective in the left rail.
- Click Add V2 Measurements to open the picker.
- Browse the Categories or Groups tab, or search by name, and check what you need.
- Click Add Measurements. Your selection lands in the note, grouped and ready for values.
- Fill in each field — a number, a text field, a dropdown, or a table of left and right values.
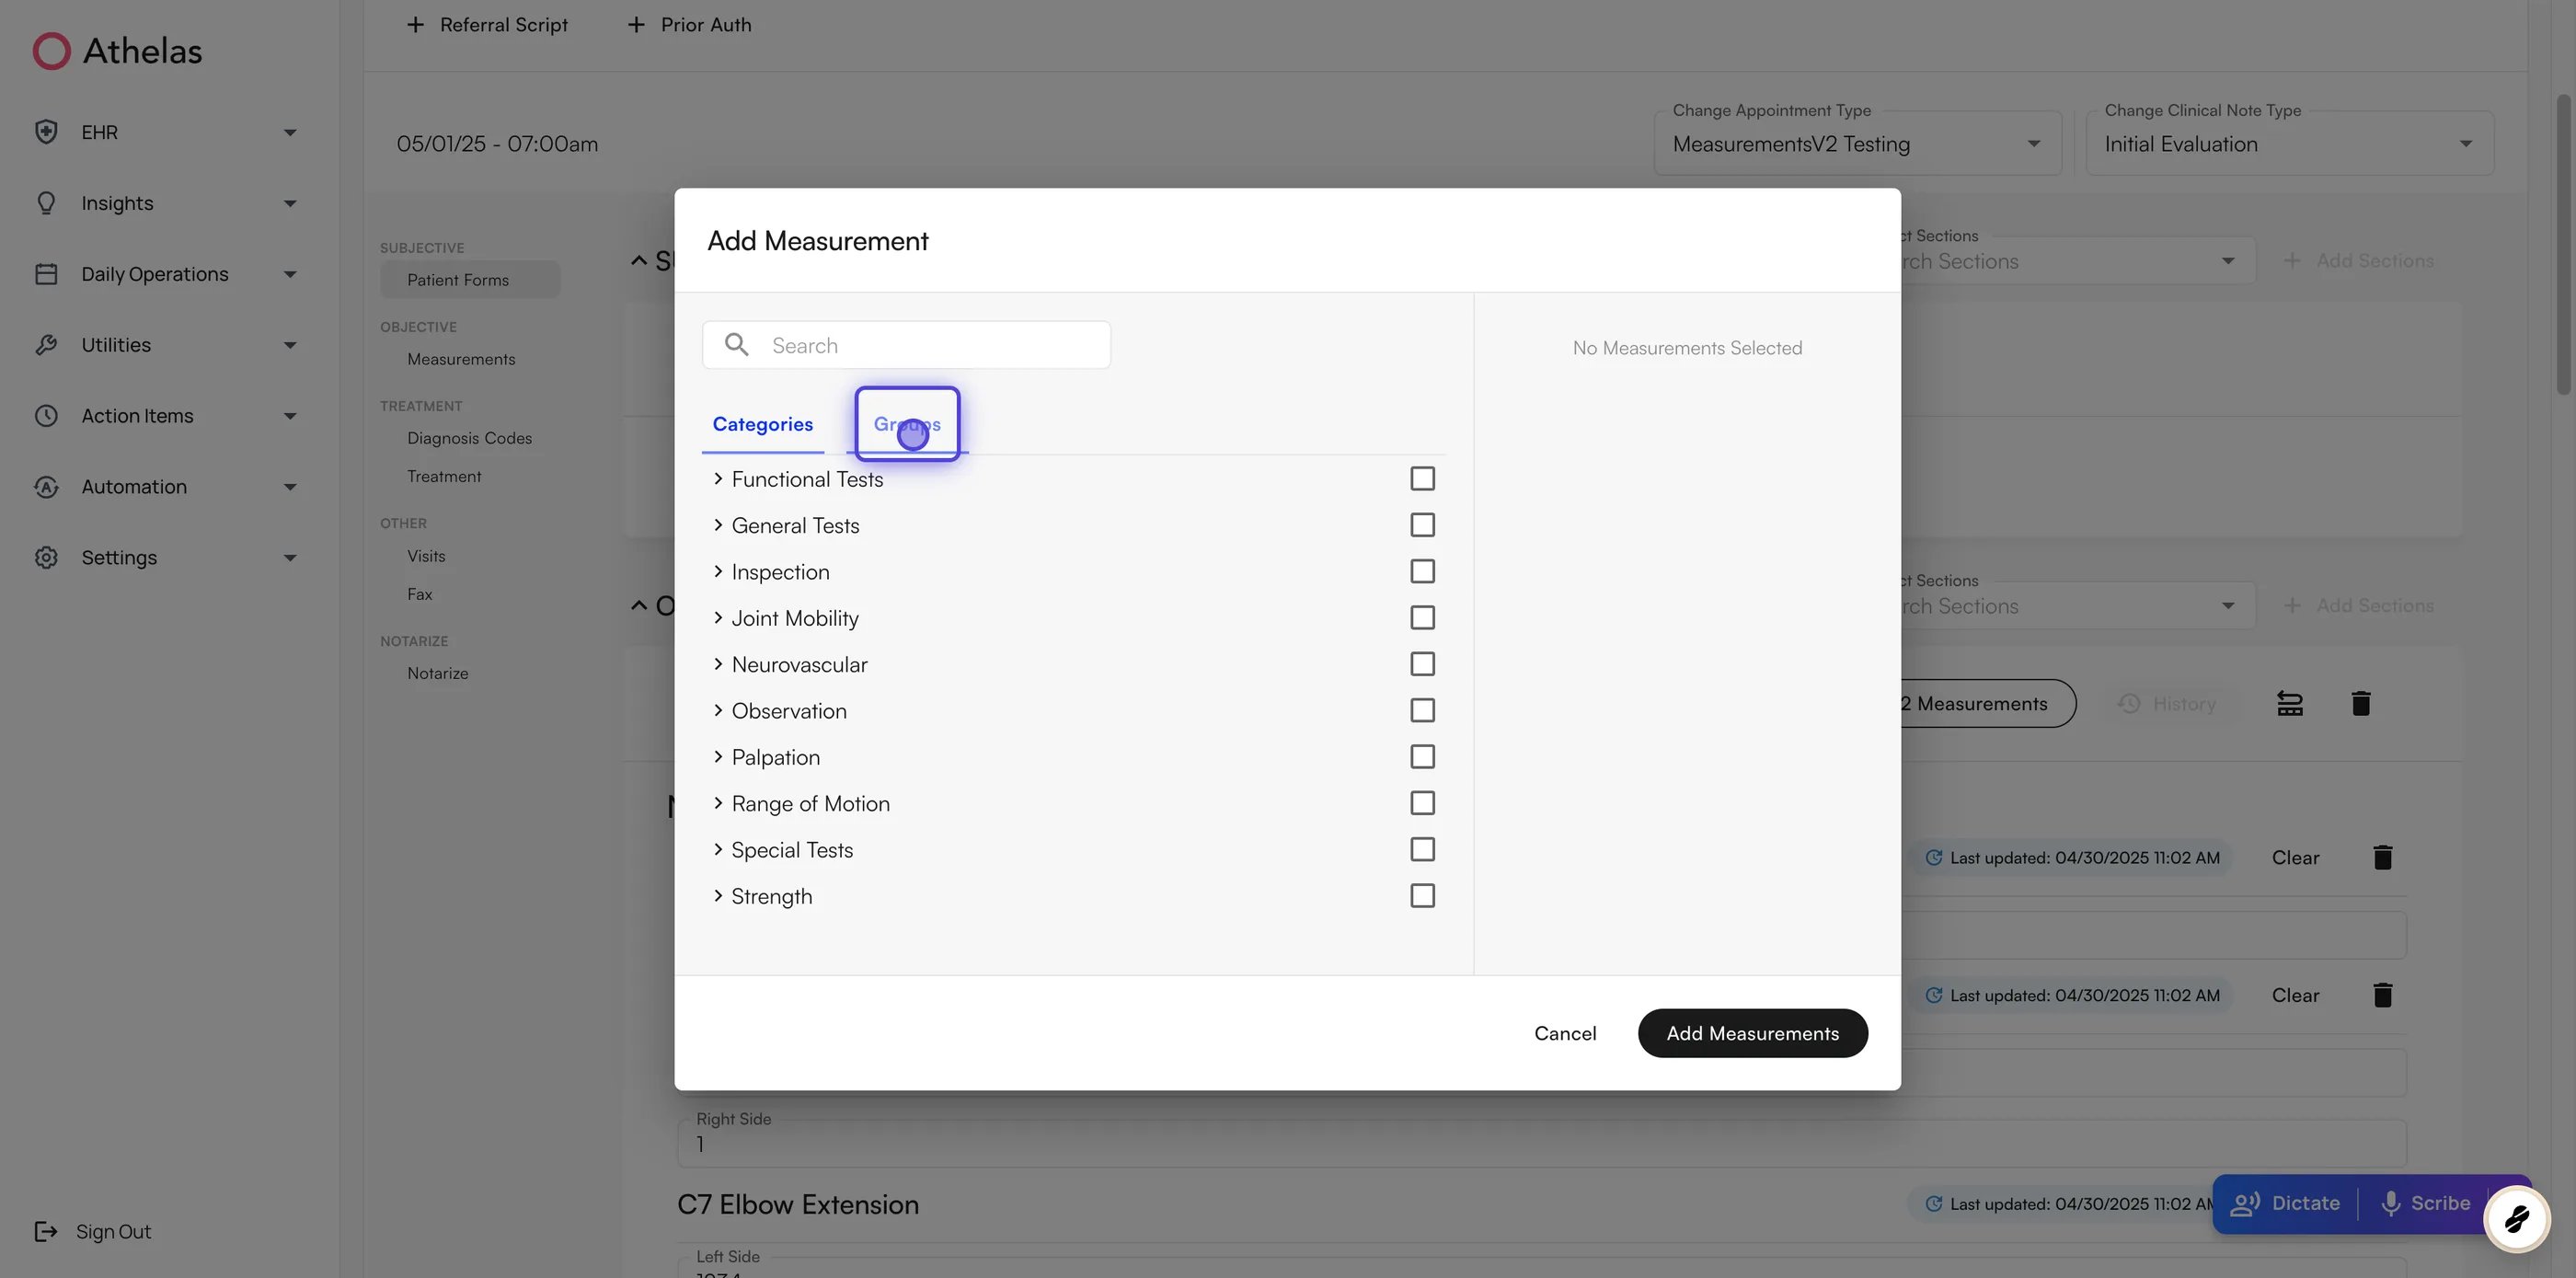
- History — review the patient’s earlier values for the measurements on the note.
- Pull the values documented at the previous visit into this note, when a previous note exists.
Measurements documented on the initial evaluation carry forward automatically to follow-up notes in the same case, so a daily note opens with the previous values already in place.
Setting up measurements on an appointment type
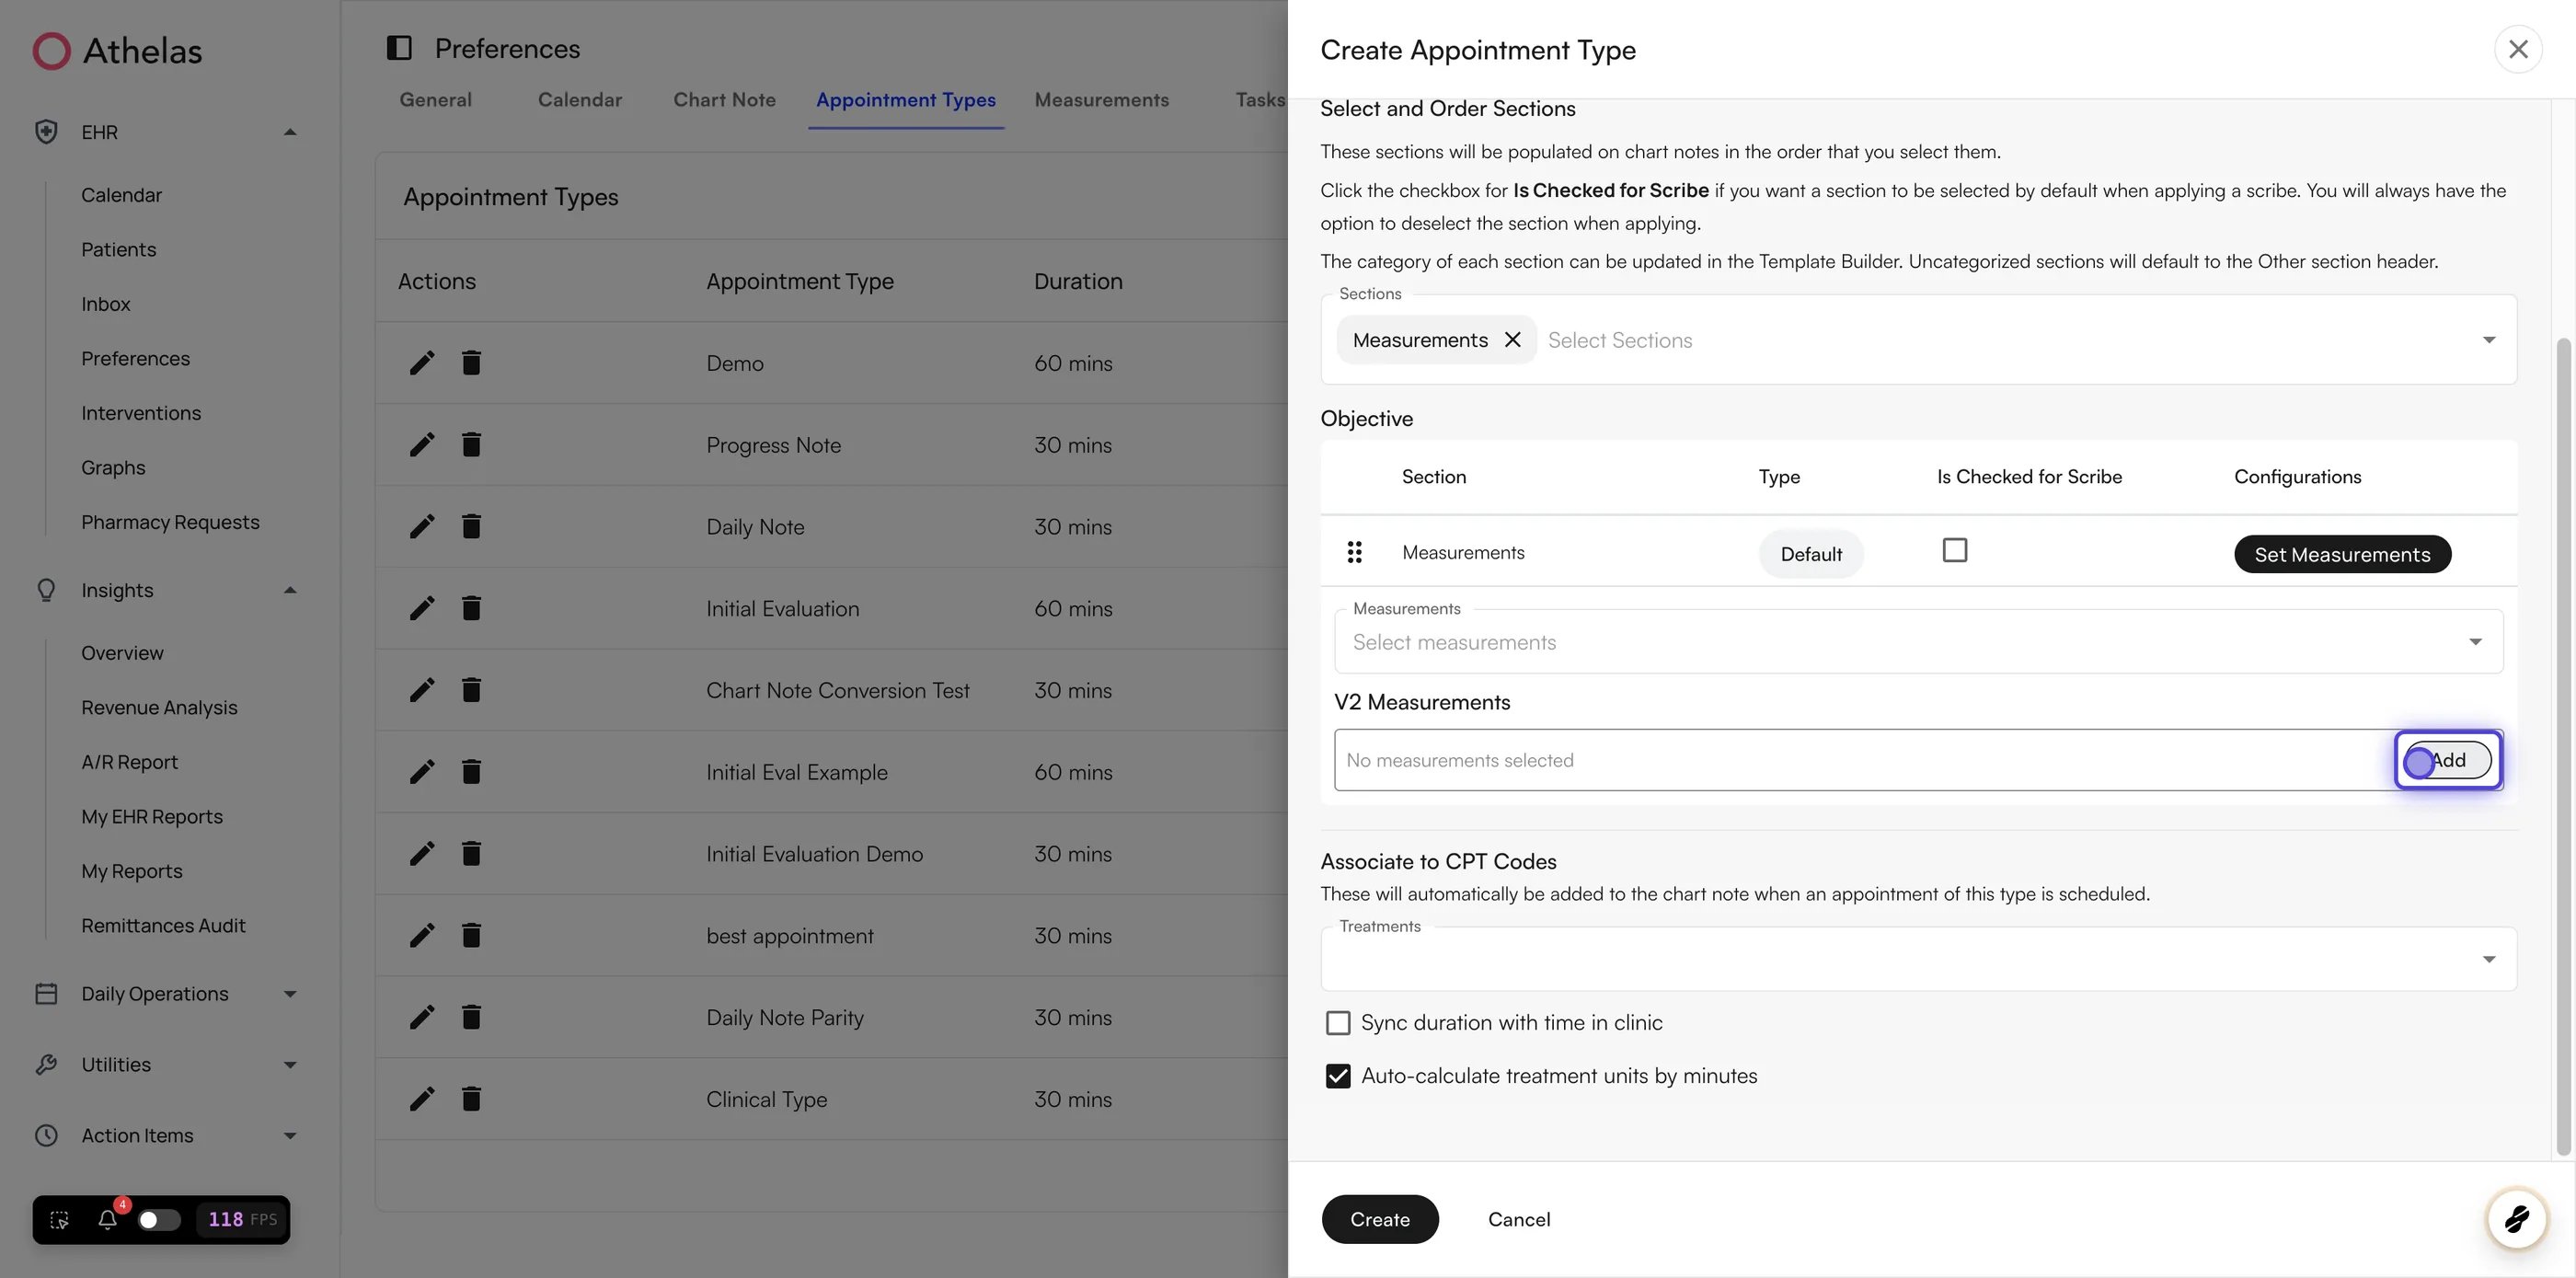
Attach measurements to an appointment type so every visit of that type opens with the right blocks in place. Attaching measurements is admin setup, done once per appointment type in Preferences → Appointment Types. To set default measurements for an appointment type:- Go to Preferences → Appointment Types, then create a new appointment type or edit an existing one.
- In Select and Order Sections, search for Measurements and select it.
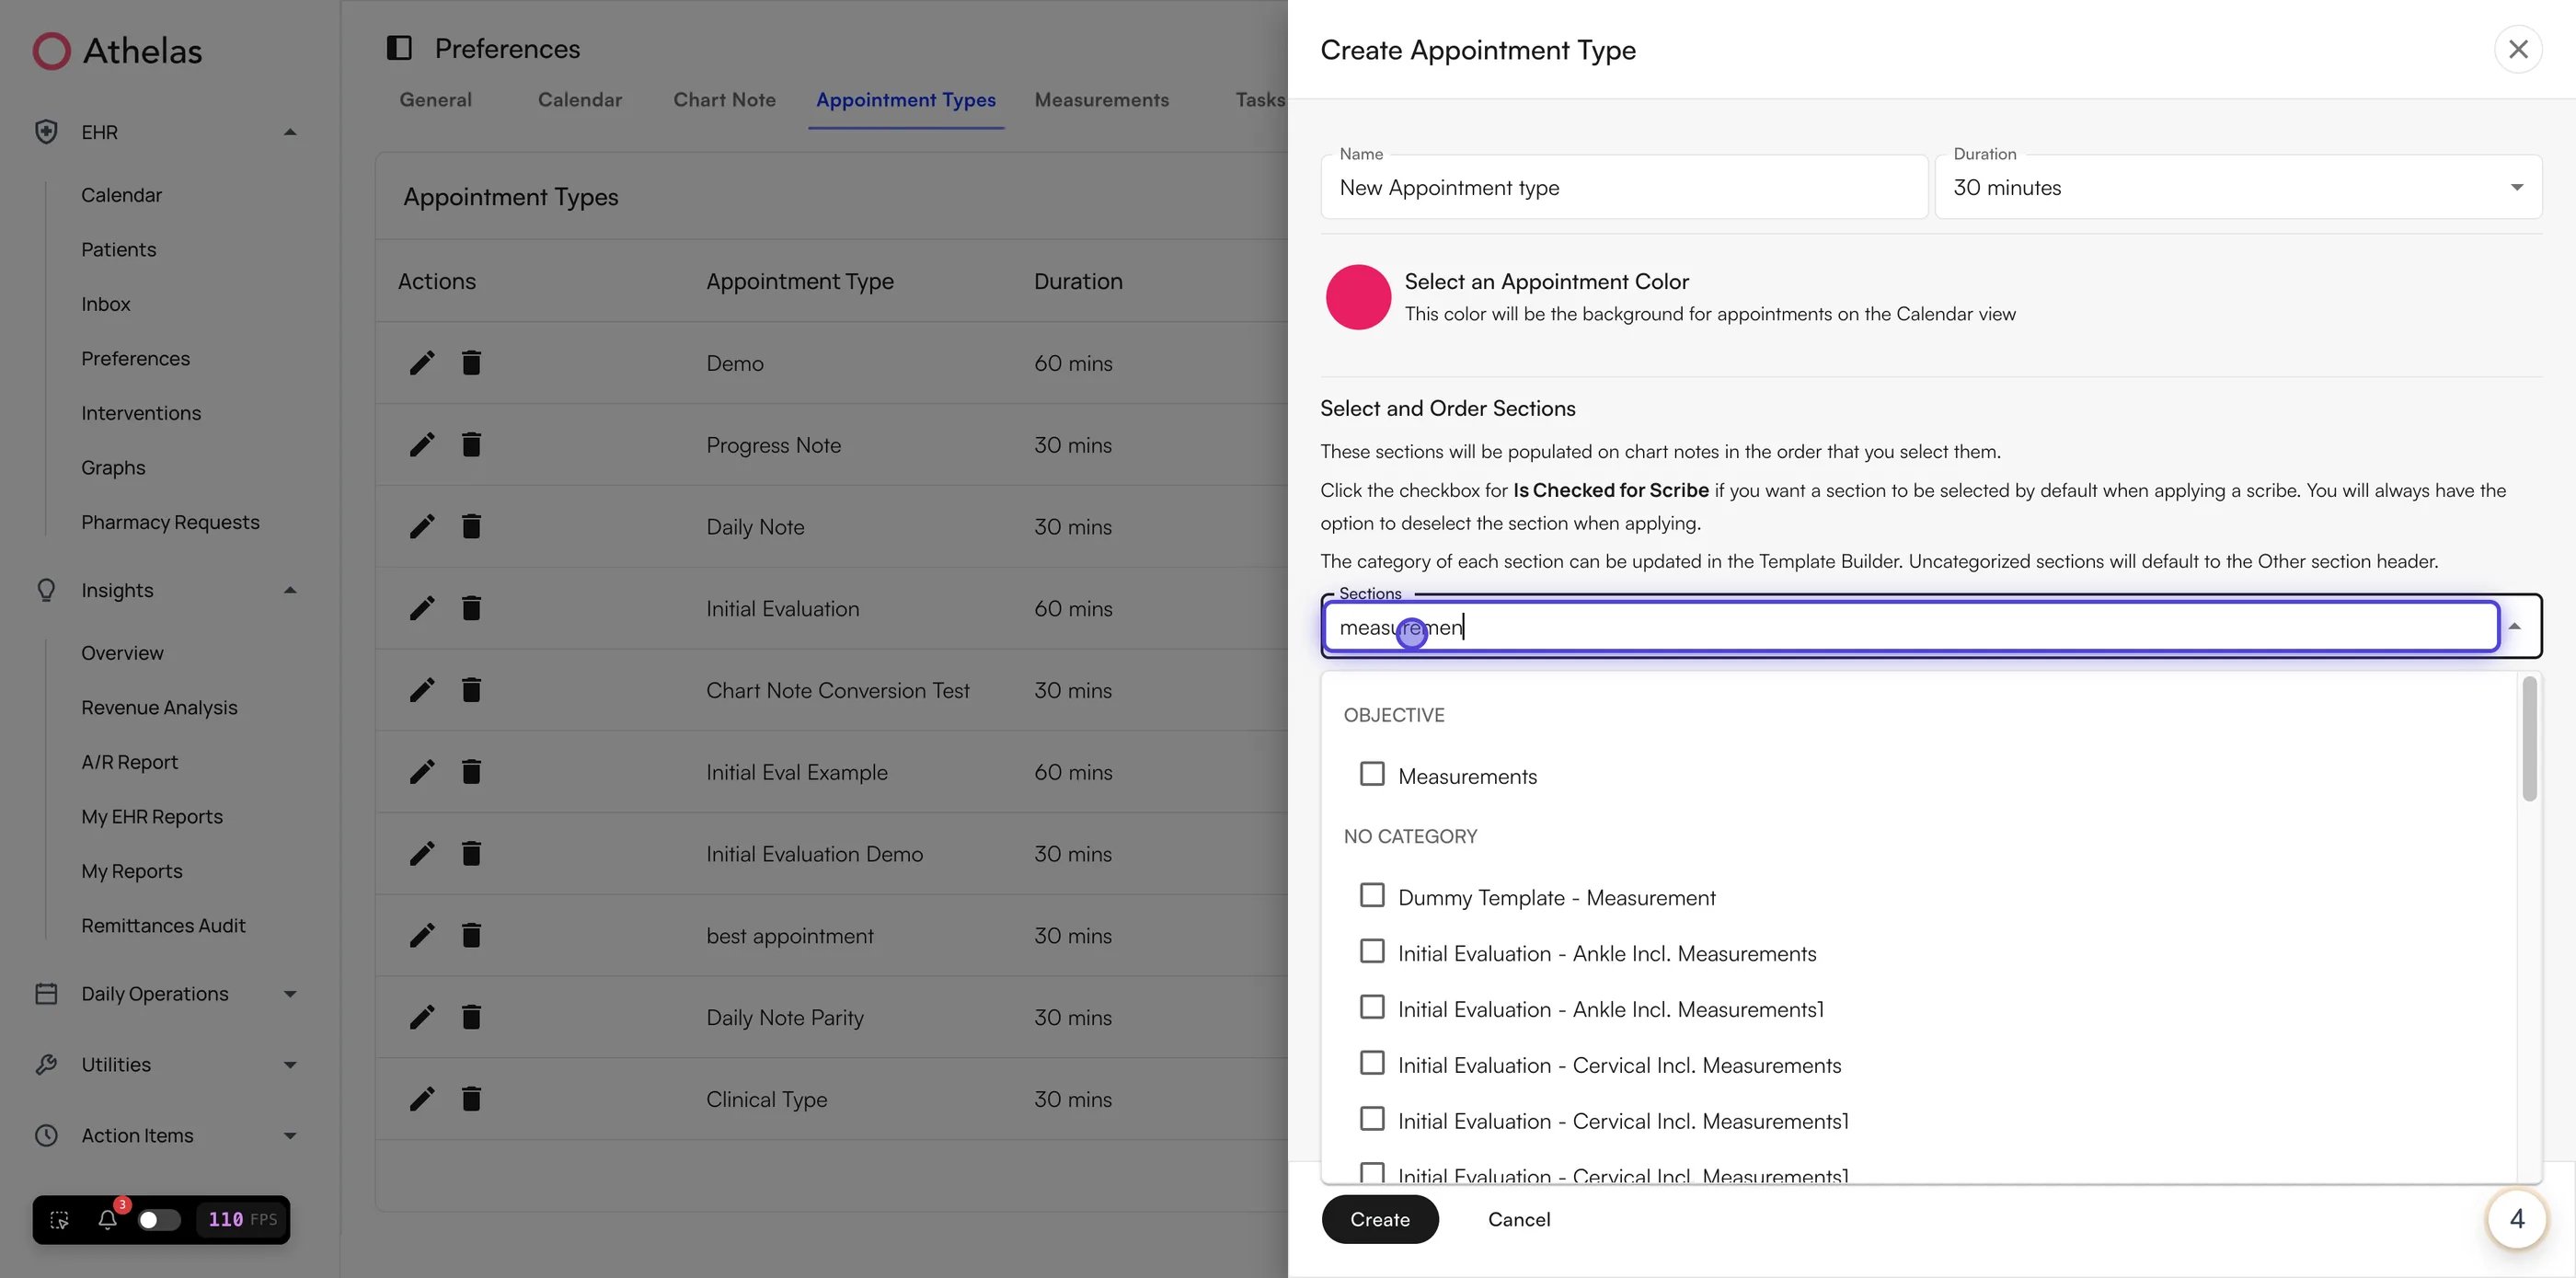
- Find the Measurements row under Objective and click Set Measurements.
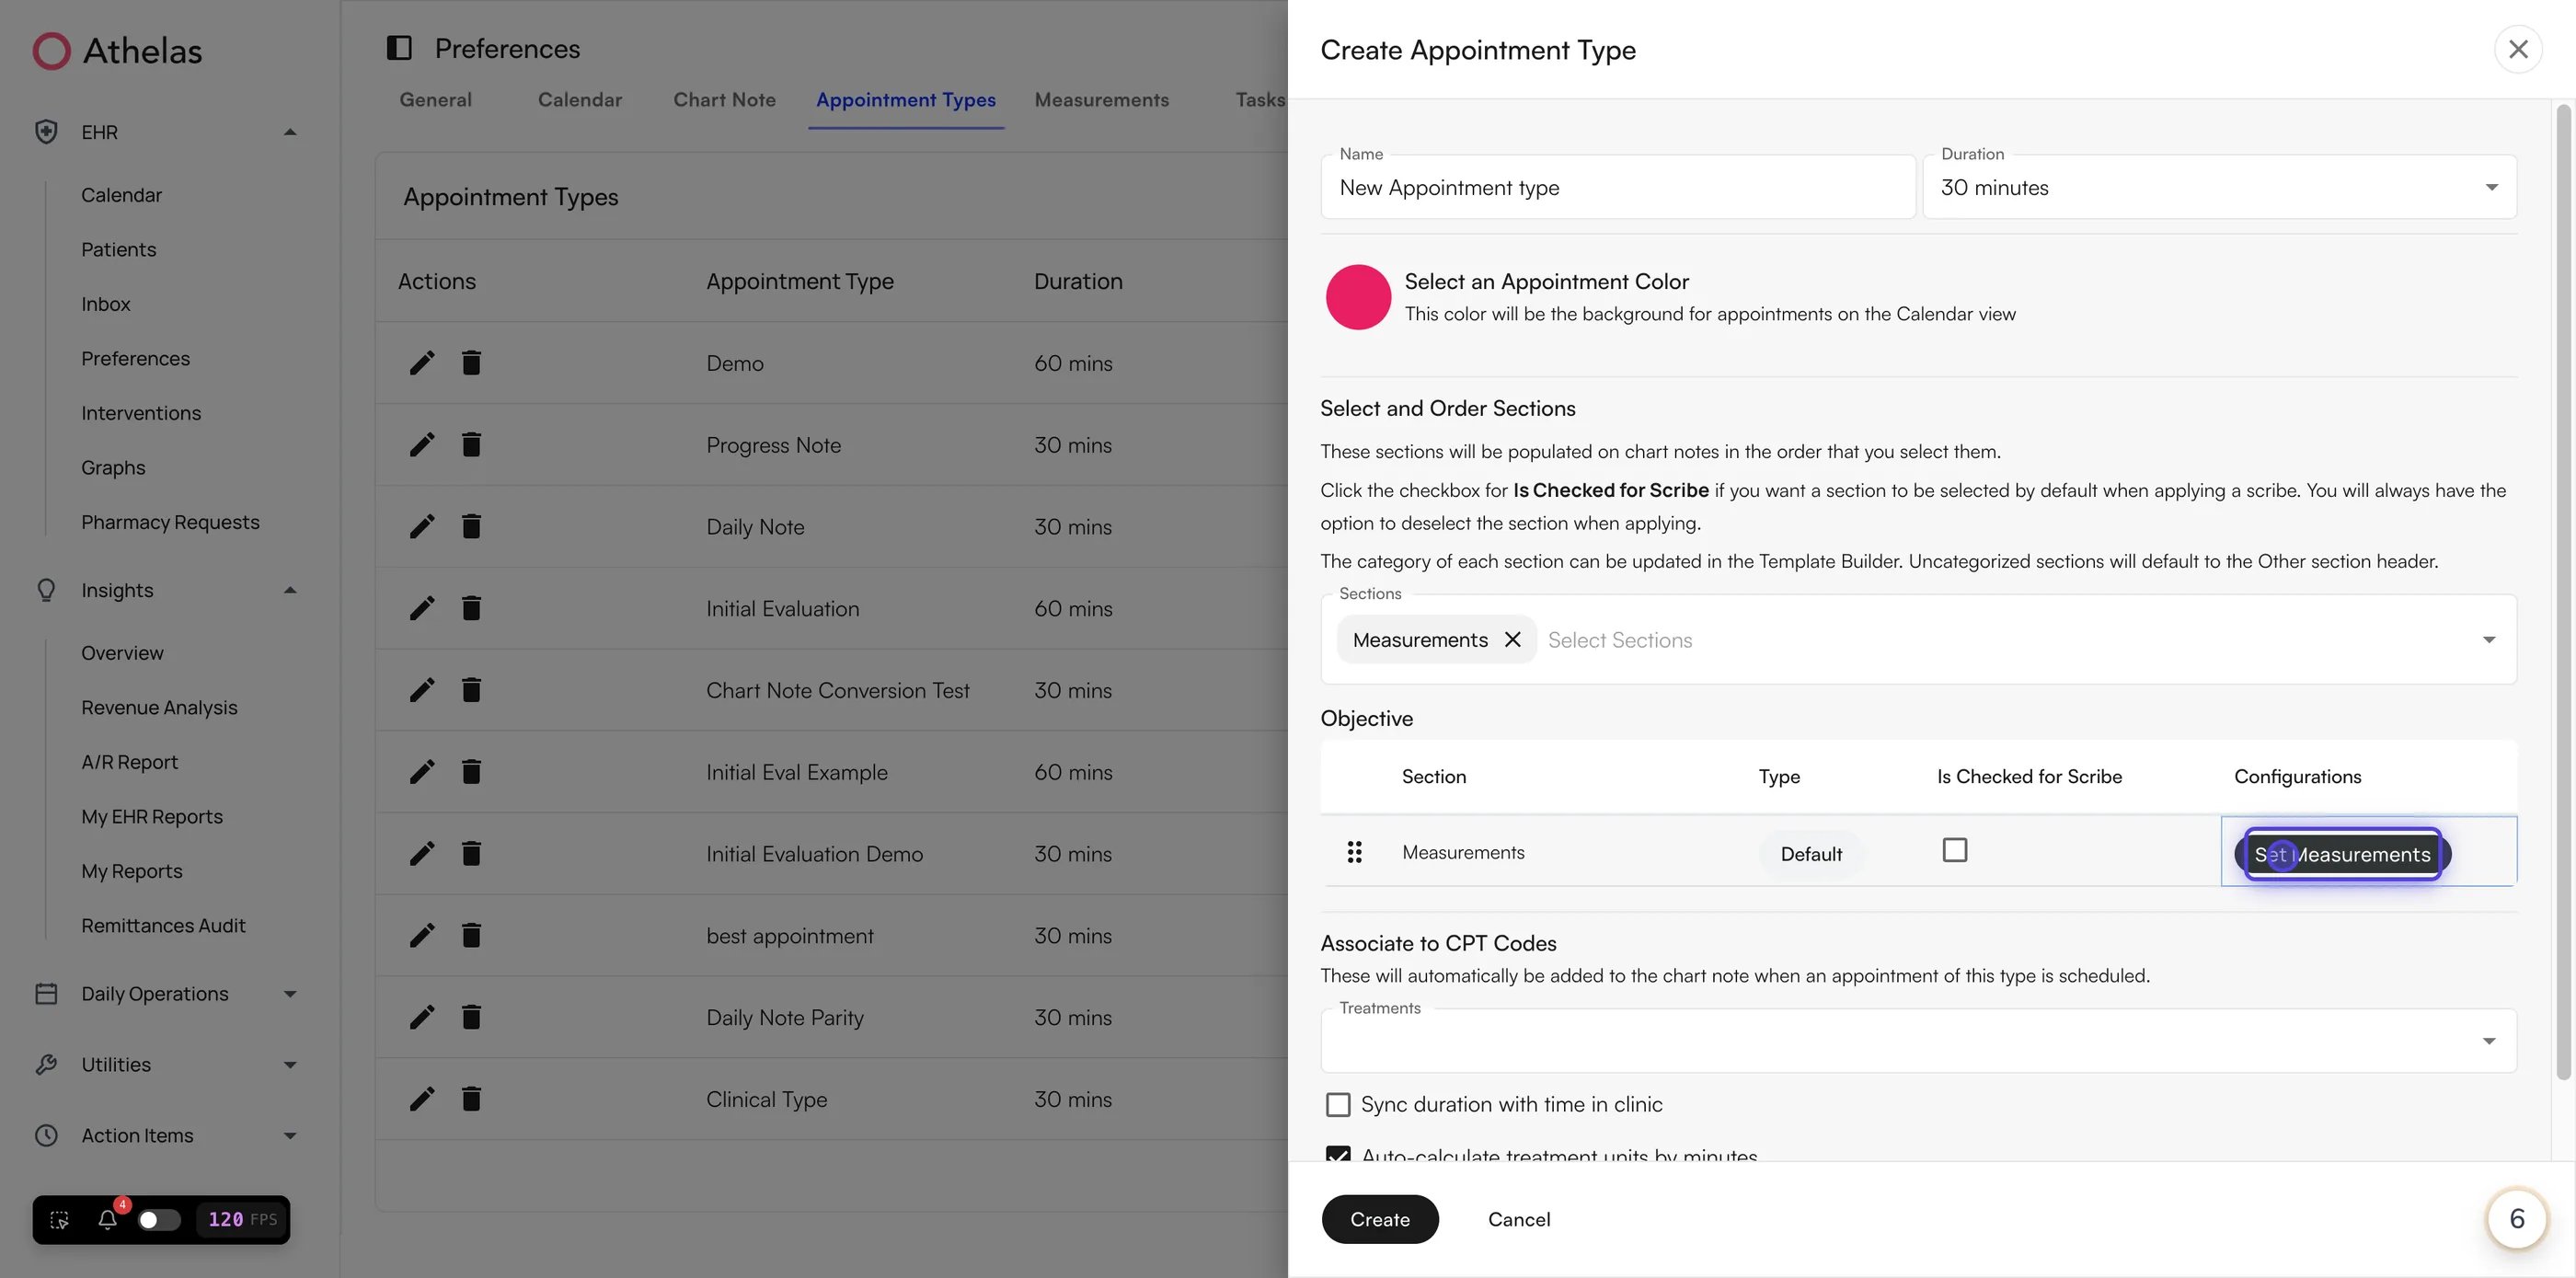
- Click Add next to V2 Measurements.
- Search by name, or browse the Categories and Groups tabs, and check the measurements you want. Everything you pick collects under Selected Measurements.
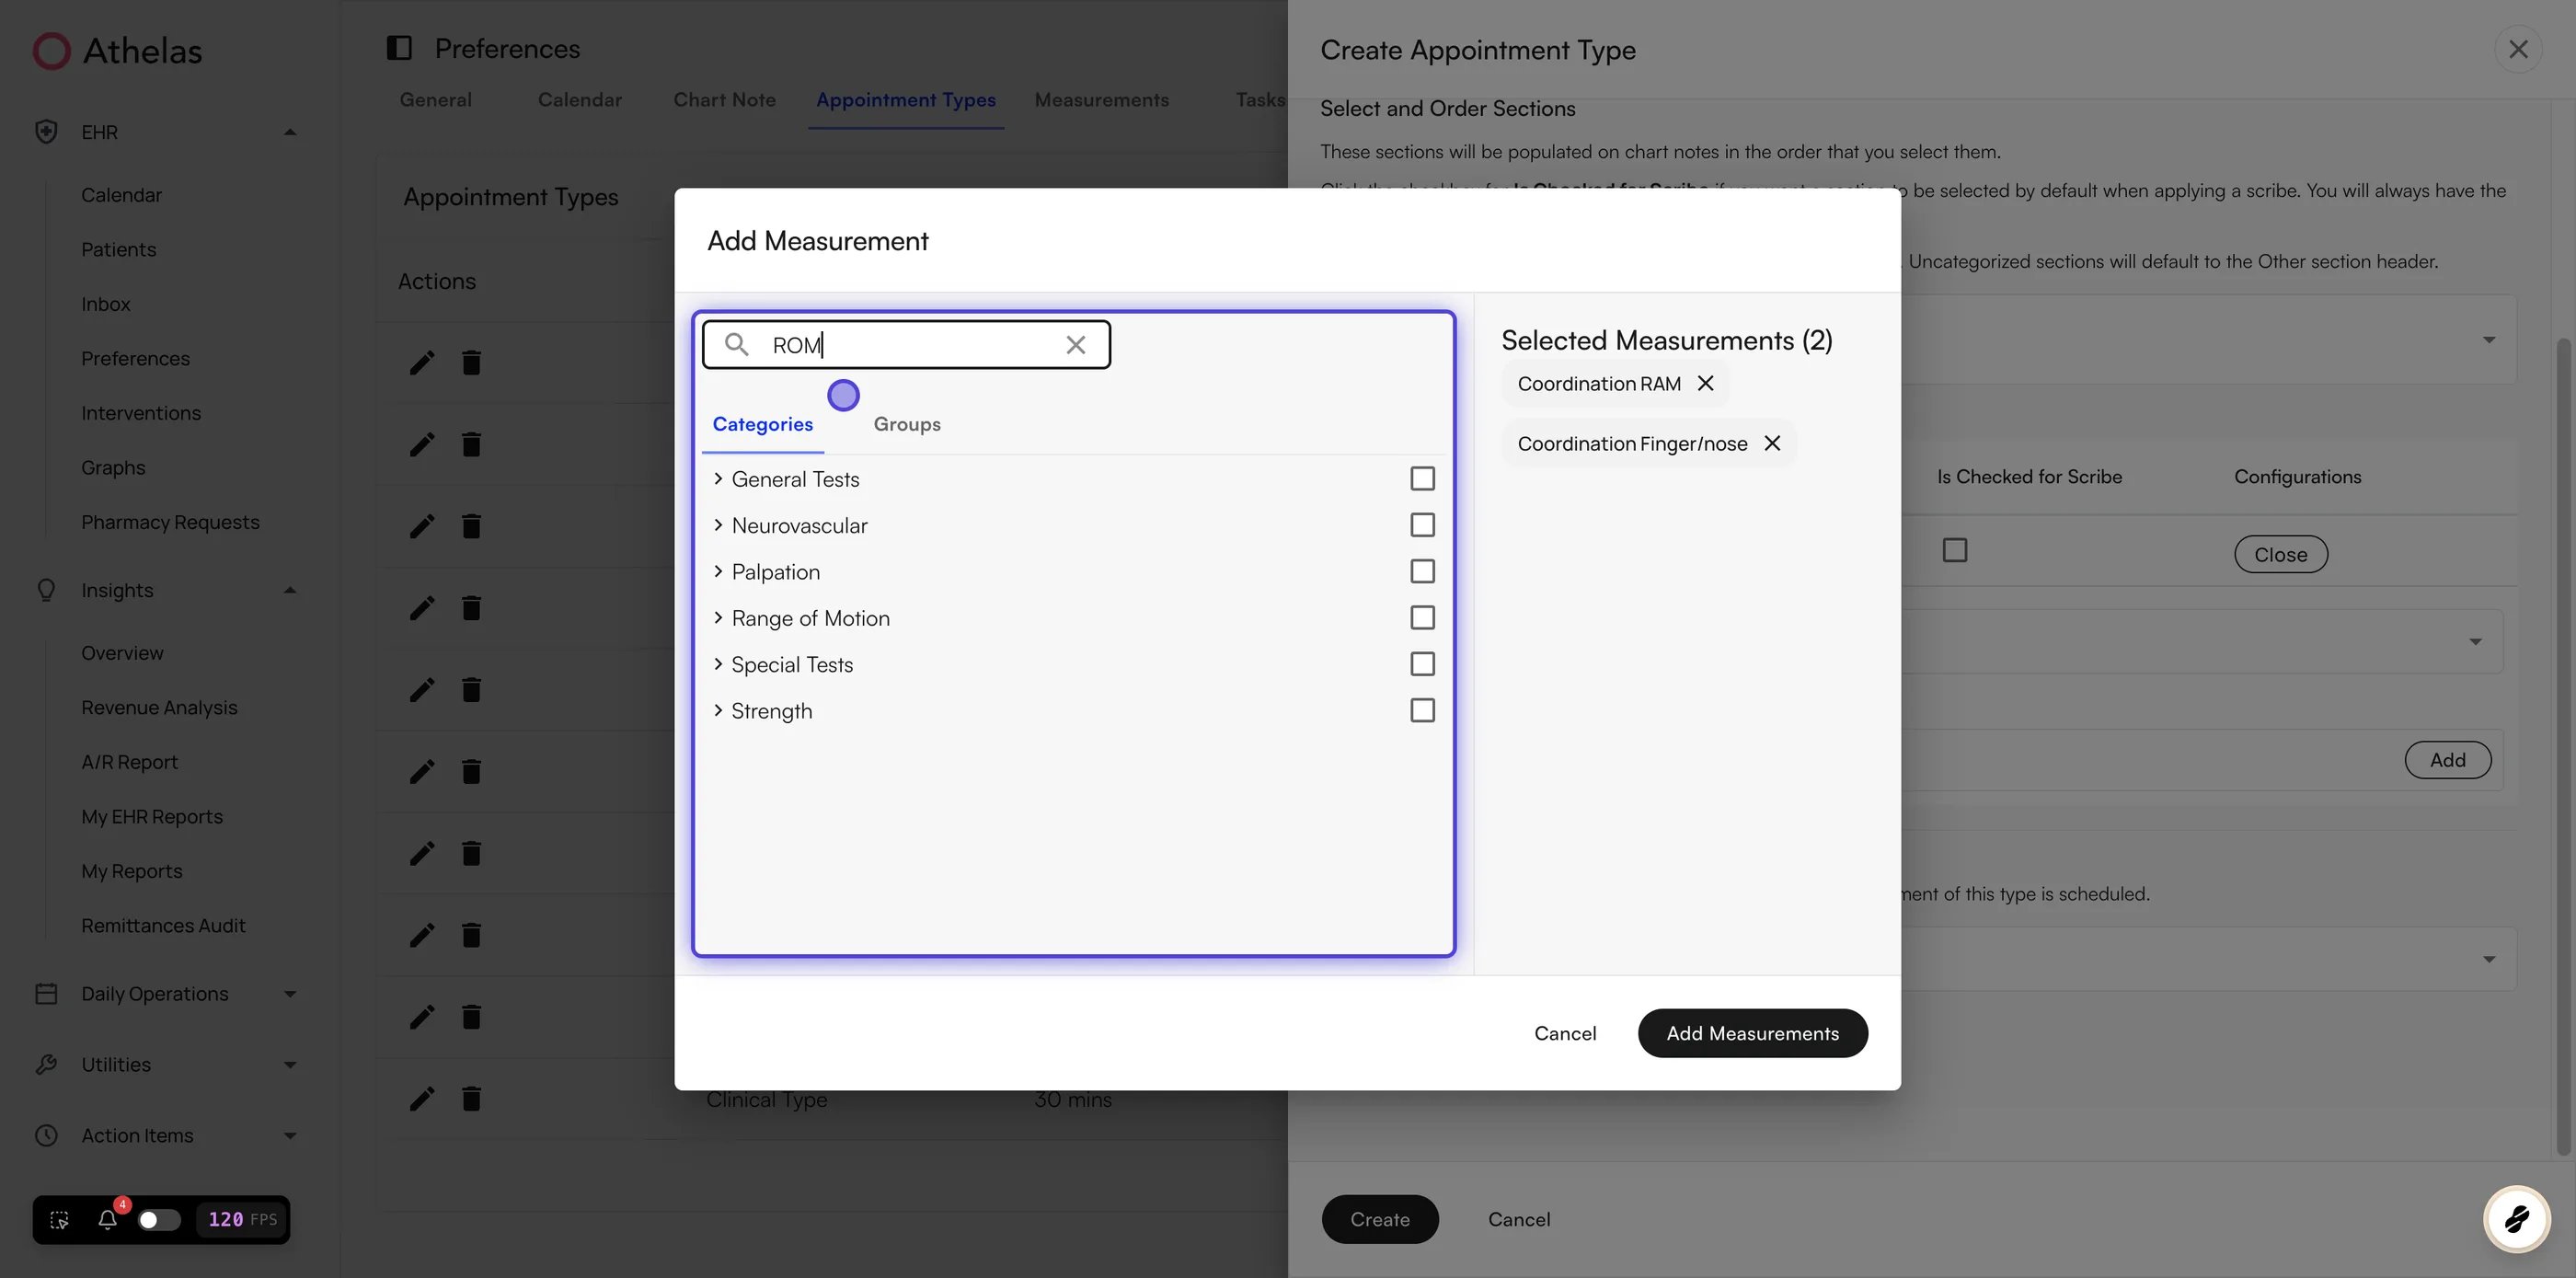
- Click Add Measurements, then save the appointment type.
Creating custom measurements
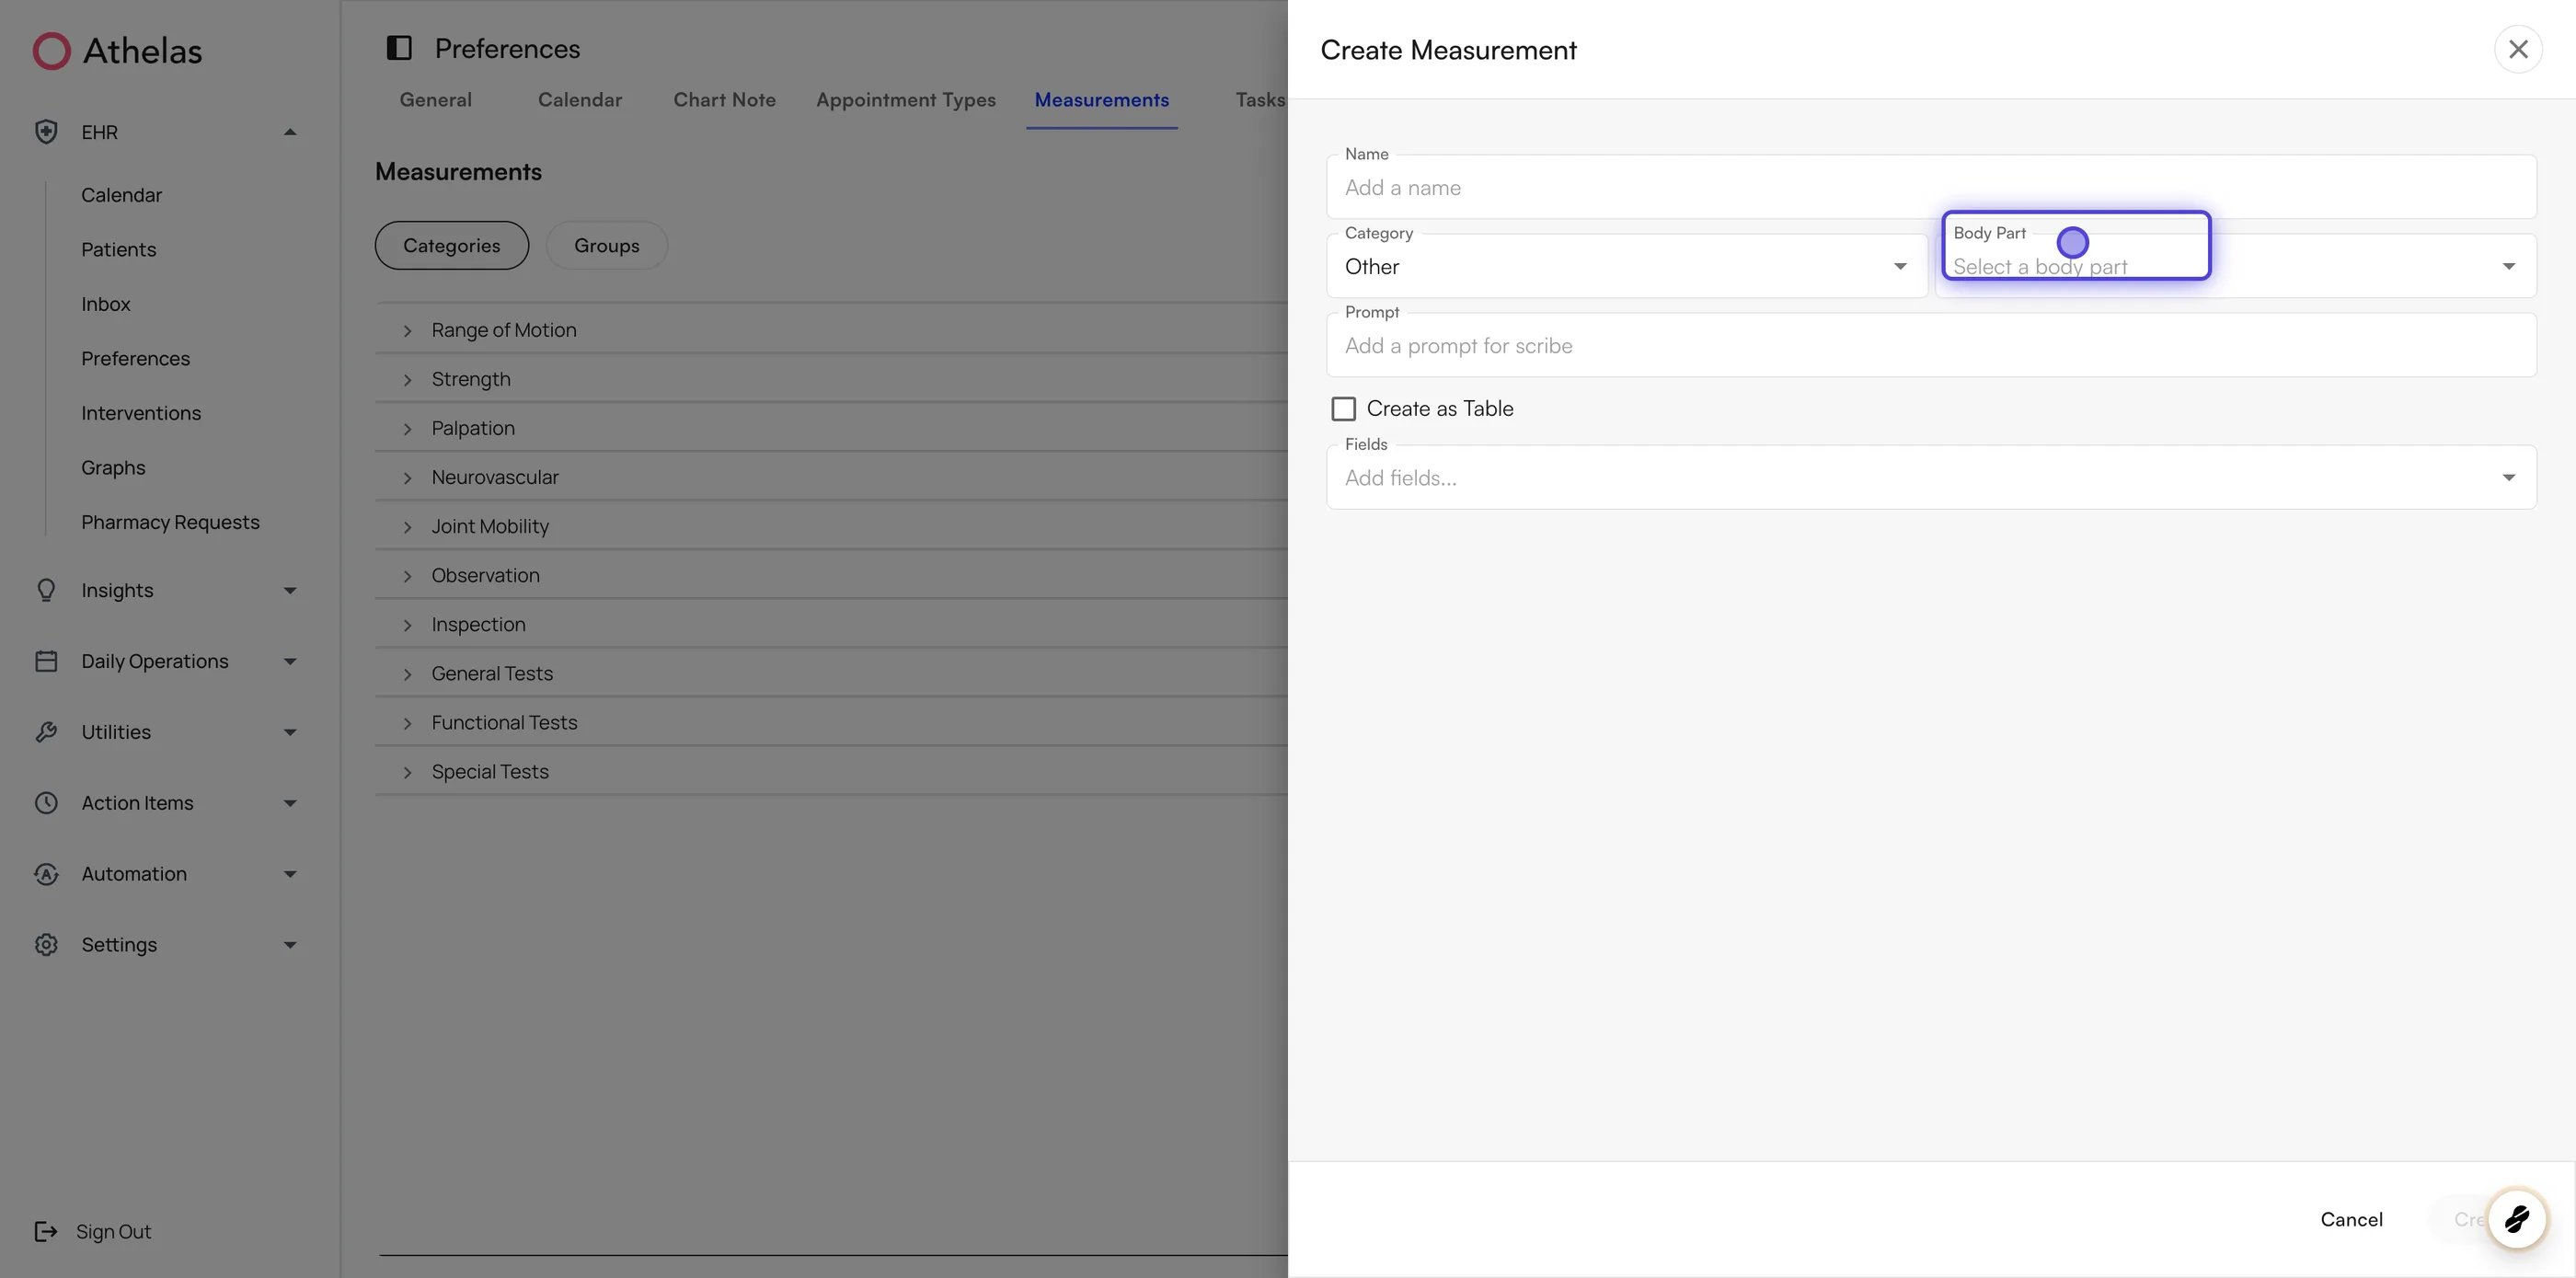
When the standard library does not cover something your practice tracks, build a custom measurement for it. Custom measurements live alongside the standard ones and behave the same way in the chart note. To create a custom measurement:- Open Preferences from the left navigation and go to the Measurements tab.
- Click + Add Measurement.
- Enter a Name.
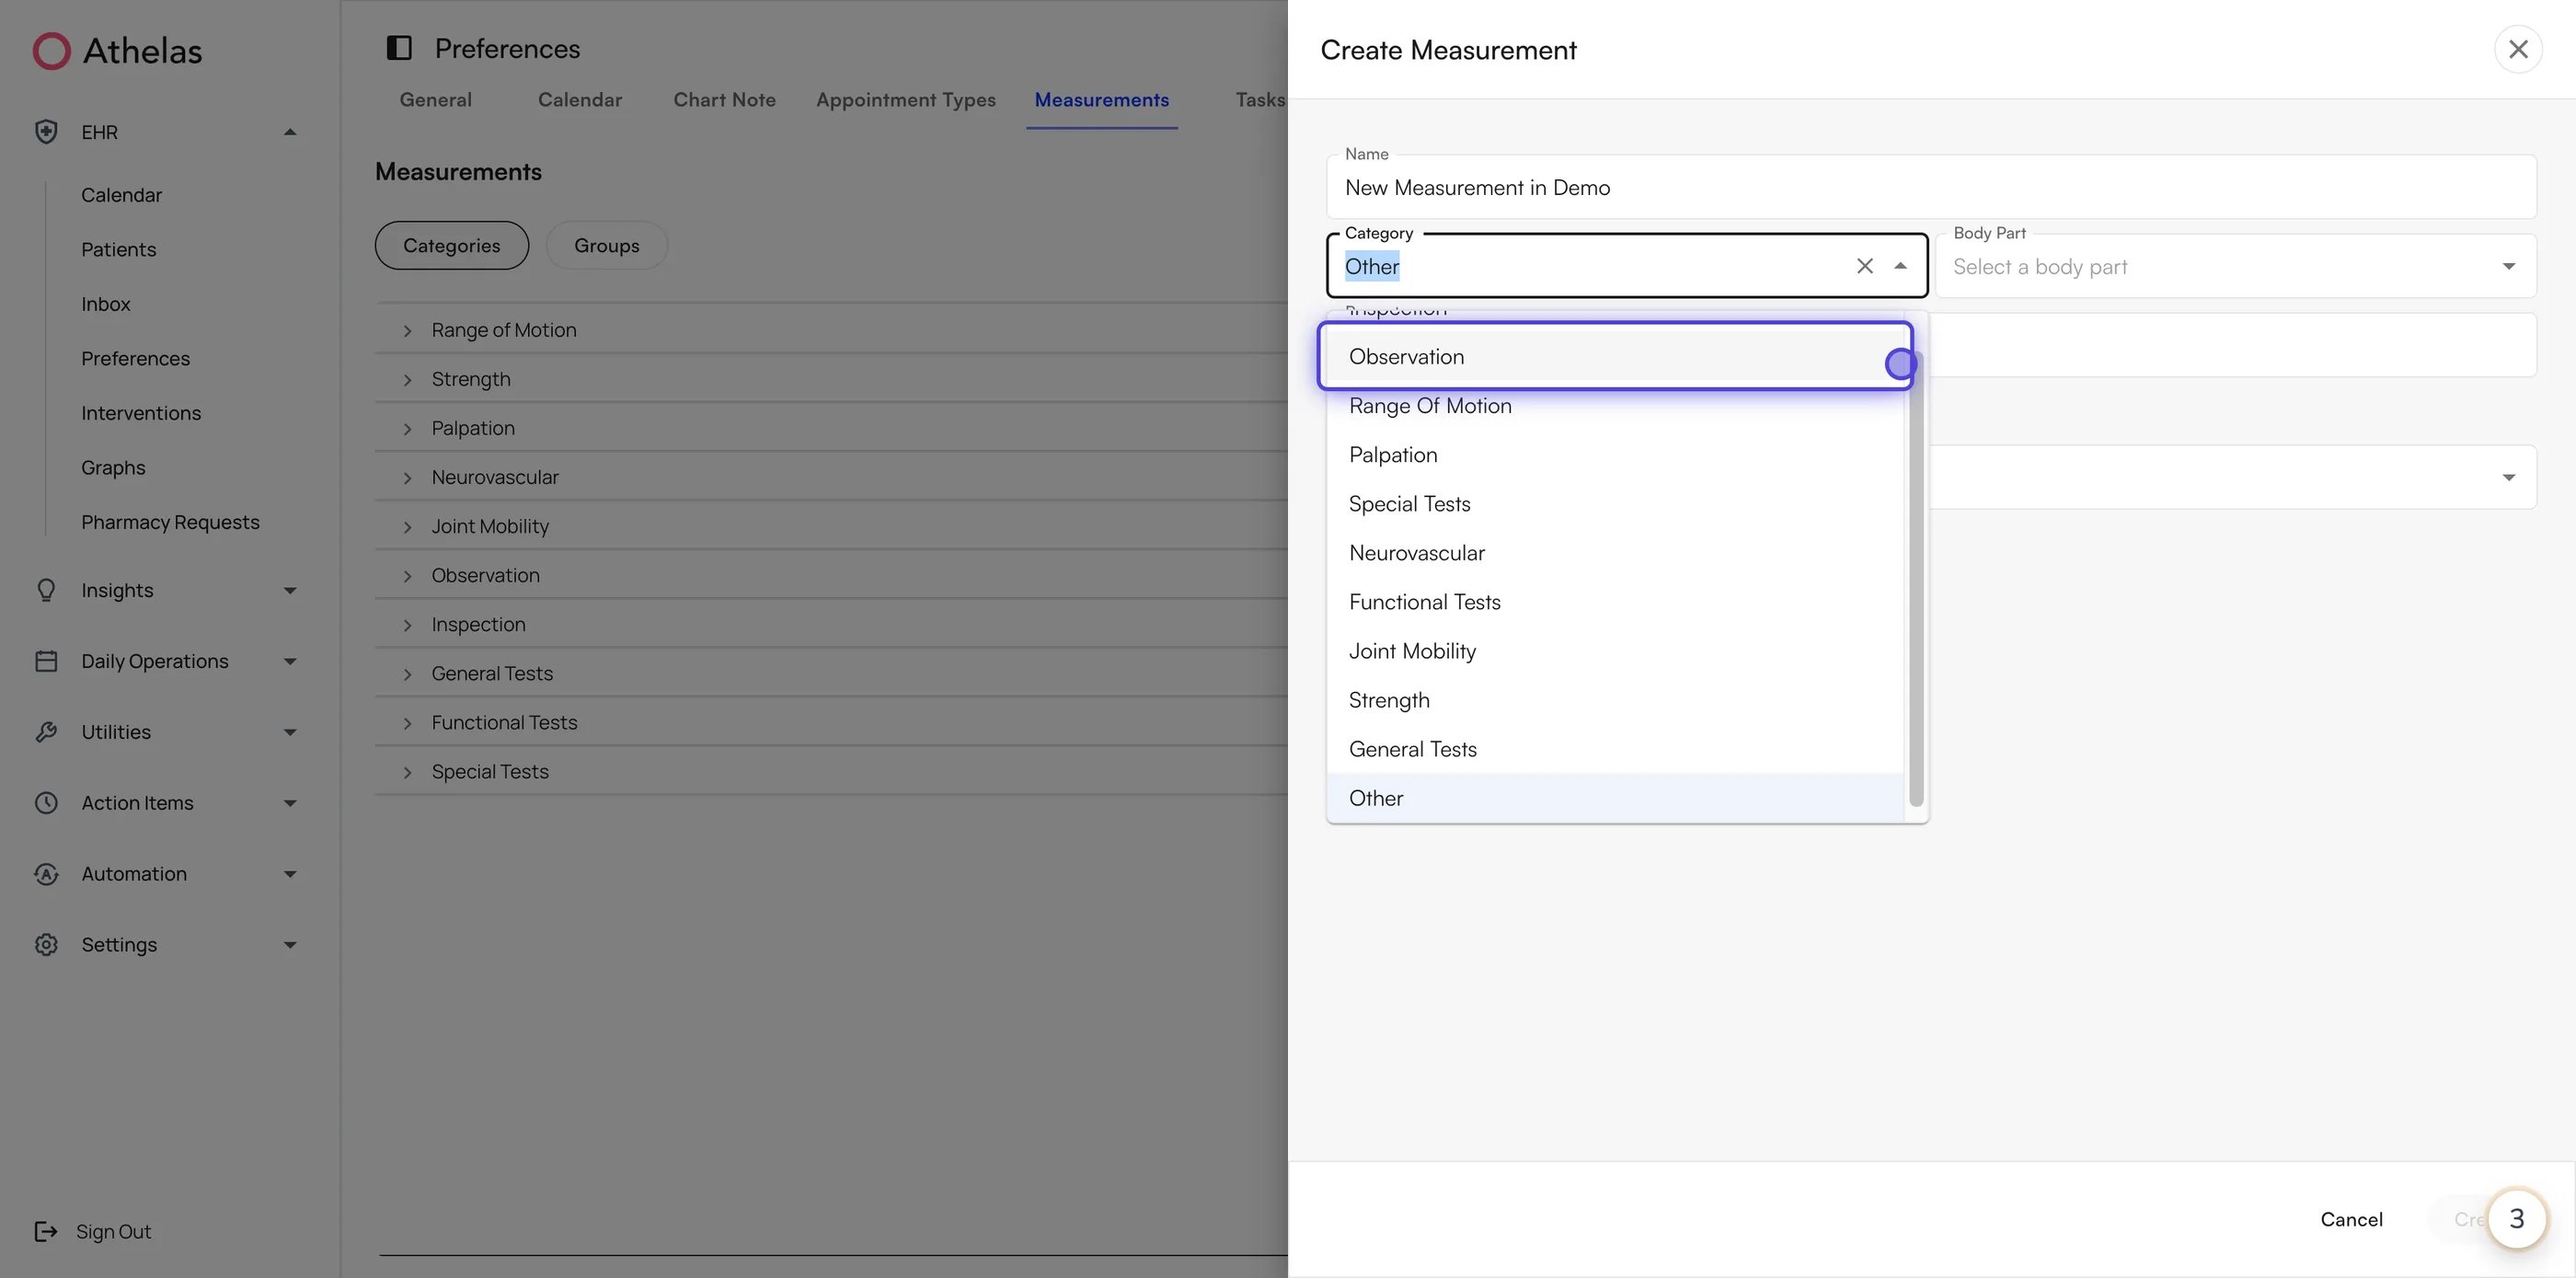
- Choose a Category — Observation, Inspection, Range of Motion, Palpation, Special Tests, Neurovascular, Functional Tests, Joint Mobility, Strength, General Tests, or Other.
- Optionally choose a Body Part so the measurement turns up when someone filters by that body part.
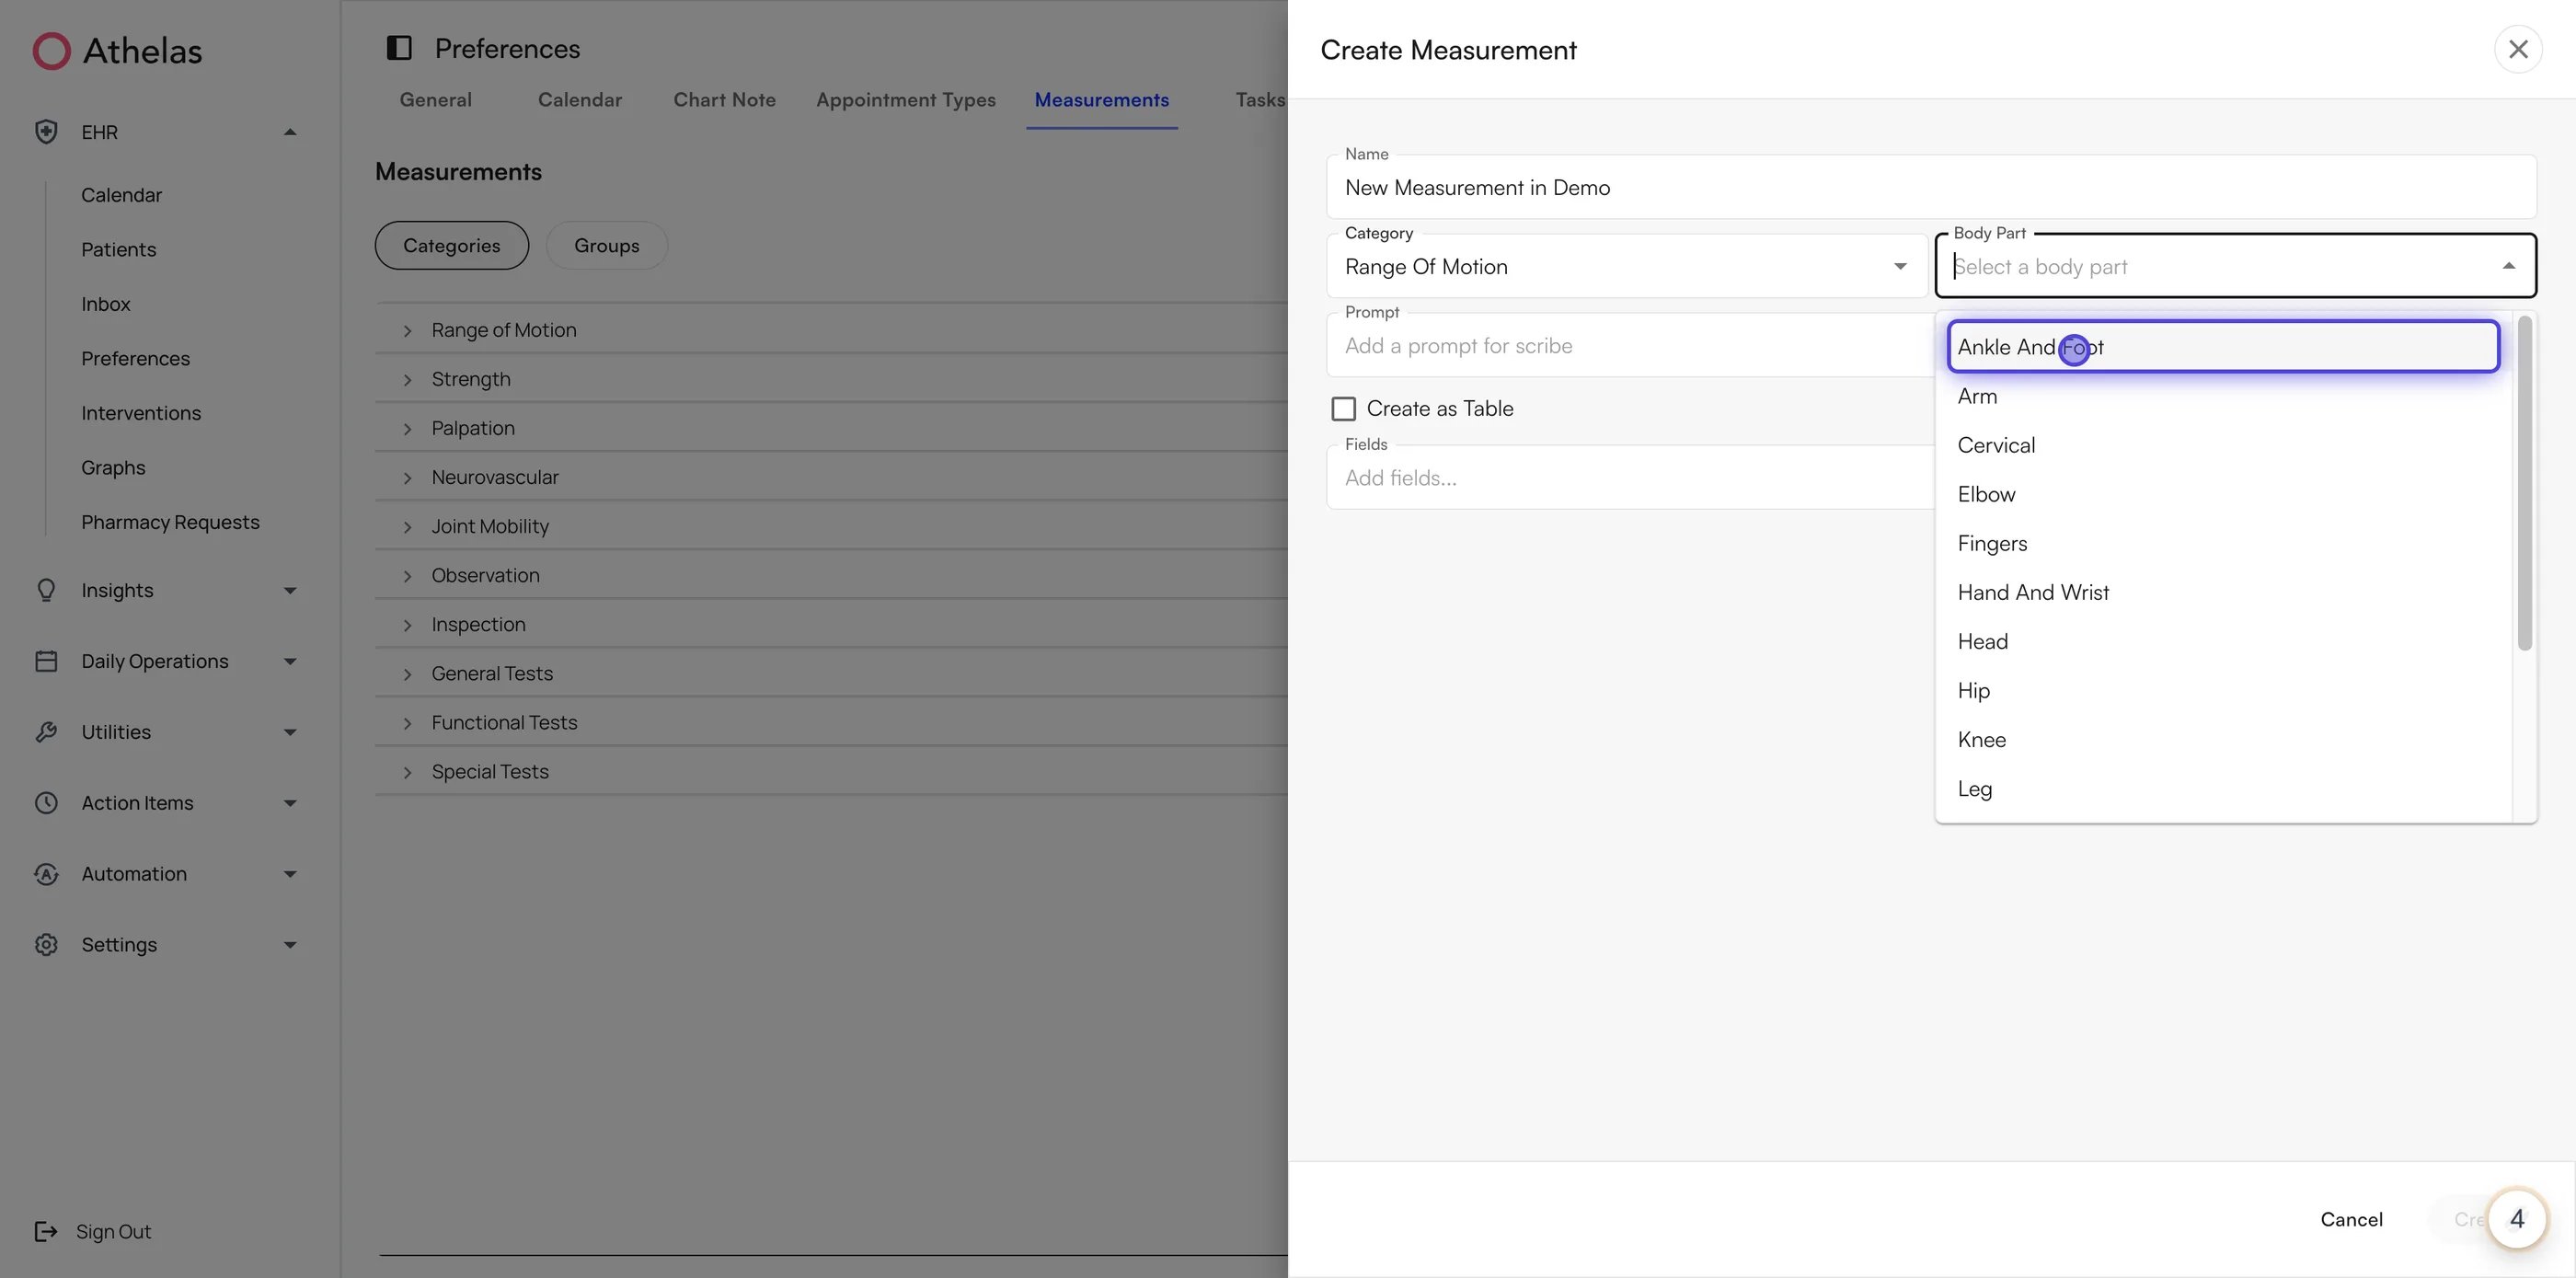
- Optionally add a Prompt — the instruction Air Scribe follows when filling this measurement from a visit recording. A specific prompt produces better documentation.
- Add the response Fields the provider fills in.
- Optionally check Create as Table, then set Row Headers and Column Headers. The Preview below shows the grid as the provider will see it.
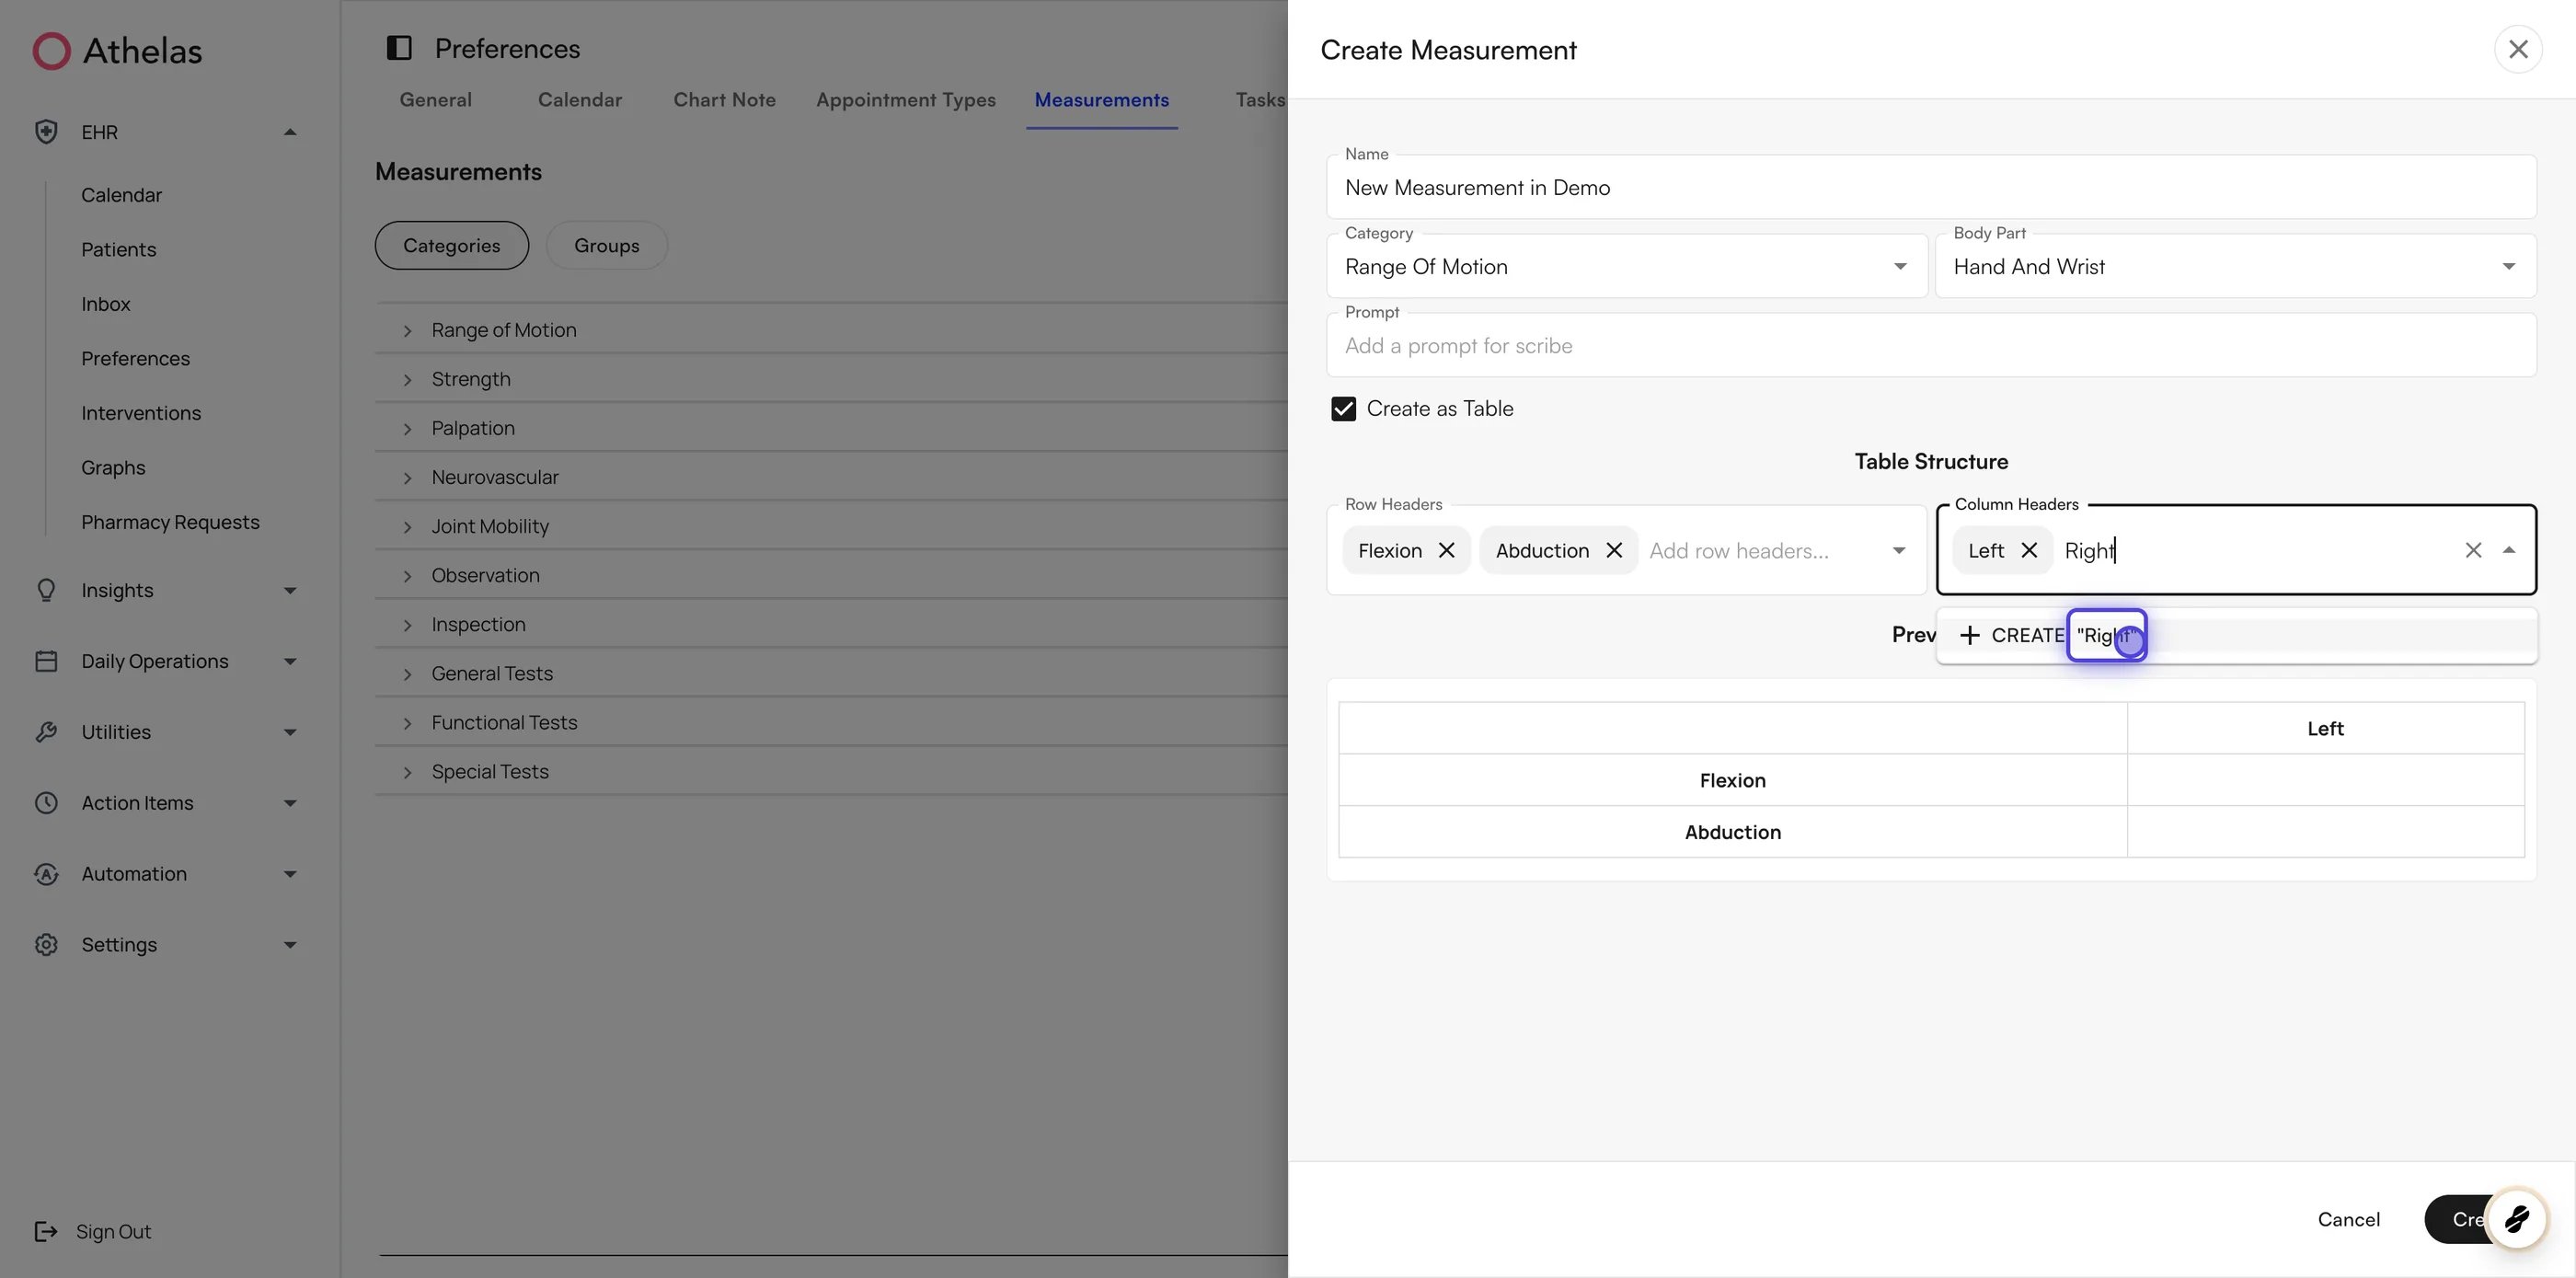
- Click Create.
- Text — fields appear as single-line entries. Best for a handful of simple values.
- Table — fields appear as a grid. Best for comparing bilateral values, such as left versus right knee.
Managing measurement groups
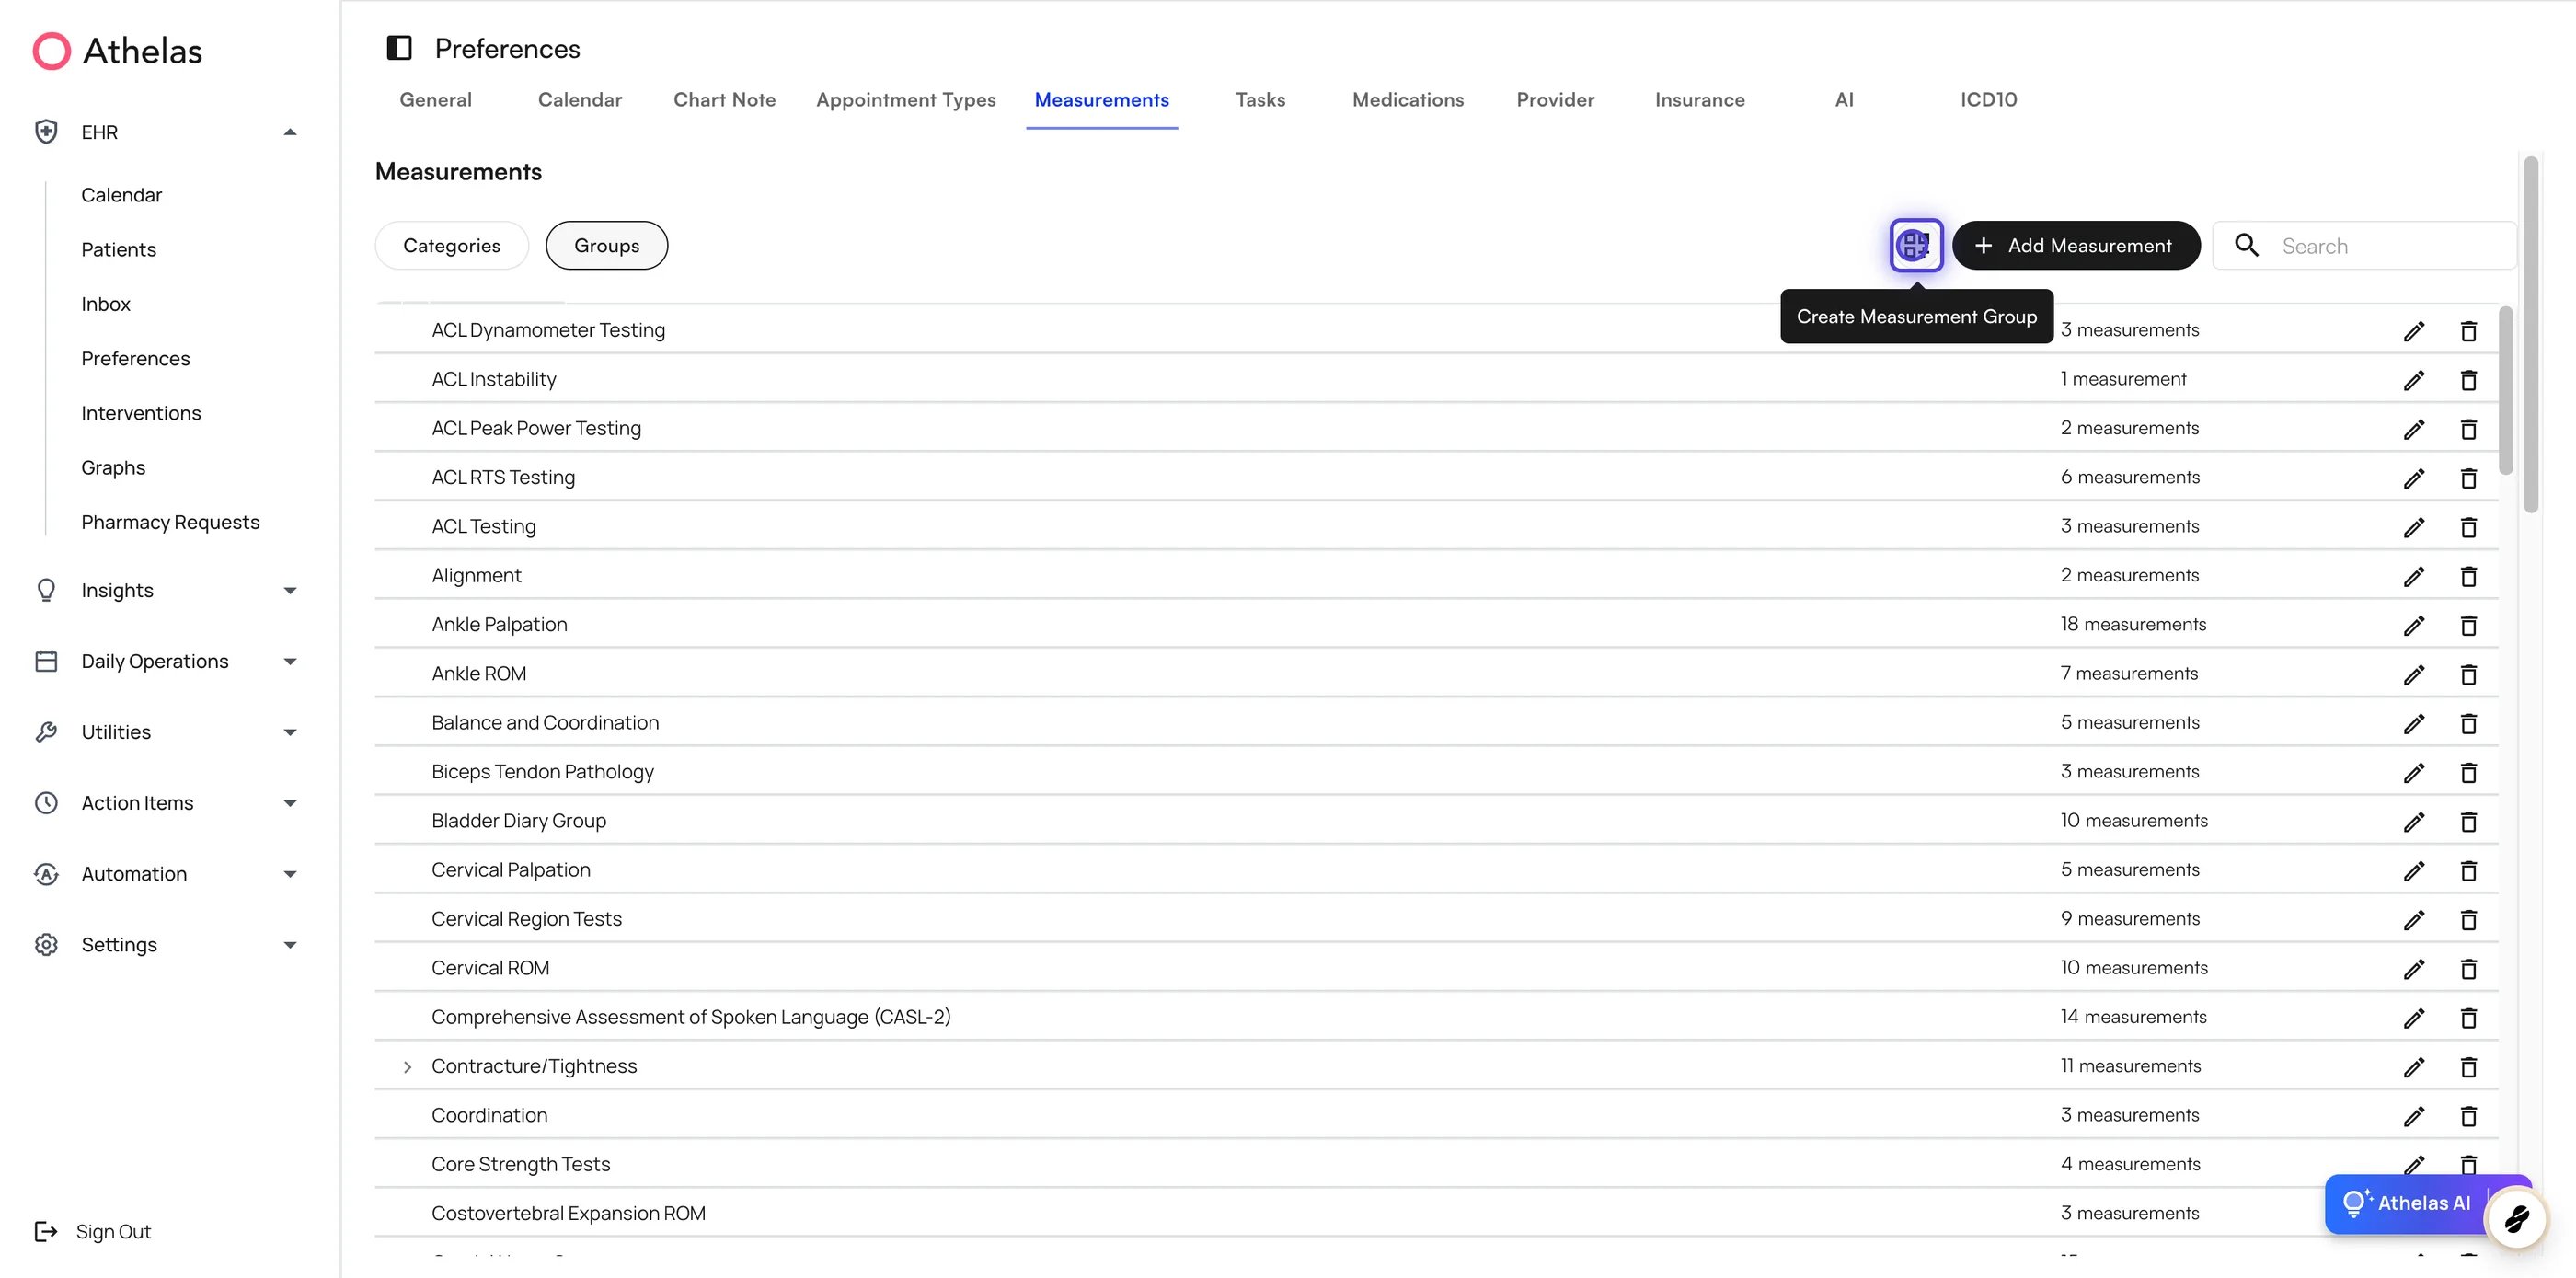
Groups are what keep a chart note readable: instead of dozens of loose fields, a provider sees Shoulder Strength and works through it as a unit. To create a measurement group:- In Preferences → Measurements, open the Groups tab and click the Create Measurement Group icon next to + Add Measurement.
- Enter a Group Name and choose a Category. A Body Part is optional.
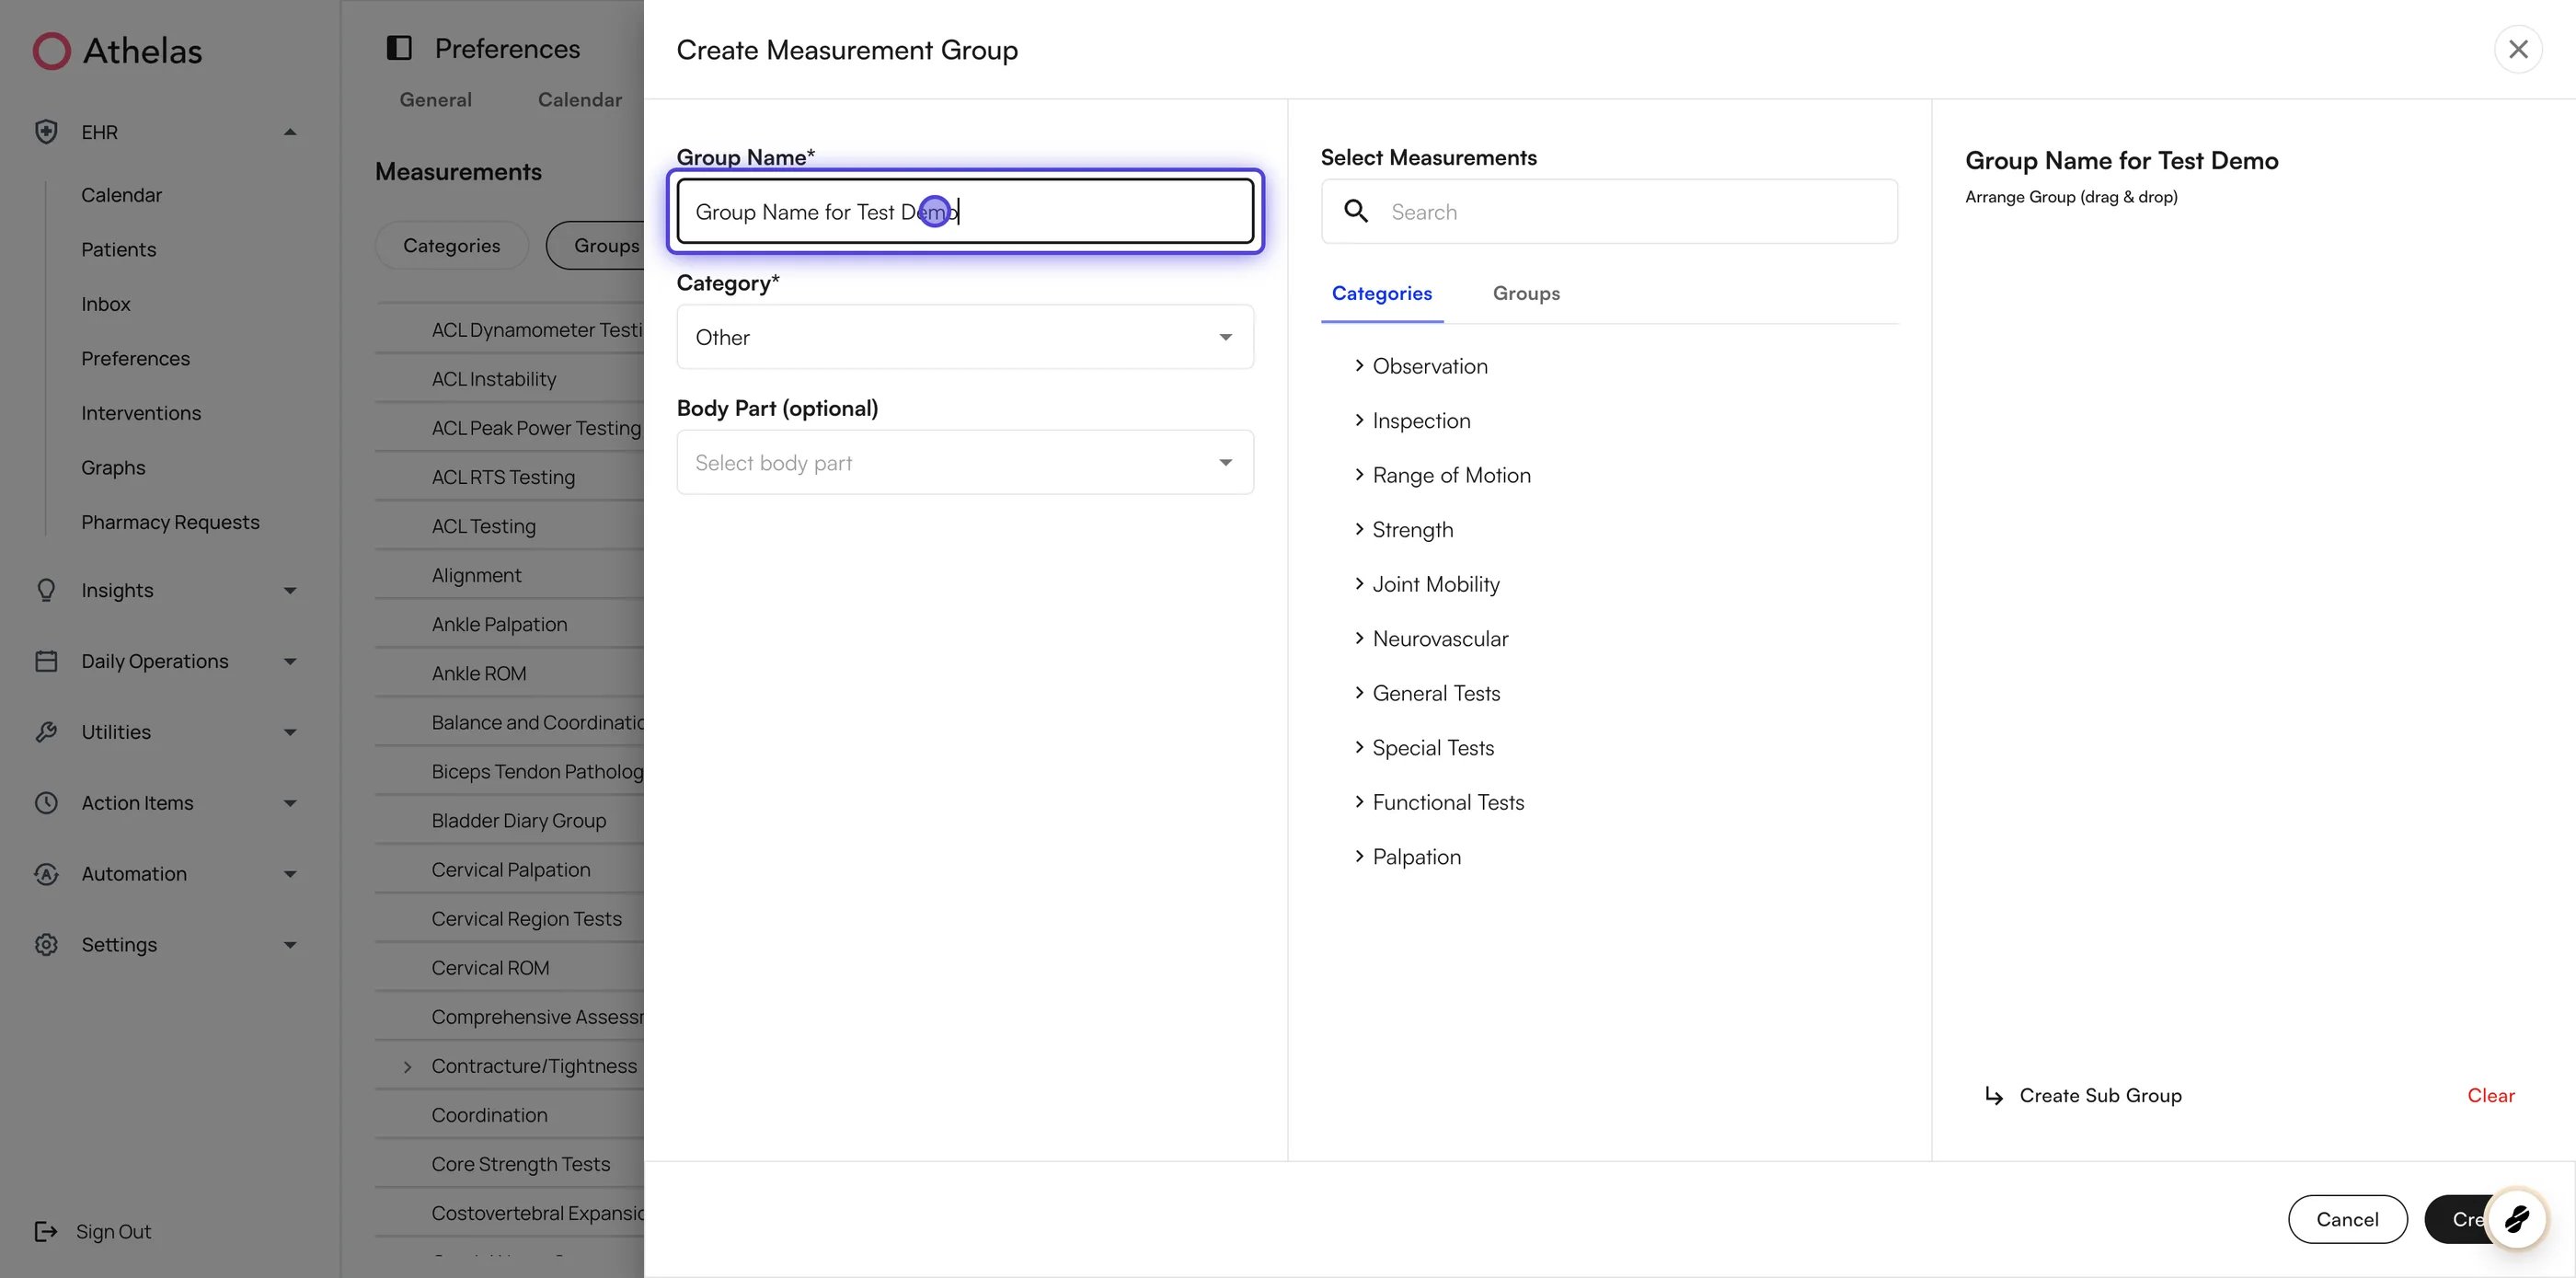
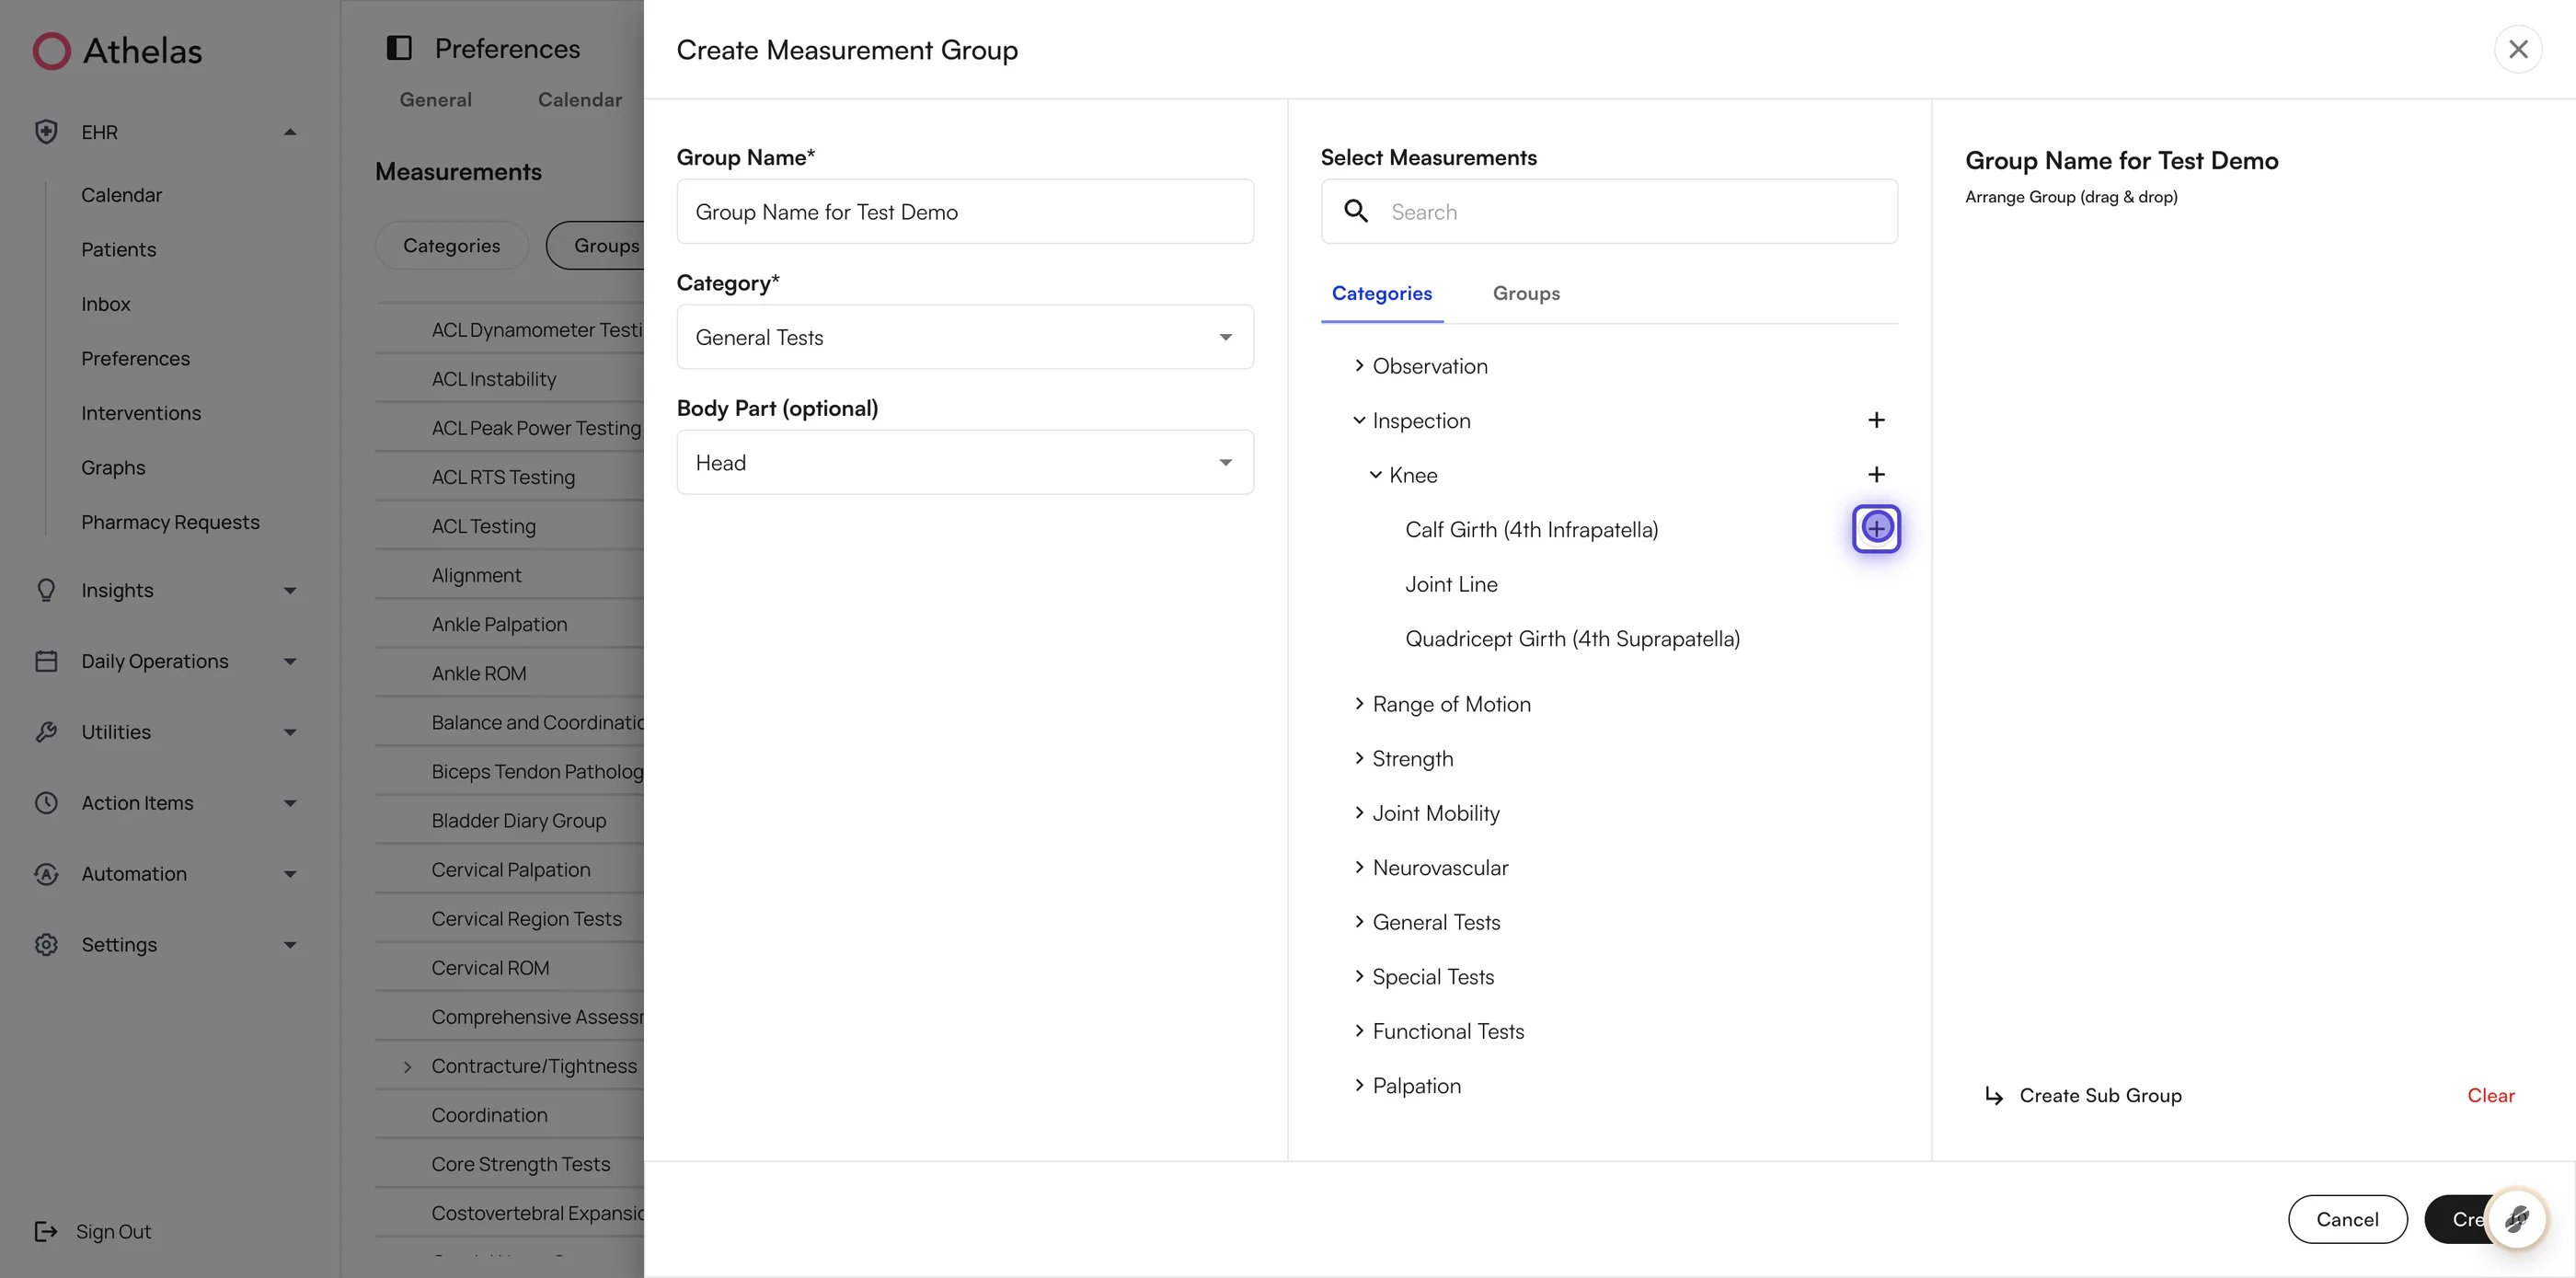
- Under Select Measurements, browse the Categories or Groups tab and click + to add an individual measurement, a category, or an entire existing group.
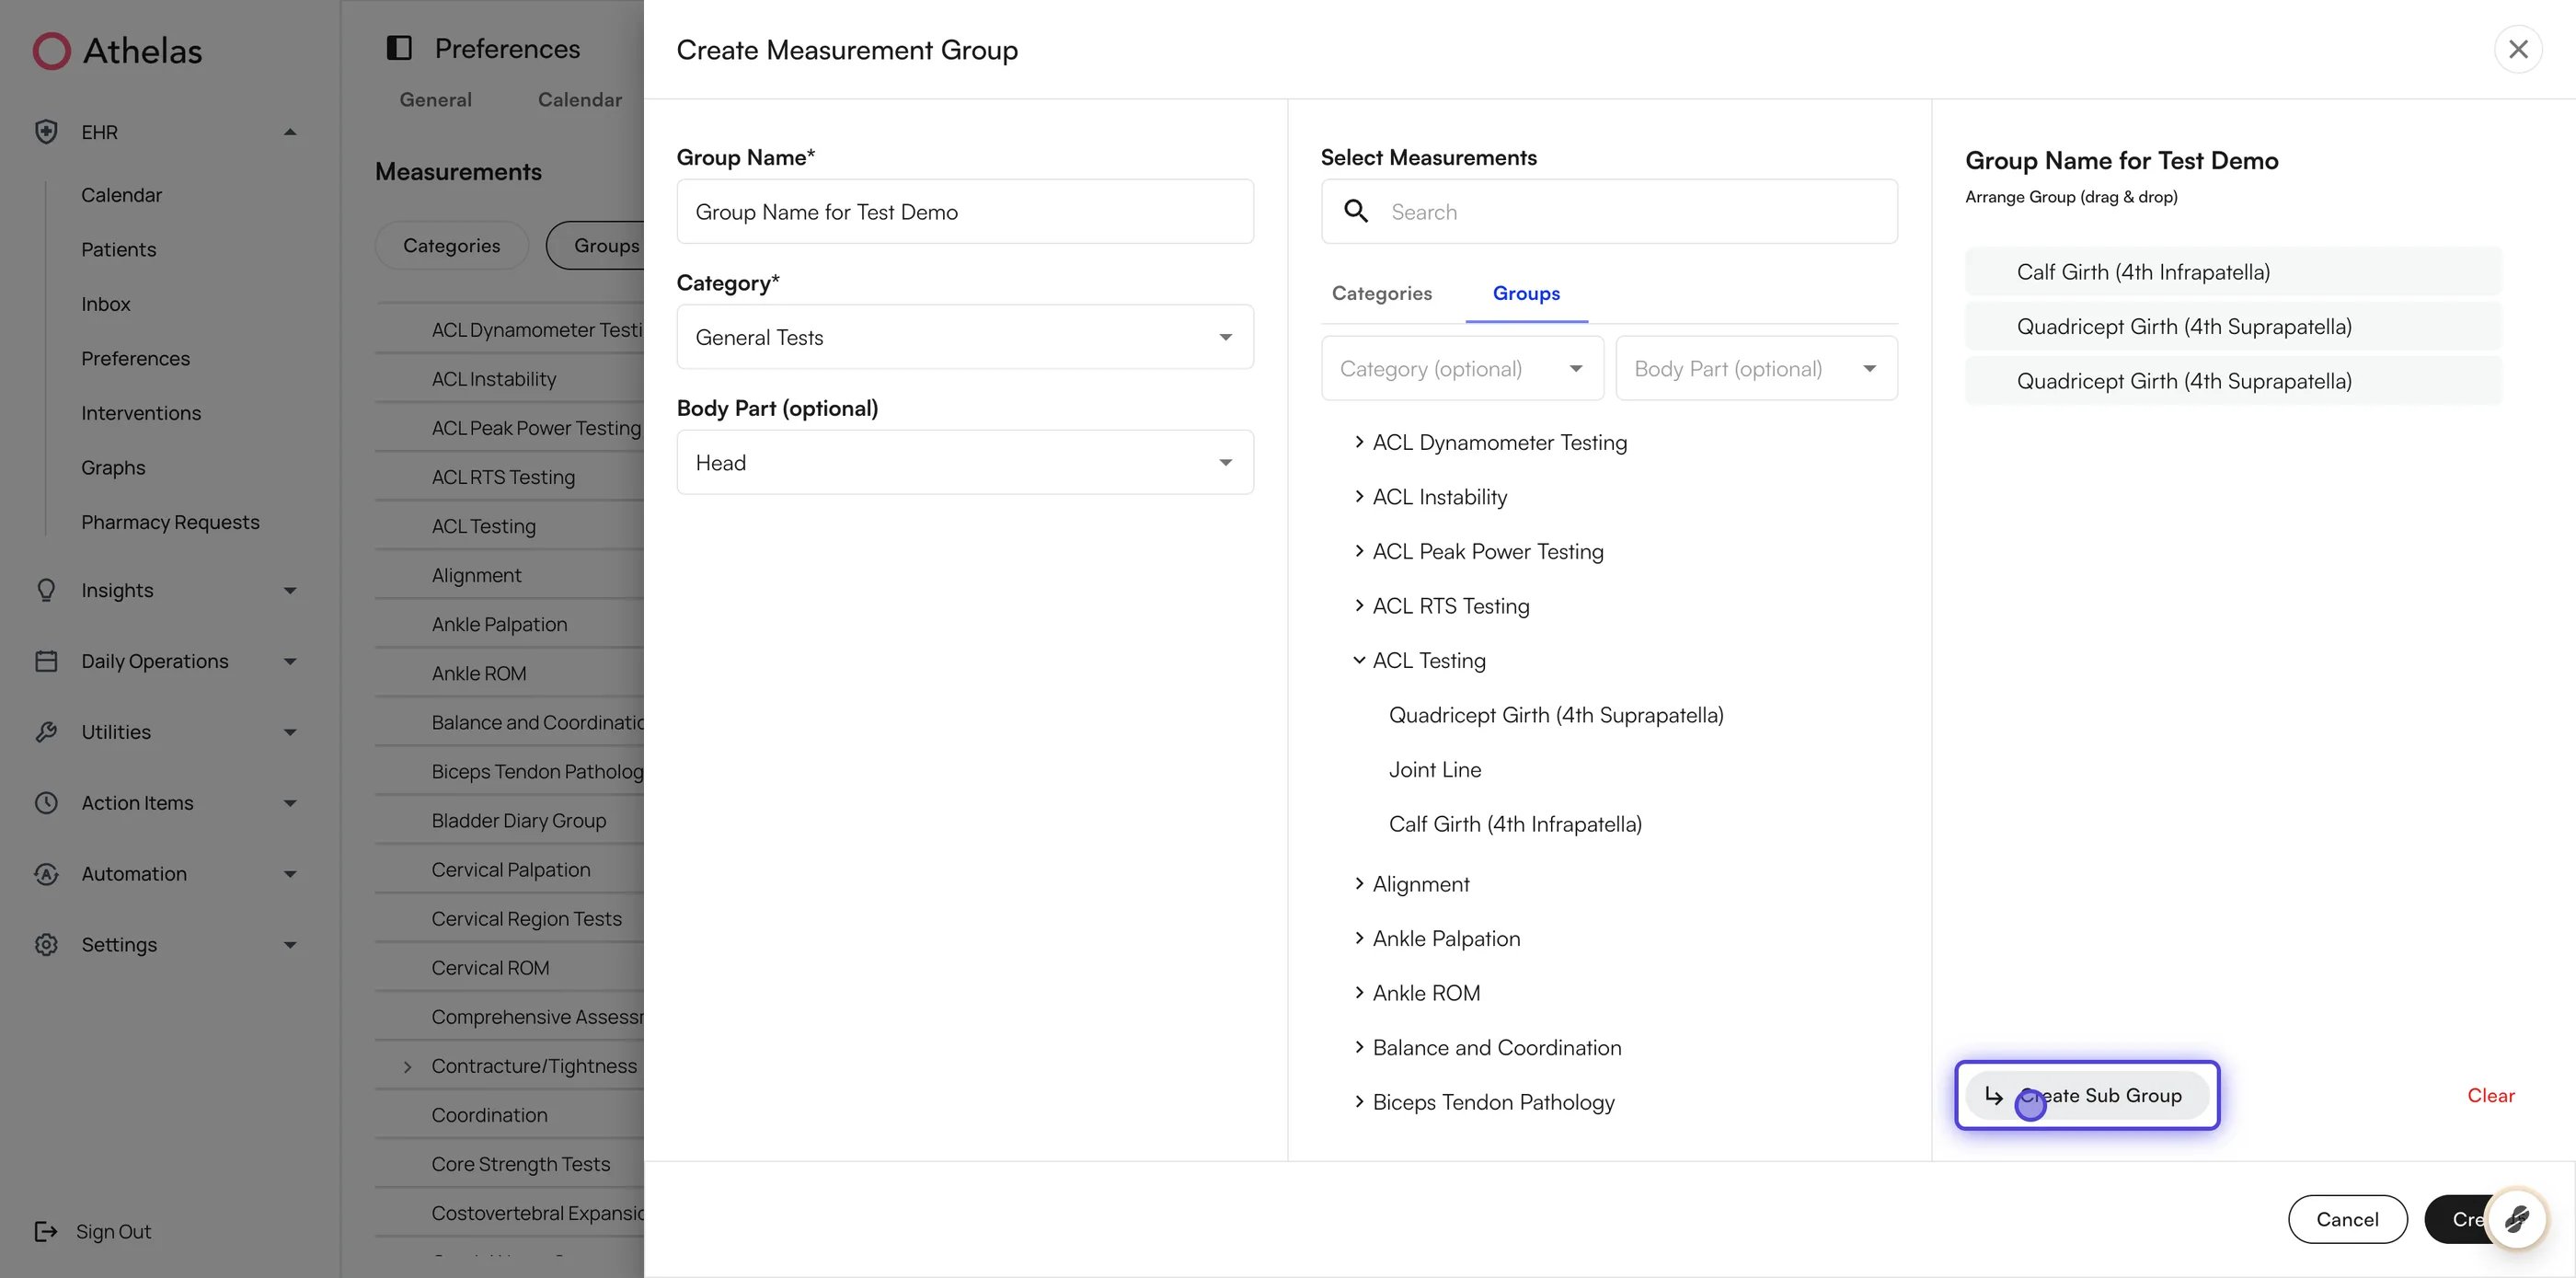
- Optionally click Create Sub Group to nest a second level, then give the subgroup a name.
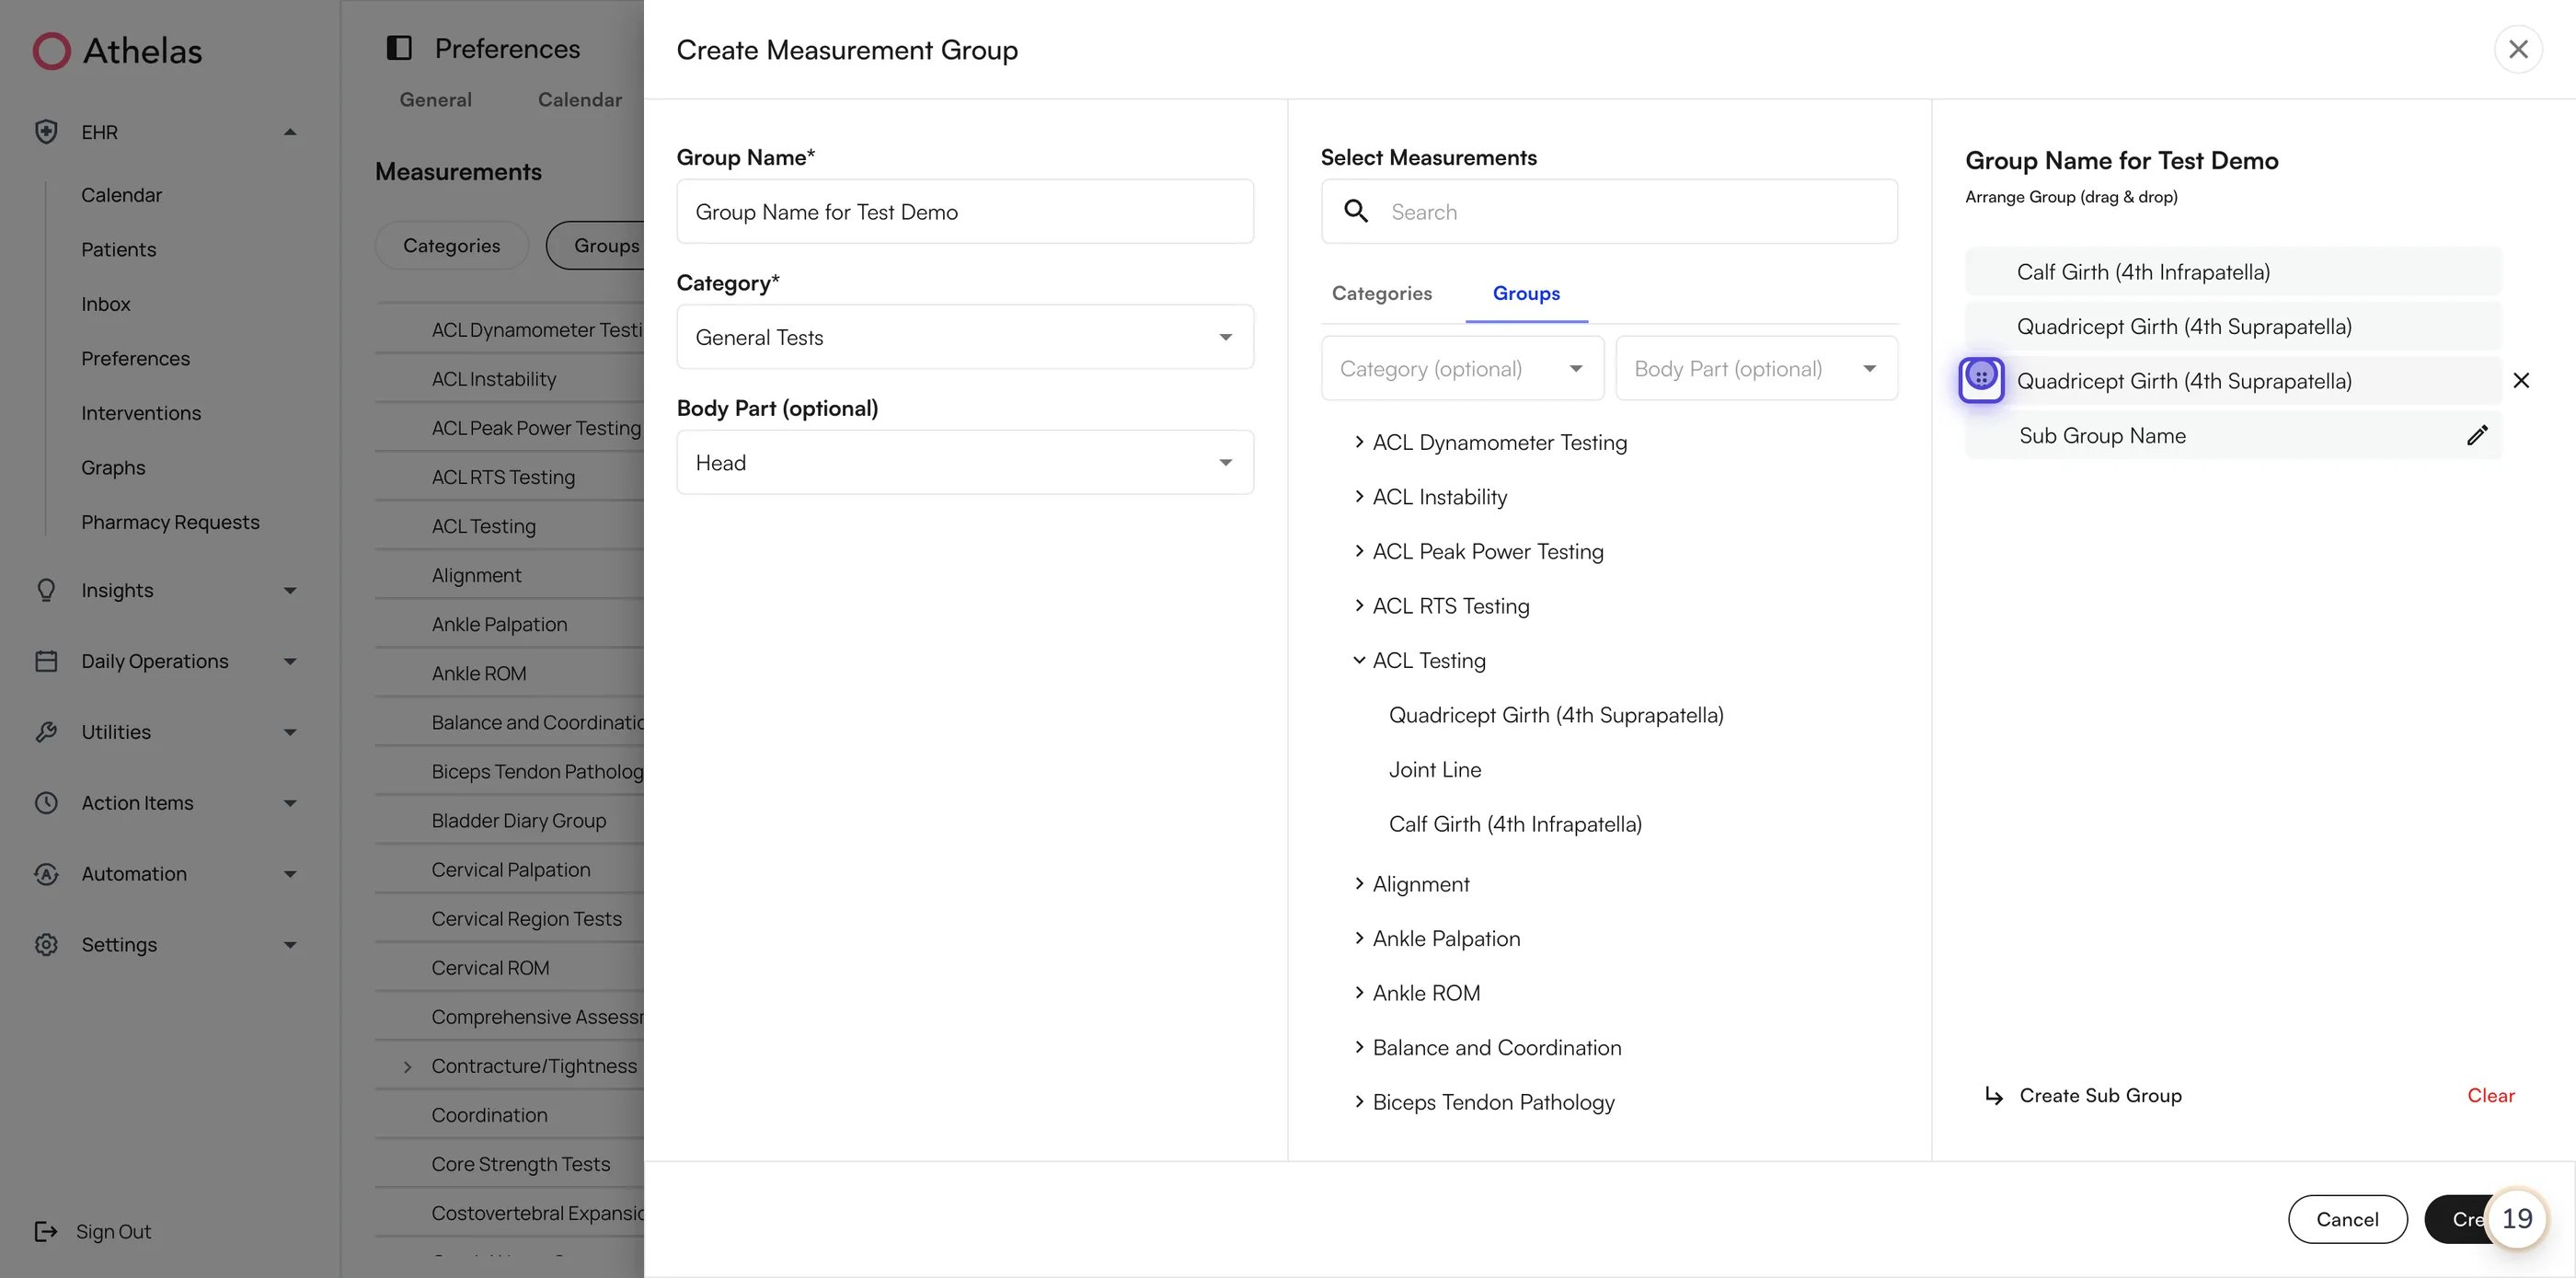
- Drag measurements into the subgroup to move them there. The right panel is arranged by drag and drop, so the order you set is the order providers see.
- Click Create.
Things to know
- Standard measurements are read-only. Build a custom measurement when you need different fields.
- Chart notes store a snapshot of the measurements and templates selected at the time, so an existing note keeps the values and layout it was documented with.
- Edits to a custom measurement are version-controlled. Older notes keep the version they were documented with, and new notes pick up the latest one.
- New appointment cases use the current Measurements section. Cases that were already open keep the section they started with, so progress notes in flight are not disrupted. Super users at your site control which appointment types use the current measurement templates.
FAQ
Can I edit a standard measurement?
Can I edit a standard measurement?
No. Standard measurements are read-only so that a measurement means the same thing across every site on Air.If you need different fields, a different category, or a table layout, create a custom measurement in Preferences → Measurements instead.
What happens to my older chart notes when a measurement changes?
What happens to my older chart notes when a measurement changes?
Nothing. Each chart note stores a snapshot of the measurements and templates selected at the time of documentation, and edits are version-controlled.Notes documented before the change keep the earlier version. New notes use the latest one.
Why can't Air Scribe find a measurement I expected?
Why can't Air Scribe find a measurement I expected?
Air Scribe fills values into the measurements that are already on the note, and does not add measurement groups for you.Add the groups you plan to document with Add V2 Measurements first, then start the recording.
How deep can measurement groups nest?
How deep can measurement groups nest?
Two levels: a group and its subgroups. Use the Create Sub Group button in the group builder, then drag measurements into the subgroup to arrange them.
A measurement is missing from a follow-up note. Why?
A measurement is missing from a follow-up note. Why?
Check the appointment type first. Default measurements are attached per appointment type, and each clinical note type can be configured to carry a section over or leave it out — measurements are sometimes excluded from follow-up visits on purpose.You can always add what you need to an individual note with Add V2 Measurements.
Questions or issues? Reach out to your clinic administrator or support@getathelas.com. The latest version of this guide is maintained at the Measurements User Guide.