Getting Started as a Staff Member
Welcome to the Athelas Healthcare platform! We're so glad you've trusted us to handle your day-to-day and we're excited to get you up and going. In this document, you'll find everything you need to know as a healthcare provider to get going.
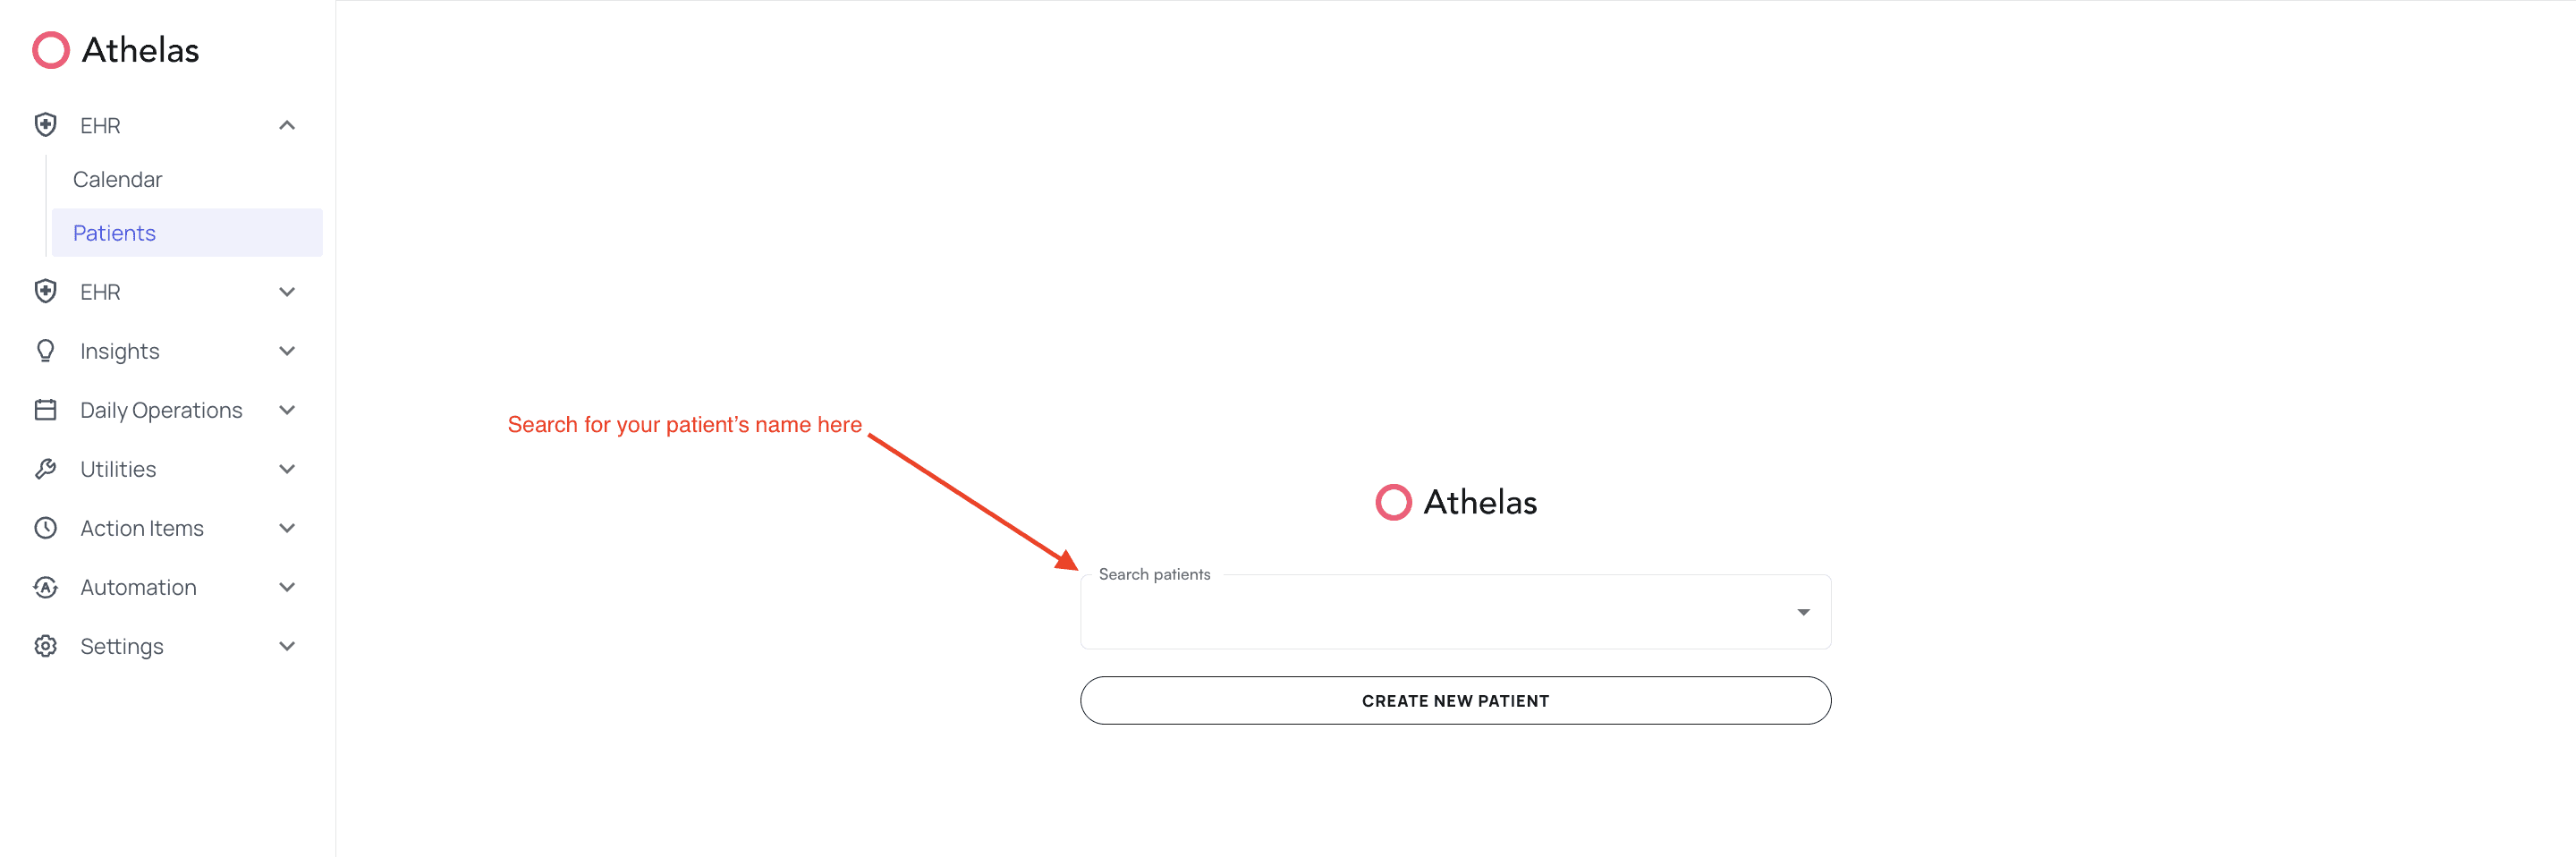
Adding a new patient
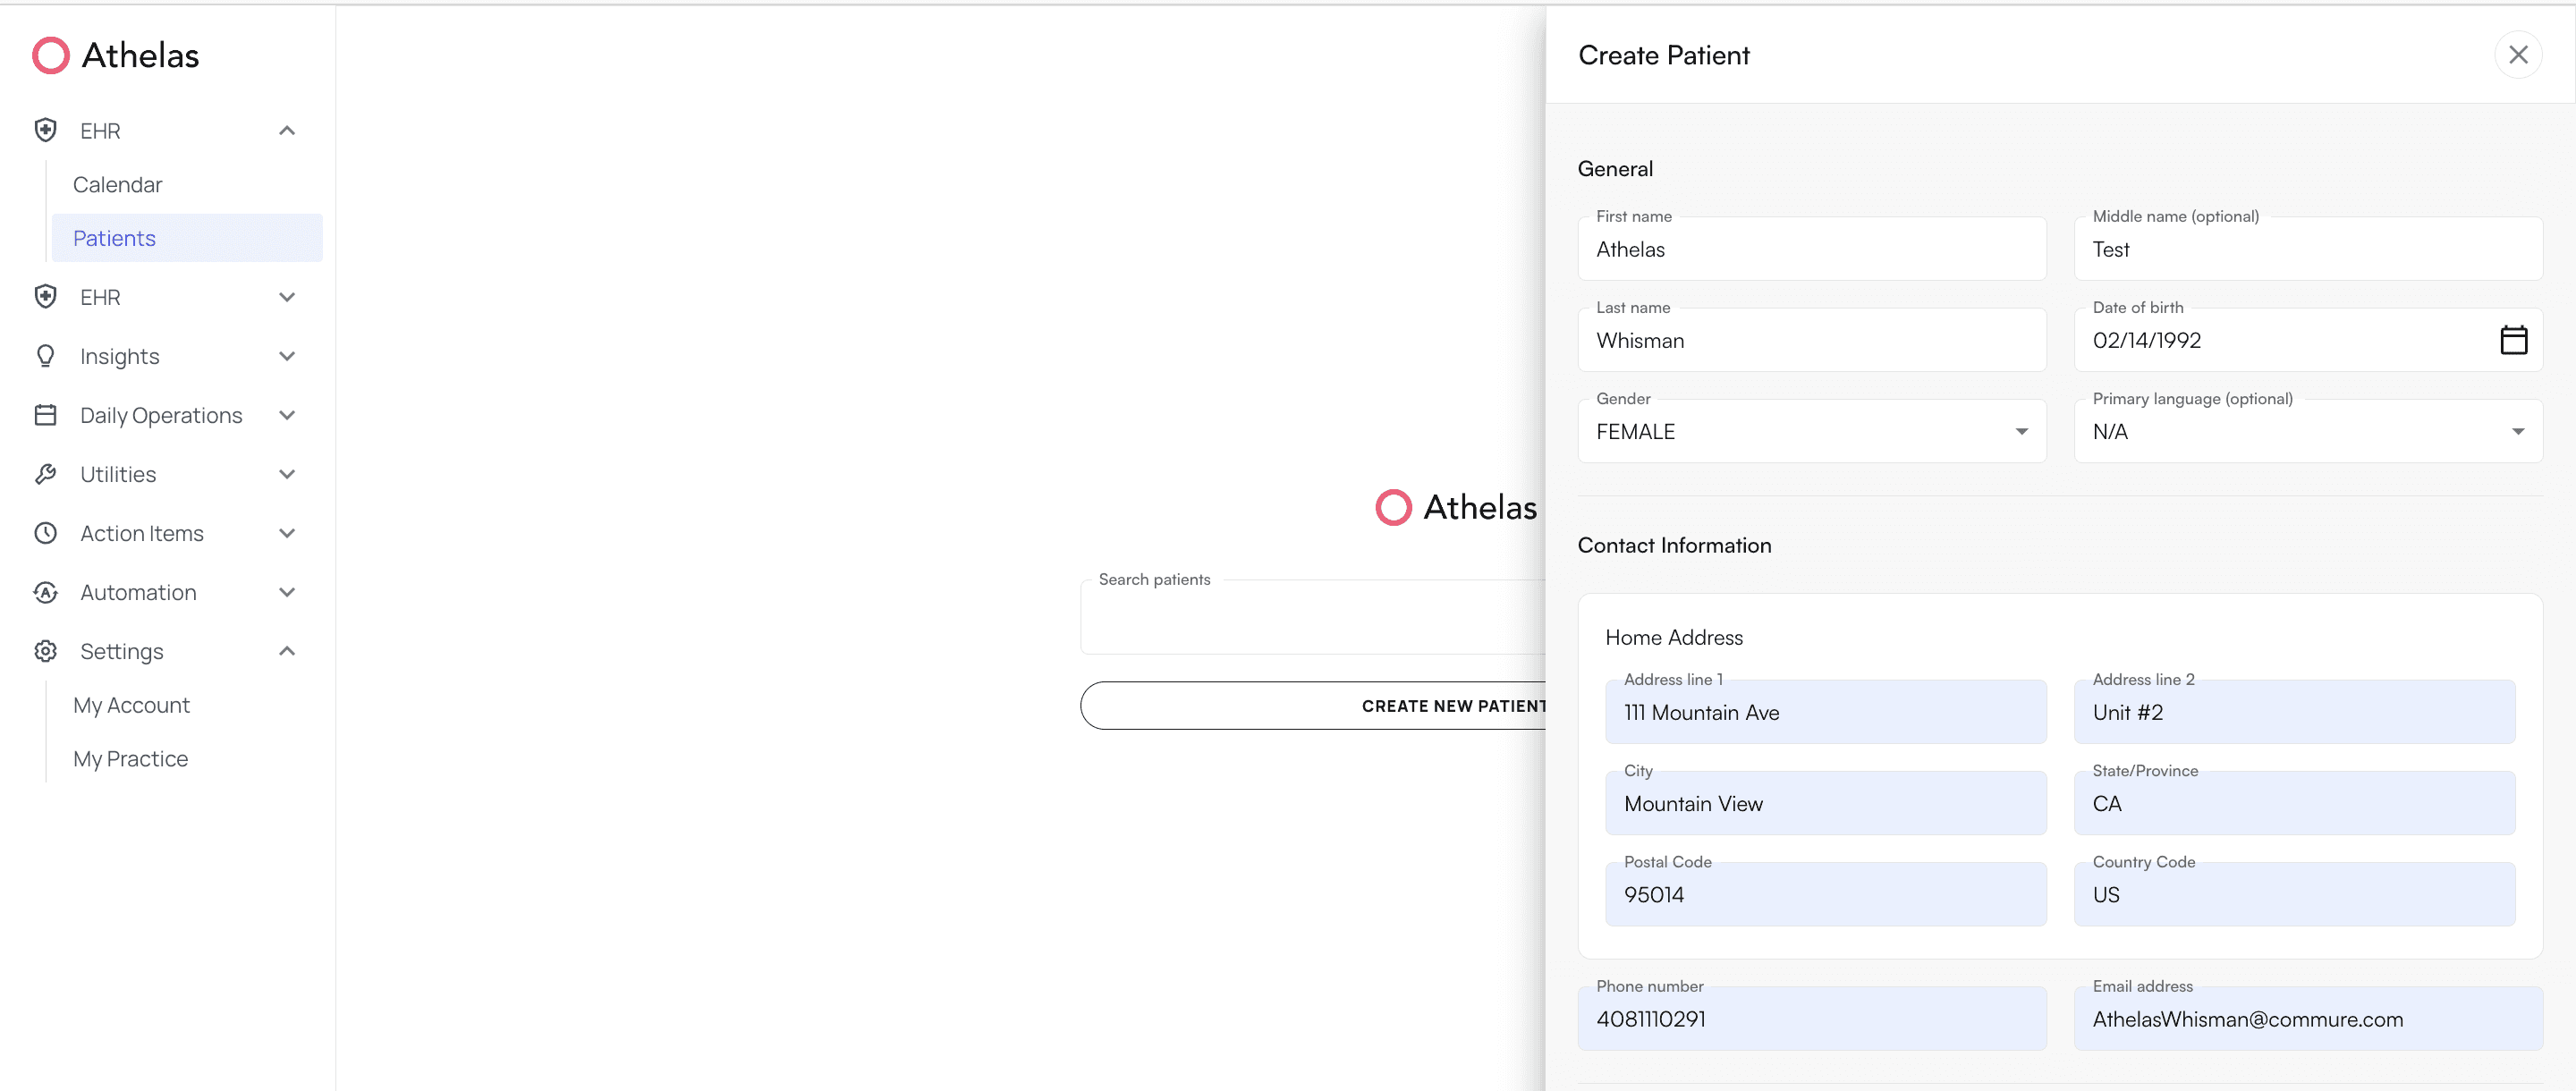
A side panel will open up, here you will be able to enter in the general patient demographics information. Please fill in the following required fields:
Full Patient Name
First and Last Name
Middle Name (If Applicable)
Gender
Date of Birth
Contact Information
Home Address (Address Line(s), City, State, Post Code and Country Code)
Mailing Address (If Different from Home Address)
Phone Number
Email Address
Insurance Information
Adding Insurance
If you’d like to add insurance, select an insurance company from the drop down menu. Then input the following information:
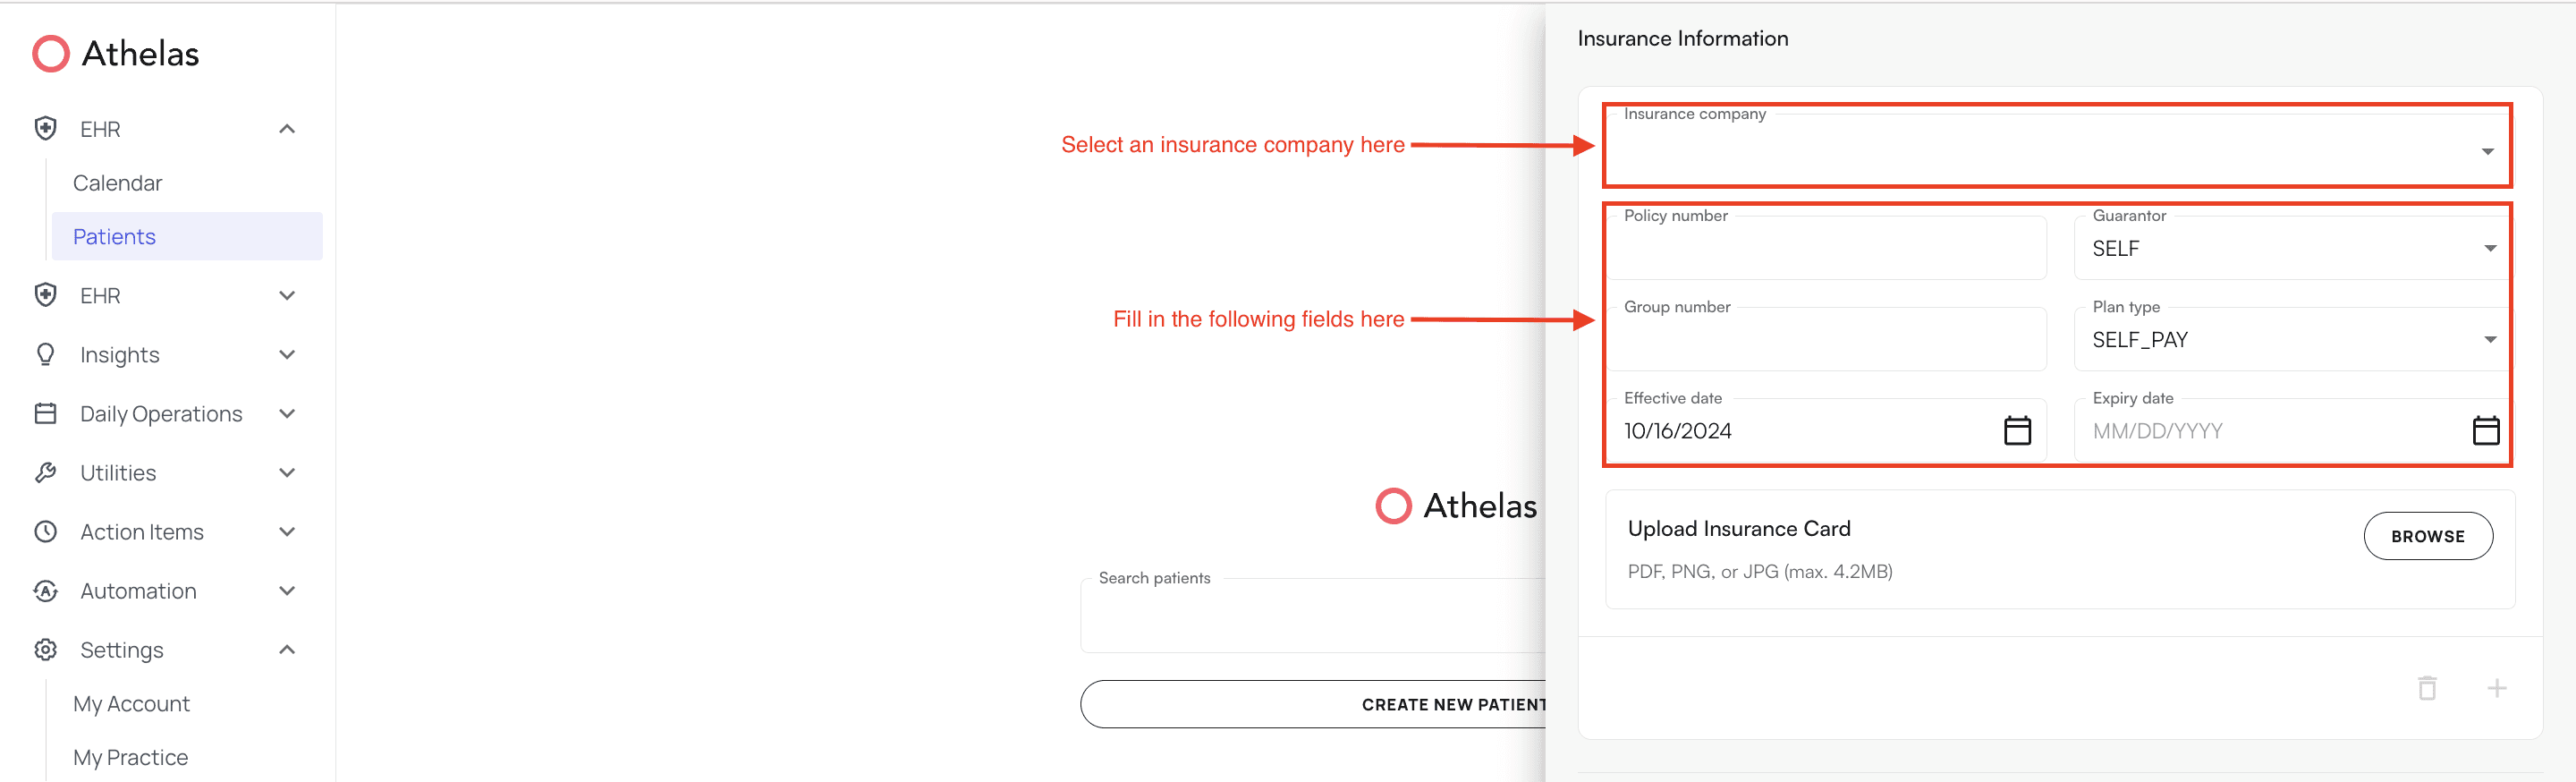
Policy Number
Group Number
Effective and expiration dates
Guarantor (relationship to policy holder)
If the relationship to policy holder is SELF, leave as is
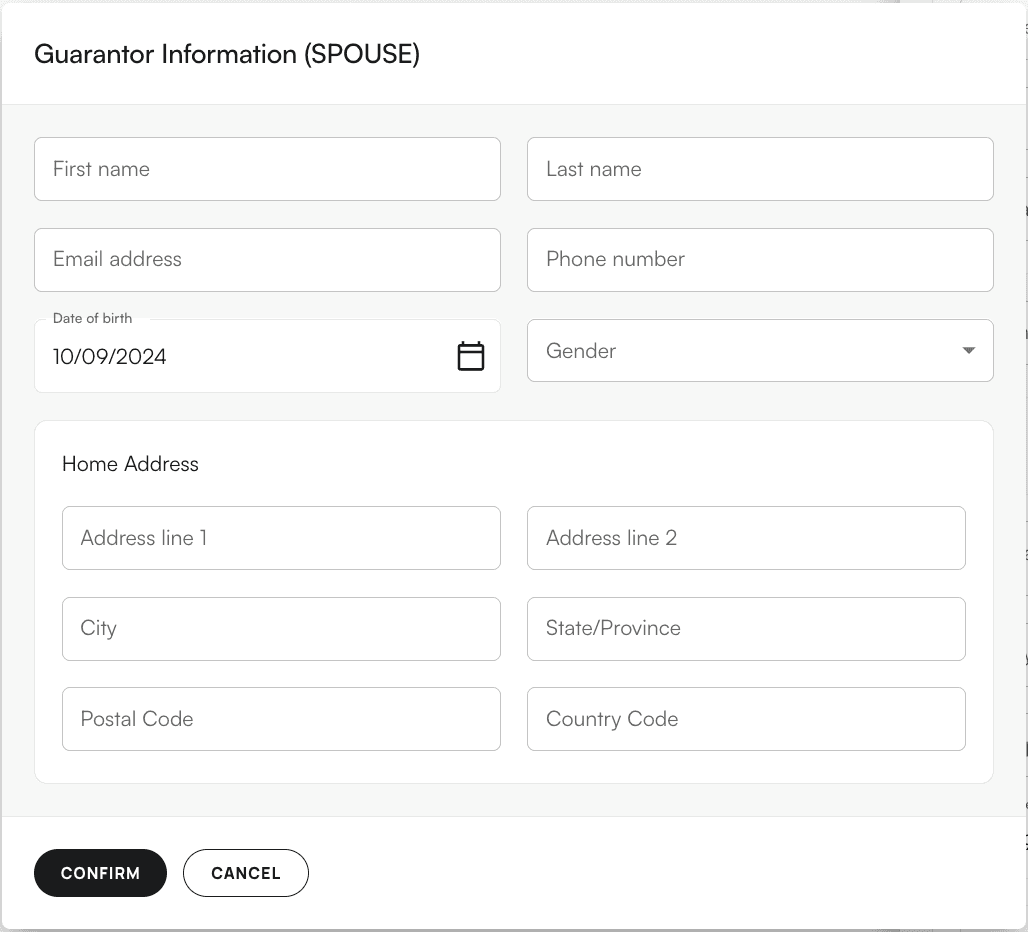
If the relationship to policy holder is not SELF, click on the guarantor box. You will be prompted to select the relationship and input the policy holder’s information. Please fill out all of the following information:
First Name
Last Name
Email Address
Phone Number
Date of Birth
Gender
Home Address (Address Line(s), City, State, Postal and Country Code)
To add additional insurances, click on the "+".
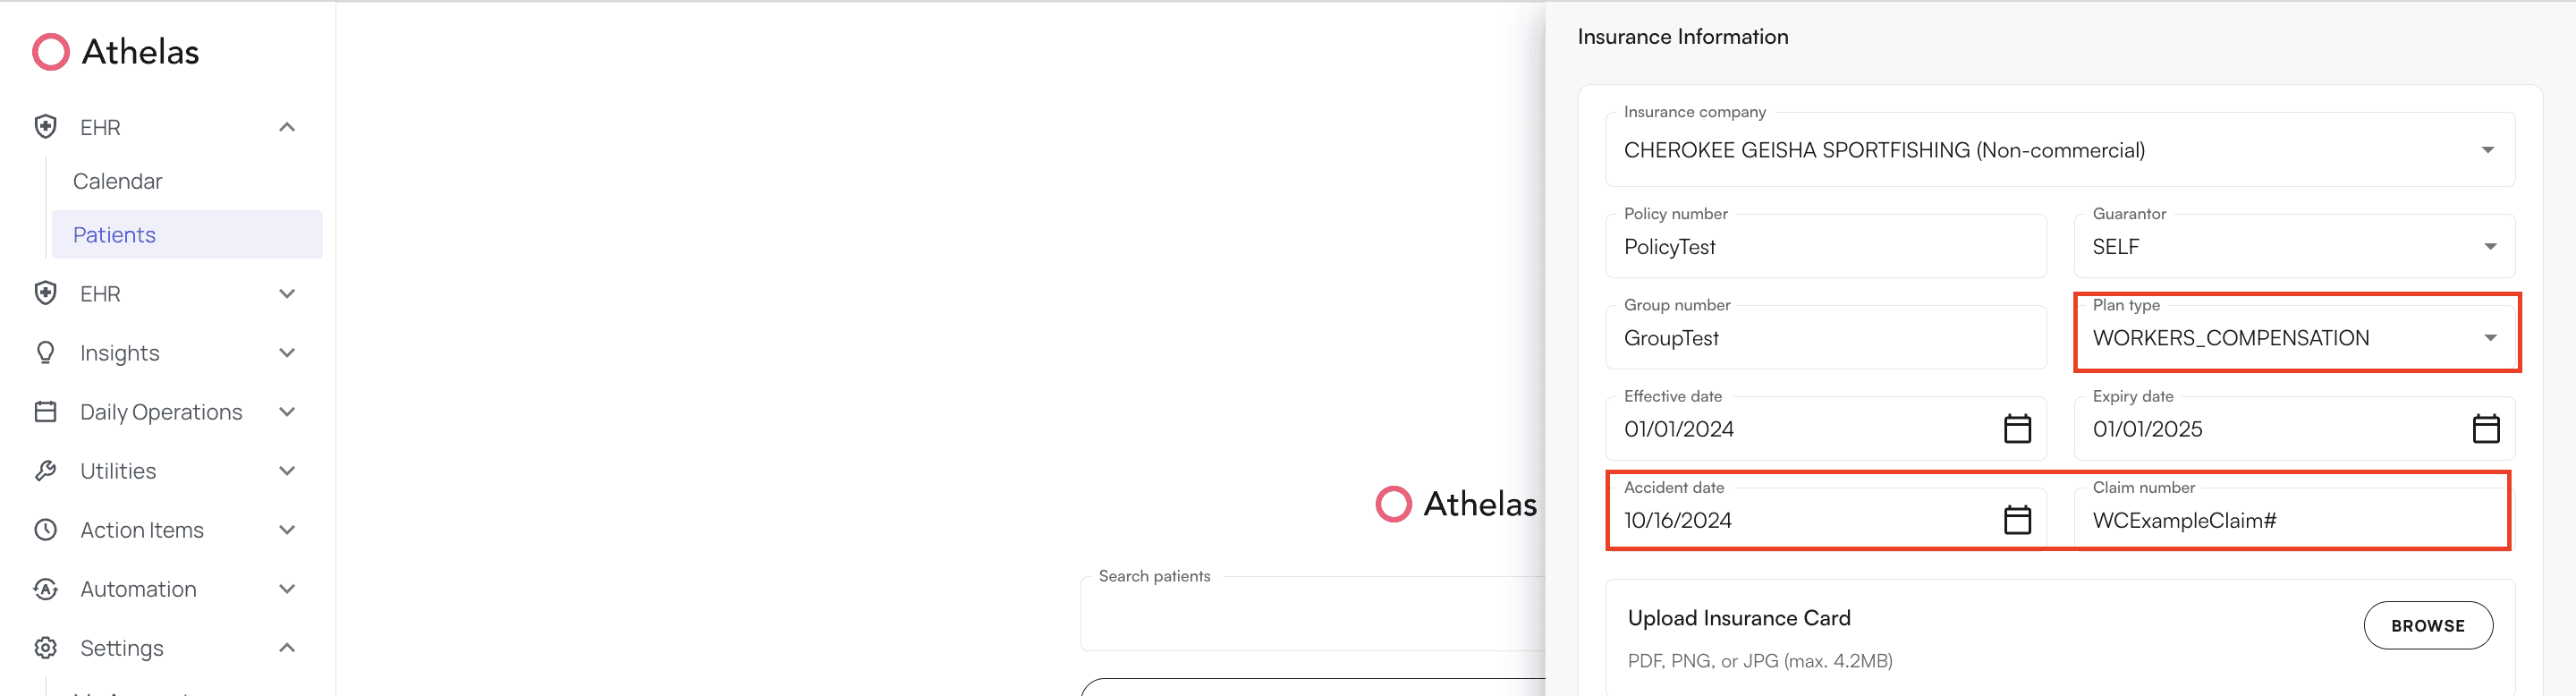
Adding Worker’s Compensation Information
When a worker’s compensation insurance company is added, the payer type will automatically change to Worker’s Compensation. However, you are also able to override the payer type to Worker’s compensation.
The additional fields:
Accident Date
Claim Number
Will also populate when the worker’s compensation insurance company is selected. Please fill out the fields with your patient’s information.
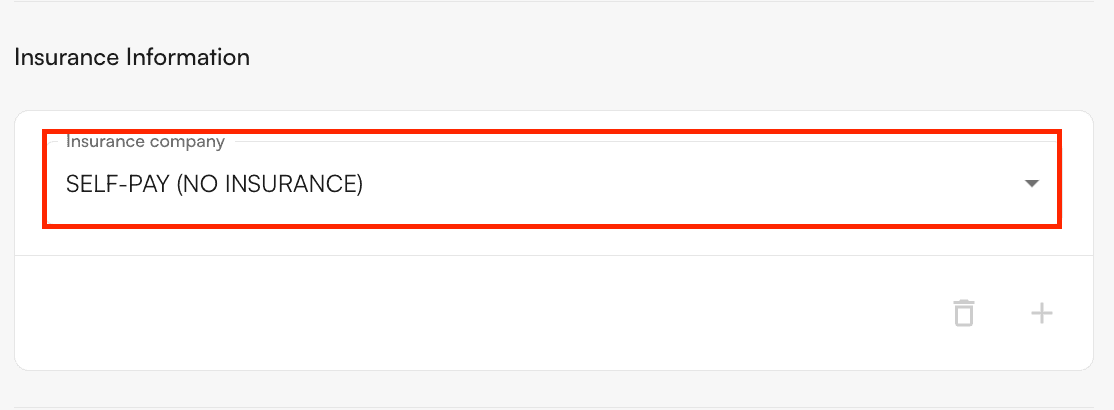
Adding Self-Pay
To add Self-Pay as an insurance, type in “Self Pay” into the Insurance Company field. Upon selection, the insurance details will disappear and leave only “Self-Pay (No Insurance)”.
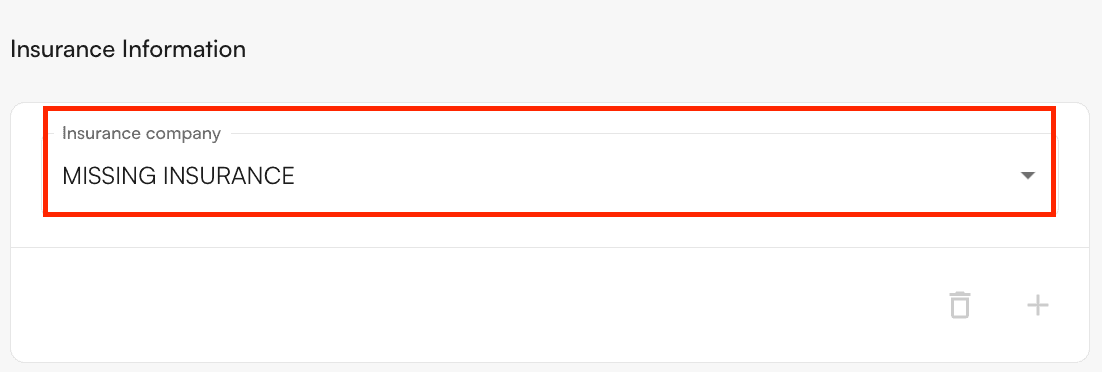
What to do when you don’t have the patient’s insurance information
If you are missing the patient’s insurance information, type in “Missing Insurance” in the Insurance Company field. Upon selection, the insurance details will disappear and leave only “Missing Insurance”.
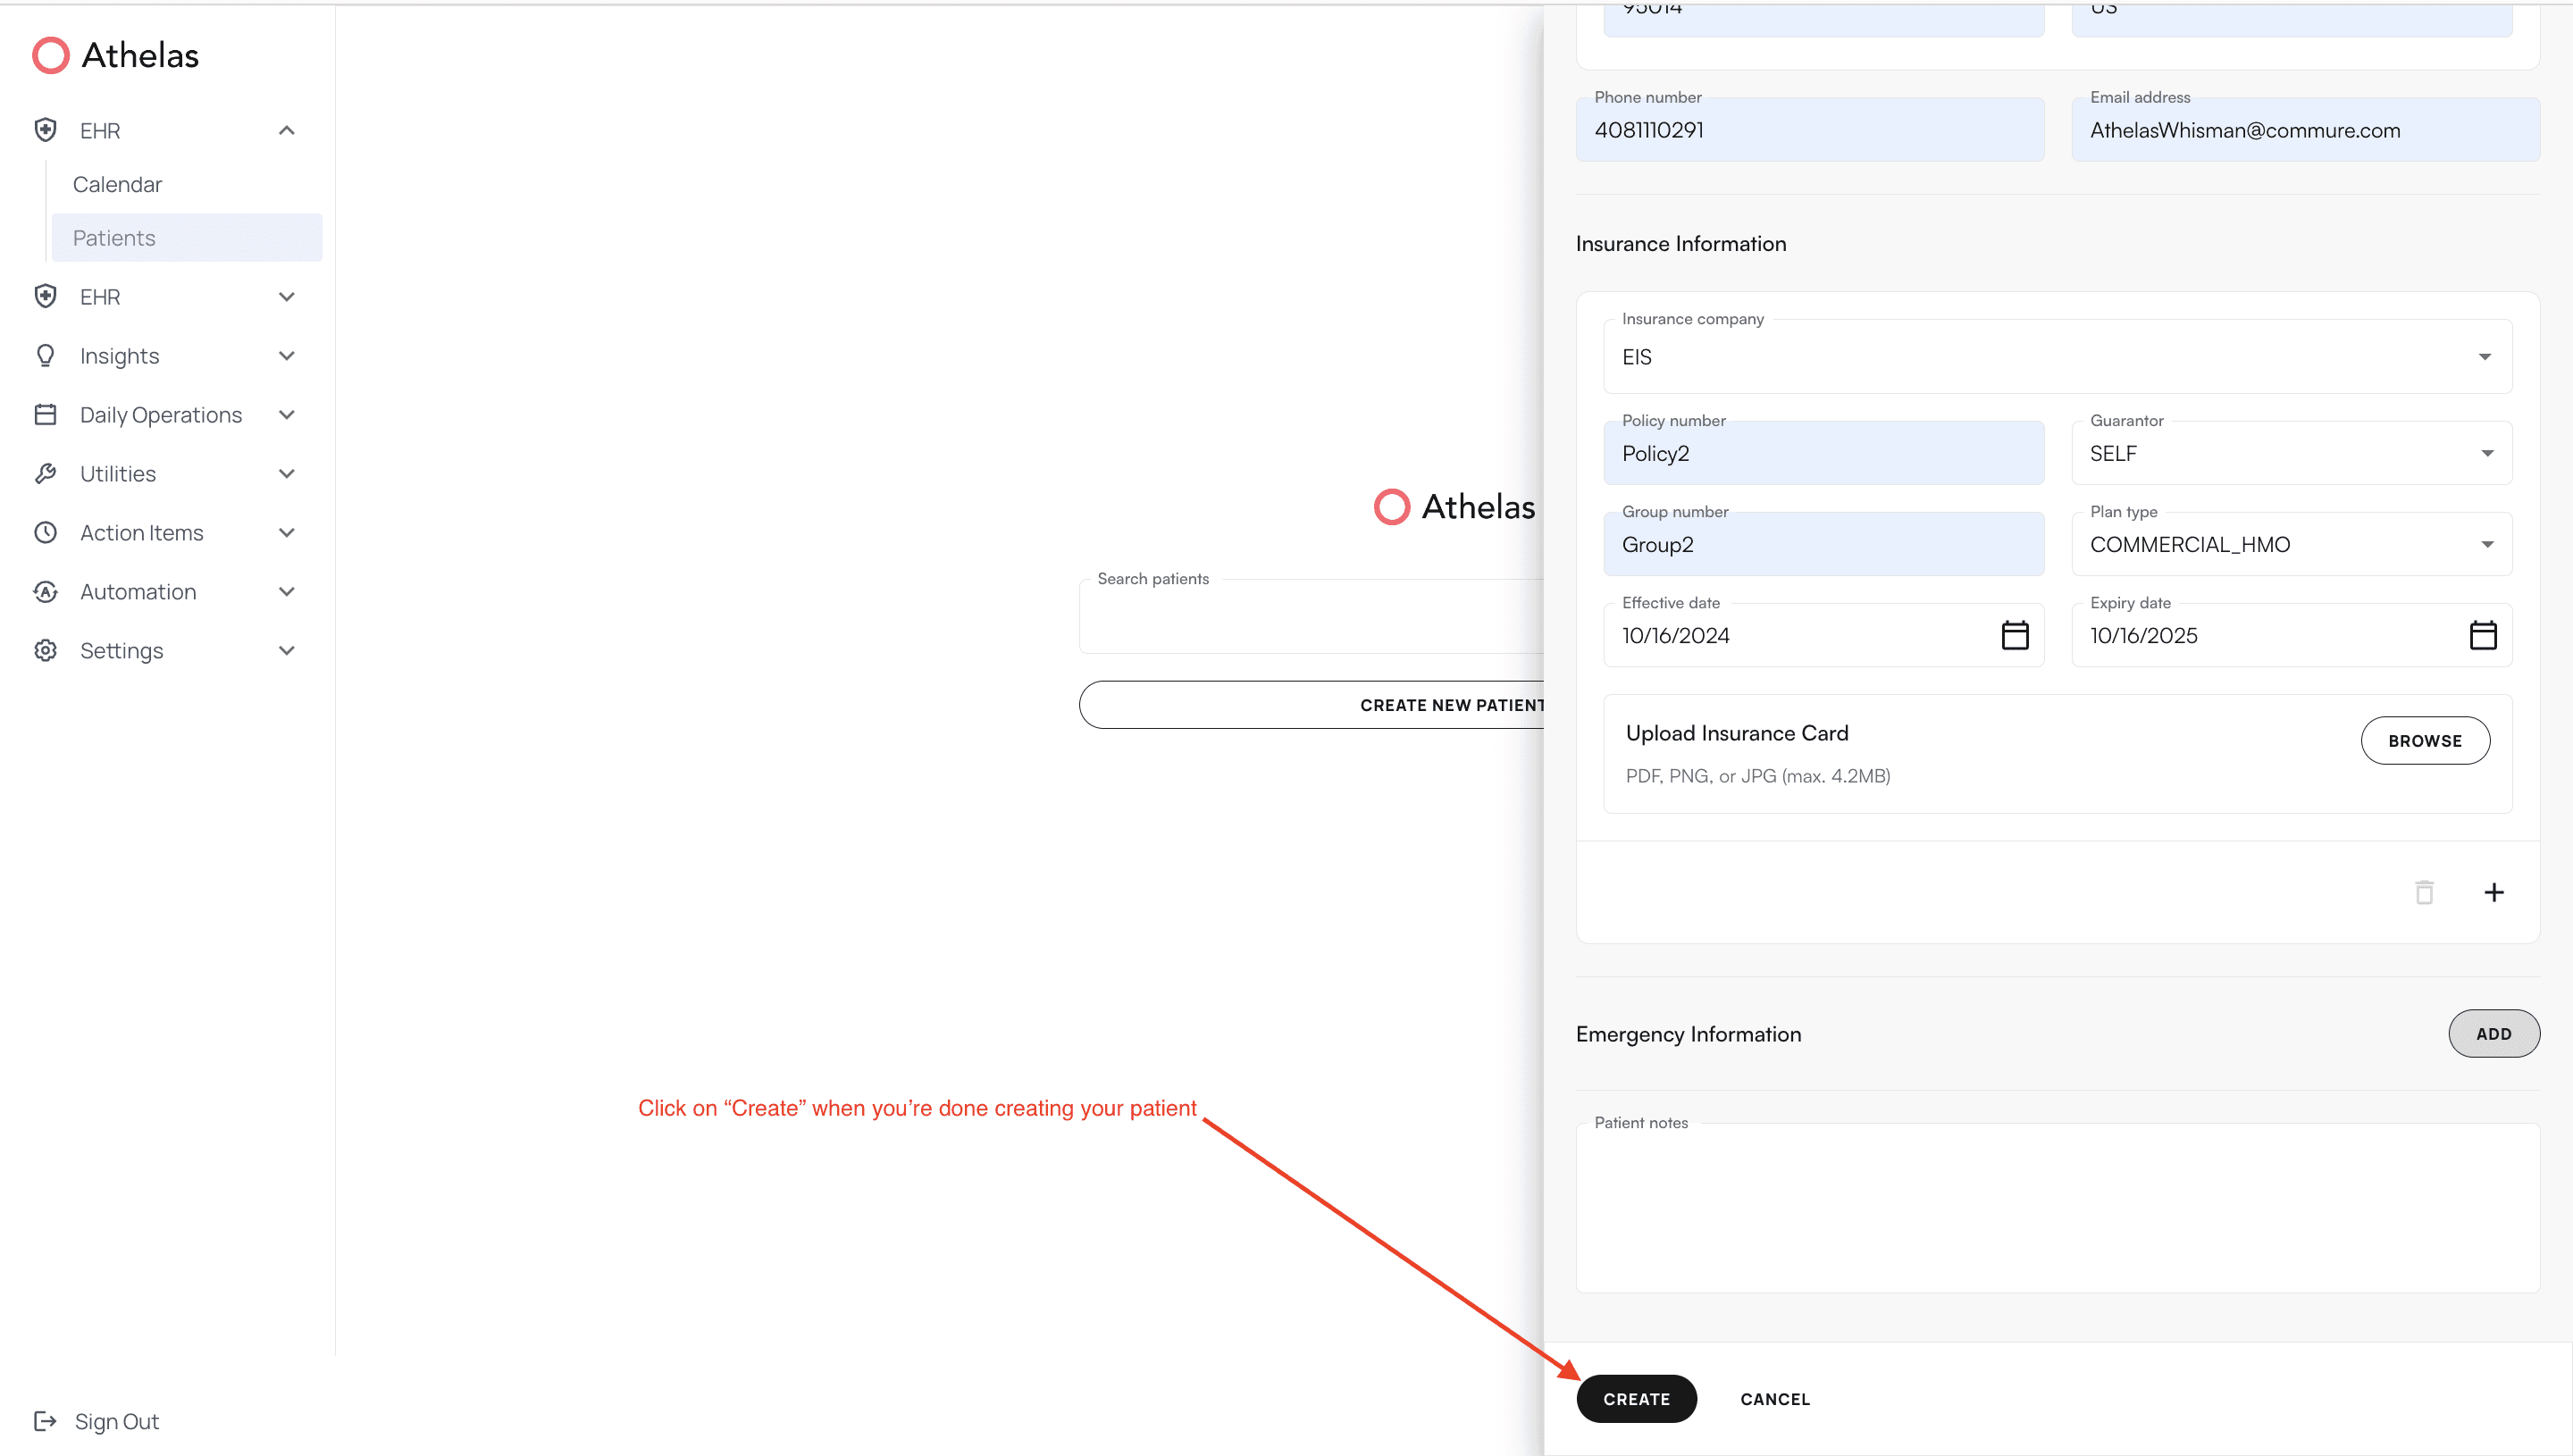
Once you’ve entered in all the required and desired fields, click “Create” at the very bottom
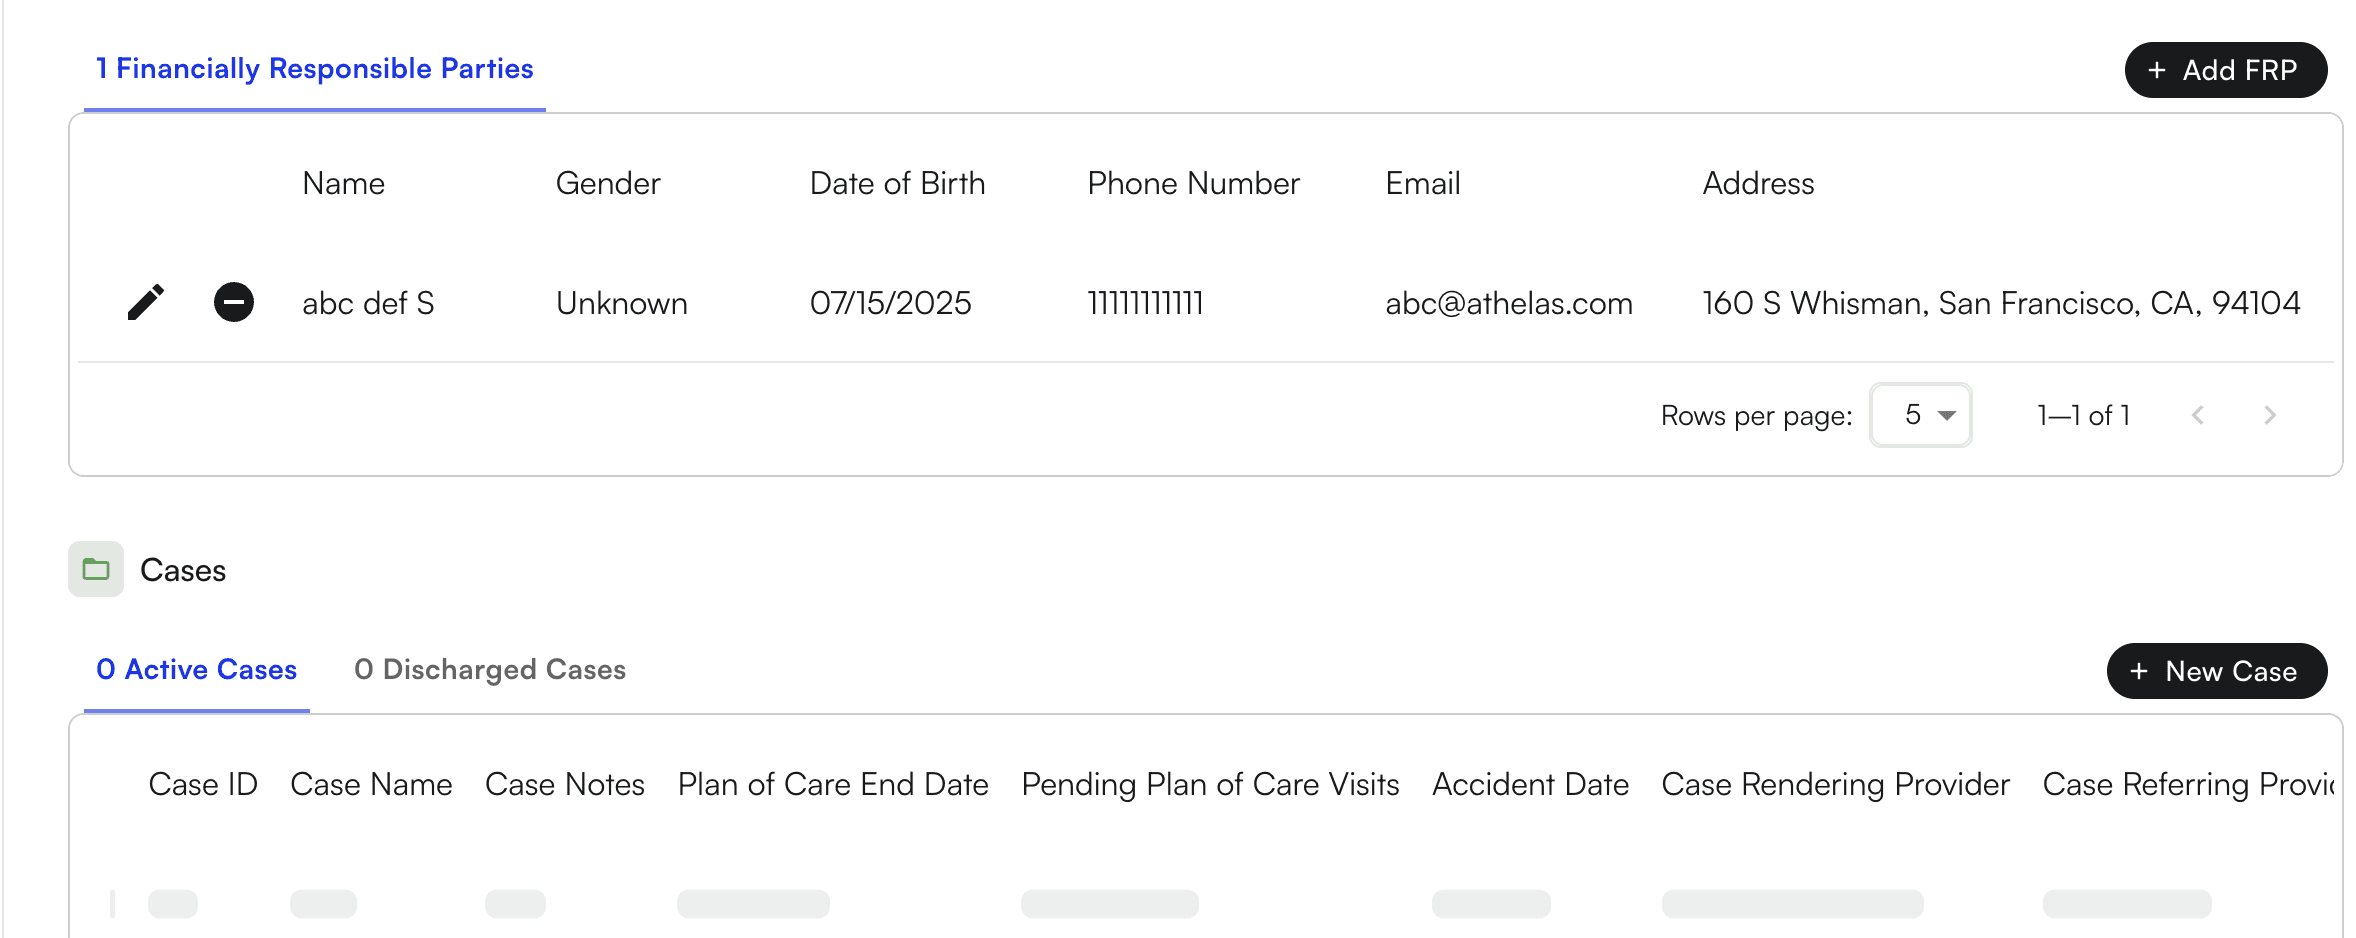
To add prior authorization(s), insurance priority, case(s) and referring provider(s) please search for your patient and enter their patient demographics.
You are now in the patient’s demographics. Click on “Create” under Cases
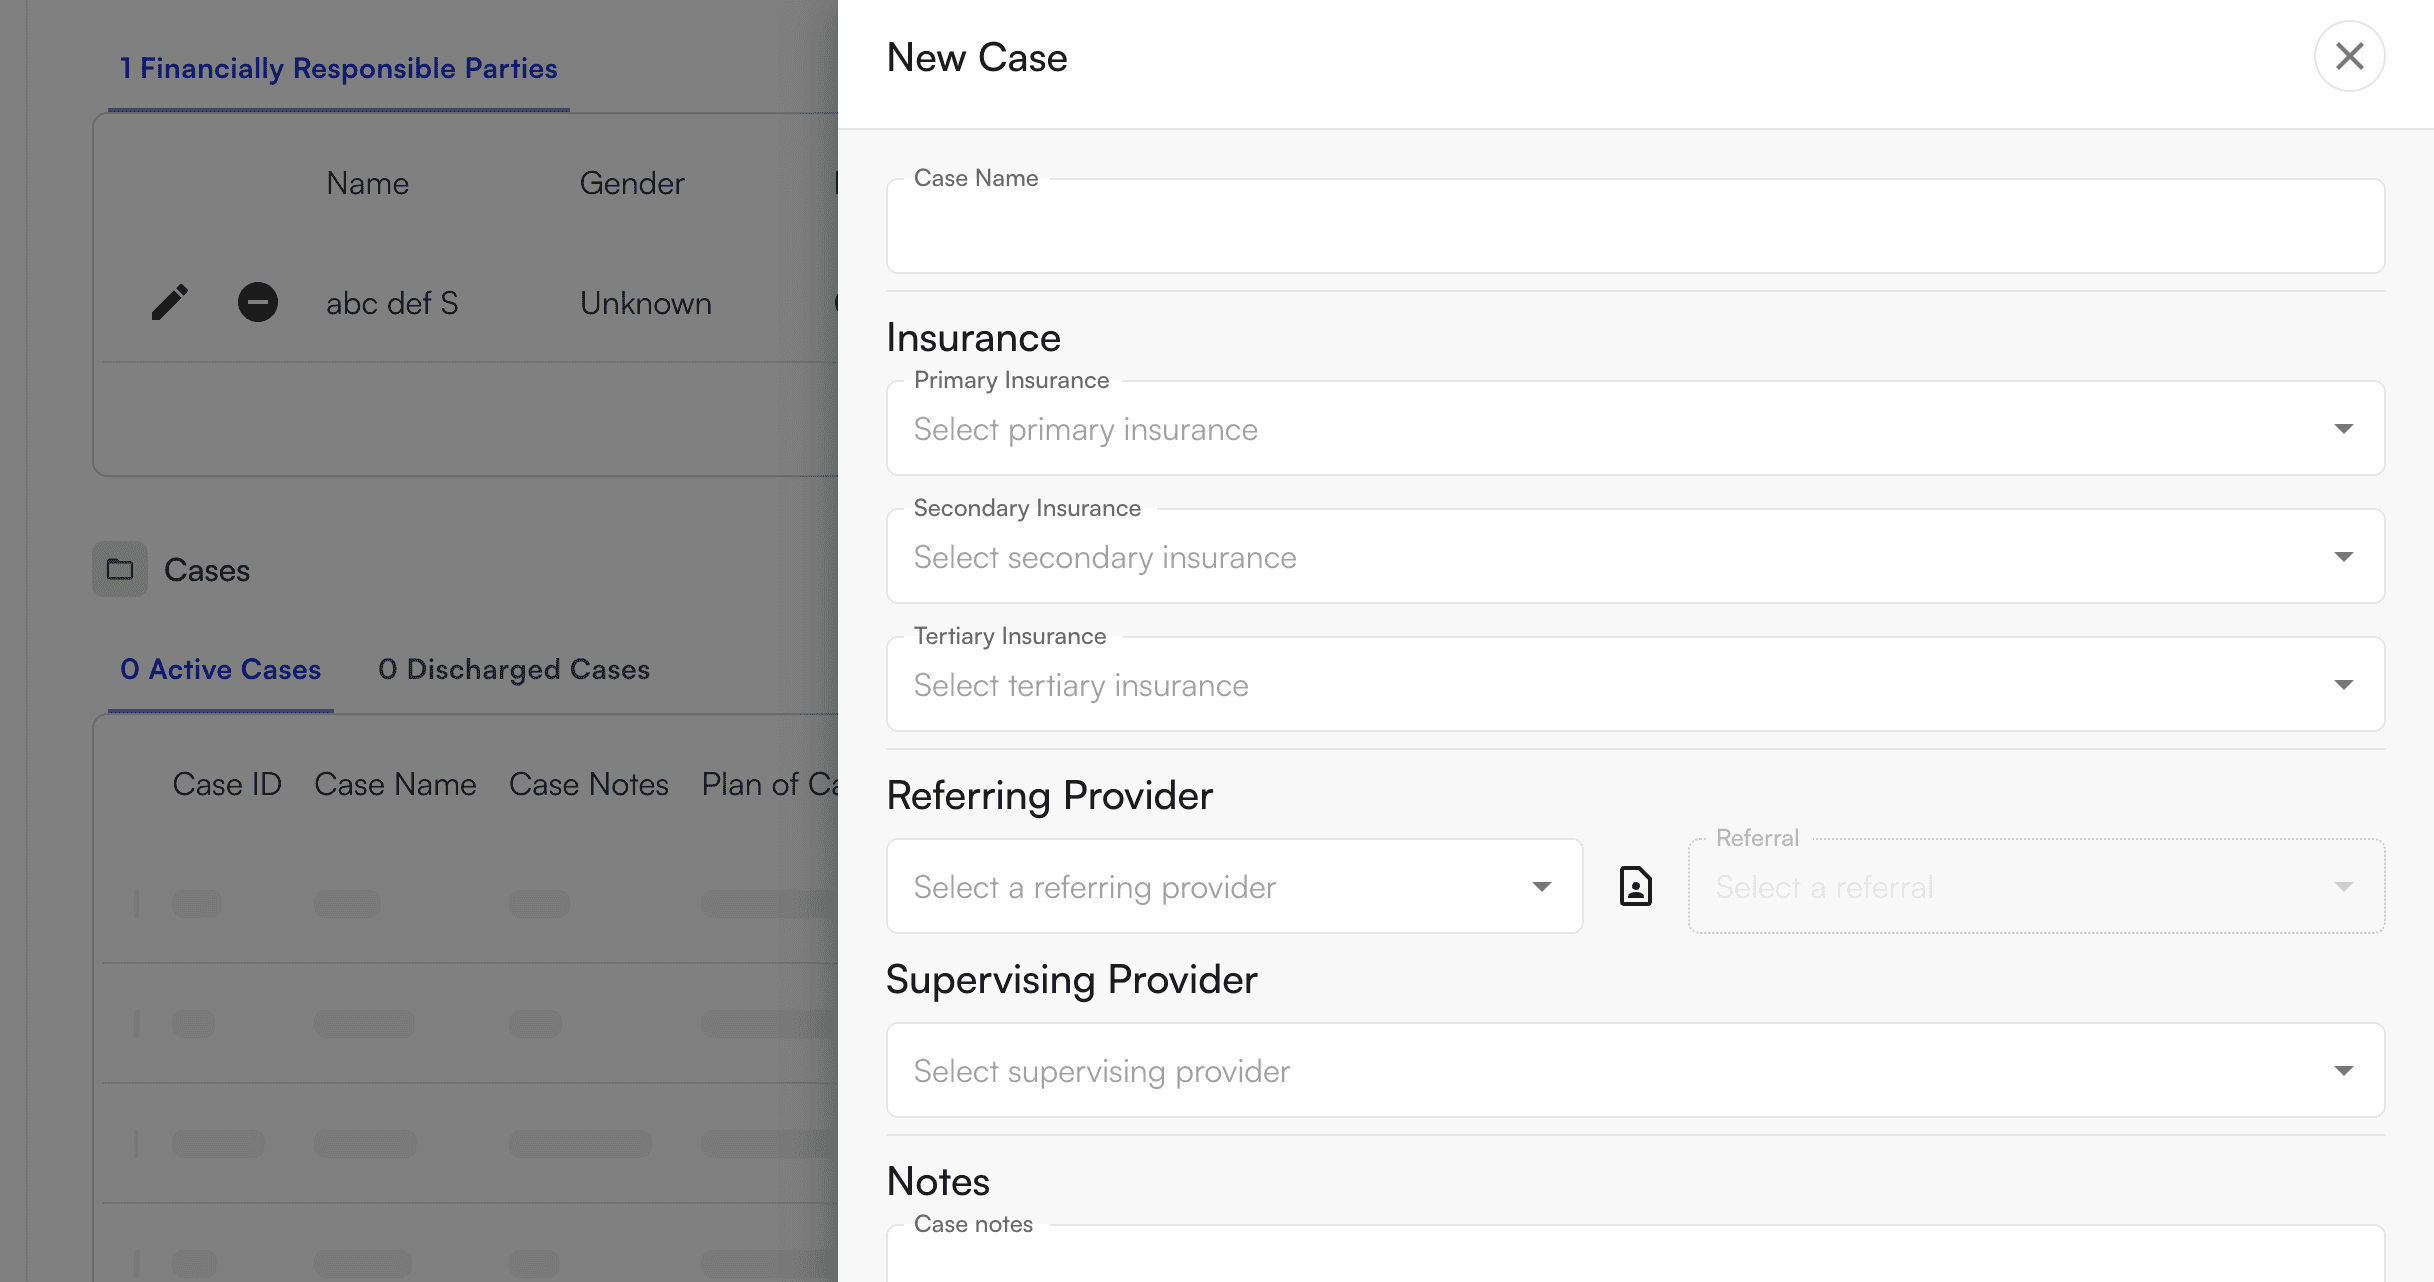
Here you can select insurance priority and find the following fields:
Case Name
Referring Provider
Case Notes
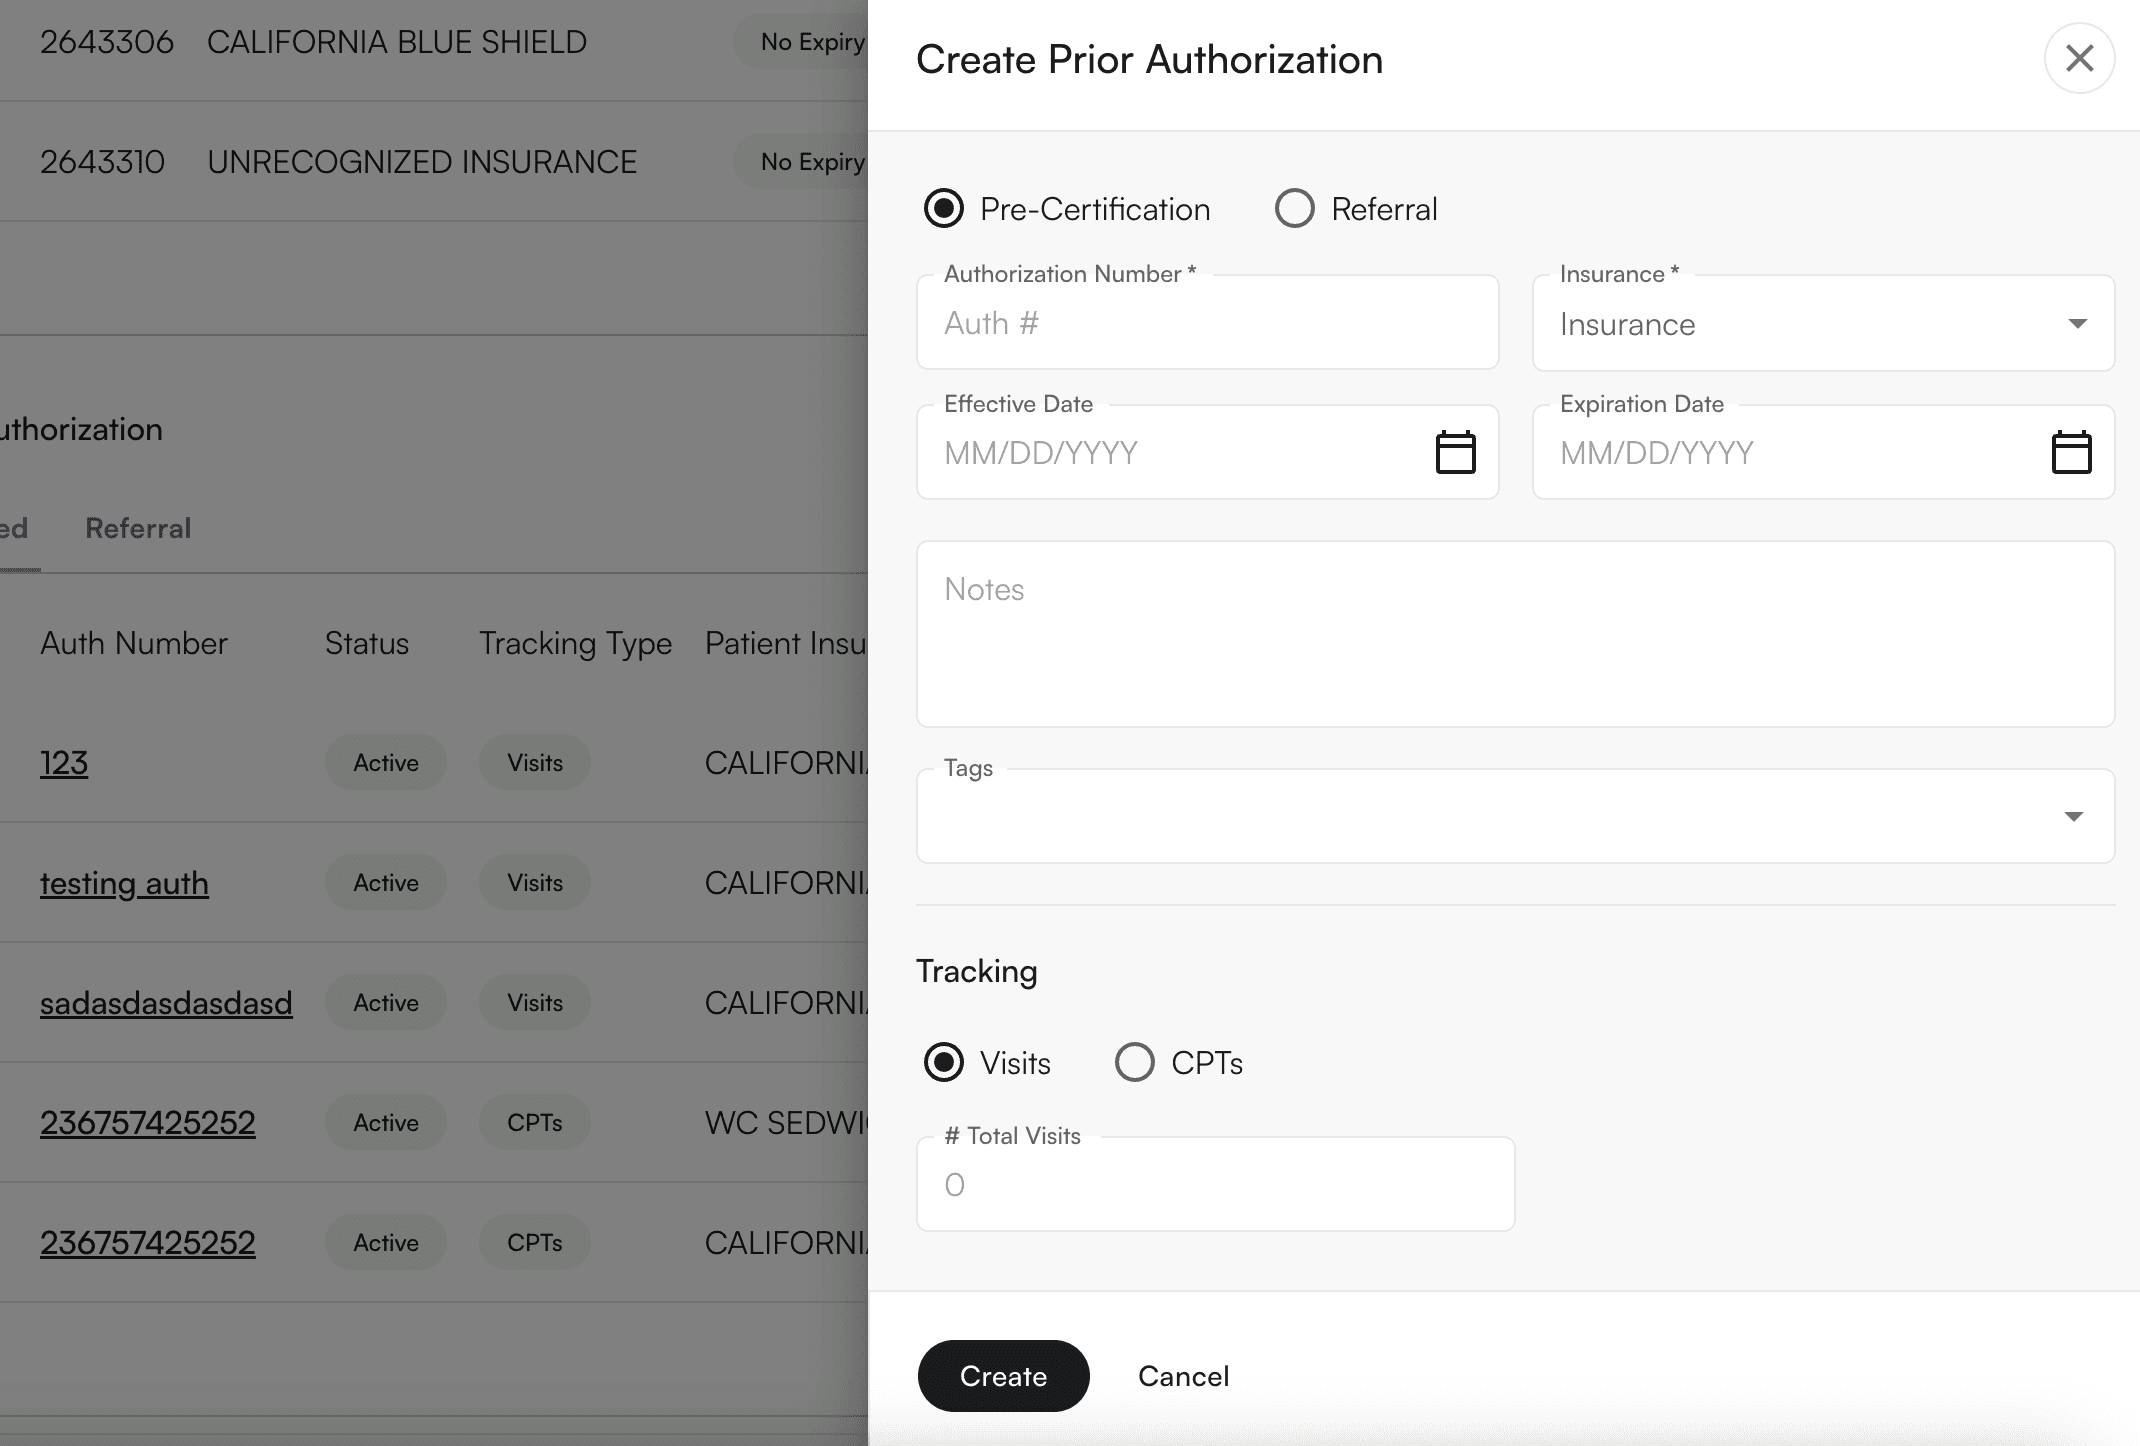
To add Prior Authorization, scroll down and click “+ New Prior Auth” under the Prior Authorization section.
When you click “+ New Prior Auth”, a small window will open up in the middle of your screen. Here you can enter the following fields:
Auth Number
Total Number of Visits
Effective Date
Expiration Date
Insurance this Prior Auth is tied to
Click “Create” once you have entered all the desired information.
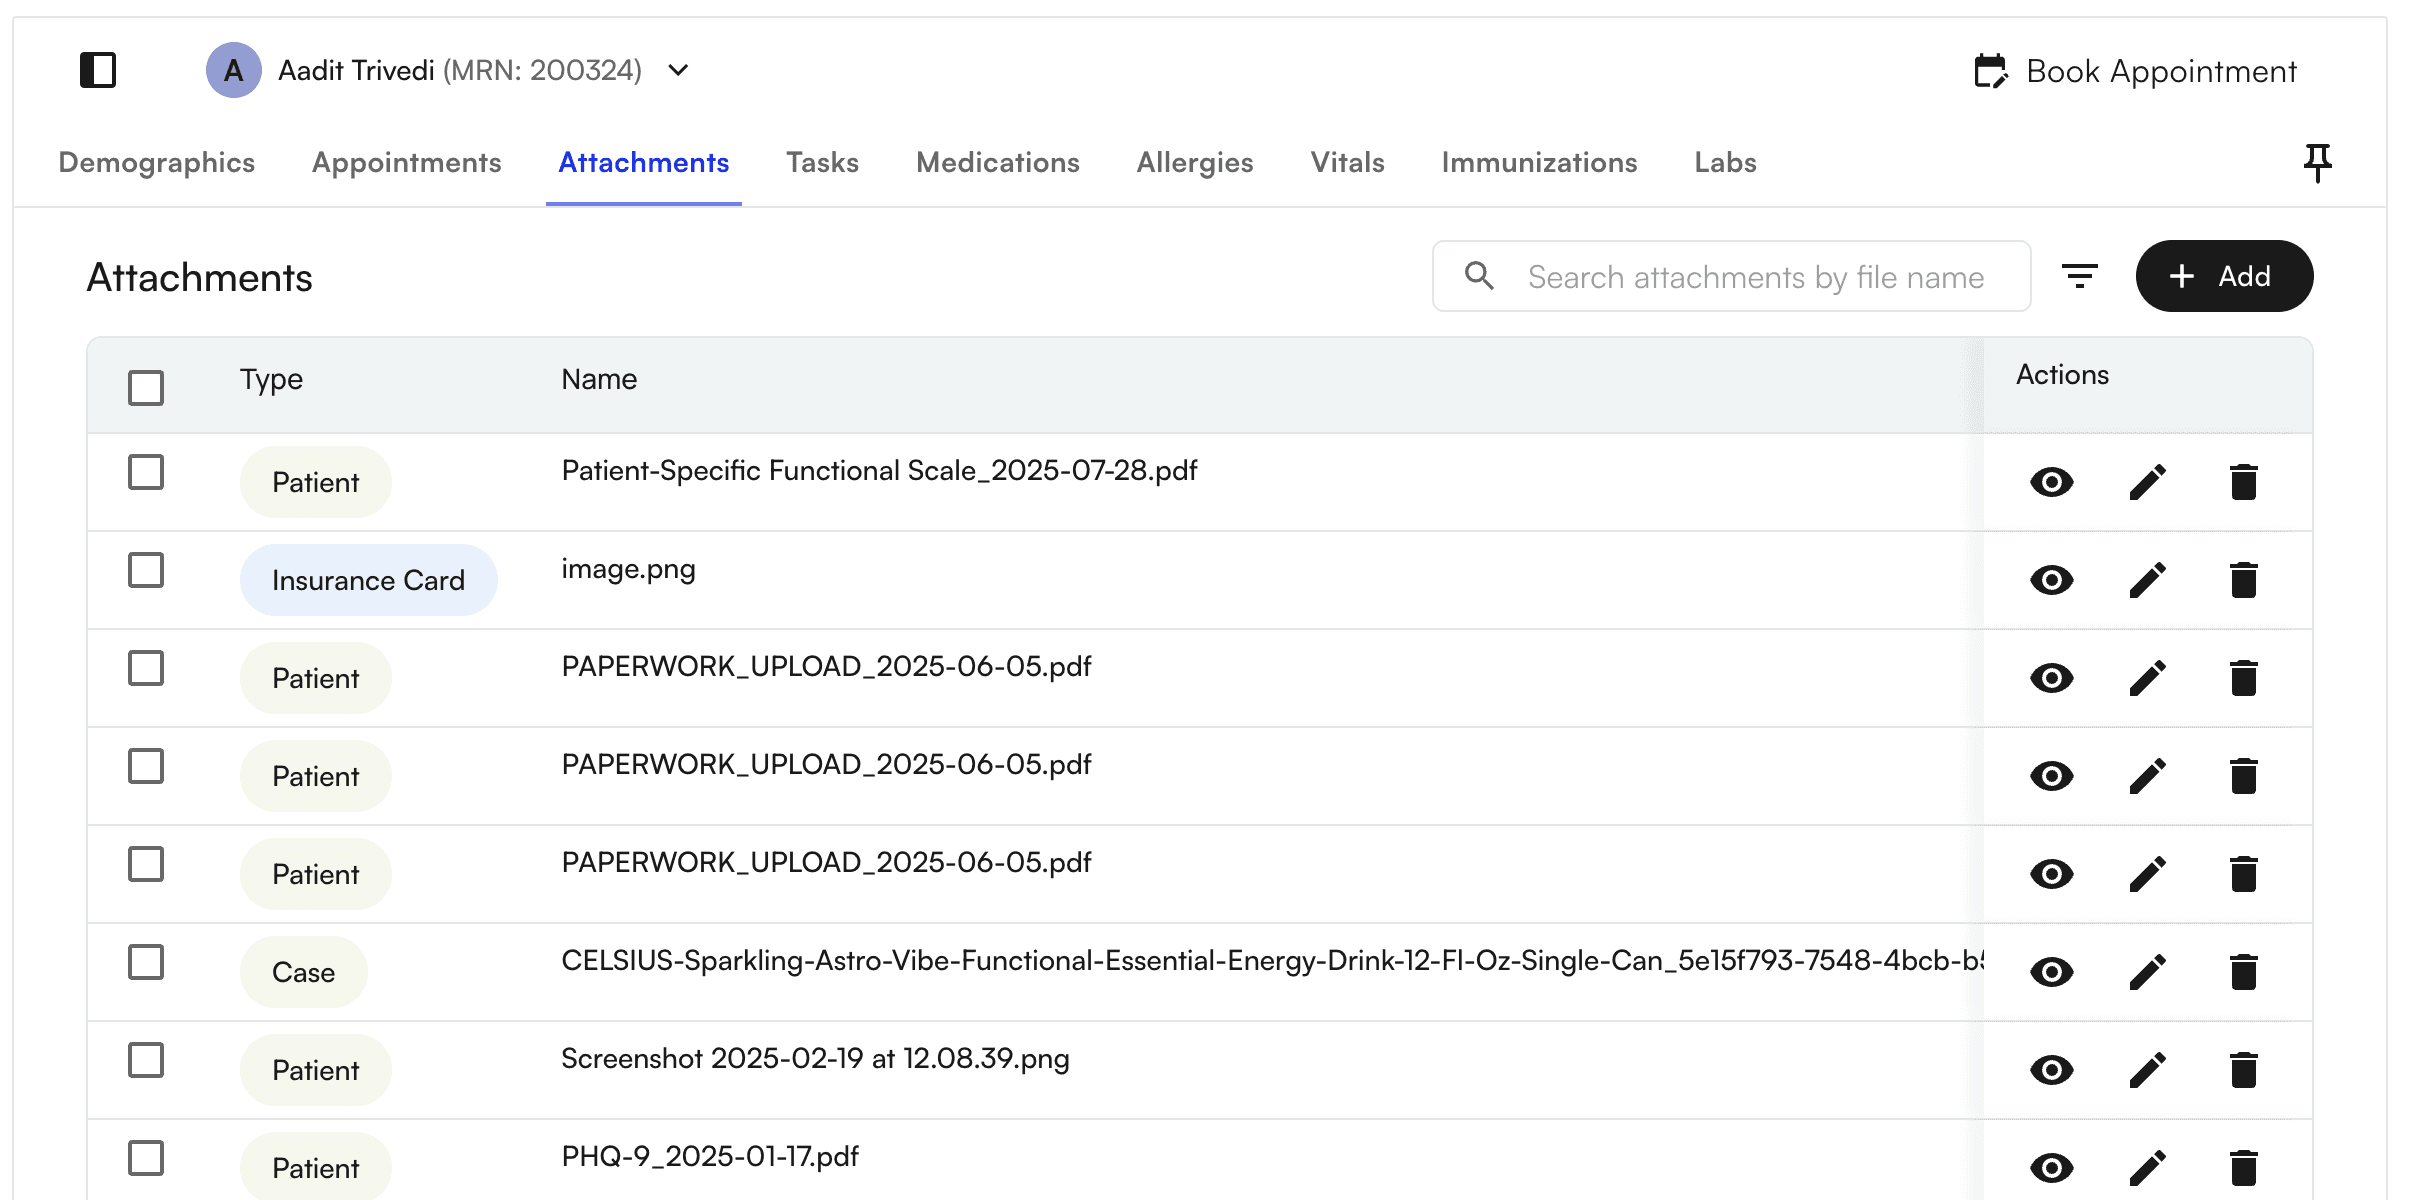
The attachment tab will house all the attachments related to the patient. Any intake forms will automatically be sent here, along with any uploaded scripts from the chart note.
Calendar Walkthrough
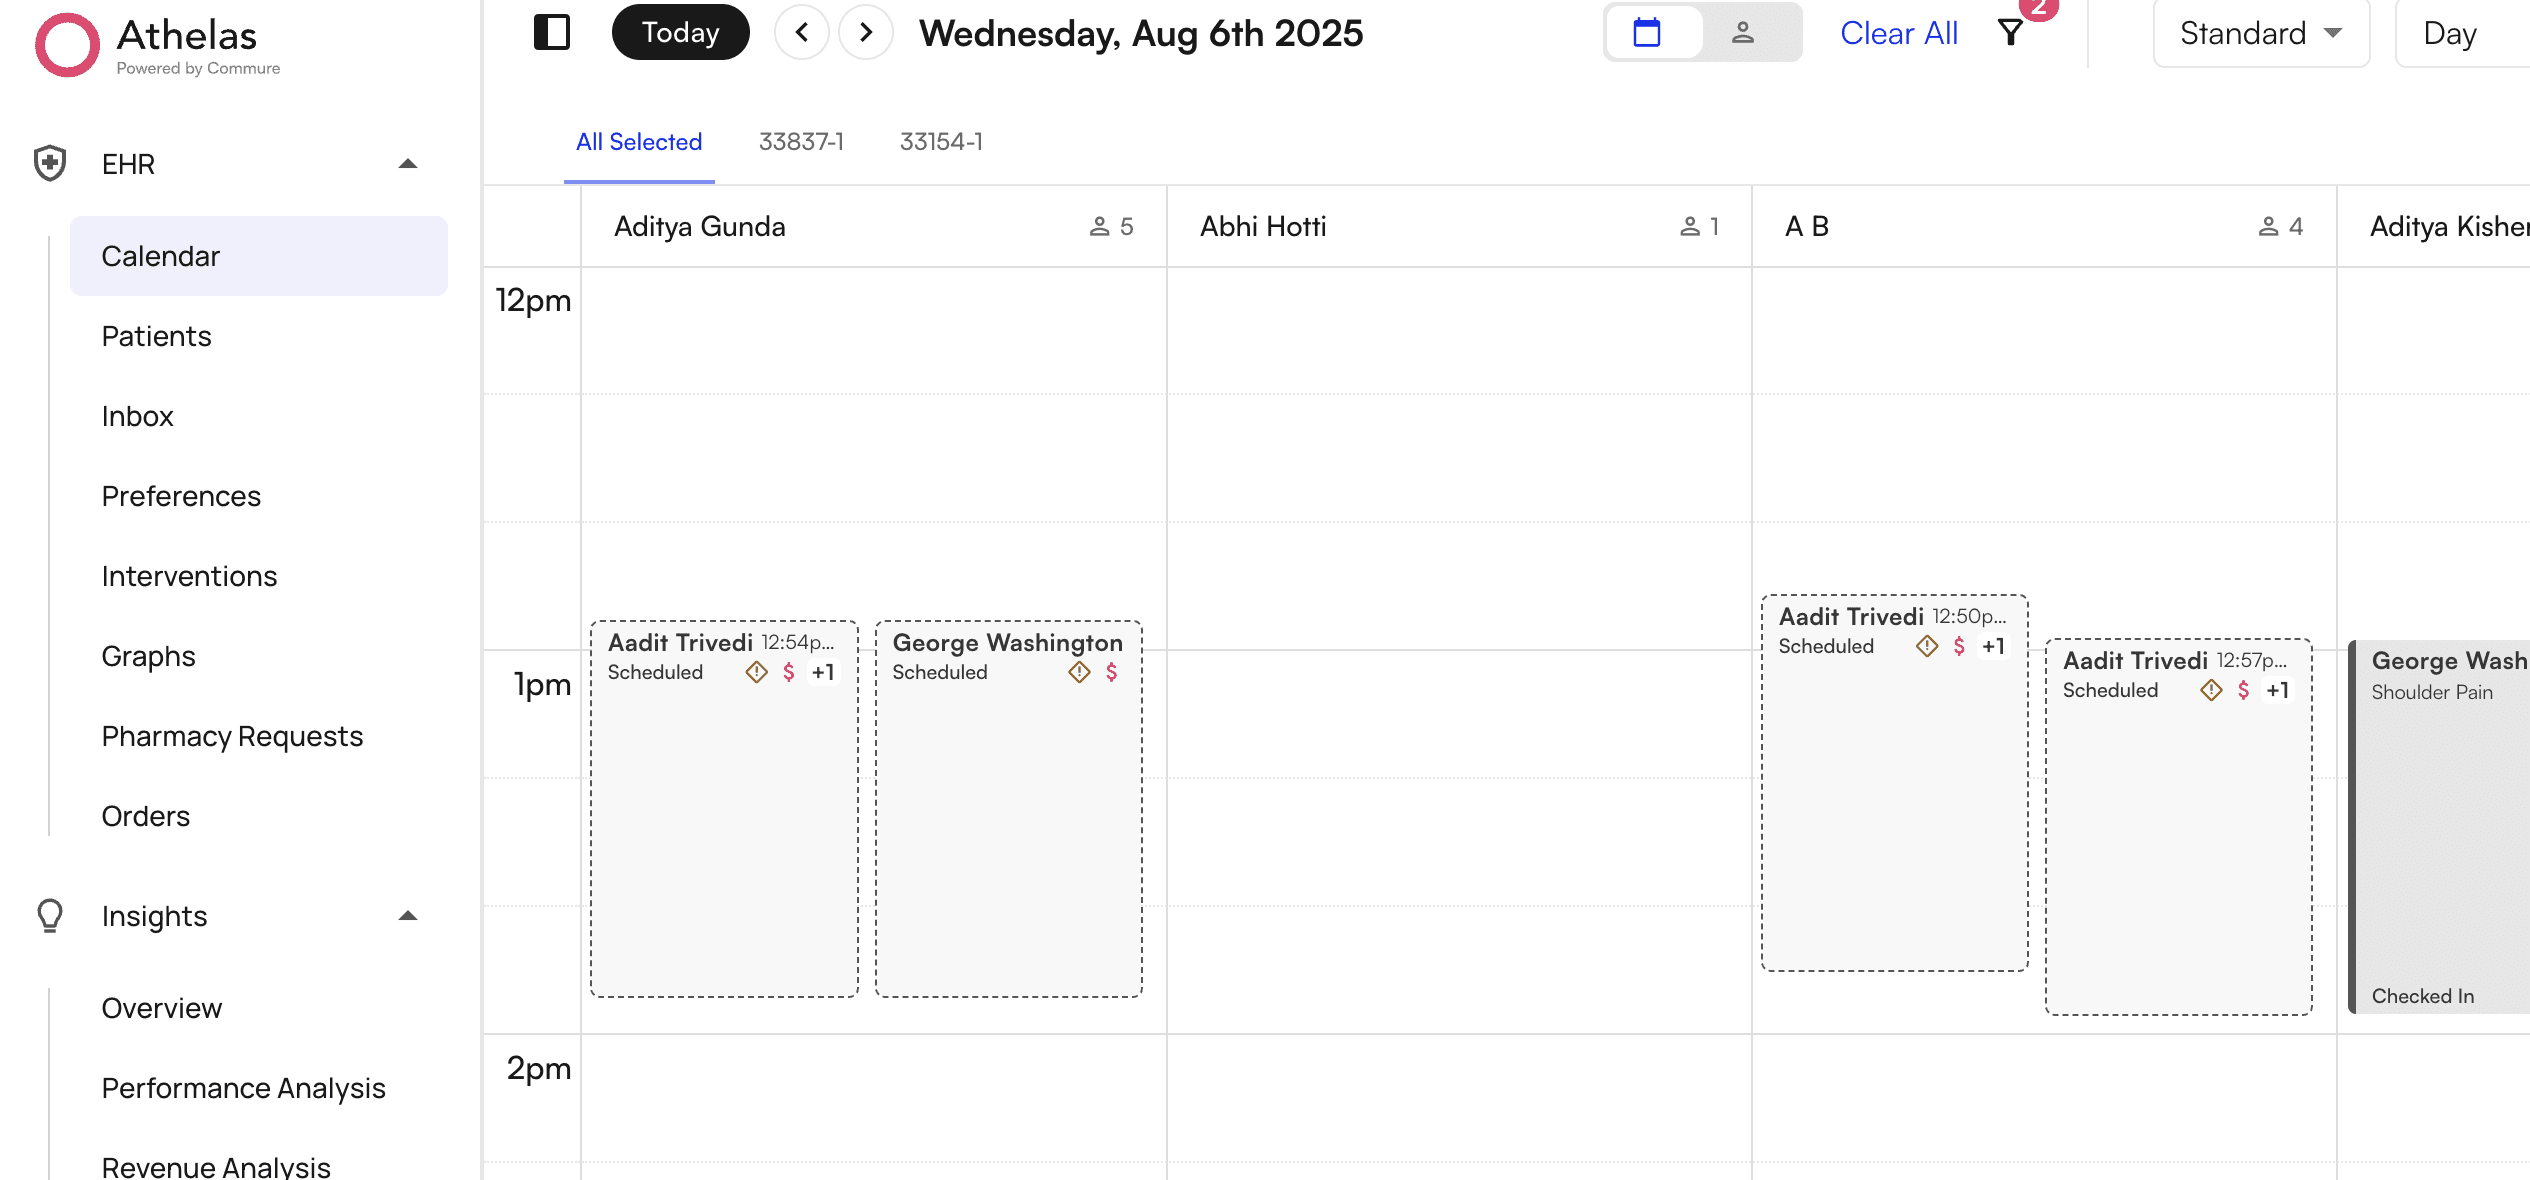
When it comes to understanding your calendar, what you’re really trying to do is get a good sense of what your day looks like in an instance’s glance, and this is exactly how it should be. The less time you need to decipher your calendar, the more time you can spend assisting patients along their healthcare journey.
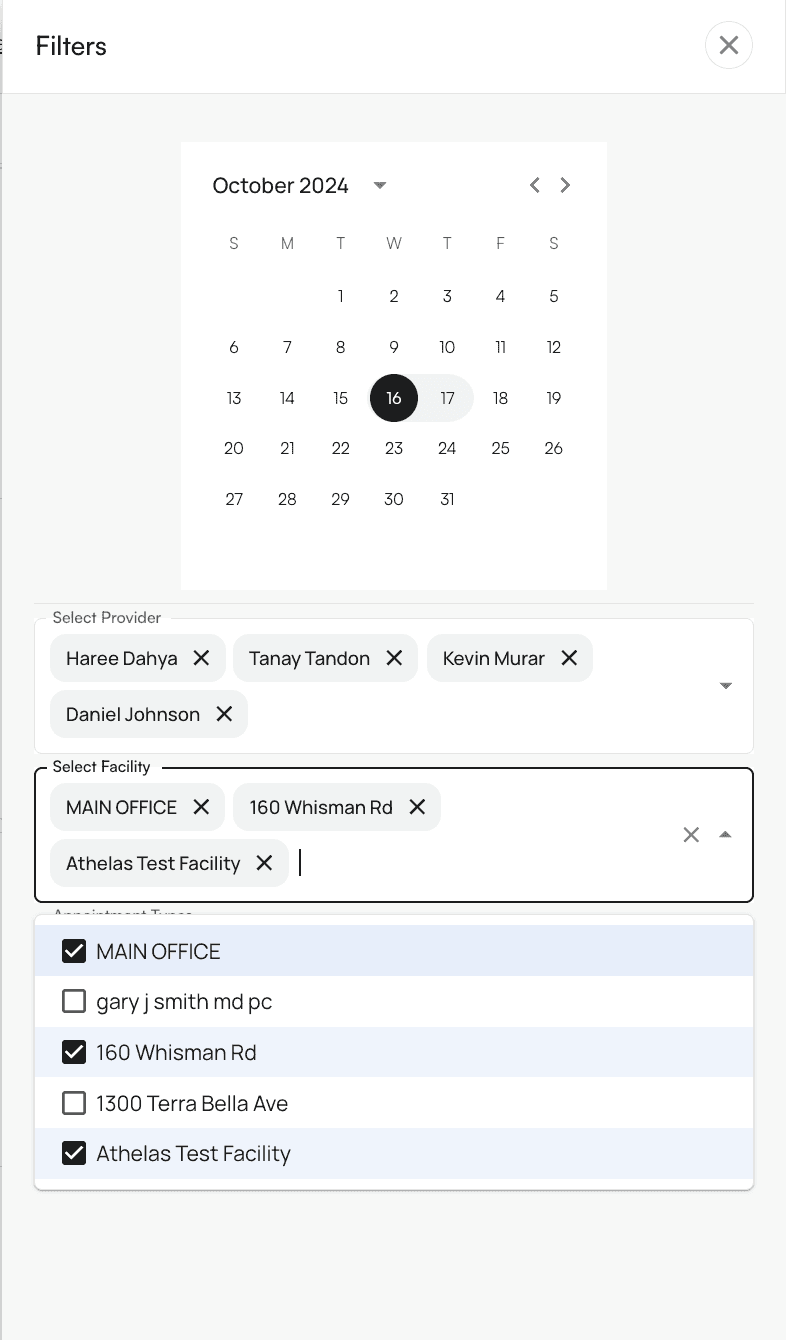
To access the calendar, click on “Calendar” on the left hand menu. To populate this calendar with information, click on filters icon on the top right corner.
A side panel on the right will open up with your filter options. Here you can filter by Provider, Facility, Appointment Type, Insurance and Patient
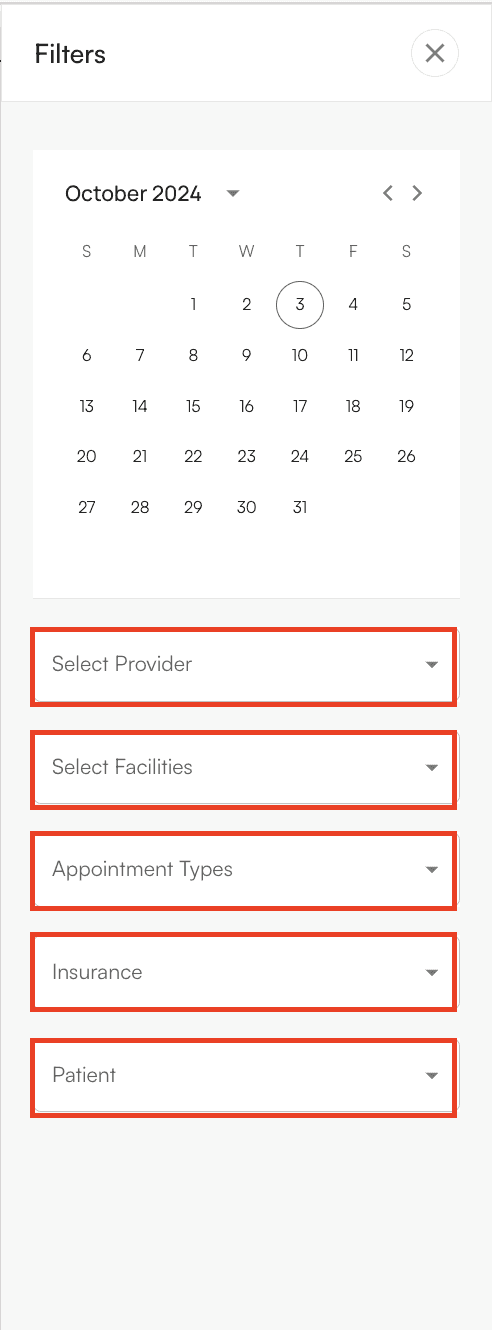
You’re able to select as many providers and facilities as you’d like to see on the calendar view.
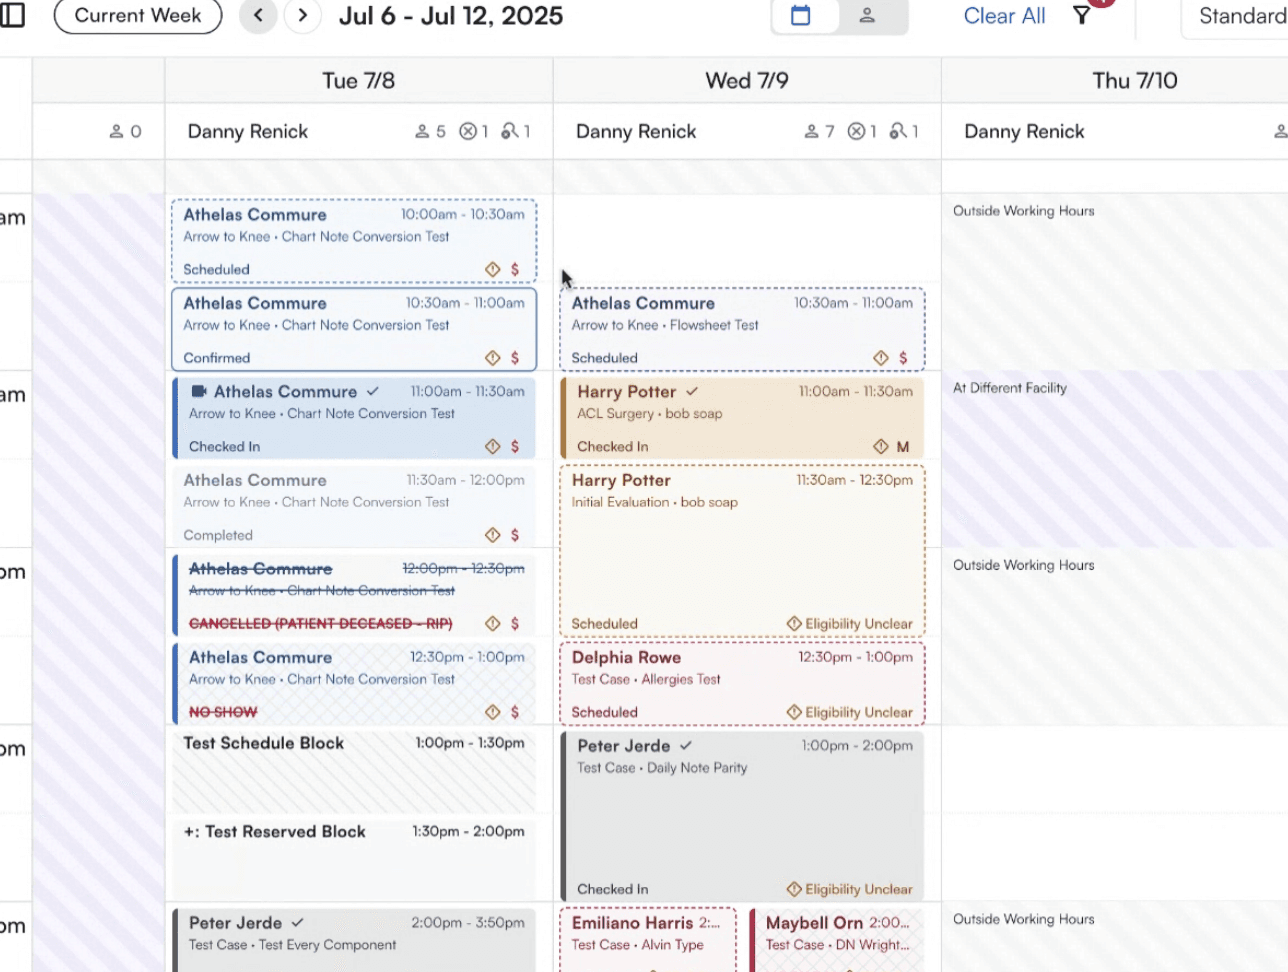
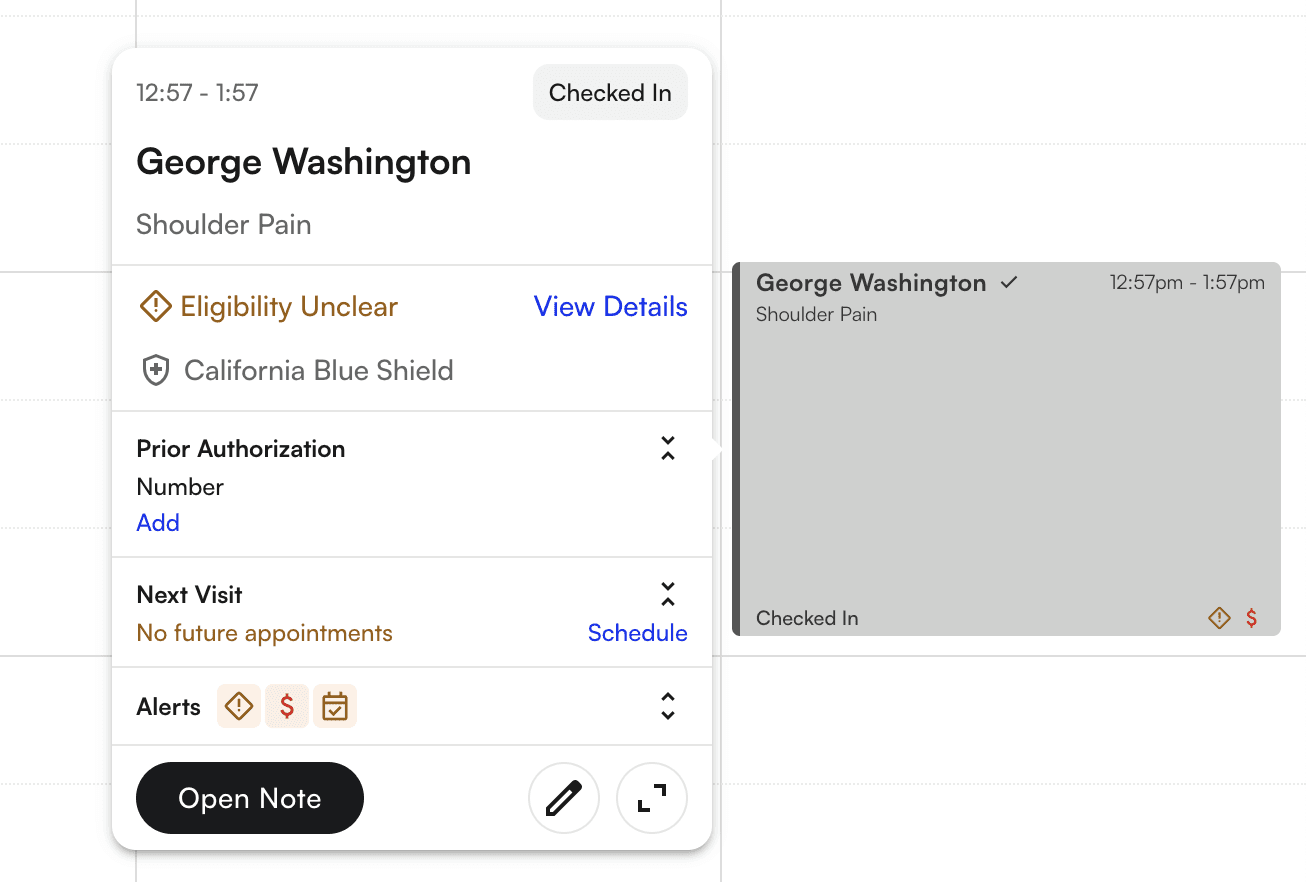
Below is a breakdown on the information listed on the schedule block
Case
Eligibility status
Payment Status
Appointment status
When you hover on the calendar block, you can take all actions in the pop up:
Edit the appointment, re-run eligibility, update appointment status if not checked in, add Prior Auth information, schedule future appointments and open the chart note
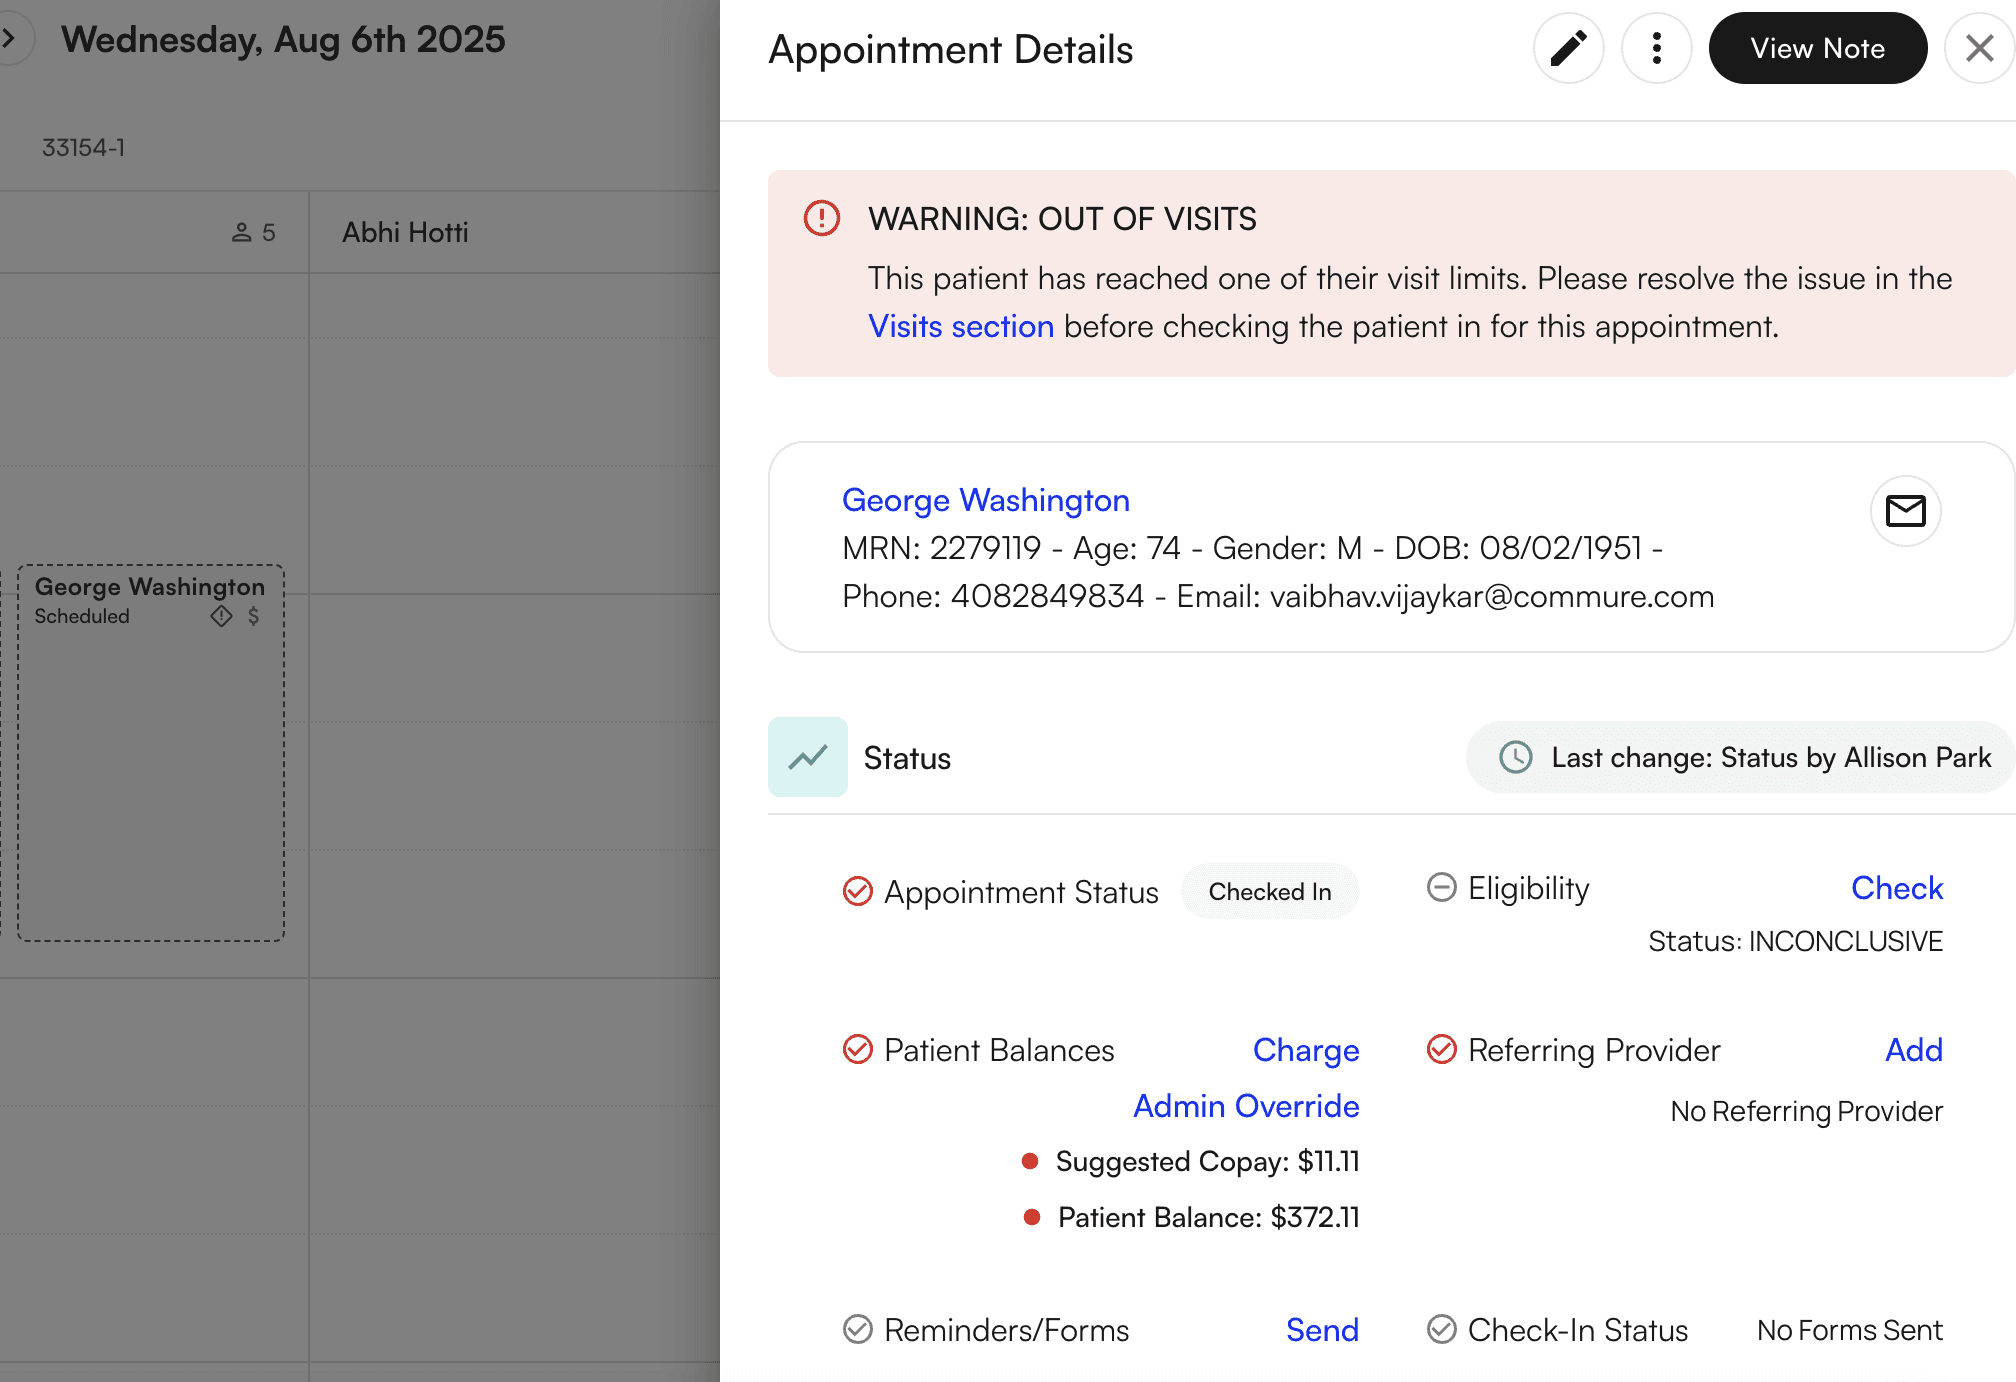
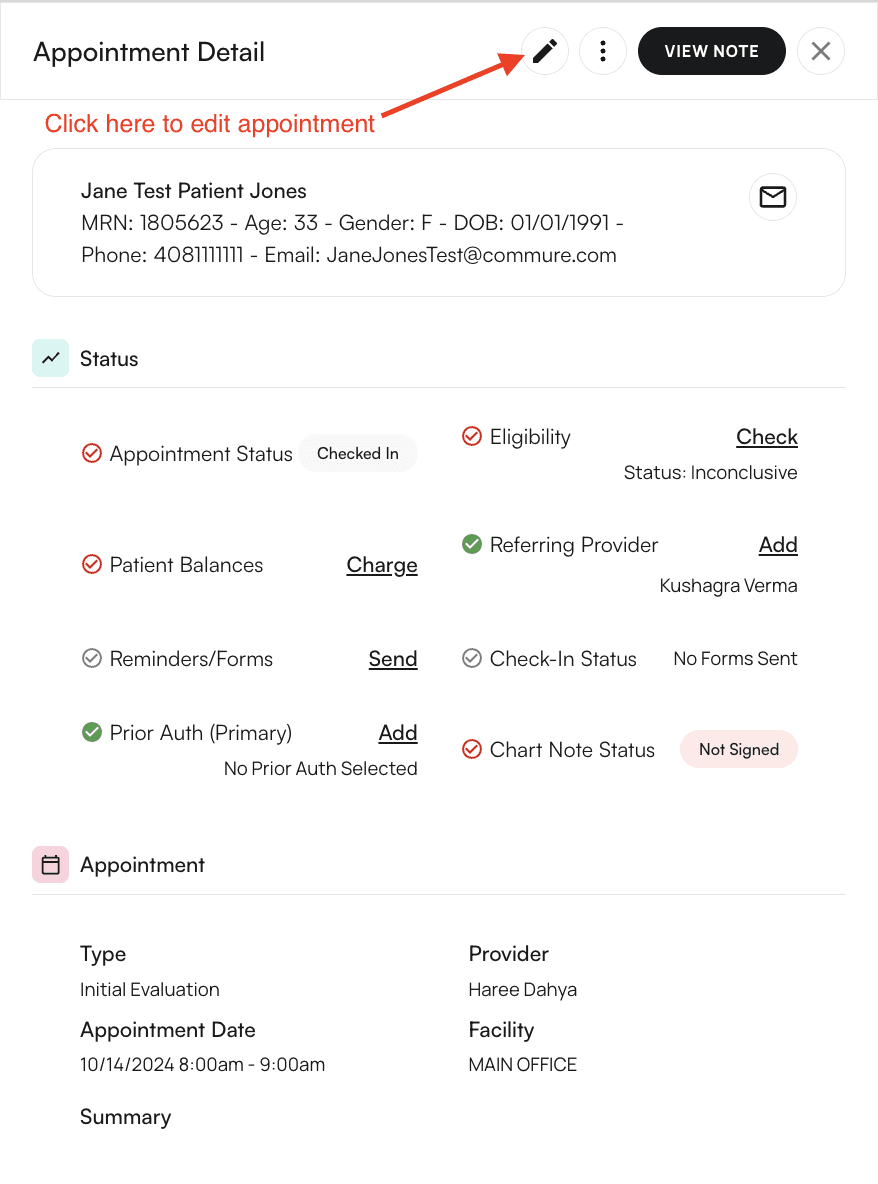
If you click on the schedule block, a side menu with the appointment details will open up. Here, you will be able to see the the following:
General patient demographics of the scheduled patient
Appointment Status
Eligibility
Patient Balances
Referring Provider
Reminders/ Forms
Check-In Status
Prior Authorization for the patient’s Primary Insurance
Chart Note Status
Appointment Type
Provider
Appointment Date and Time
Facility
Summary of the previous appointment
If you click on the pencil icon on the top of the Appointment Detail side menu, you will be able to edit the appointment details
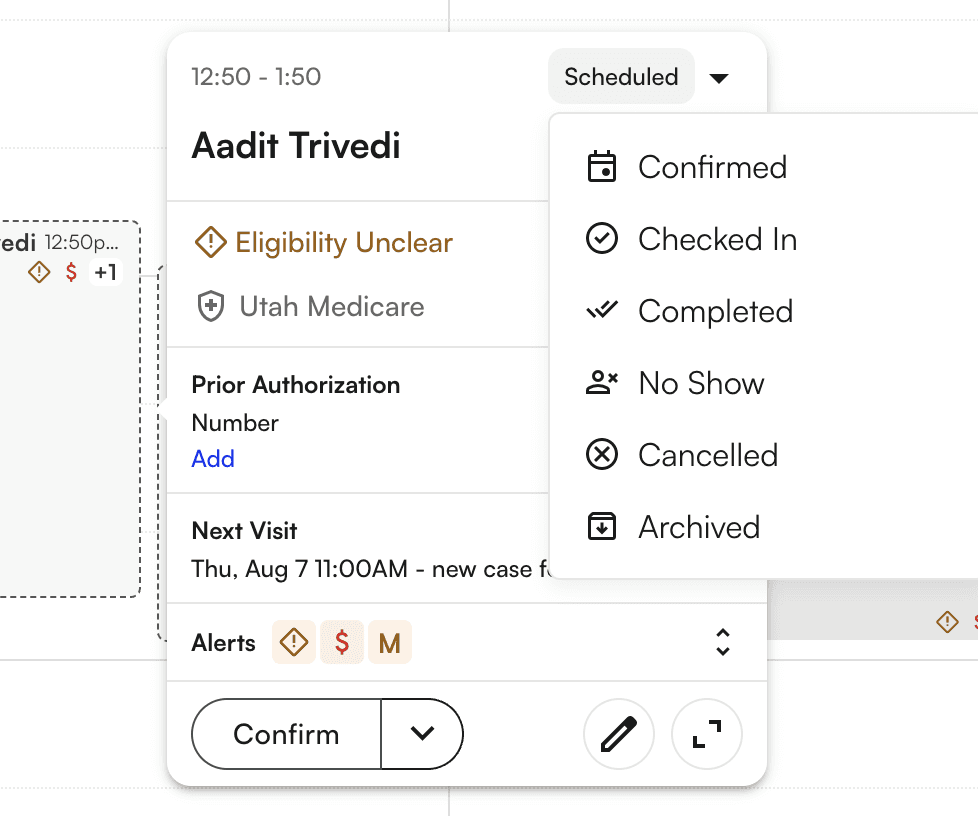
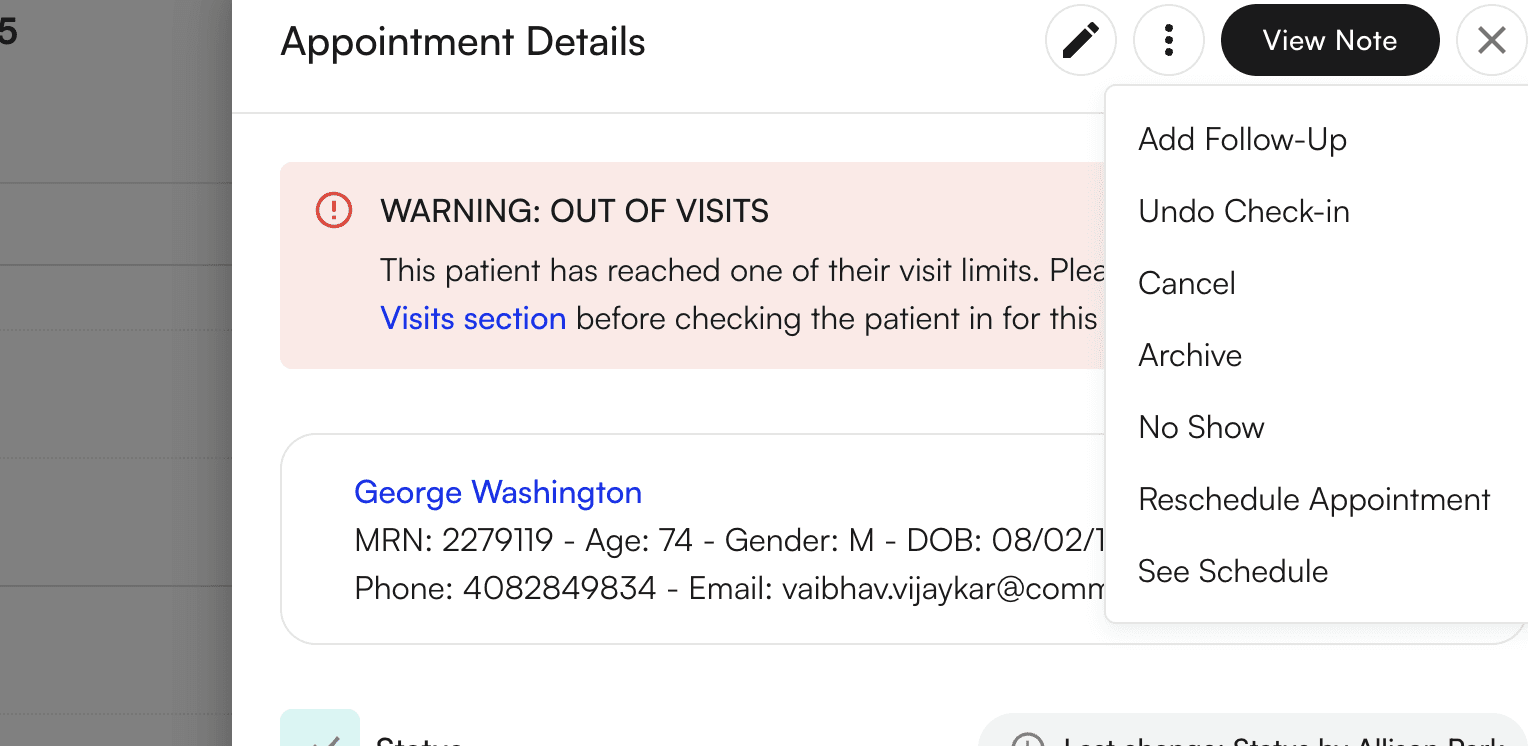
Clicking the 3 vertical dots next to the appointment edit icon will allow you to do the following:
Add a follow-up appointment
Check-In and Undo Check-In
Cancel the appointment
You’ll be prompted to enter a cancellation reason
Mark the appointment as No Show
View the patient’s entire schedule
Appointment Creation
There are multiple ways you can create an appointment. This section will walk through the multitude of ways to create an appointment.
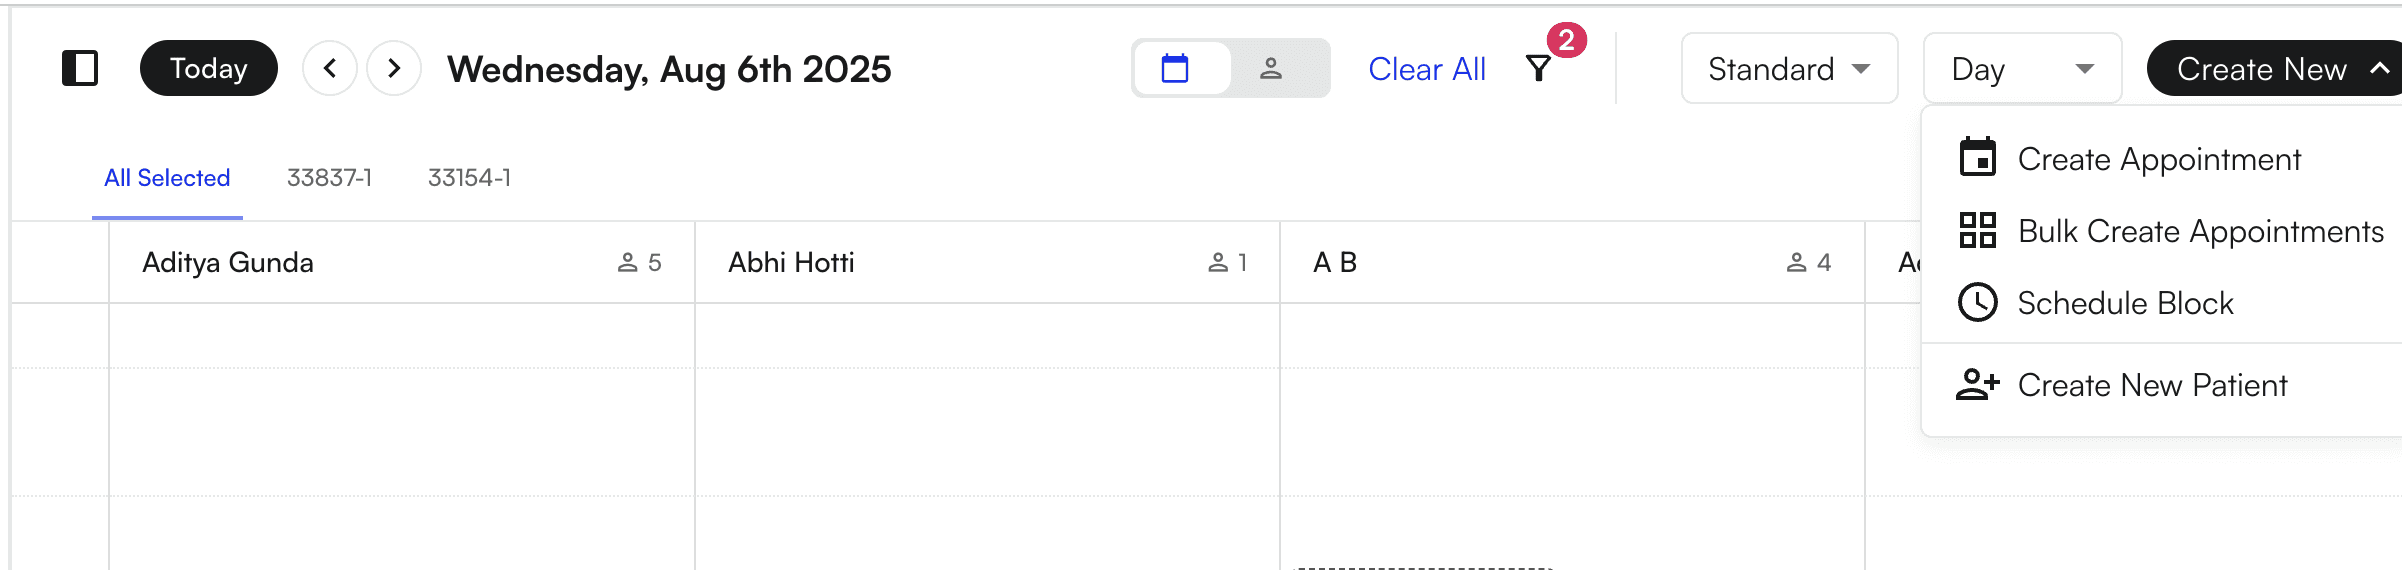
The first way to create a new appointment is to navigate to the calendar and click the “+ Create New” button on the top right corner of the screen.
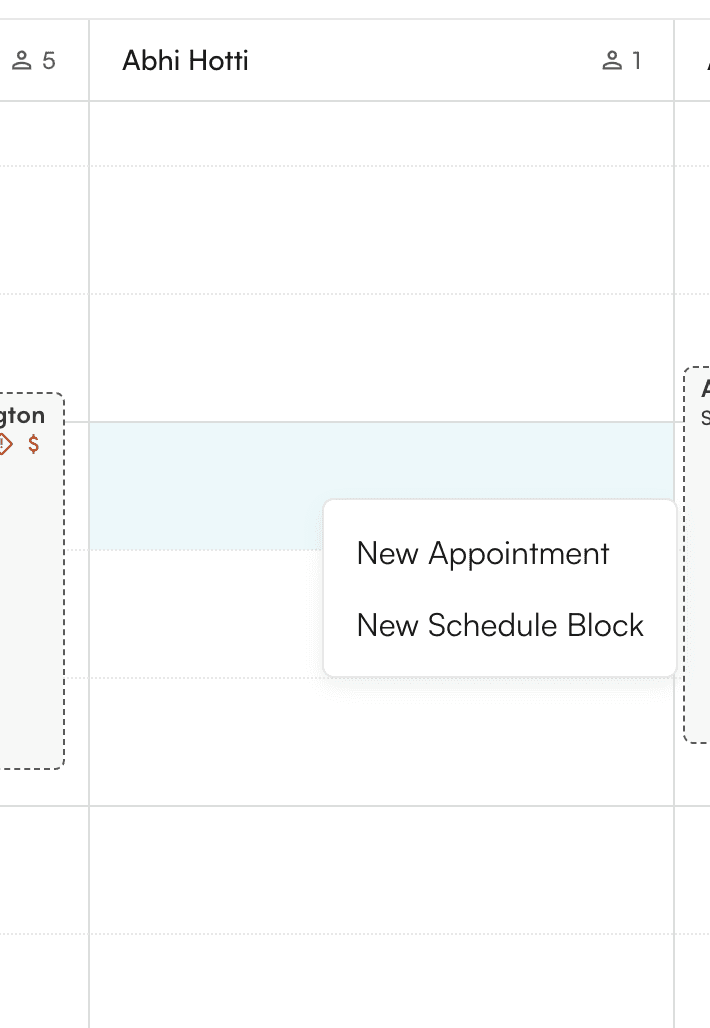
You can also create an appointment directly within the calendar by clicking on any empty space in the calendar.
Additionally, you can create an appointment directly within Patients —> Appointments. Simply click on “Patients” and search up your patient’s name.
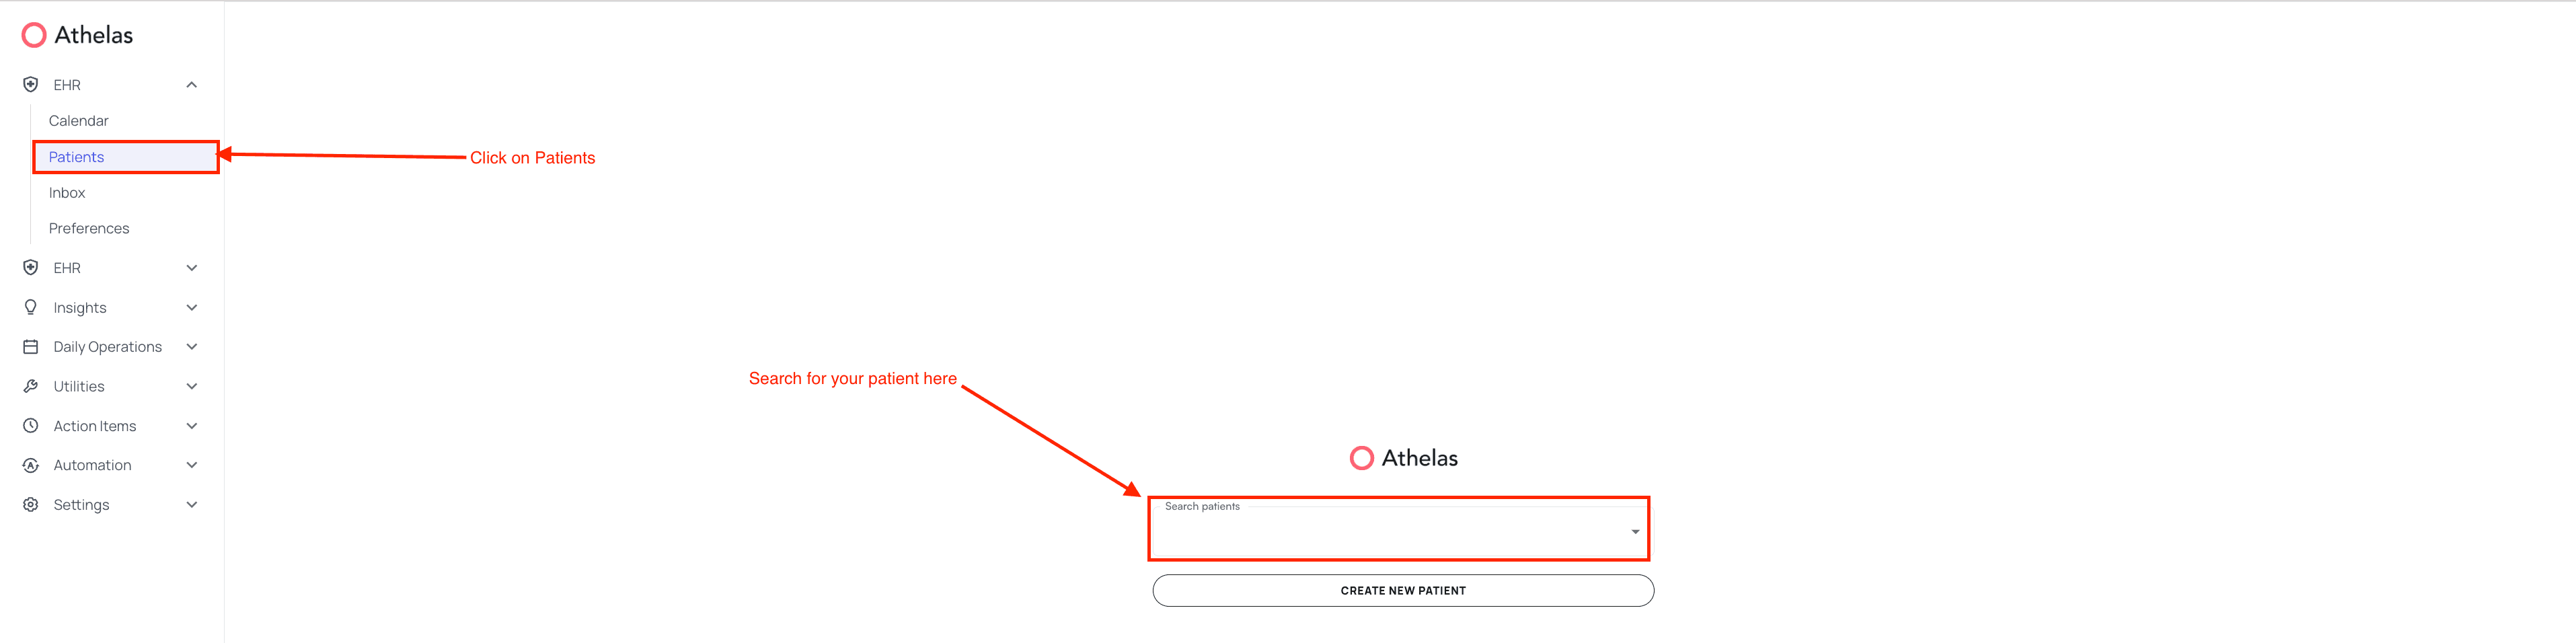
Now click on “Appointments” once you’ve entered the patient’s demographics. On the top right corner, click on “+ New Appointment” or “Book Appointment” in the top right corner
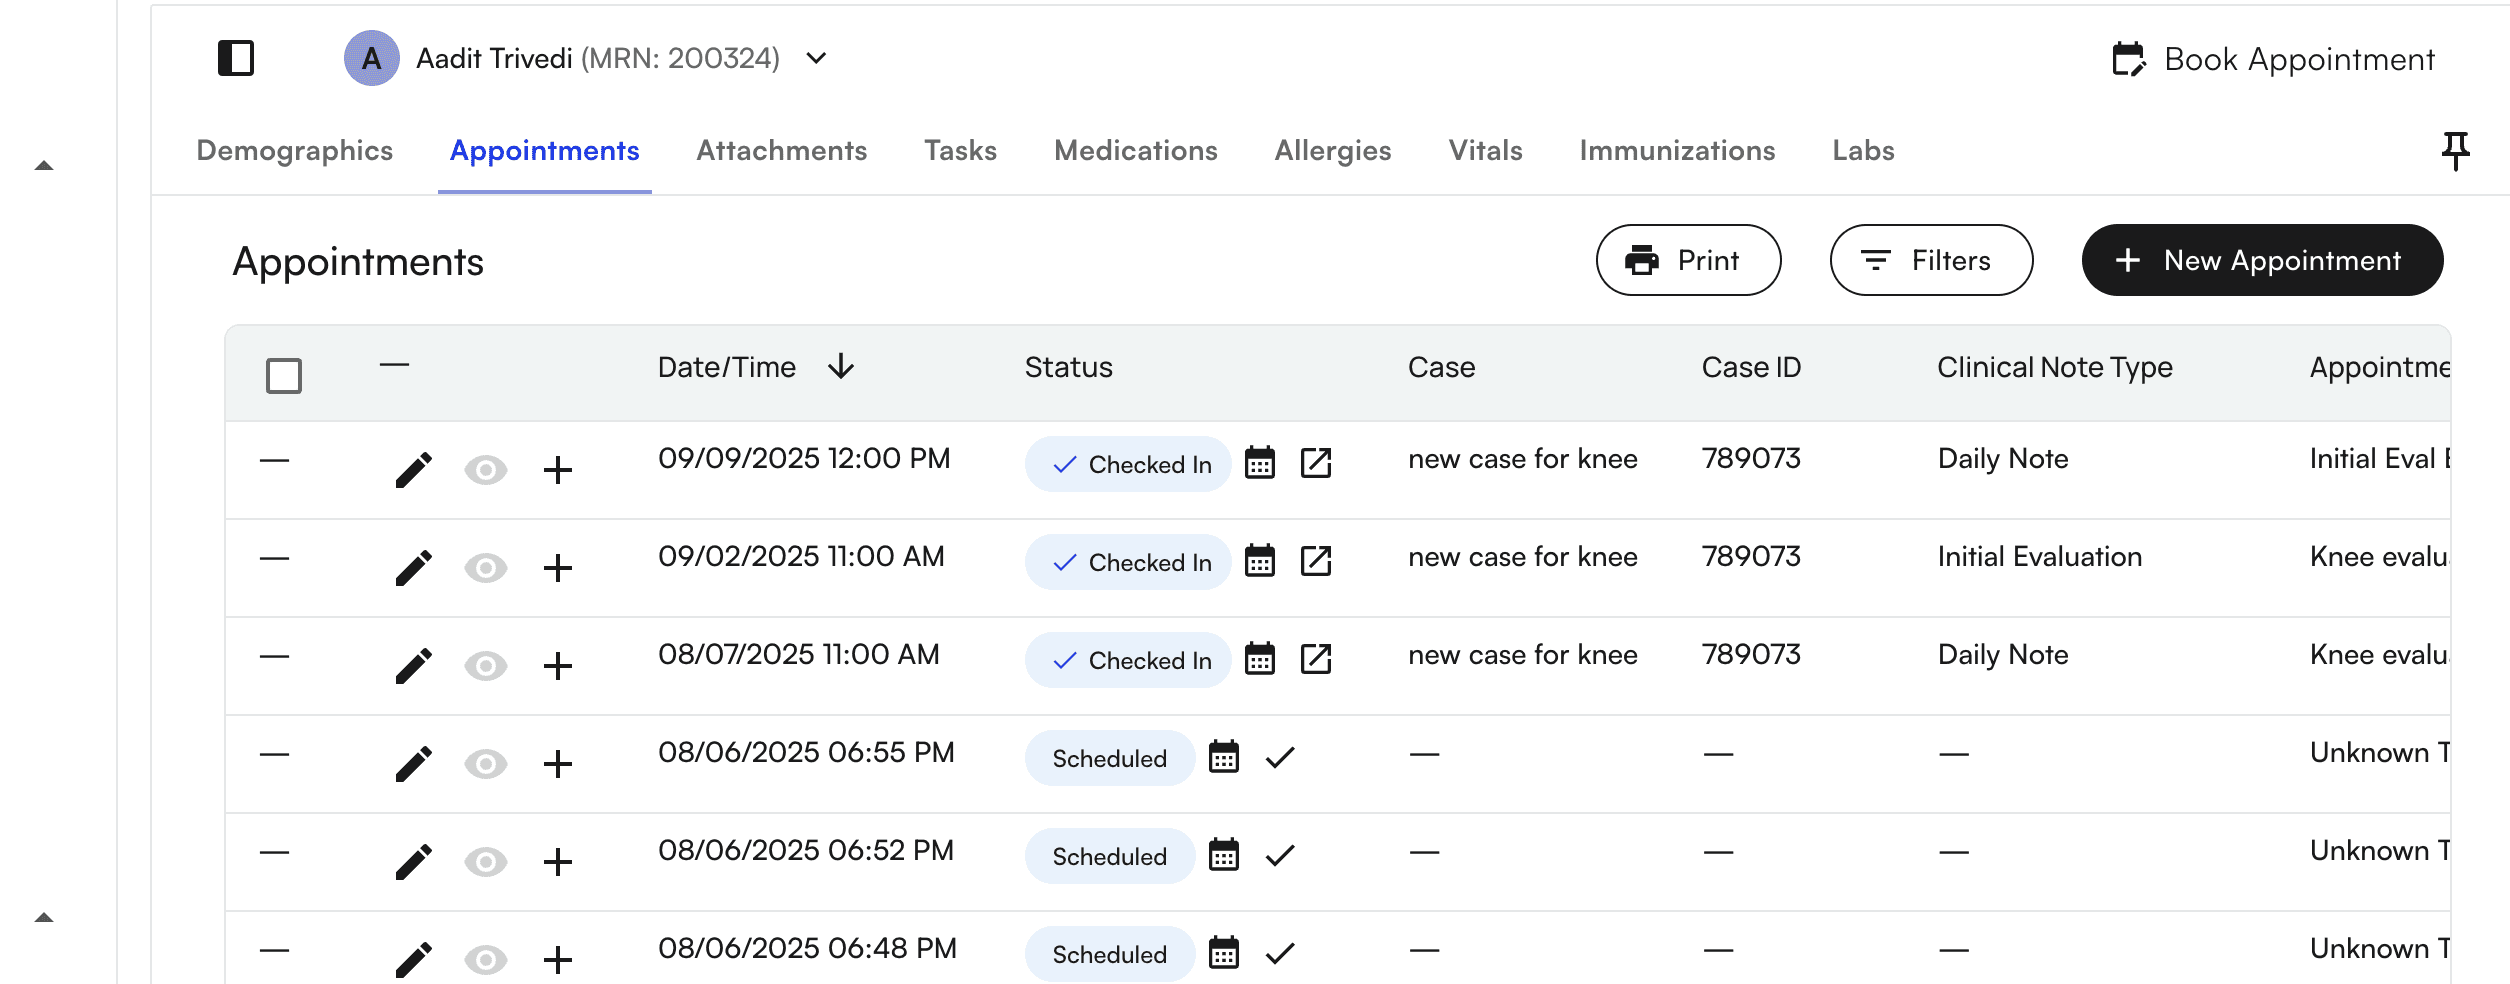
Whichever method you decide to utilize for appointment creation will cause a side panel to open up when you click “+ New Appointment”
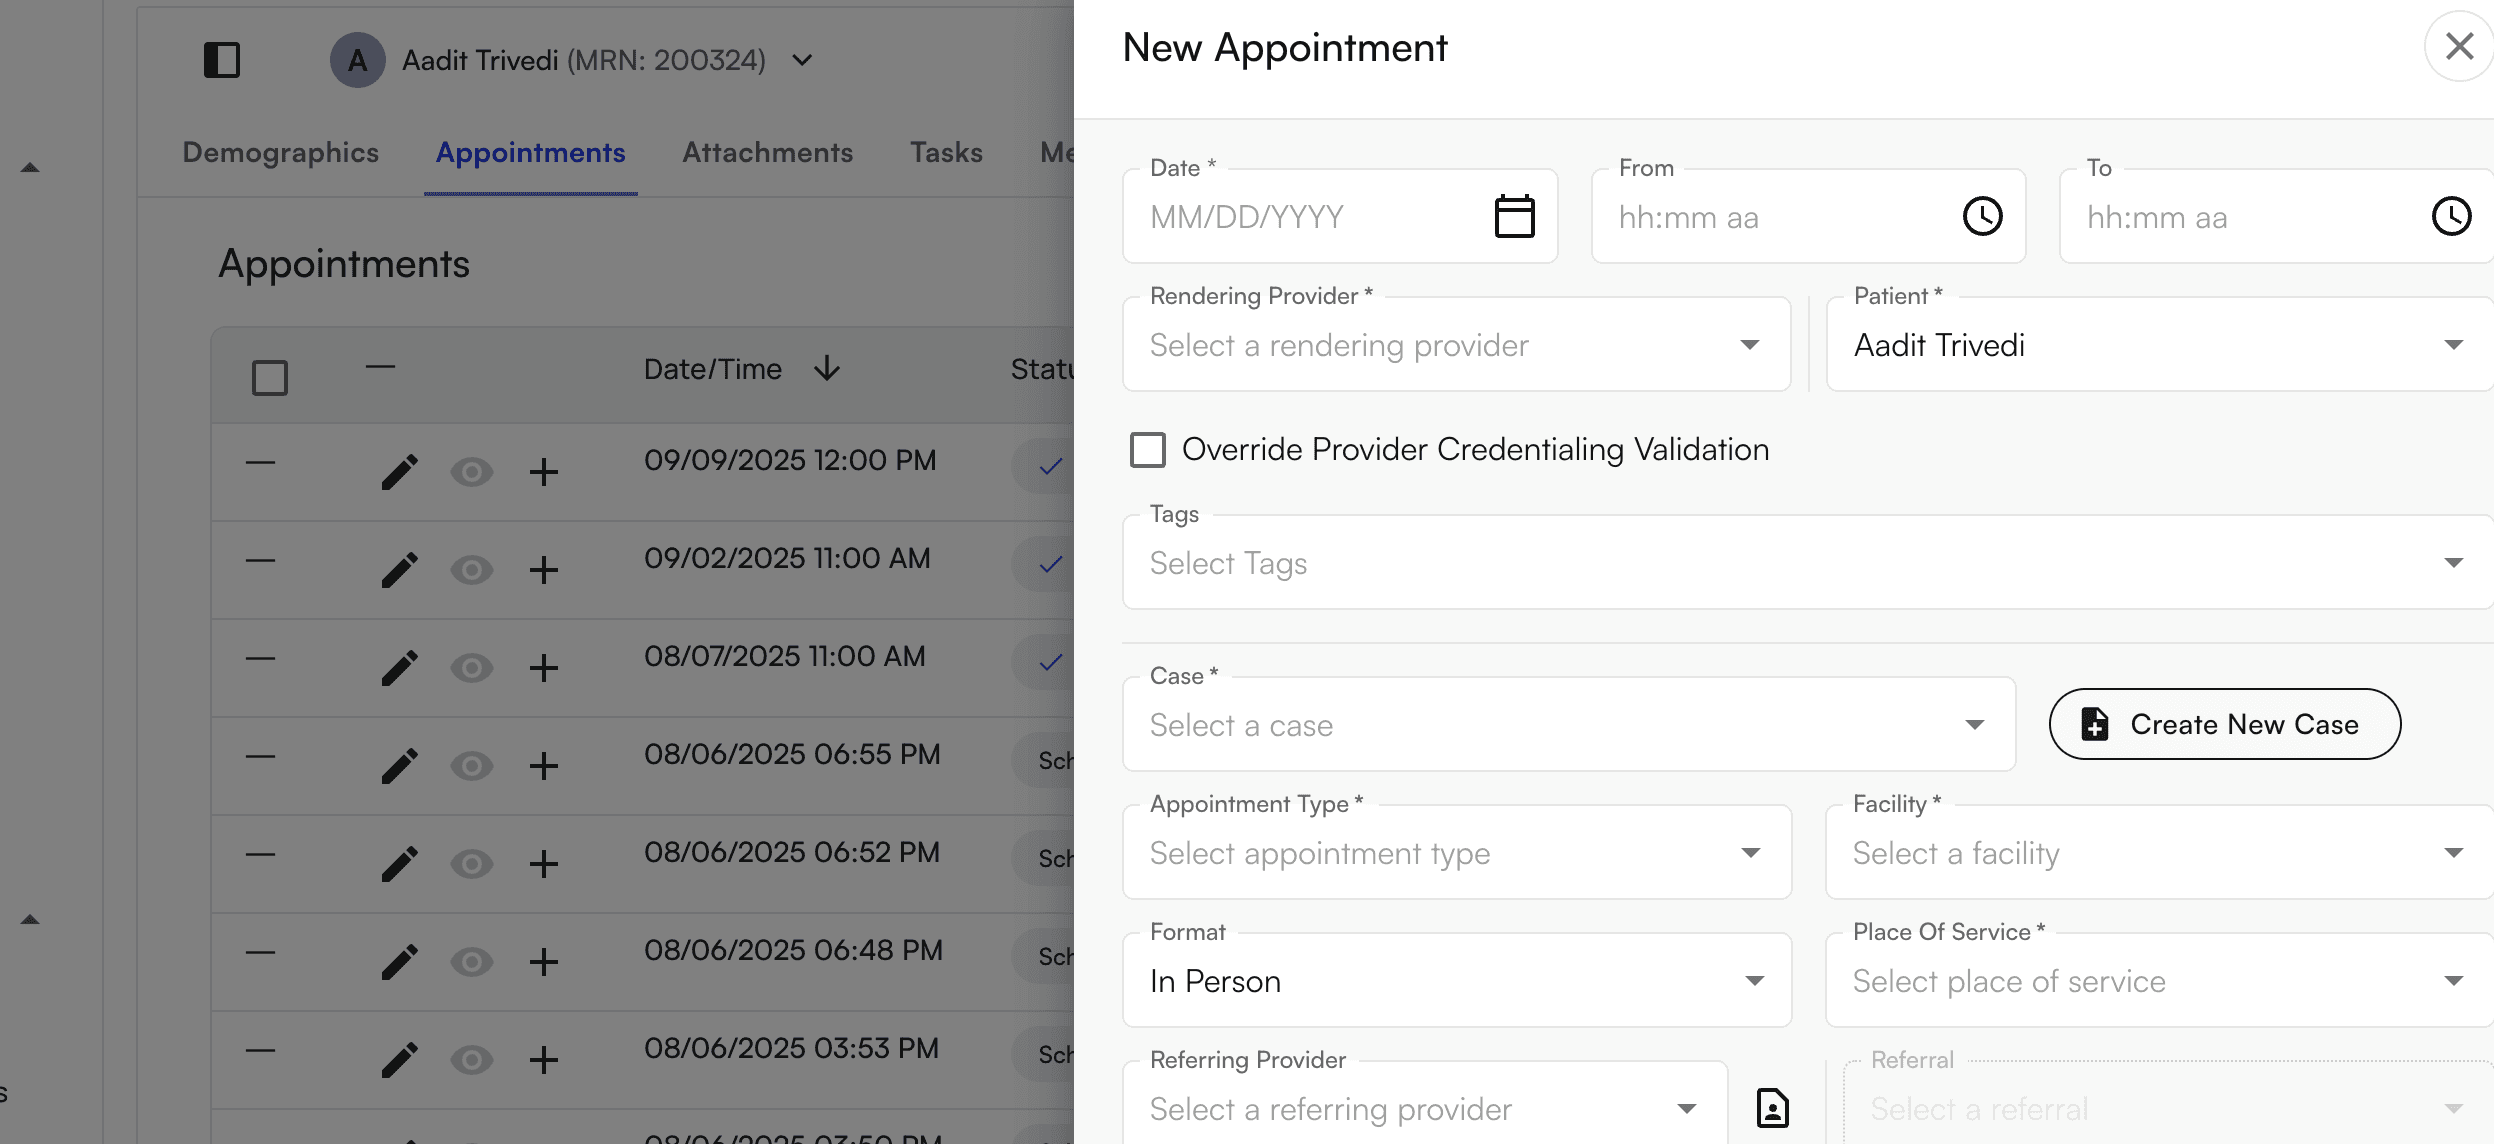
Please enter/ configure the desired information in the following required fields:
Appointment Date
Appointment Time
Provider (Rendering)
Patient
Case
Appointment Type
Facility
Format
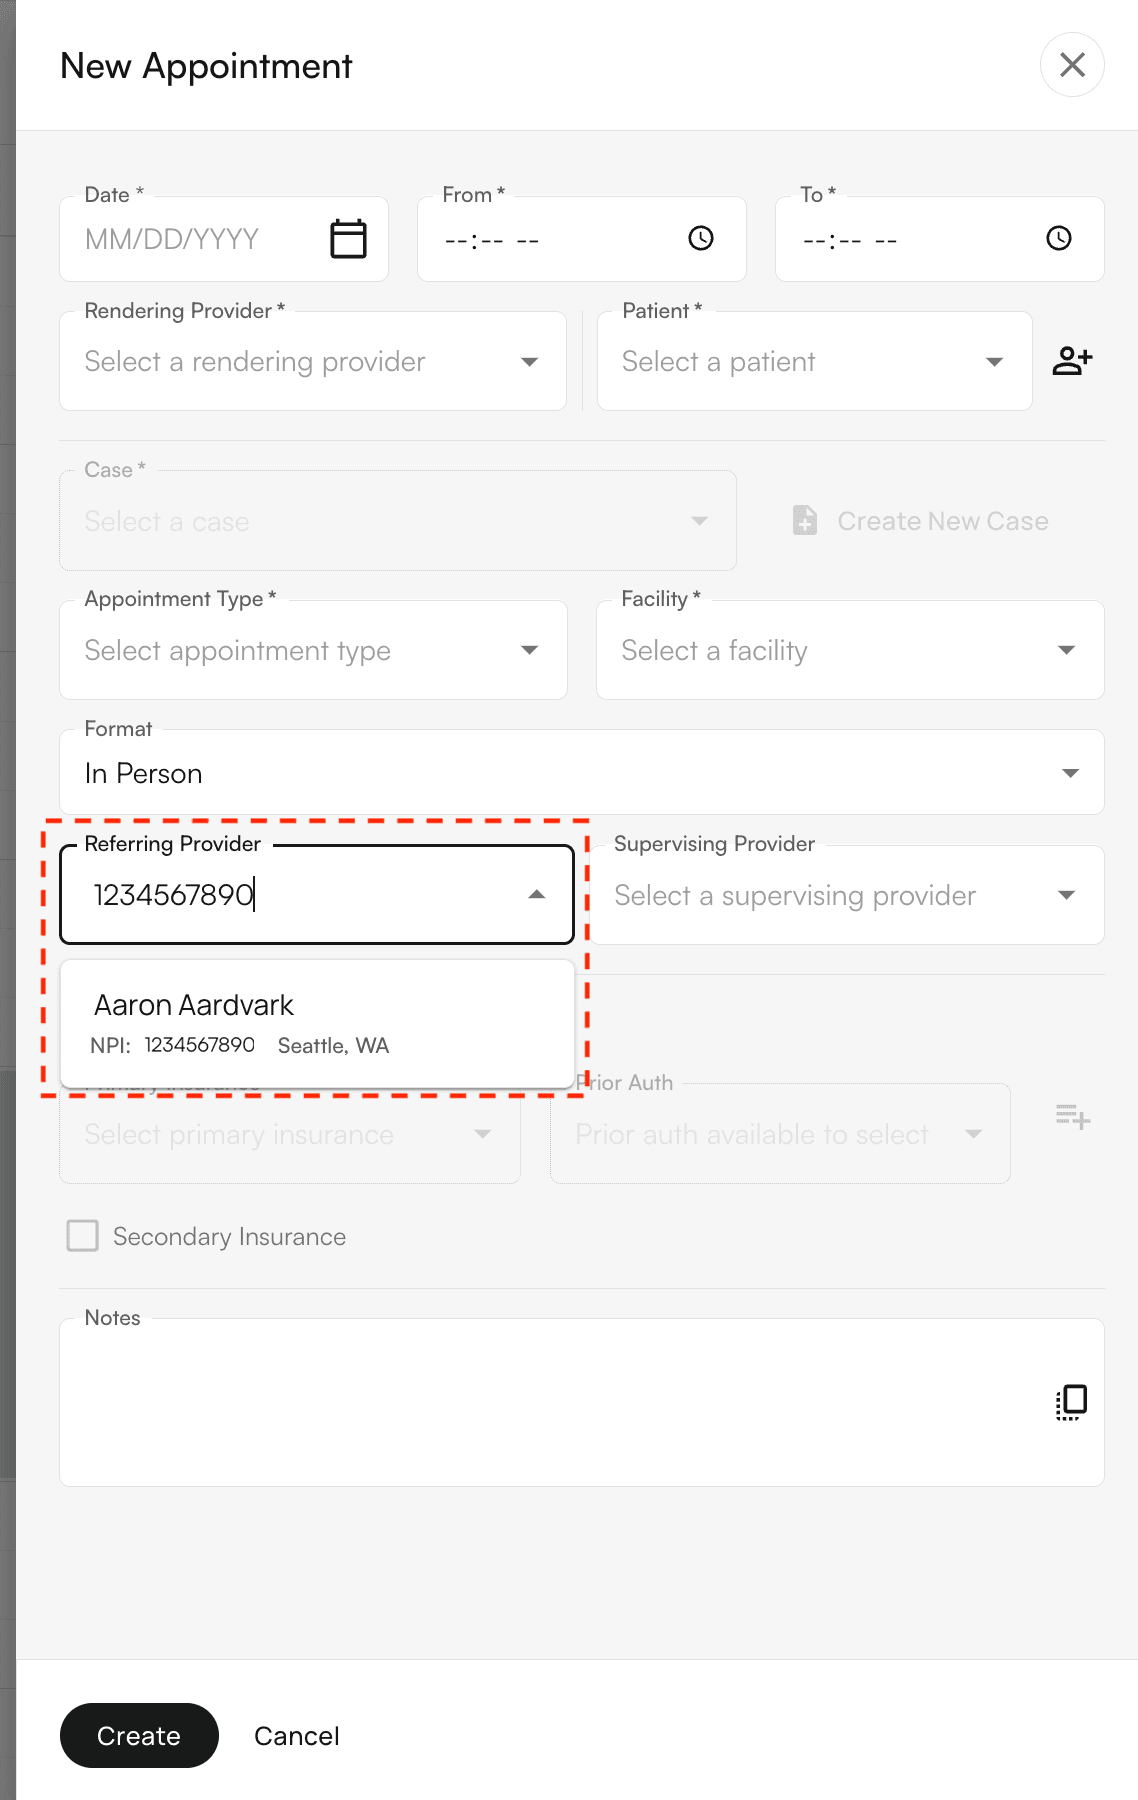
Additionally, you are able to add a referring provider, change insurance priority for the appointment (and sync it permanently to the case) and choose any prior authorizations per insurance.
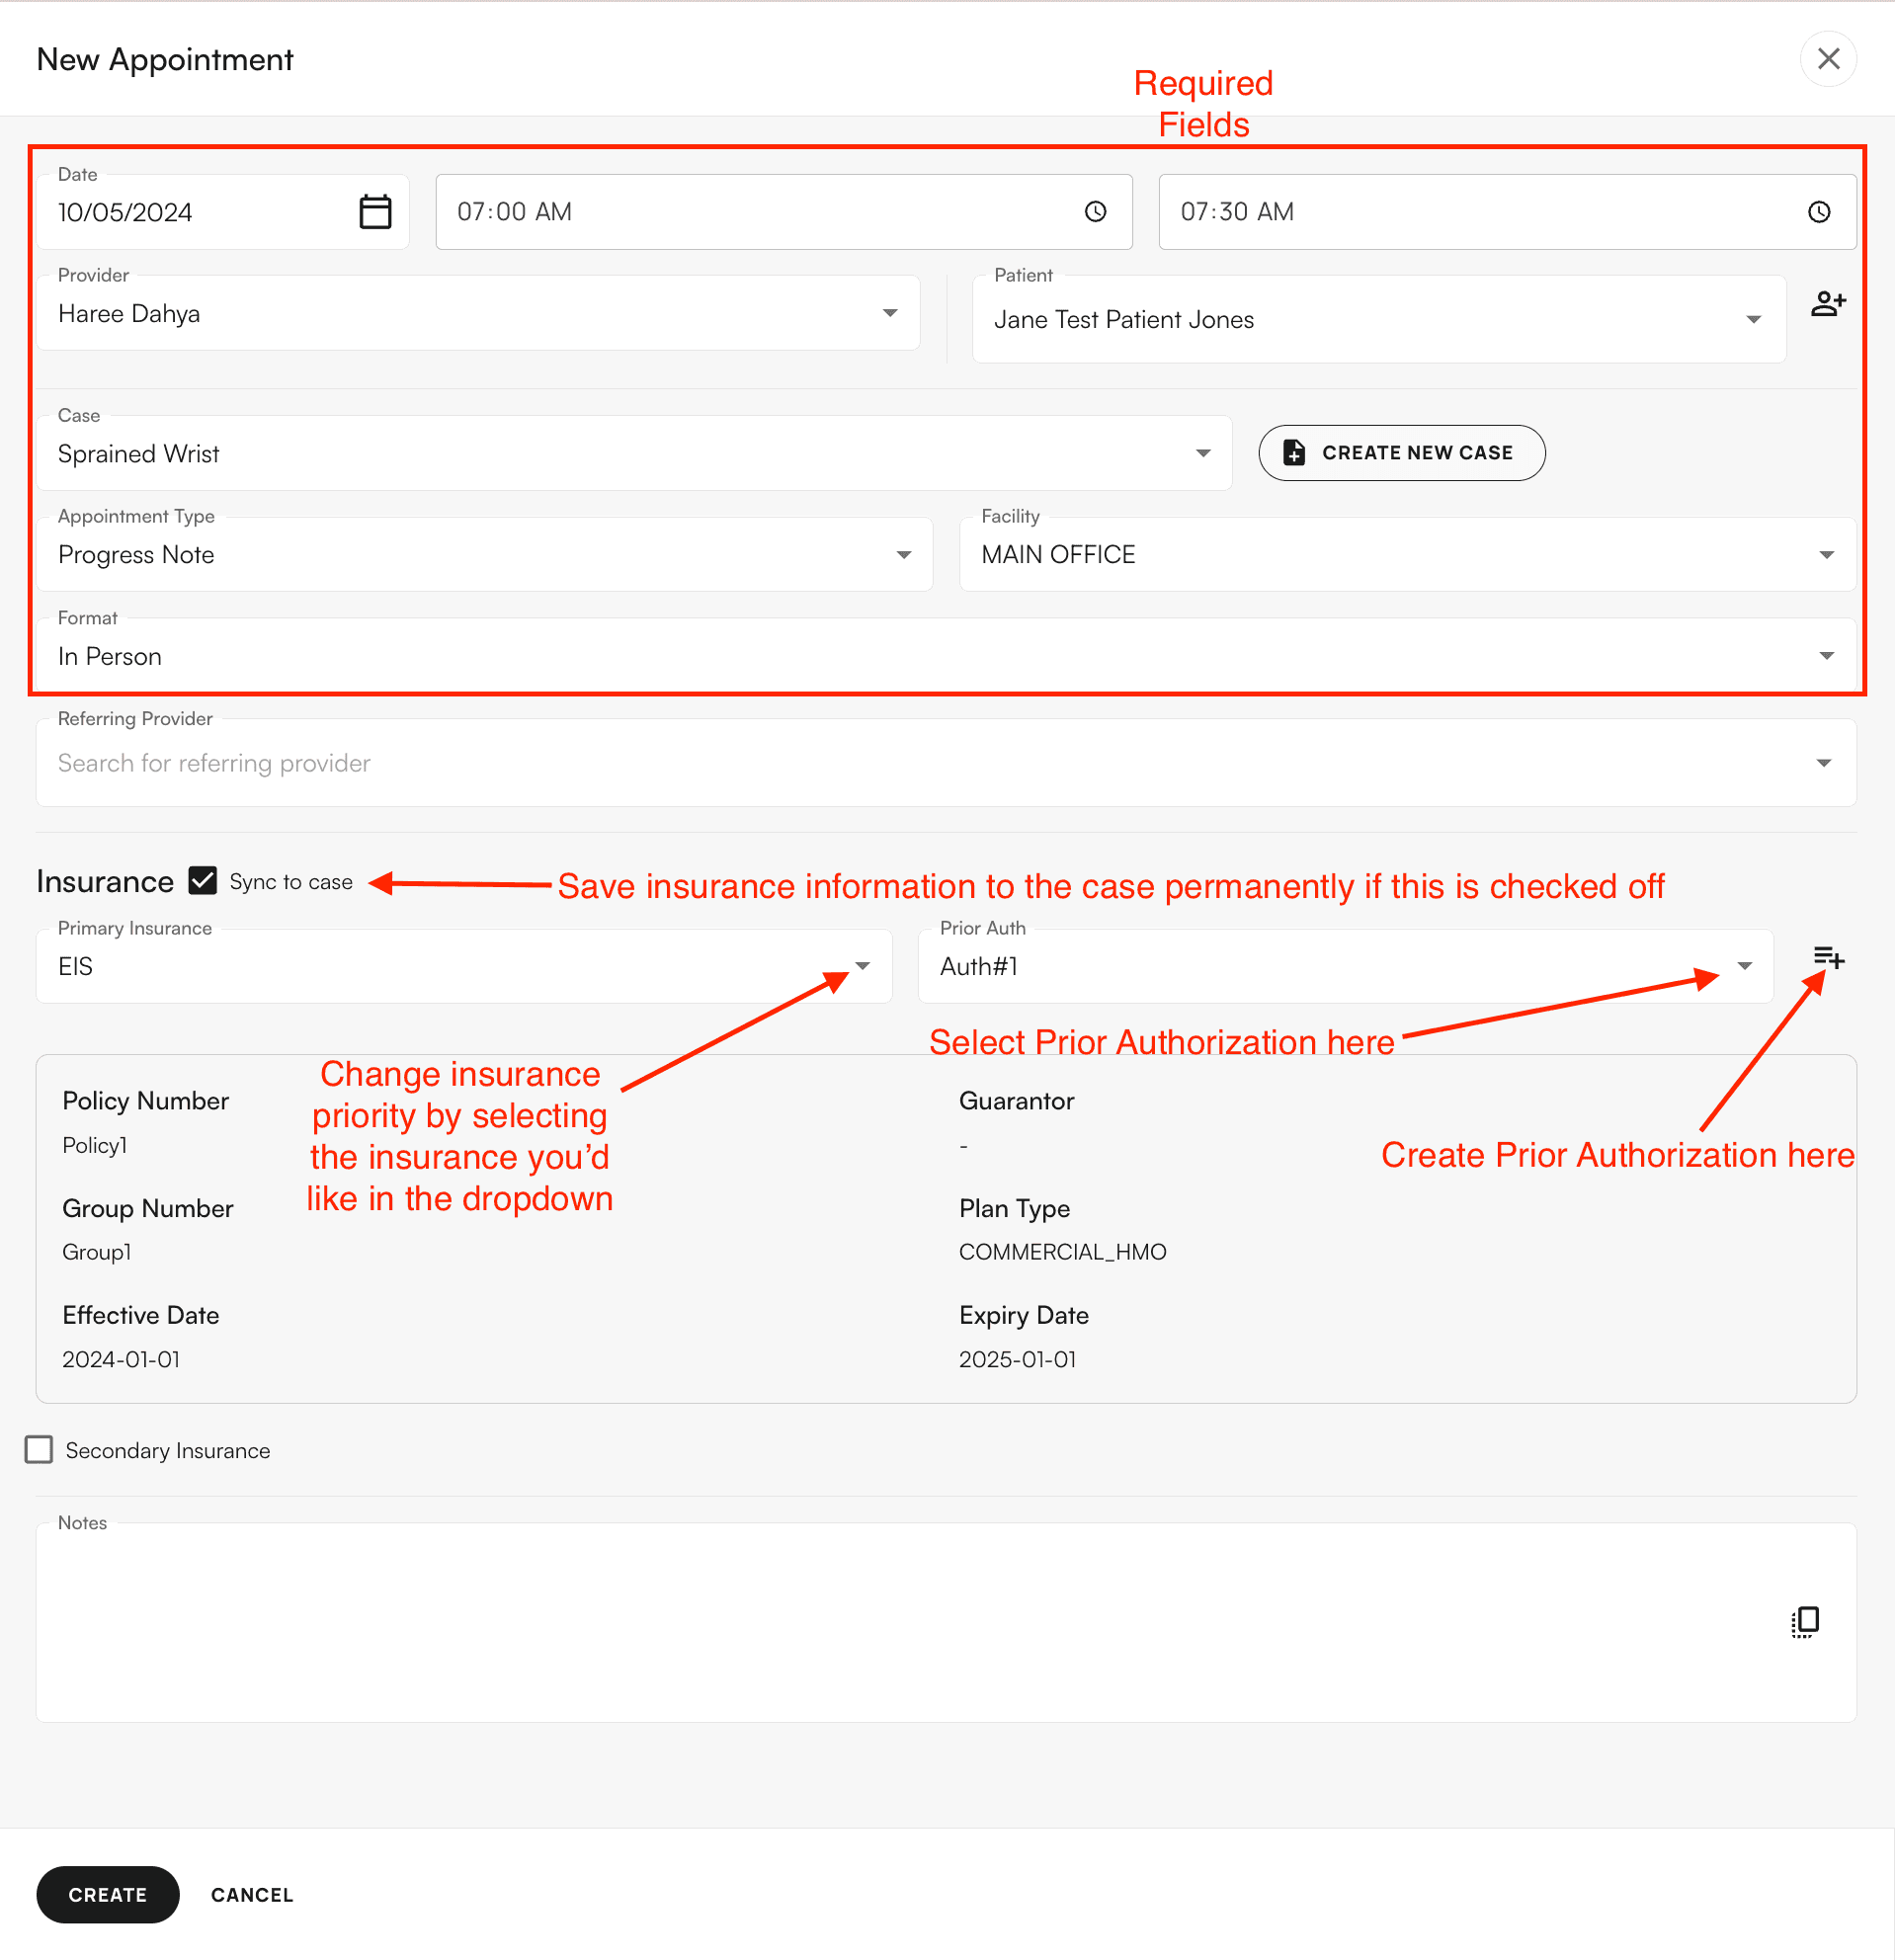
Click “Create” at the bottom of the side panel to successfully create the appointment.
We use the NPI registry to find and add referring providers to our system. To add a referring provider, type their NPI number into the search field and their information will populate, as shown below.
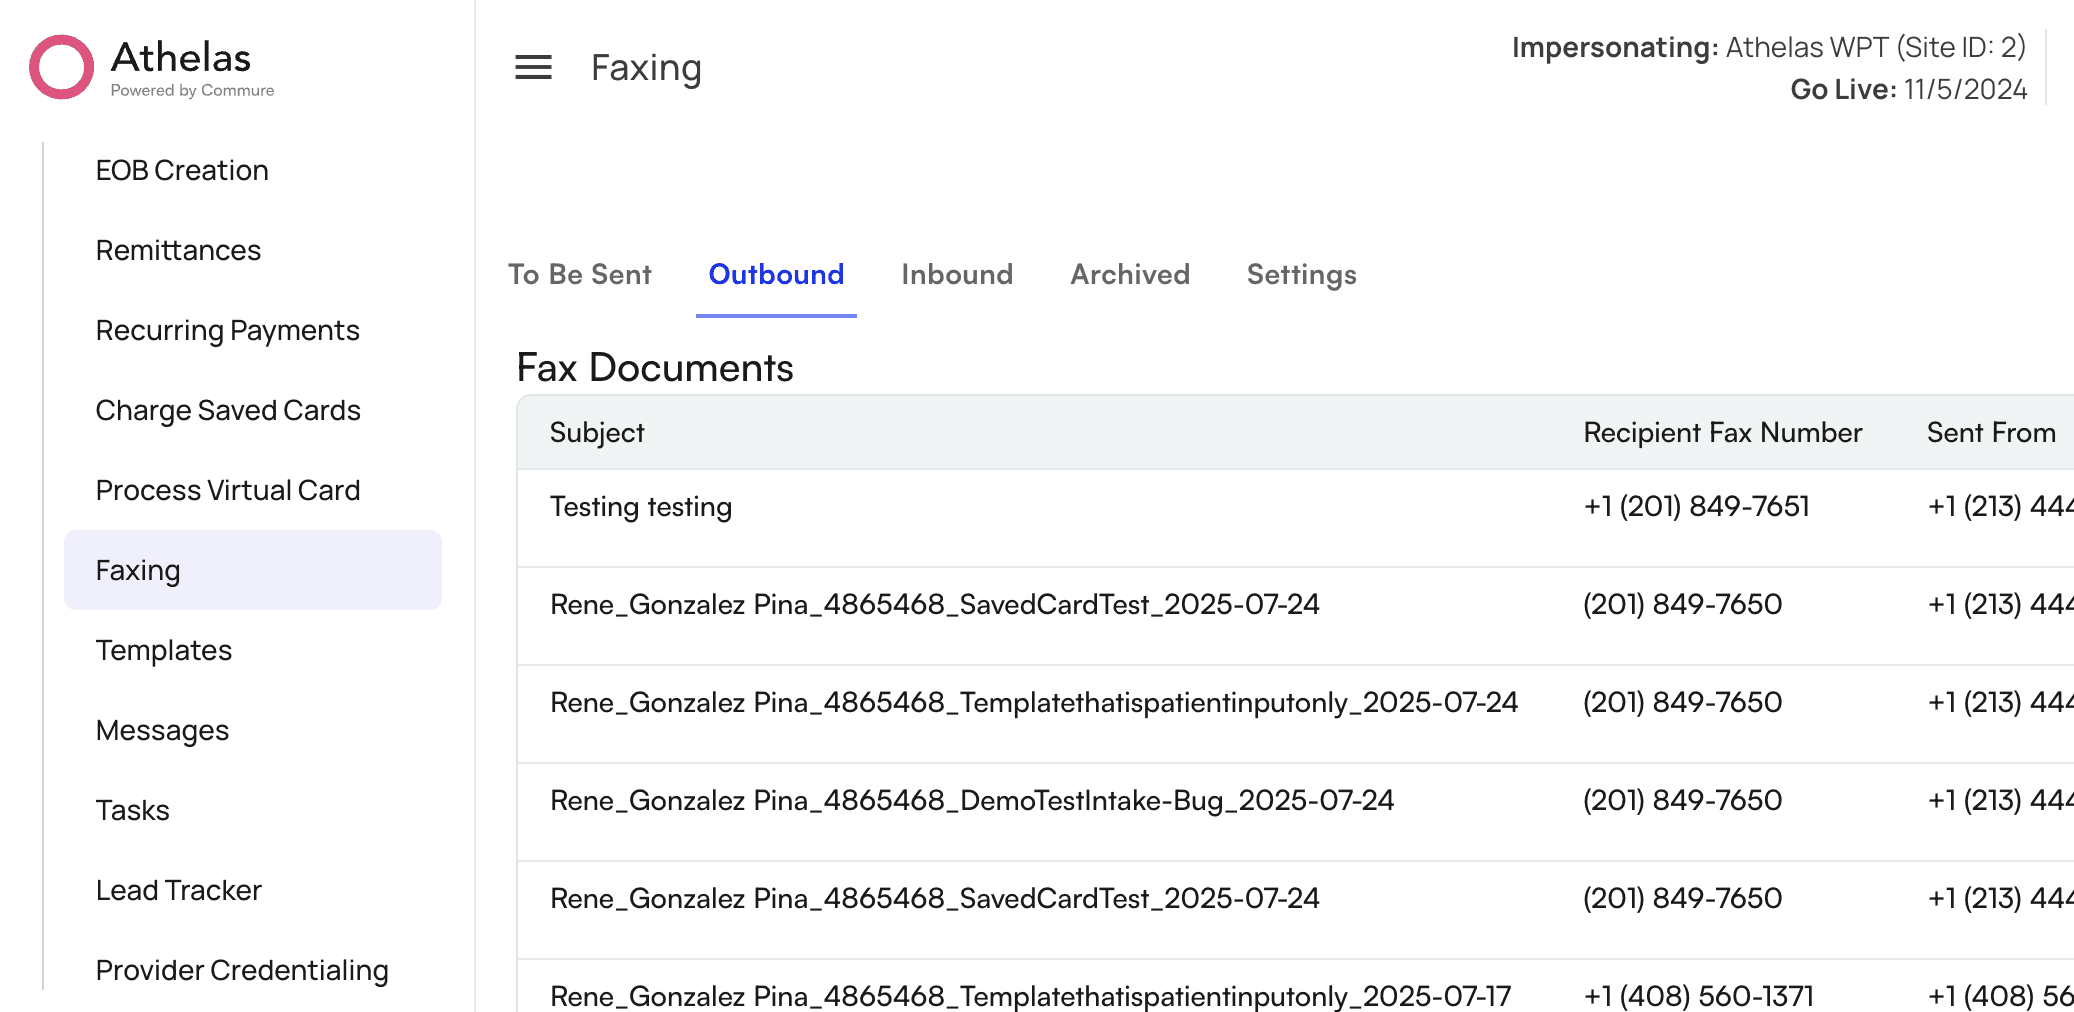
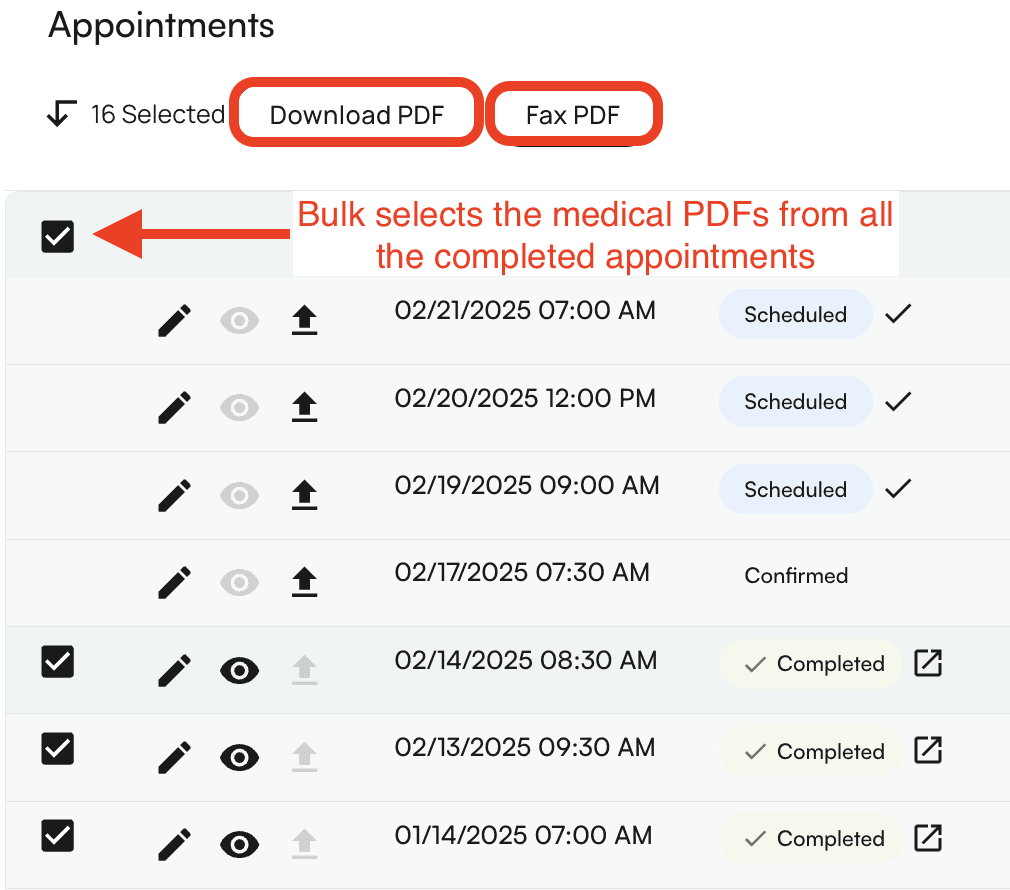
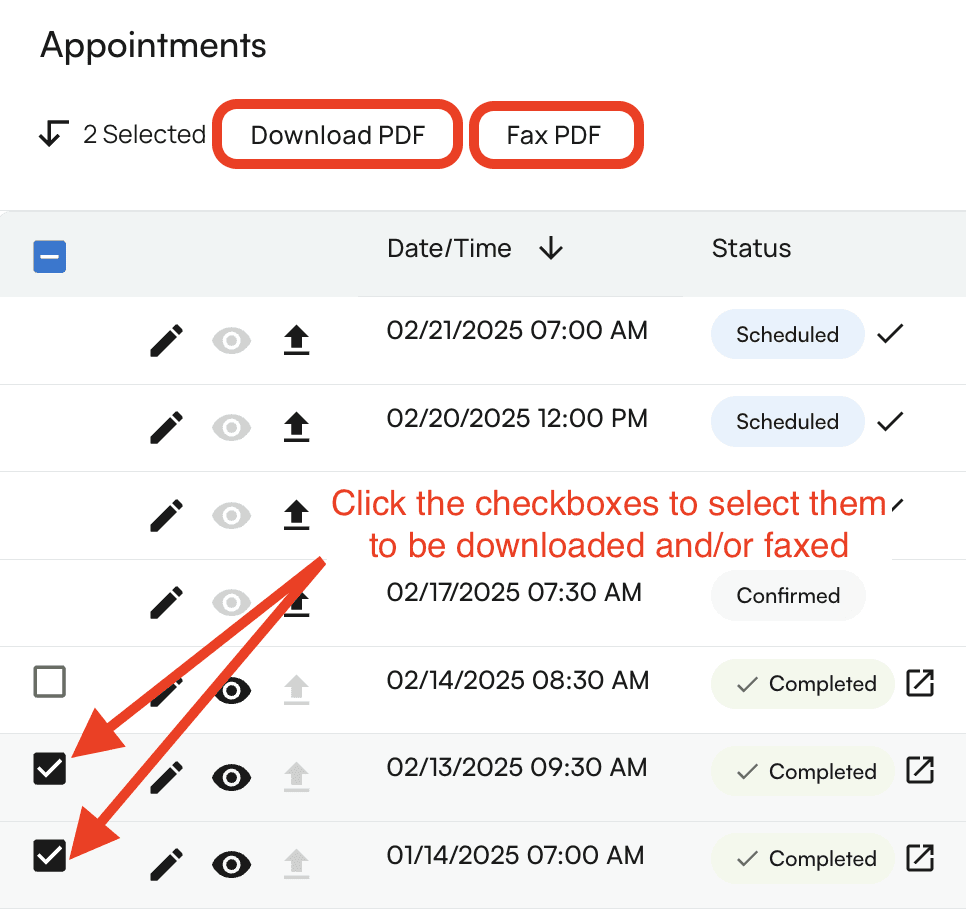
Faxing
You can easily bulk fax and download PDFs by clicking on the checkbox at the very top of the appointments table. All of the completed appointments will have a checkbox next to them. You’ll be able to uncheck any that you don’t want to download or simply check the boxes next to the appointments you’d like to download or fax.
Although faxing can be done through the patient profile as seen in the above section, there is a dedicated faxing page within Air to send and receive faxes. To get to this page click on Utilities on the left hand menu, then select the Faxing section.