Getting started as a Healthcare Provider
Welcome to the Athelas Healthcare platform! We're so glad you've trusted us to handle your day-to-day and we're excited to get you up and going. In this document, you'll find everything you need to know as a healthcare provider to get going.
Navigating Chart Notes
The Chart Note is the essential workflow for a Provider within our EHR. In this section, we outline the notable features for proper usage including navigating to the chart note, recording a note via Scribe, adding measurements, goals, treatments and exercises, locking and signing your note:
Fundamental Components of our Chart Note
Plan of Care
Measurements
Goals
Treatments
Navigating to the Chart Note
To view the chart note for a patient, you must first check in an appointment for the patient you’d like to conduct the for.
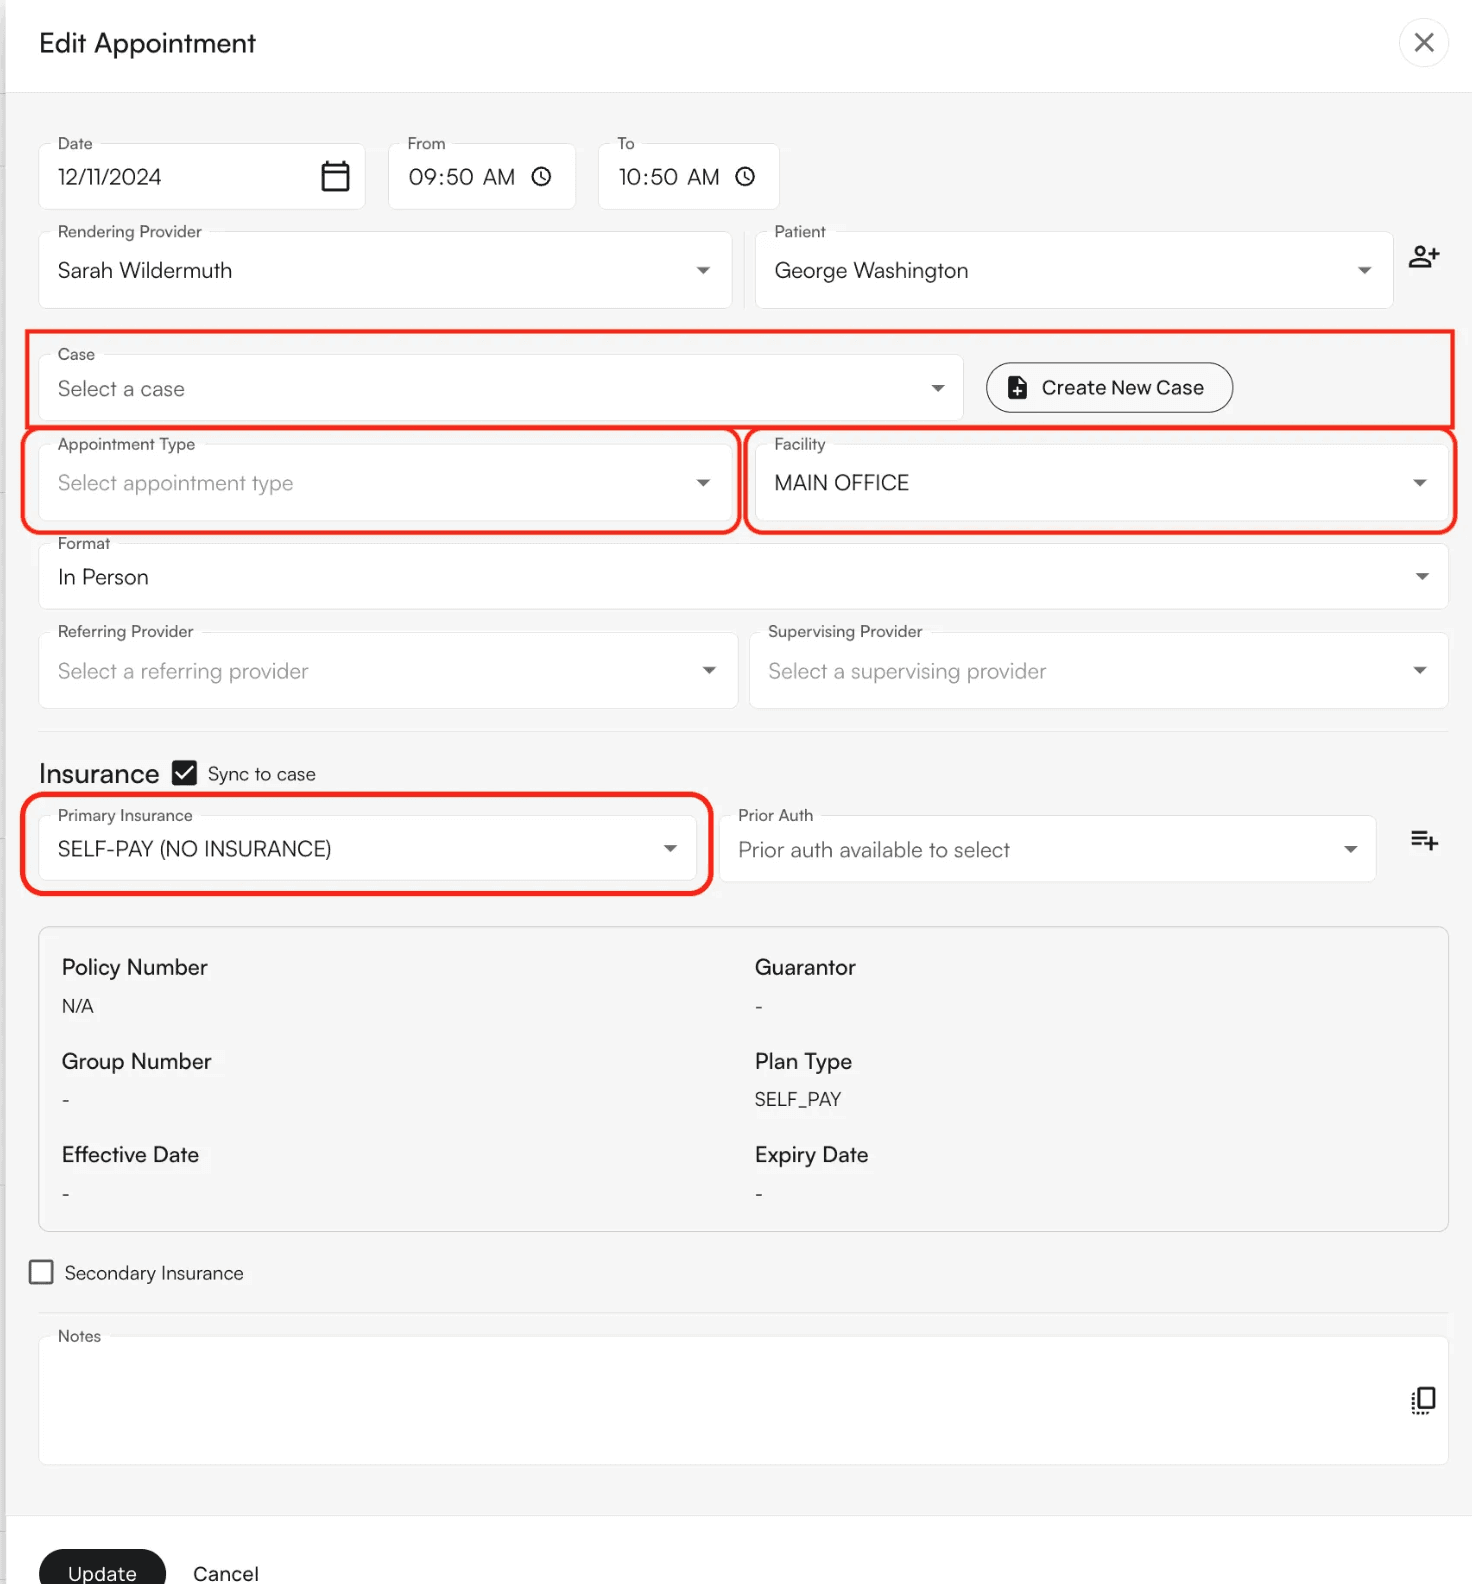
Note: In order to check in an Appointment a Case must be present. This means that the user should add the relevant case to the Appointment so that a Chart Note can be created**.**
If there is no given case, the user will receive an error when trying to check in.
You may enter add this via the drop-down or go ahead and create a new Case in correspondence to the Appointment
Required Fields for an Appointment :
Case
Appointment Type
Facility
Insurance
Alternatively, you can navigate to the chart note via the patient’s profile:
Click on “Patients” on the left hand menu and type in the patient’s name into the search bar.
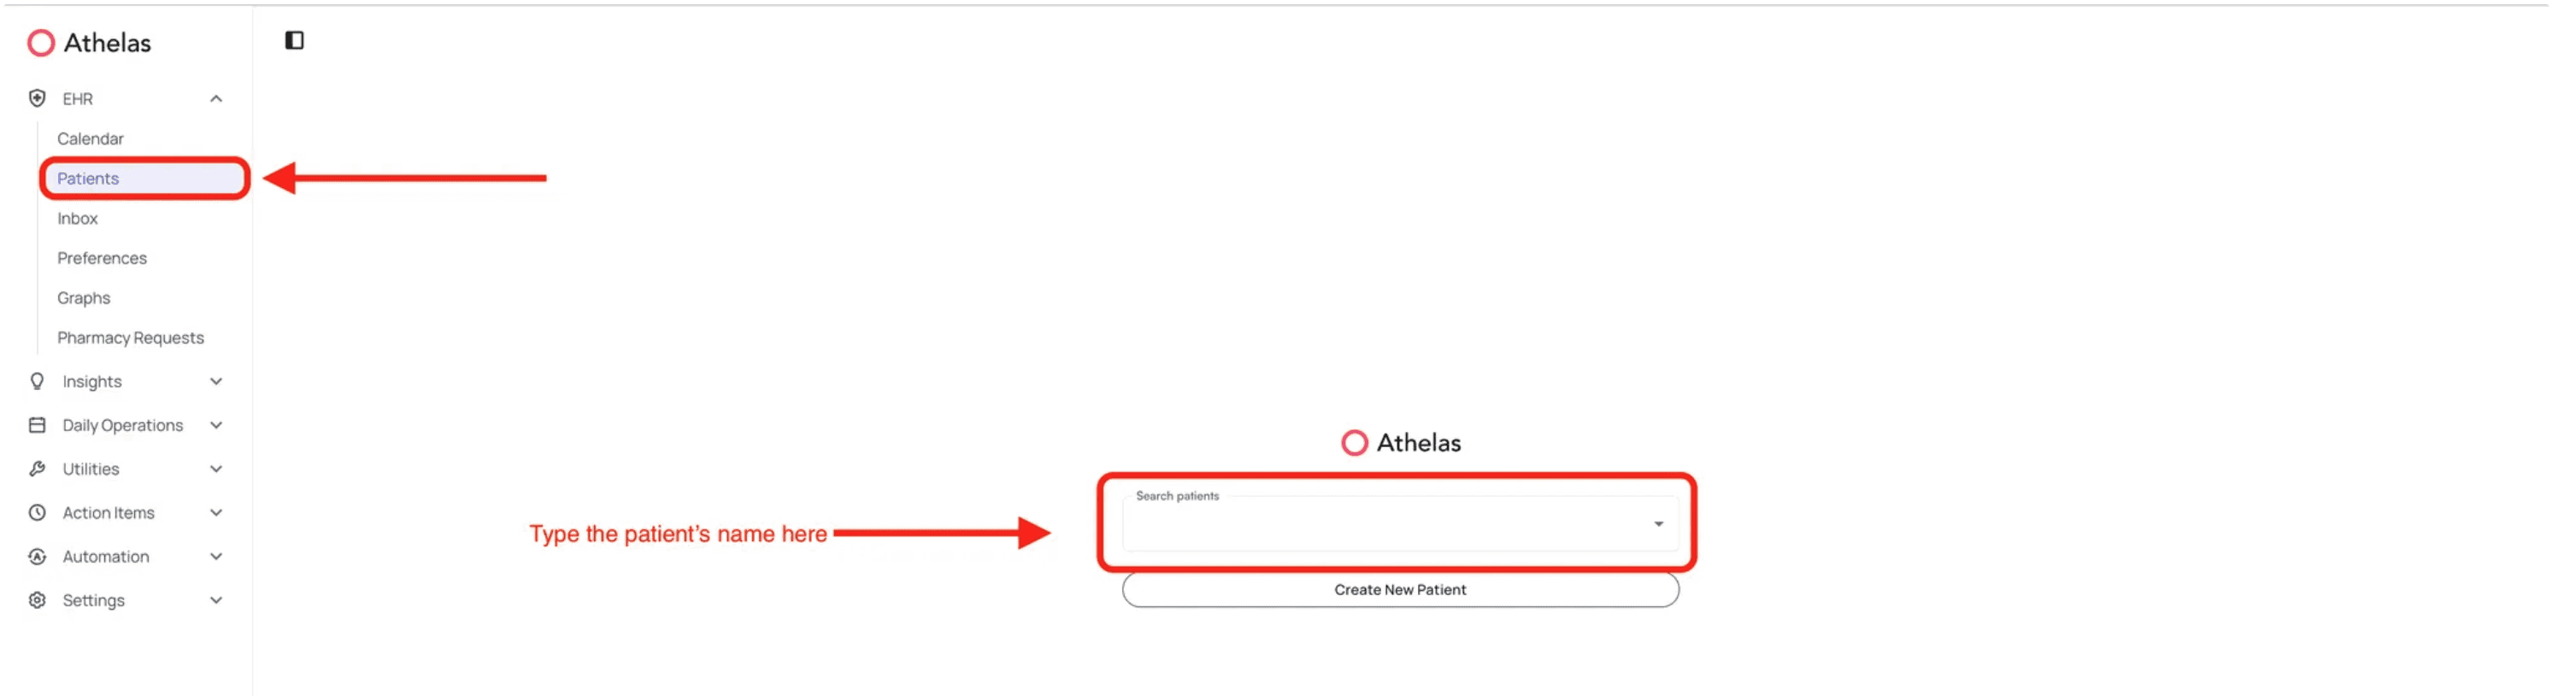
You’ll be automatically be routed to the Appointments page of the patient’s profile.
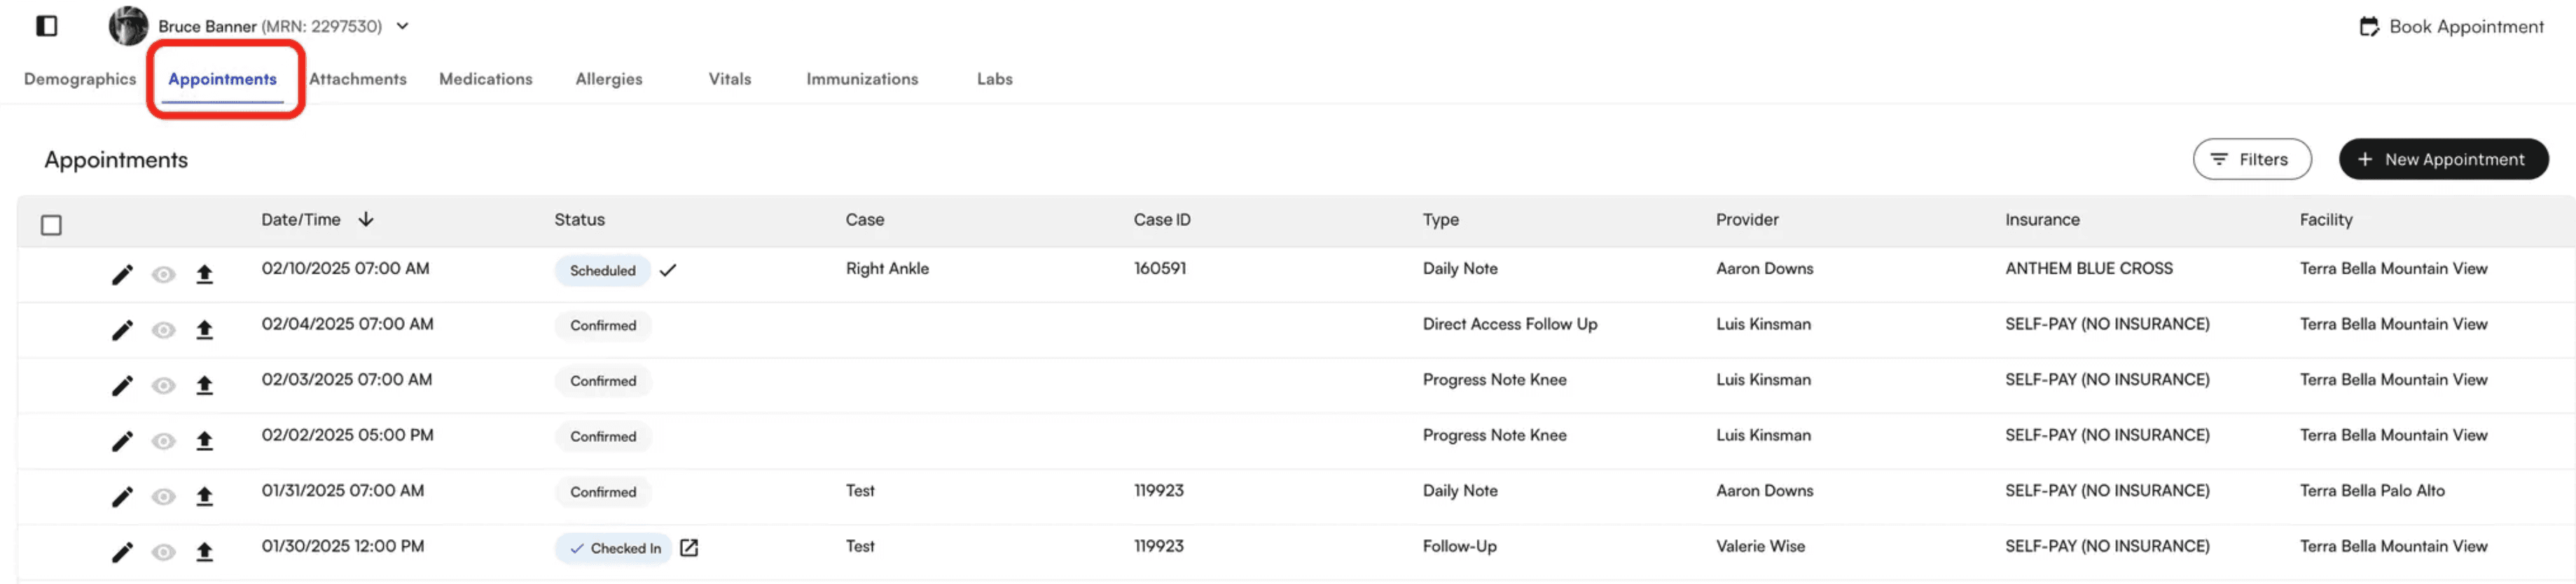
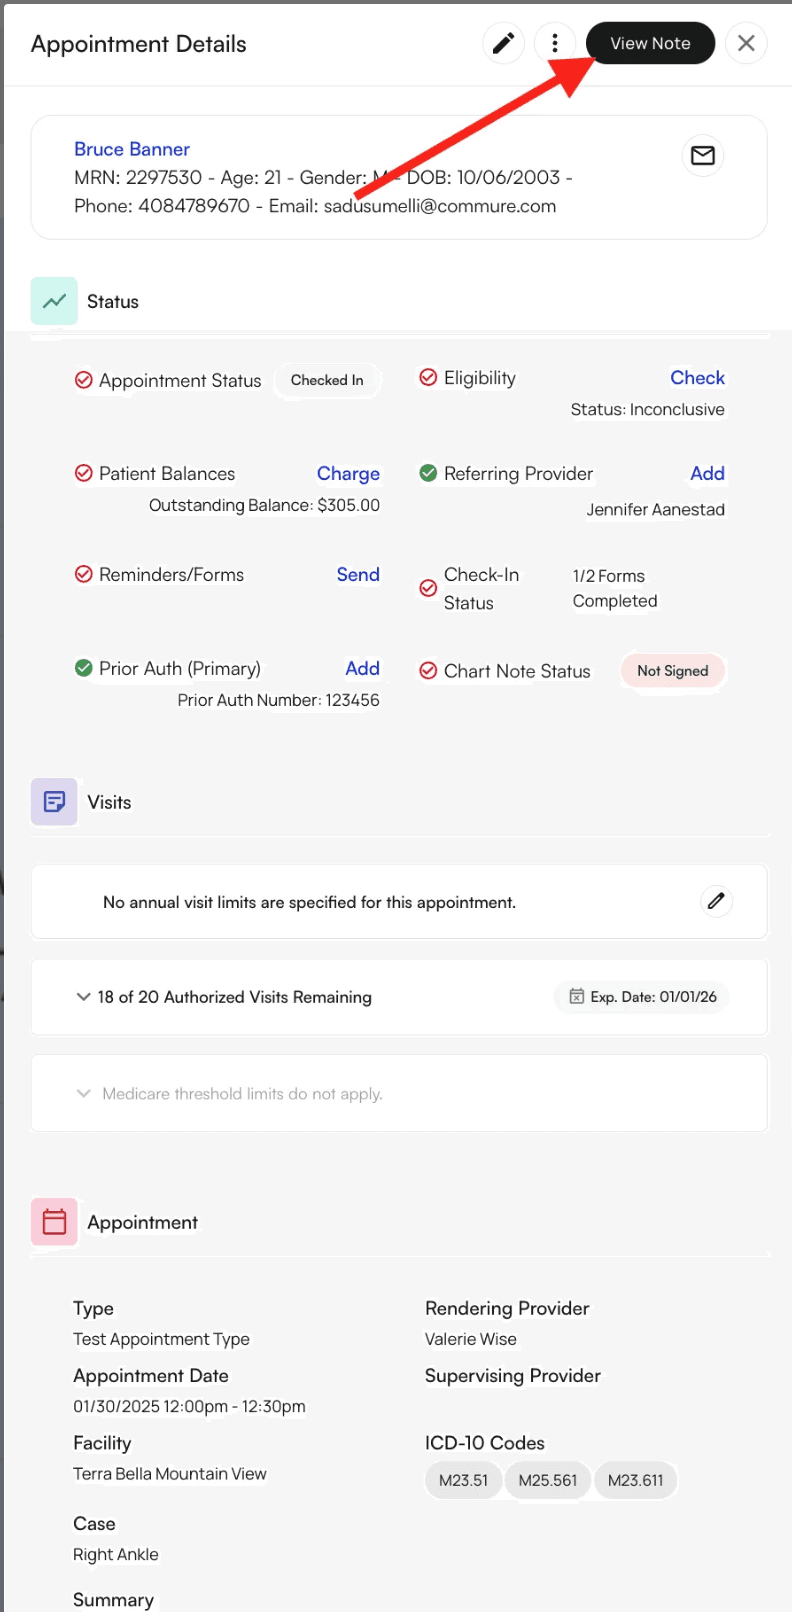
If an appointment has yet to be checked in, the status will indicate that it is scheduled with a checkmark next to it. Clicking this checkmark will check in a patient.
If an appointment is checked in, the status will indicate as such. Clicking on the box icon with an arrow sticking out of the top right corner will open up the chart note.
Once you open up your Chart Note you will be greeted with the following Buttons to allow for the appropriate base set-up.
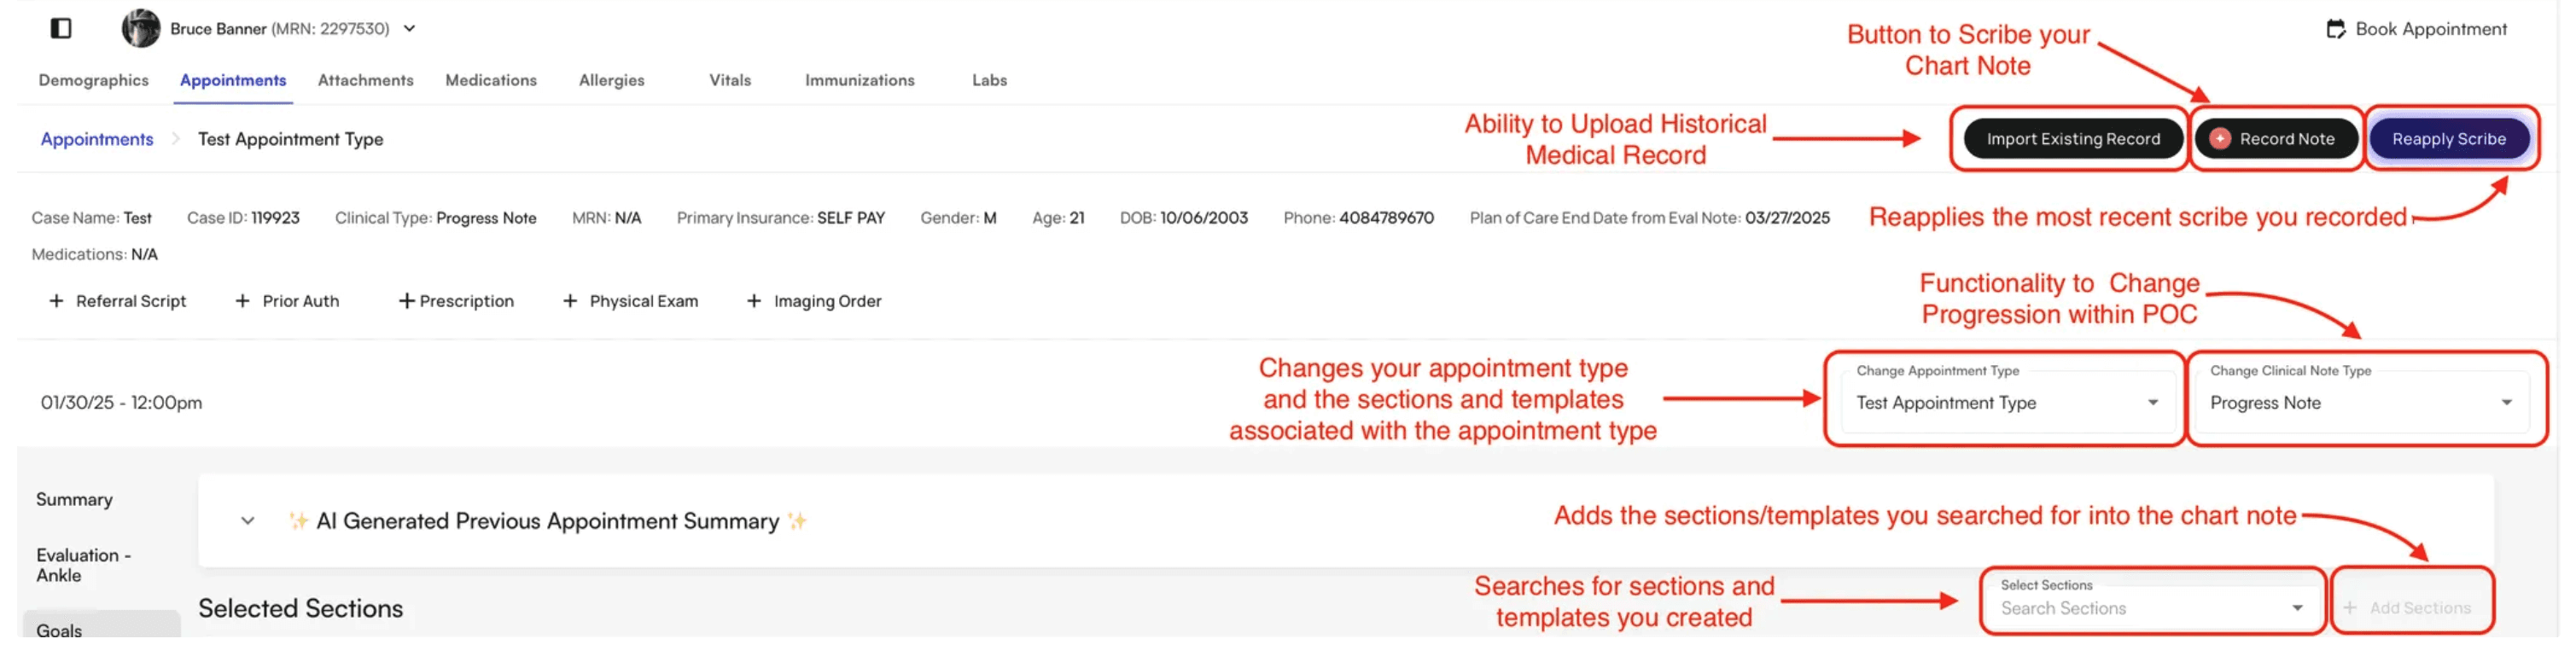
Recording a Note
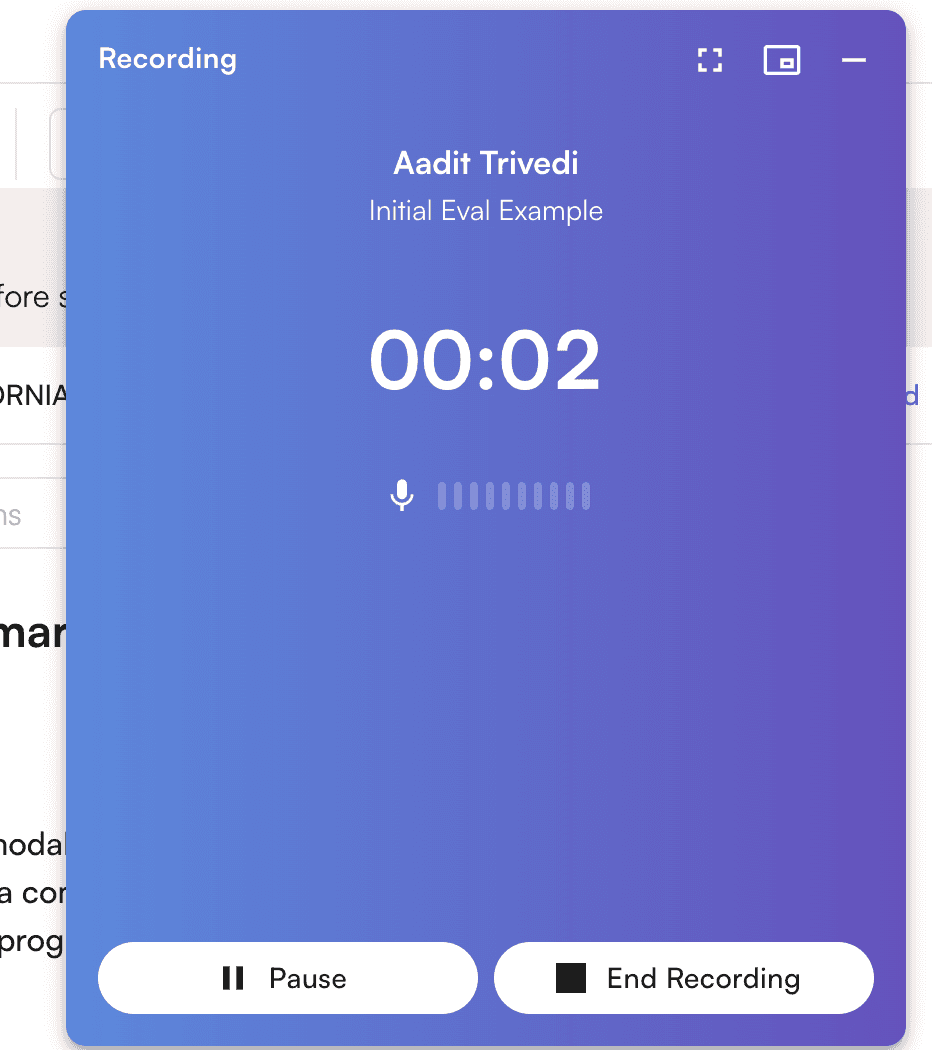
Scribe is a powerful tool which will allow the conversation with your patient to be auto-populated into the encounter based on what was said.
Click the bottom right “Athelas AI” button - a window will open up with the option to “Start Recording”, click this to activate Scribe.

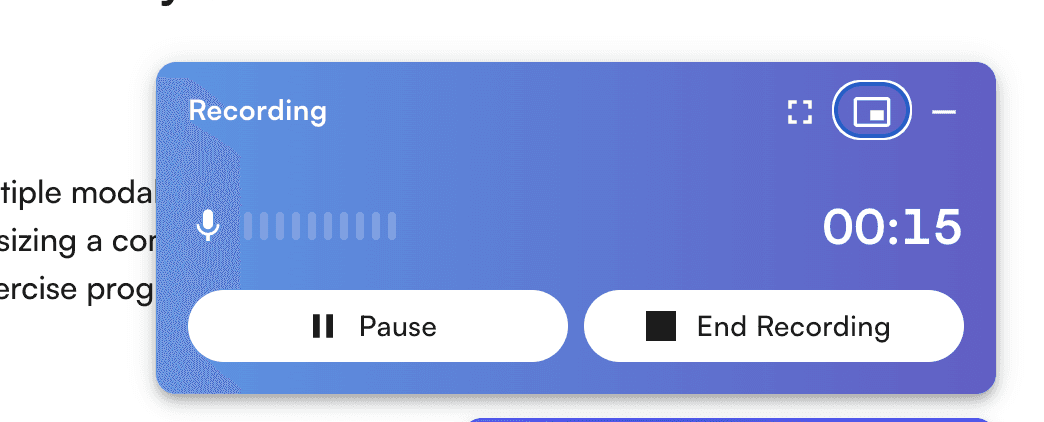
Record your conversation. While the EHR Scribe widget is open, you can navigate to other EHR pages on the Athelas EHR website and continue to record in the background. However, you will not be able to navigate to non-EHR pages unless you end/cancel the recording. You can click “Minimize” to minimize the widget. It will continue to record in the background while minimized.
When you’re ready to upload the recording, click “End Recording”.
After the recording is successfully uploaded, it will take some time for the backend to generate a scribe from your recording. At this point, you are free to wait for generating to finish, or close the window and do something else.
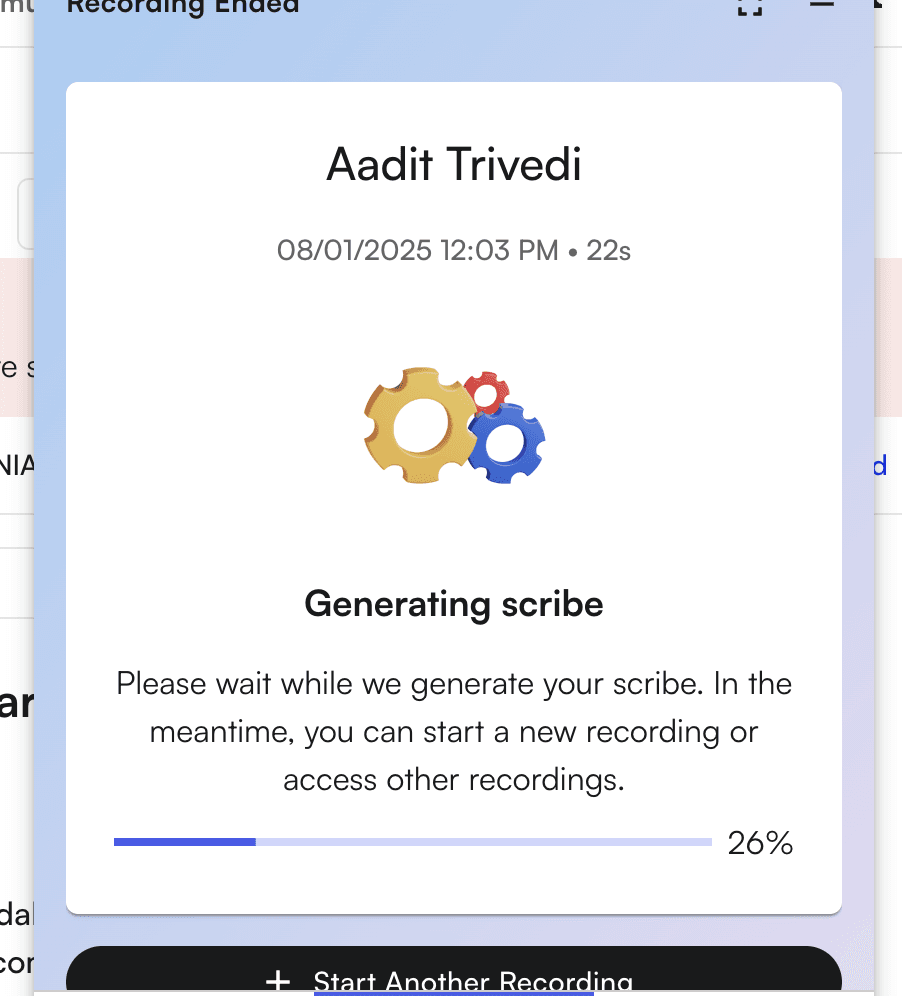
Once generating completes, click “View Scribe” to view generated outputs
Measurements
Here is an example of how Measurements will appear within the Chart Note
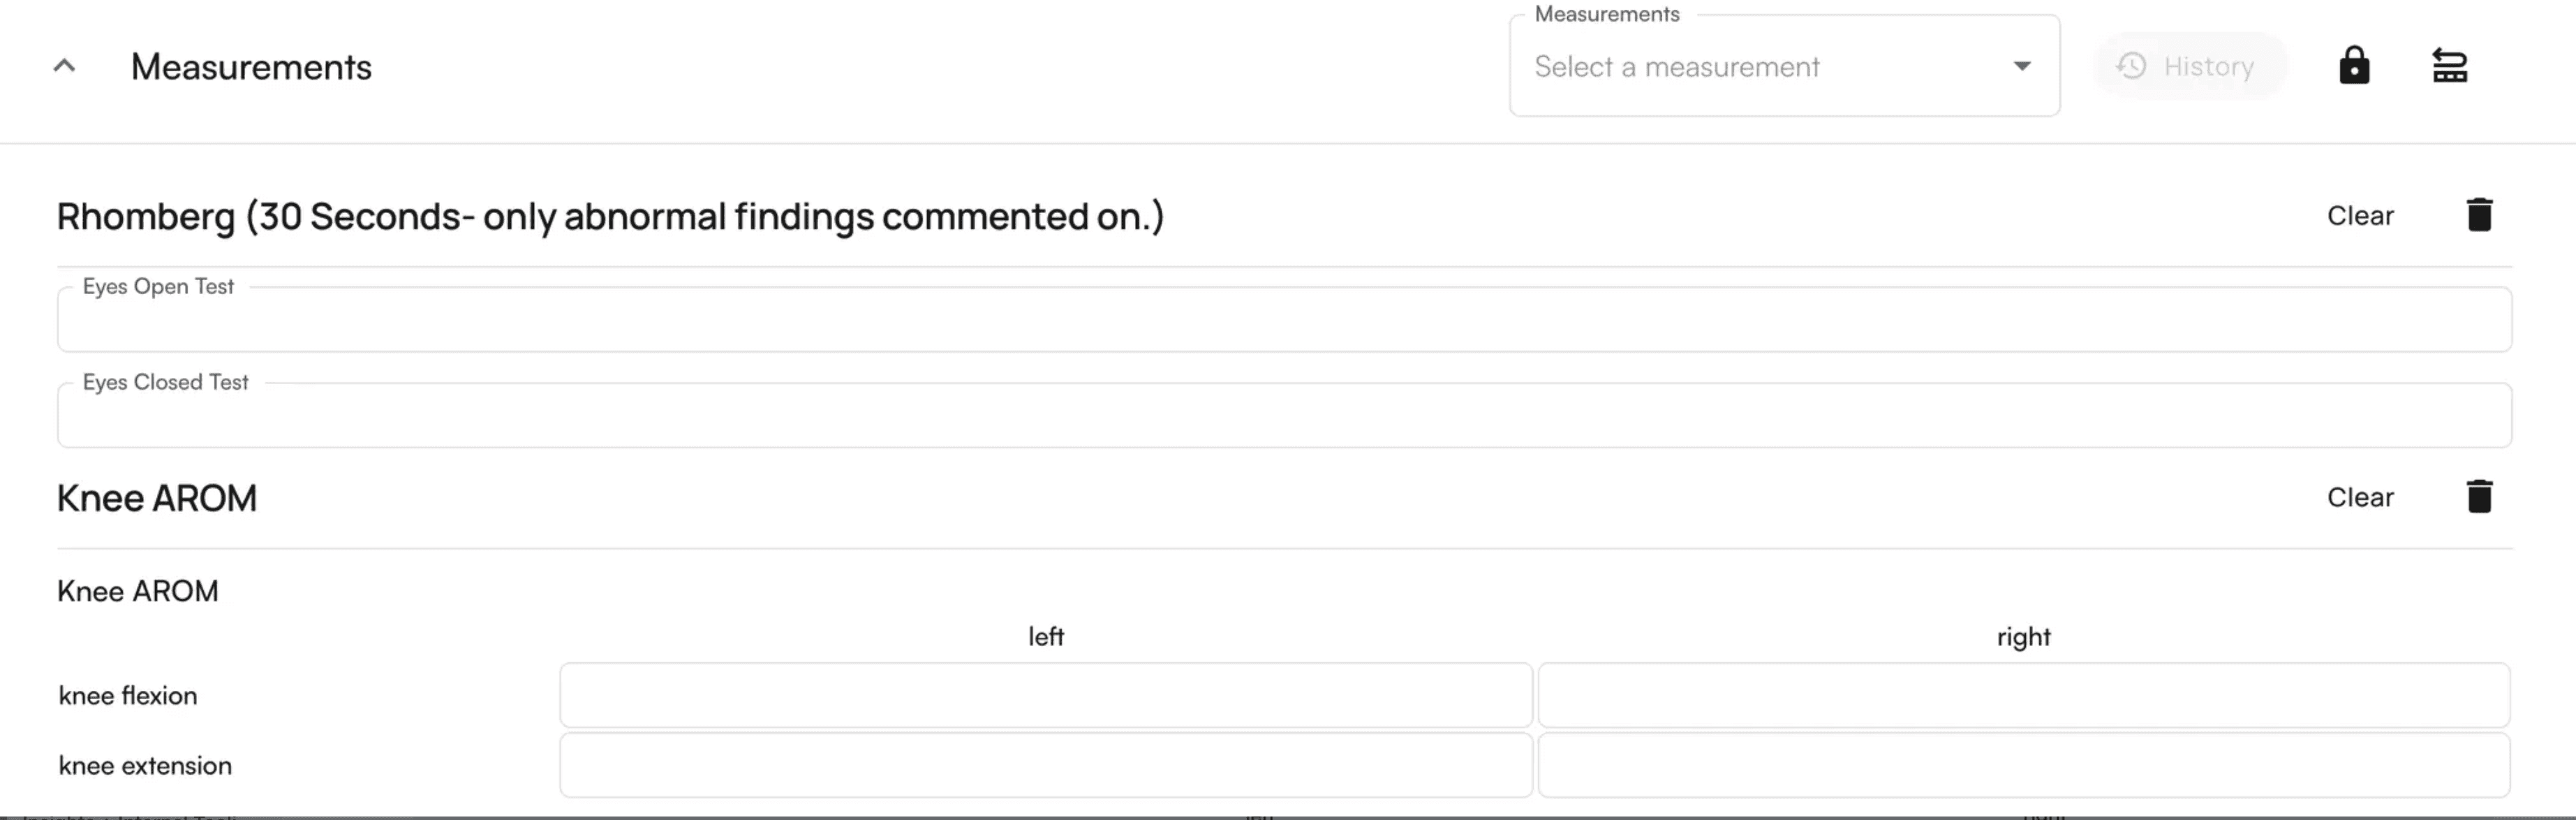

Clicking on measurements will display them in a categorized order.
Left Image: LE Neuro Exam-related Measurements are grouped together and below the ones with No Associated Group will be anchored at the bottom. Clicking on the individual measurement will add it to the chart note, but clicking on the + icon on the right side of the group name will add all measurements within the group.
An important point to note is that the user will also have the ability to view the History of Measurements and pull data from the previous chart note for measurements if it exists for a patient.

Goals
This is the Goals section: To add Goals, click “+ Add Goal”. Additionally, clicking the curled arrow will pull data from the previous chart note for goals.
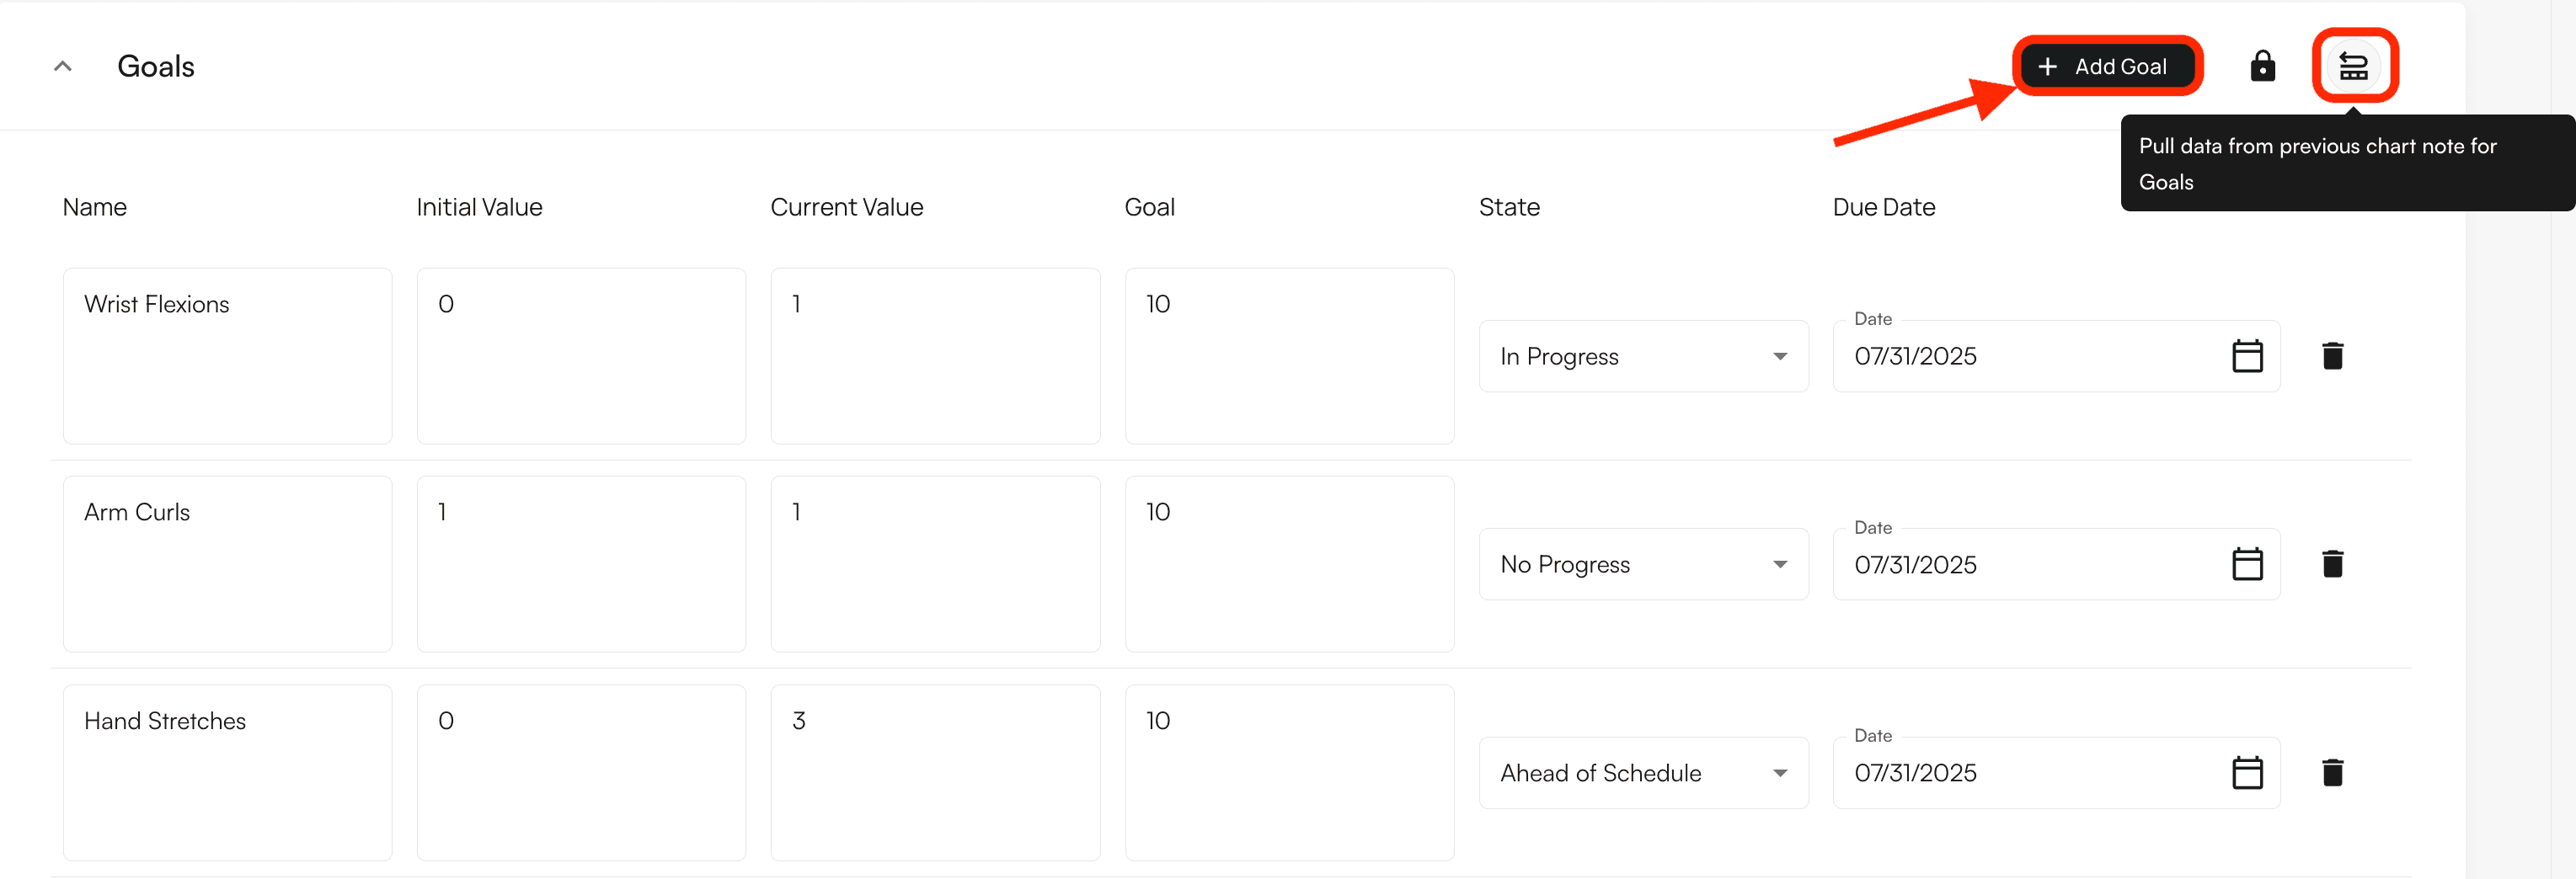
A window will open up, allowing you to input the details of the goal. Once you’ve entered the information, click on “Add Goal” at the bottom of the window.

Note: Scribe will be able to pick up the following Goal and discern the Values + Specifications based off of your transcription.
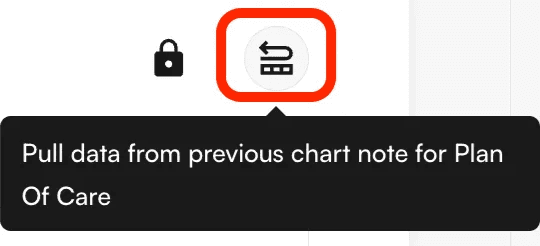
Plan of Care
When selecting Plan of Care, the user will be prompted to input:
Start Date
End Date
Frequency + Units
Duration + Units
Visit Count

You are not required to input all of the fields as some auto-population exists. For instance, if duration + units, frequency + units and start date are inputted- the end date and visit count will auto-populate based off the information listed. However, the option to override this is also available.
Clicking on the curled arrow icon will also allow you to pull data from the previous chart note for plan of care.
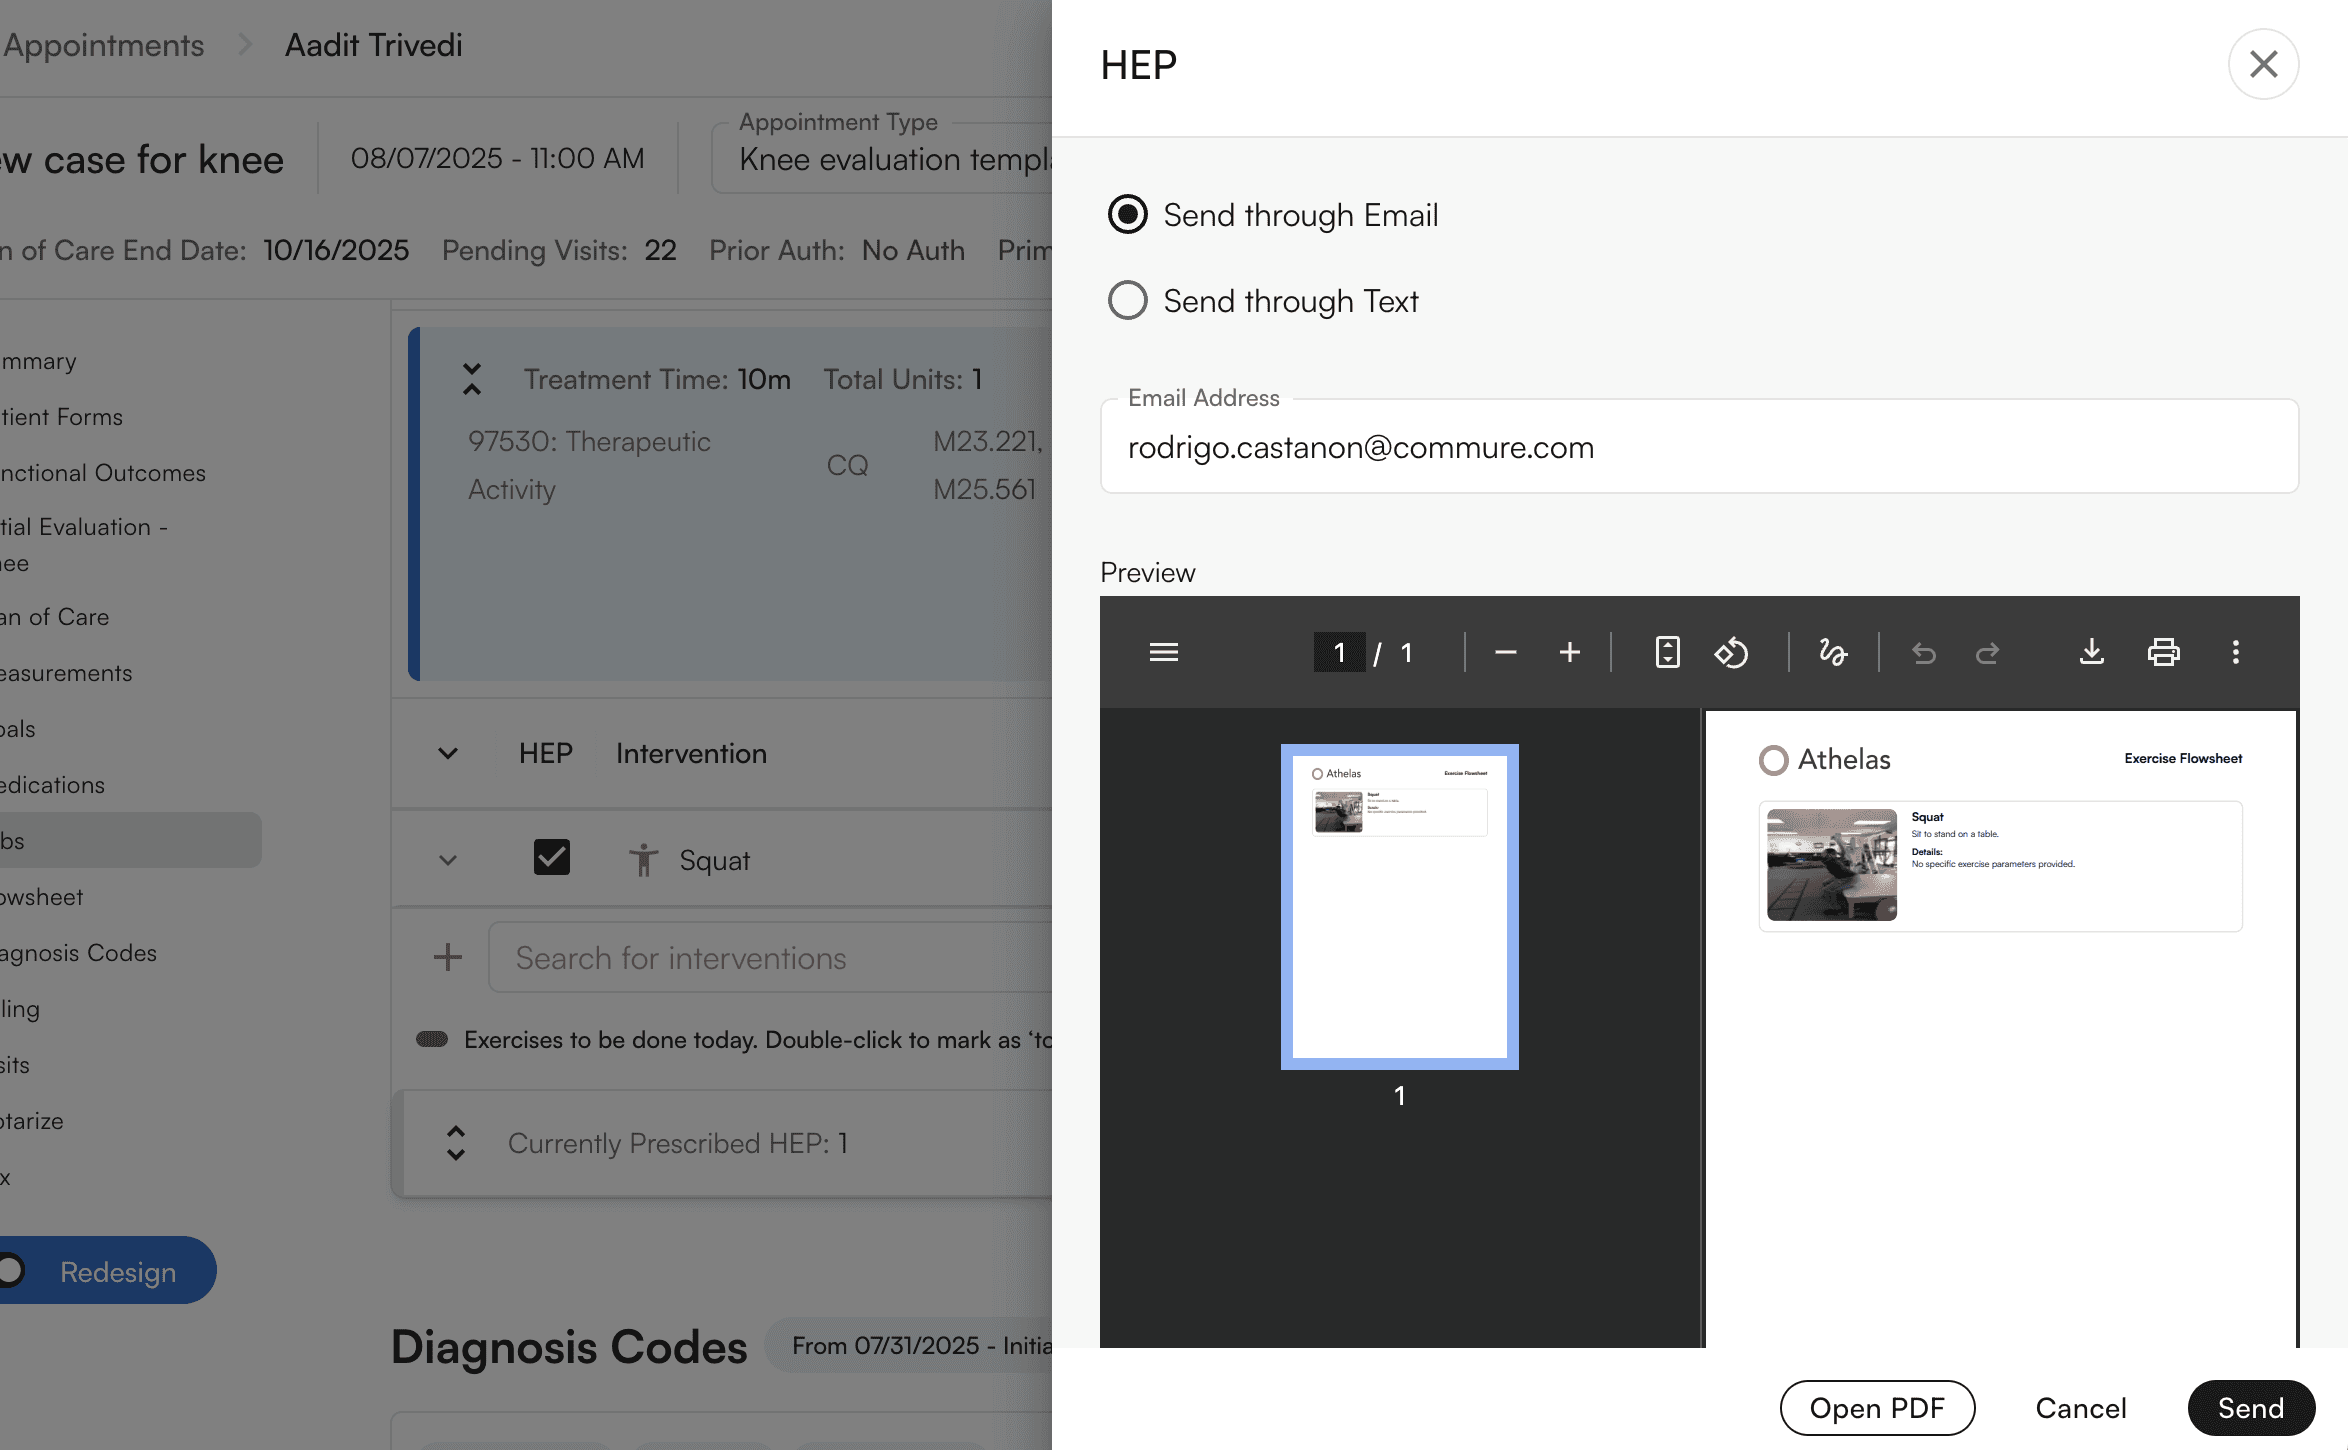
Home Exercise Programs
By clicking the checkbox for an intervention marked as HEP , this will add this to a staging area where a Home Exercise Program can be prepared.
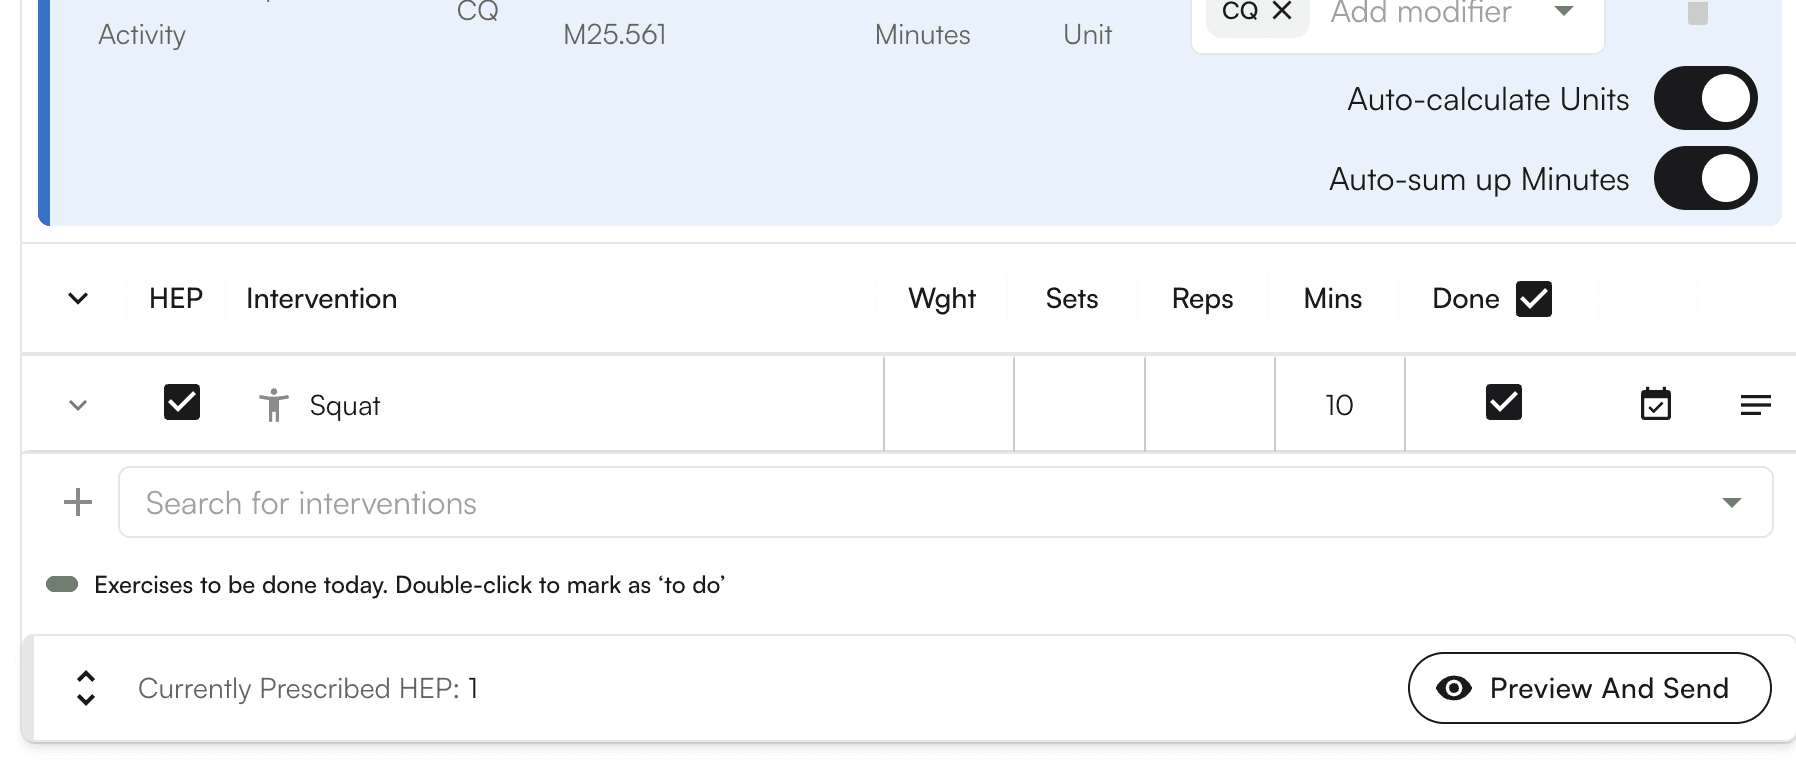
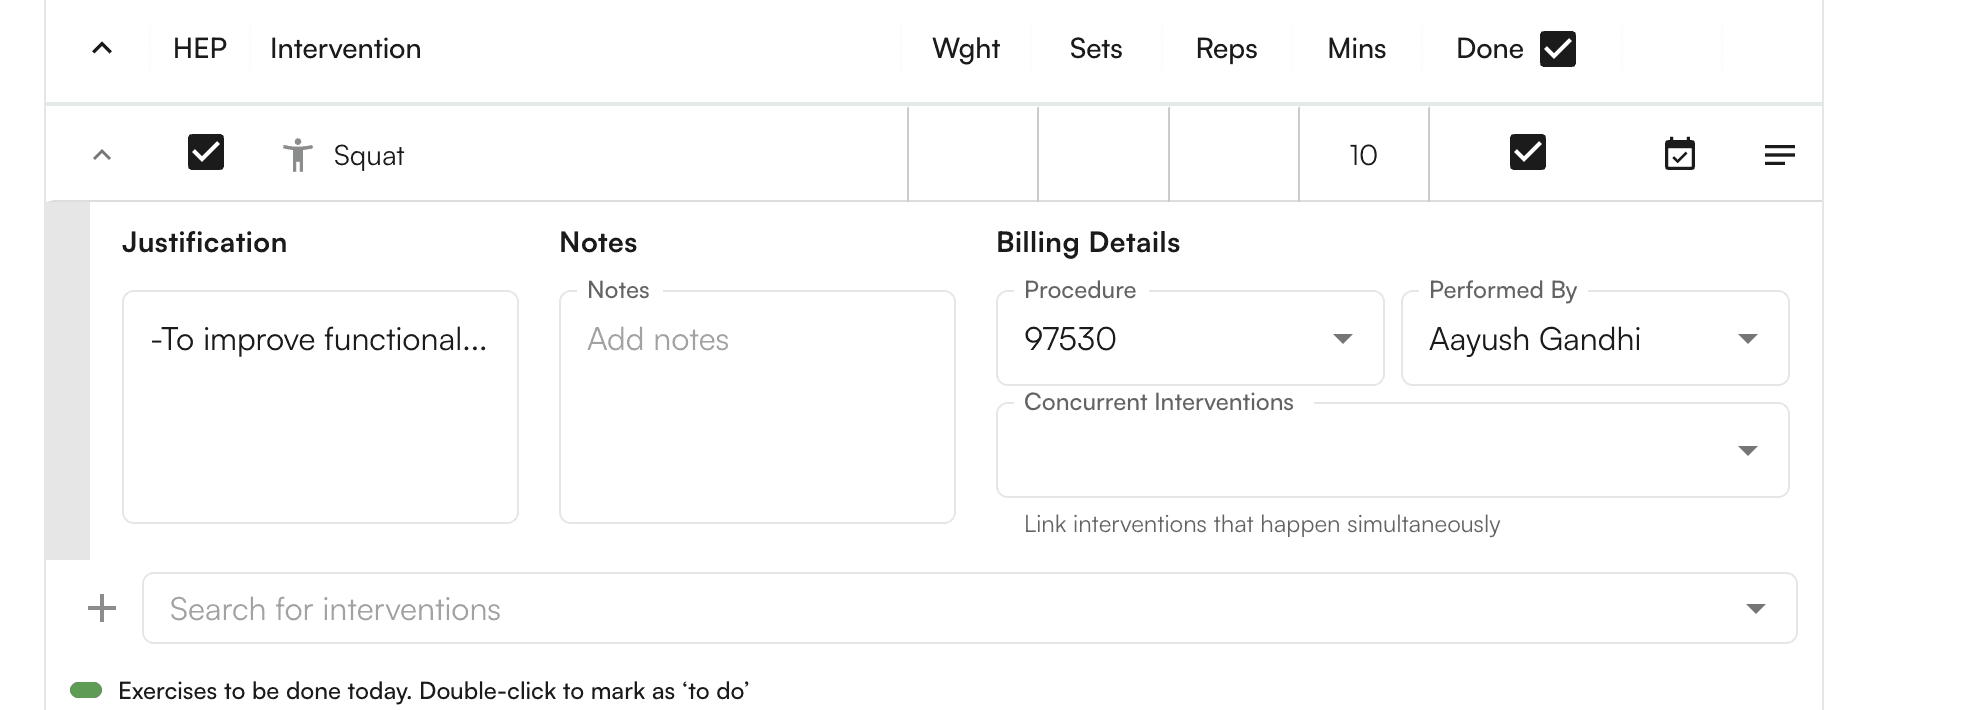
Clicking the caret for HEP will open up the dropdown to assign any additional notes to the HEP section on a per intervention basis.
You can “Preview and Send” to email, text and print the PDF
Templates in Chart Notes
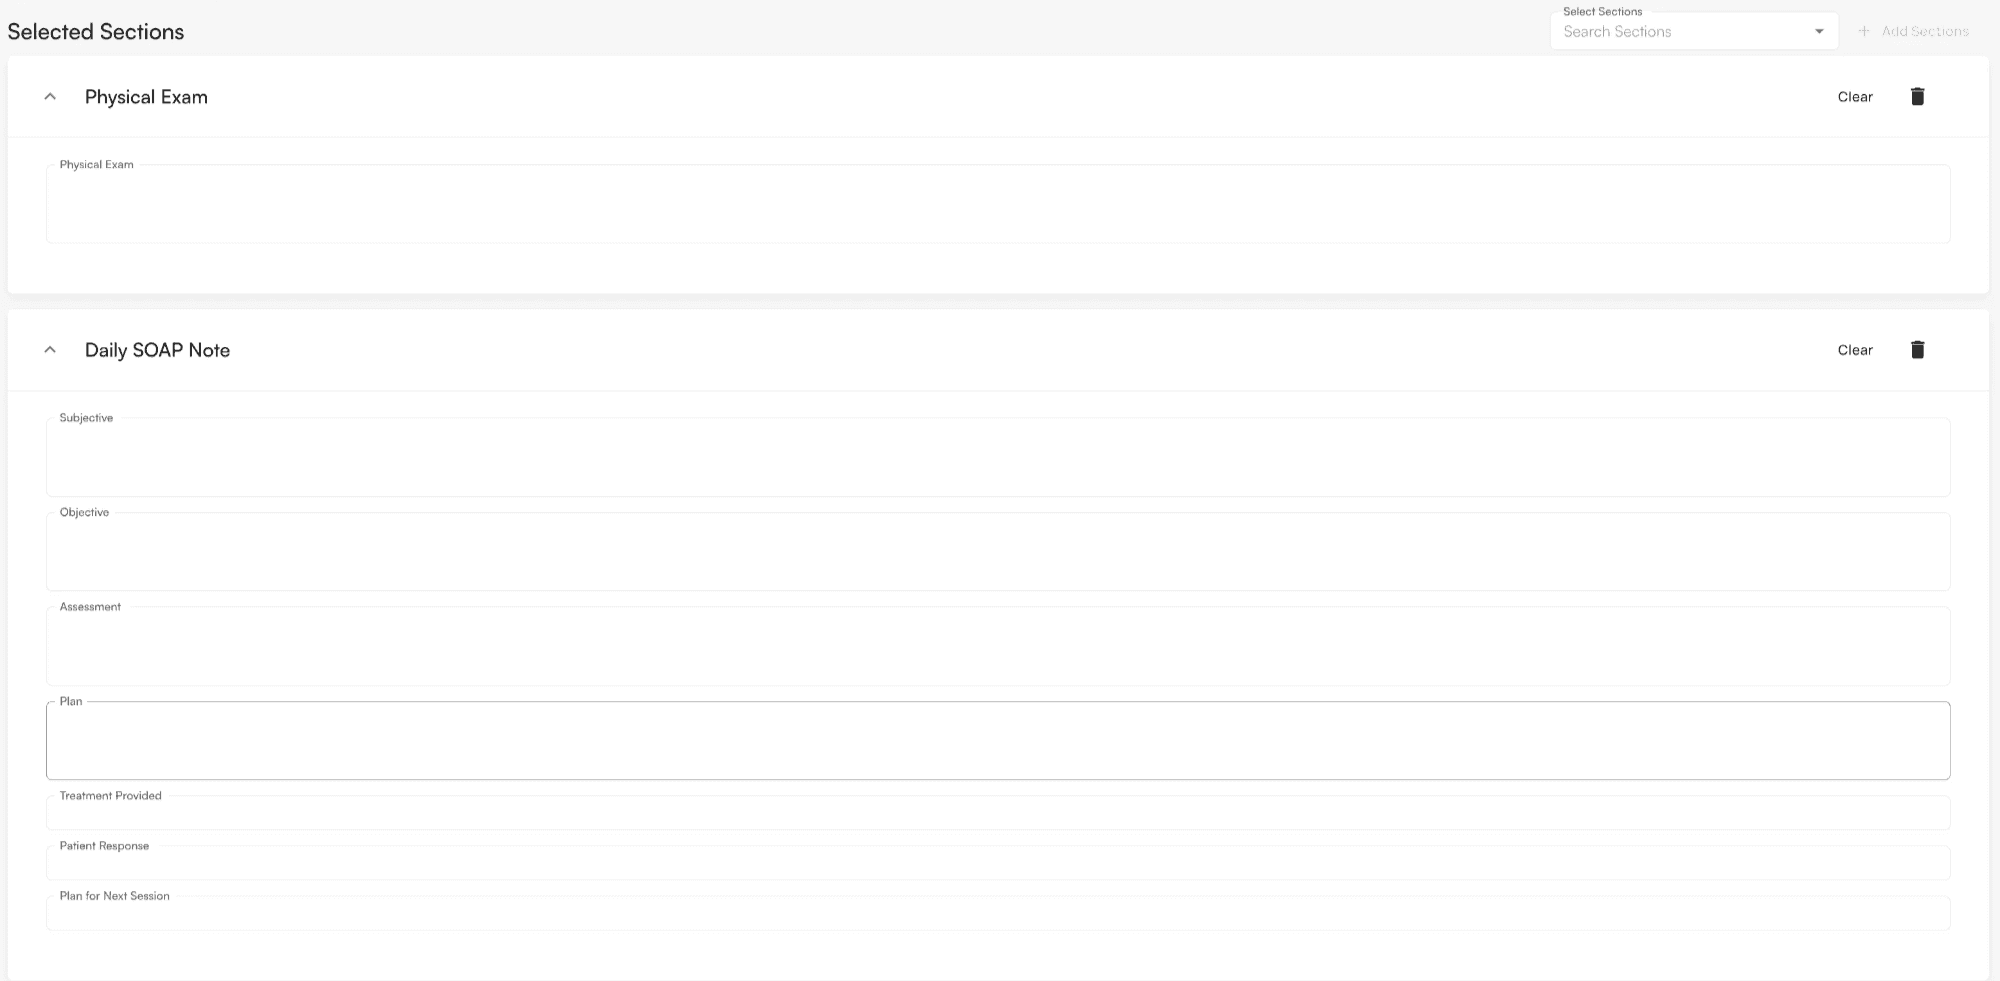
Templates are what you will be primarily utilizing to note down information during the patient’s encounter. This is includes SOAP notes, initial evaluations, or any other specialized fields the user would need to capture within the chart note and will be categorized under Selected Sections.
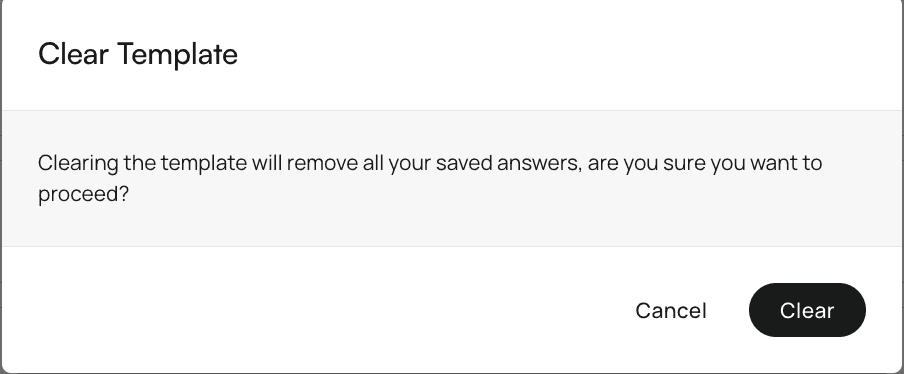
These templates are able to be scribed into as well. In the case where you’d like to clear all the information from the template, click on Clear on the top right corner of the template section.

Additionally, a warning will pop up after clicking on Clear to ensure that you want to delete the templates contents. This guards against any accidental data deletion.
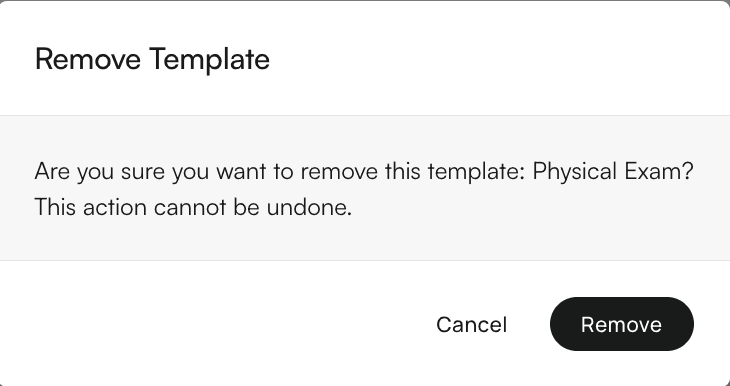
Clicking on the trash icon will delete the template altogether. This is helpful if you no longer need the section or accidentally added a template.

Similarly to clearing a template, a warning will pop up after clicking this icon to ensure that you want to delete the entire template.
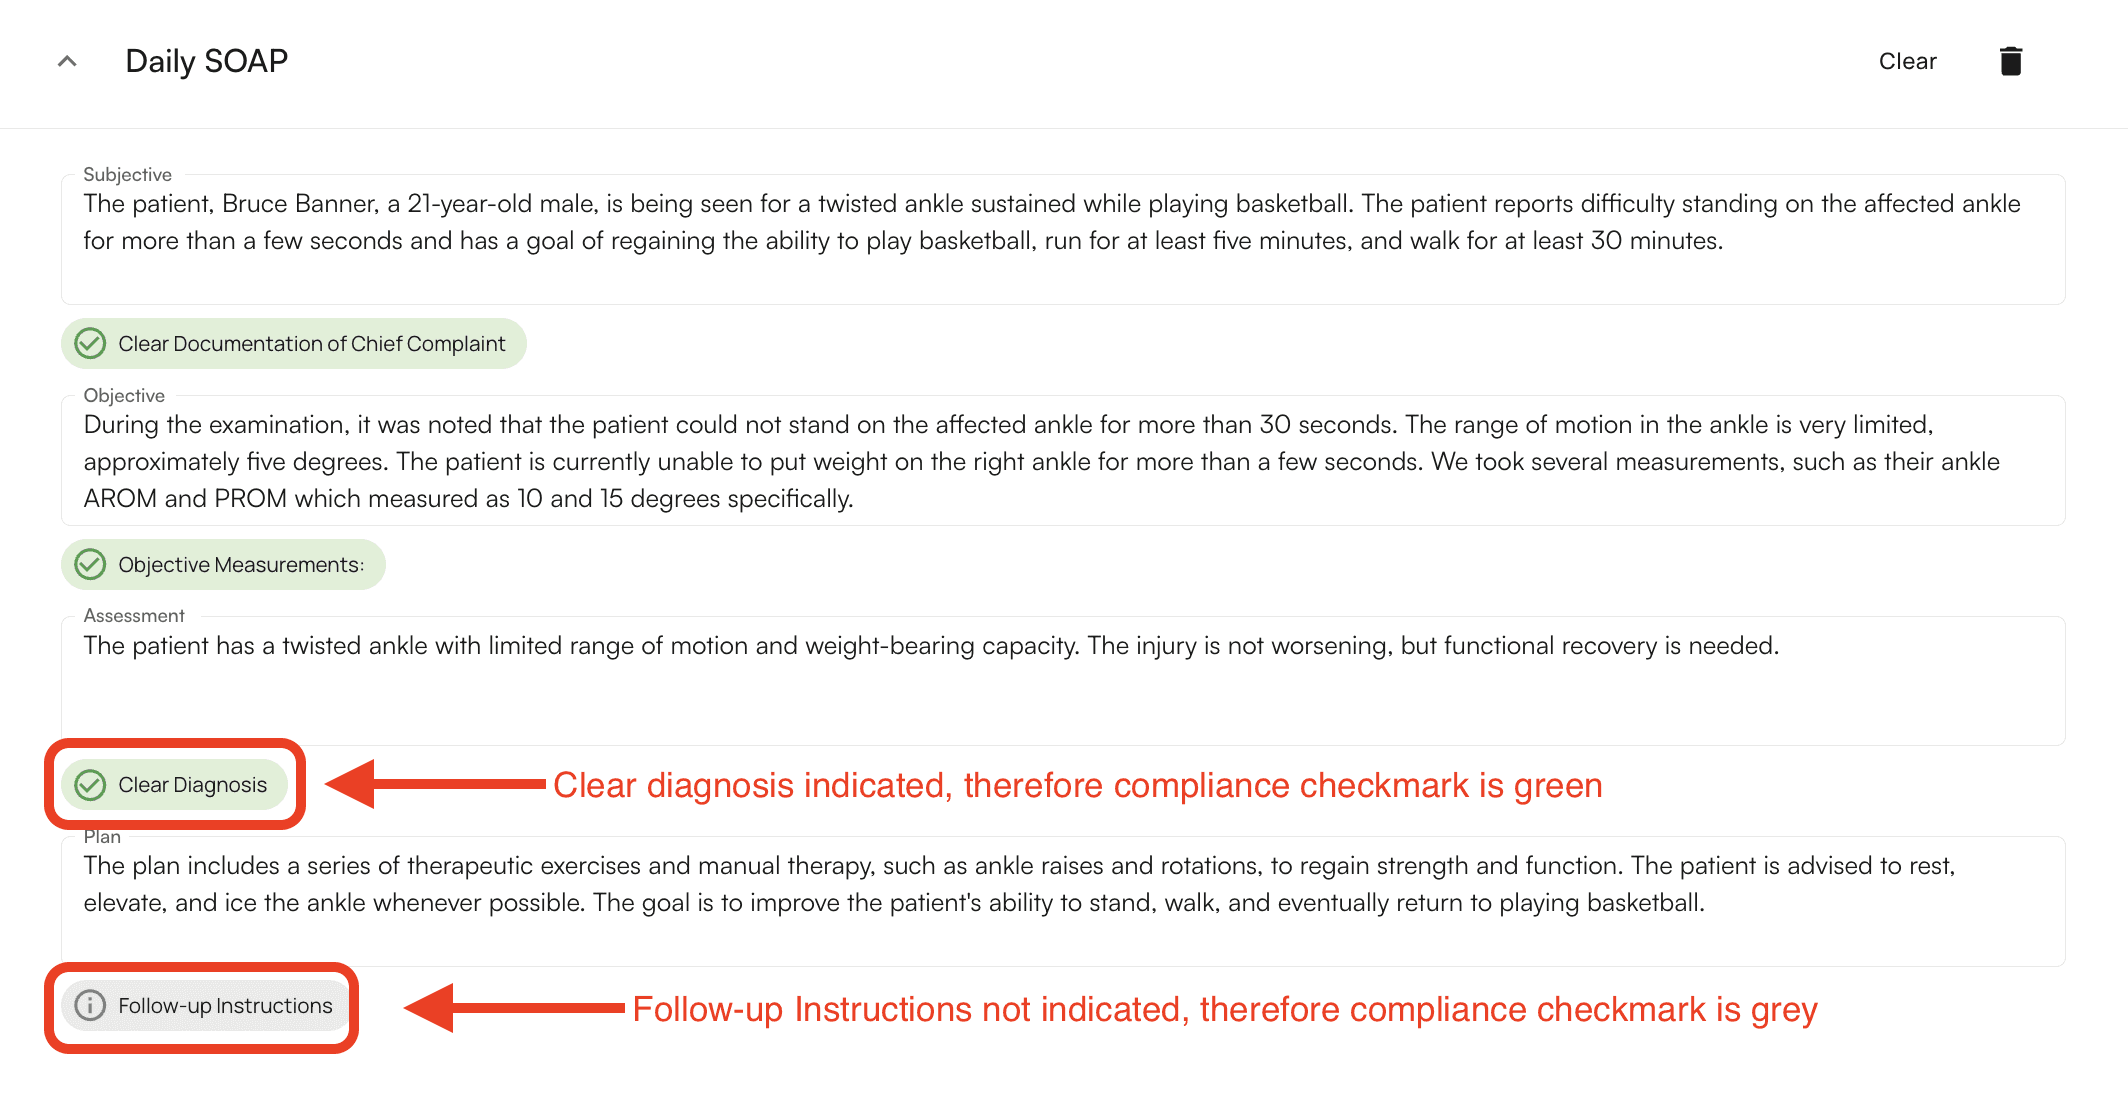
Compliance Checkmarks
Compliance checkmarks are a feature within Air that can be configured for any template within the EHR. They are used to track specific details that should be captured within the chart note. If the detail is not captured, the compliance checkmark will be a grey color. If it is the icon will turn green. You have the ability to either type in this information or utilize scribe.
https://www.loom.com/share/032d1ead44ad4444b9a00374d2de5163?sid=6a6039ae-0cff-430e-9289-18b135137e54
https://www.loom.com/share/50bbe7ac7e6d421ab5f7d7386a84c044?sid=8bdddc49-dc0f-4841-a162-9f88dc7c88a6
Treatments
User has the ability to select the treatment according to the corresponding CPT code
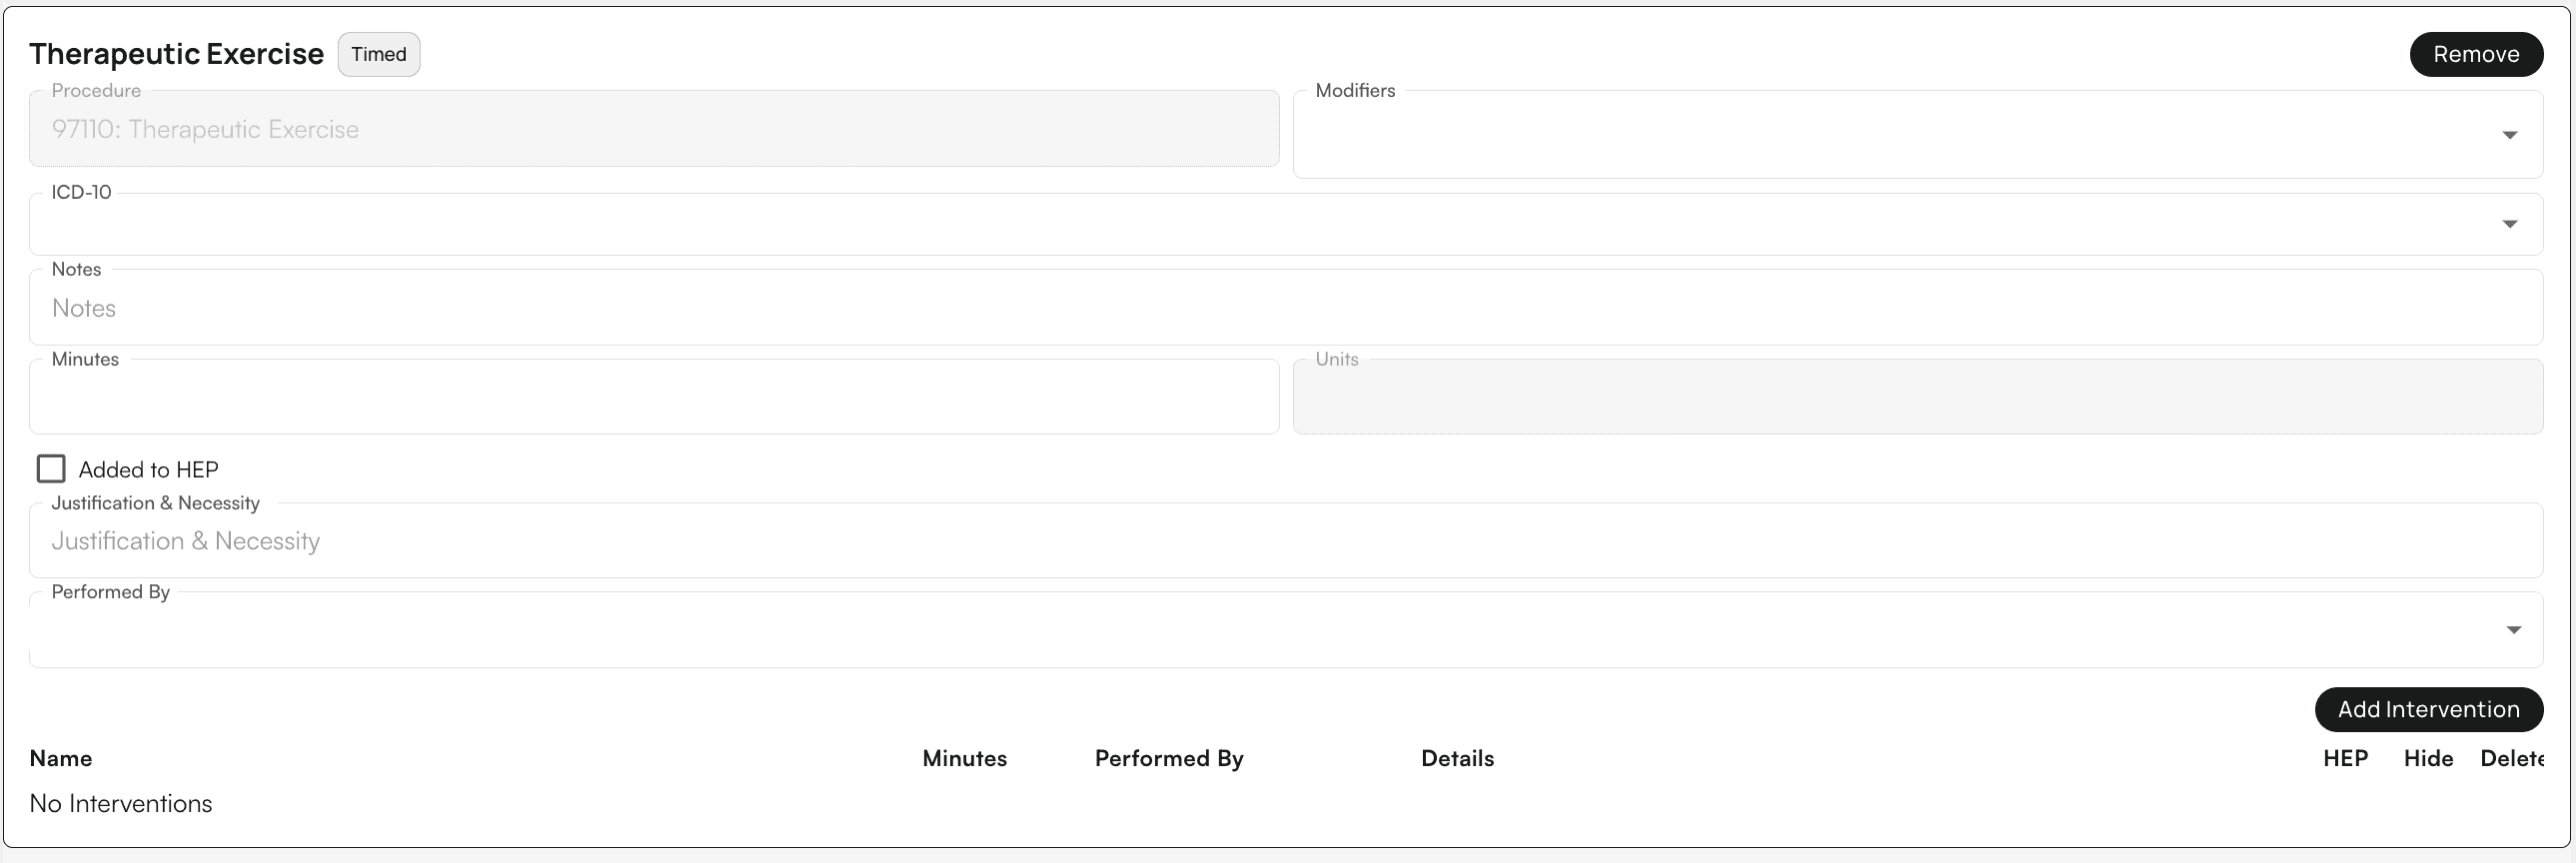
Within this section, one will also have the ability to Add Interventions to specify the Exercises associated to the given Treatment.
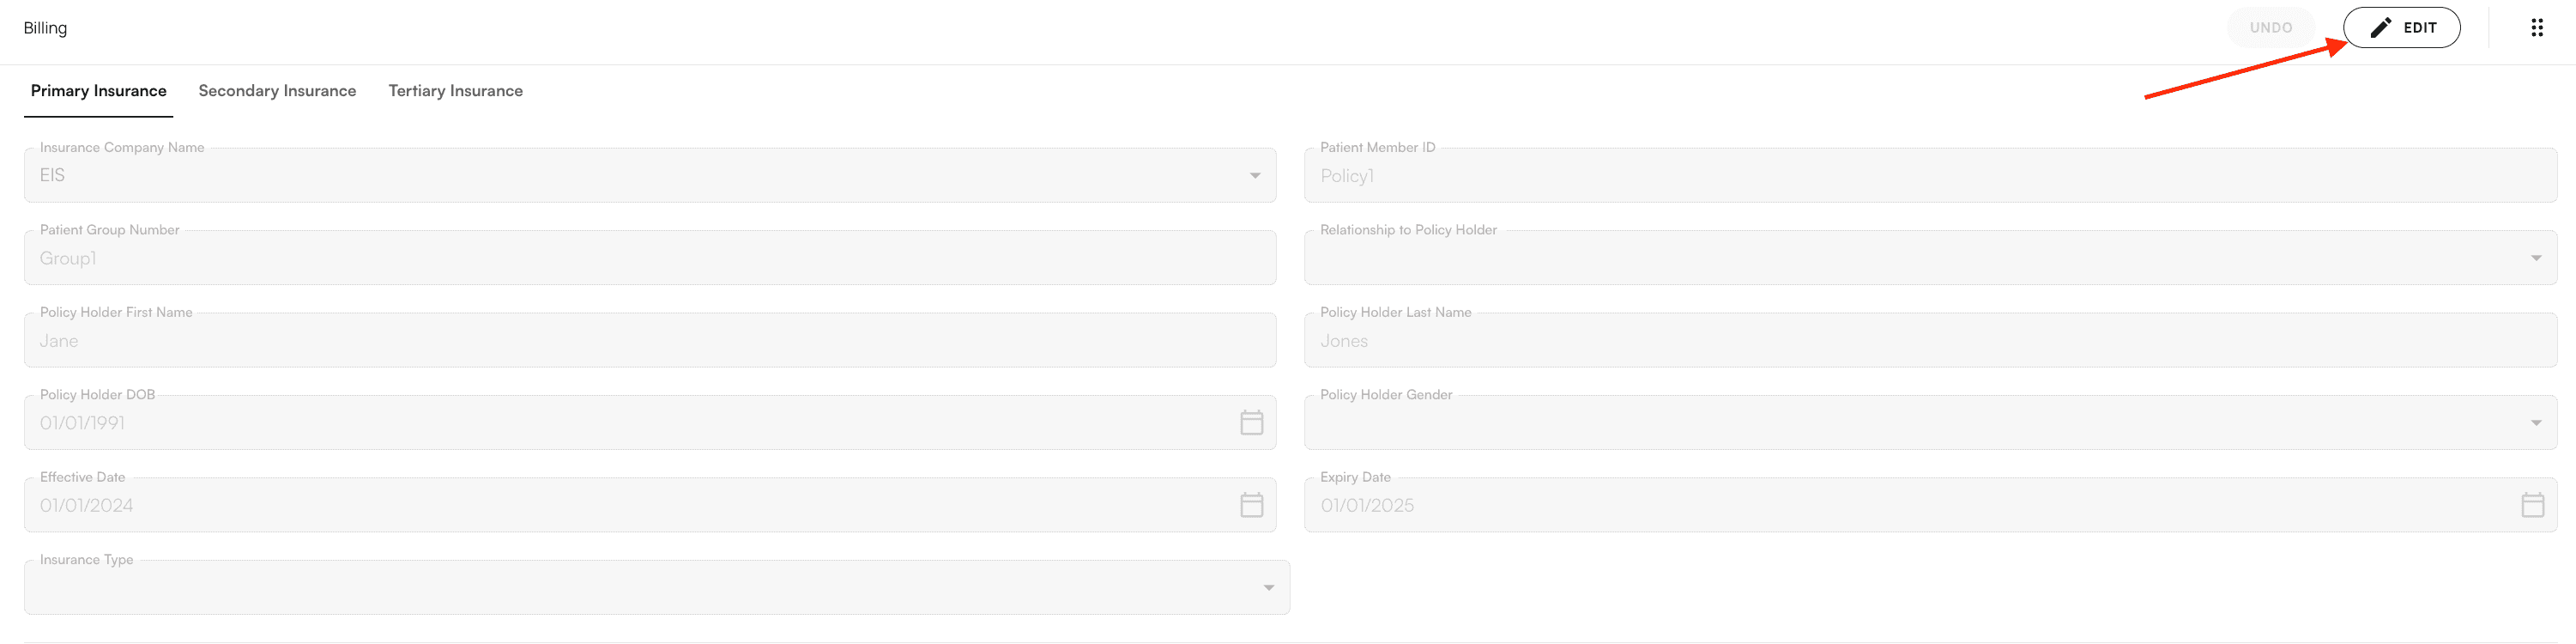
Insurance priority and billing information can also be edited here. Click on “Edit” under the billing section to do so.
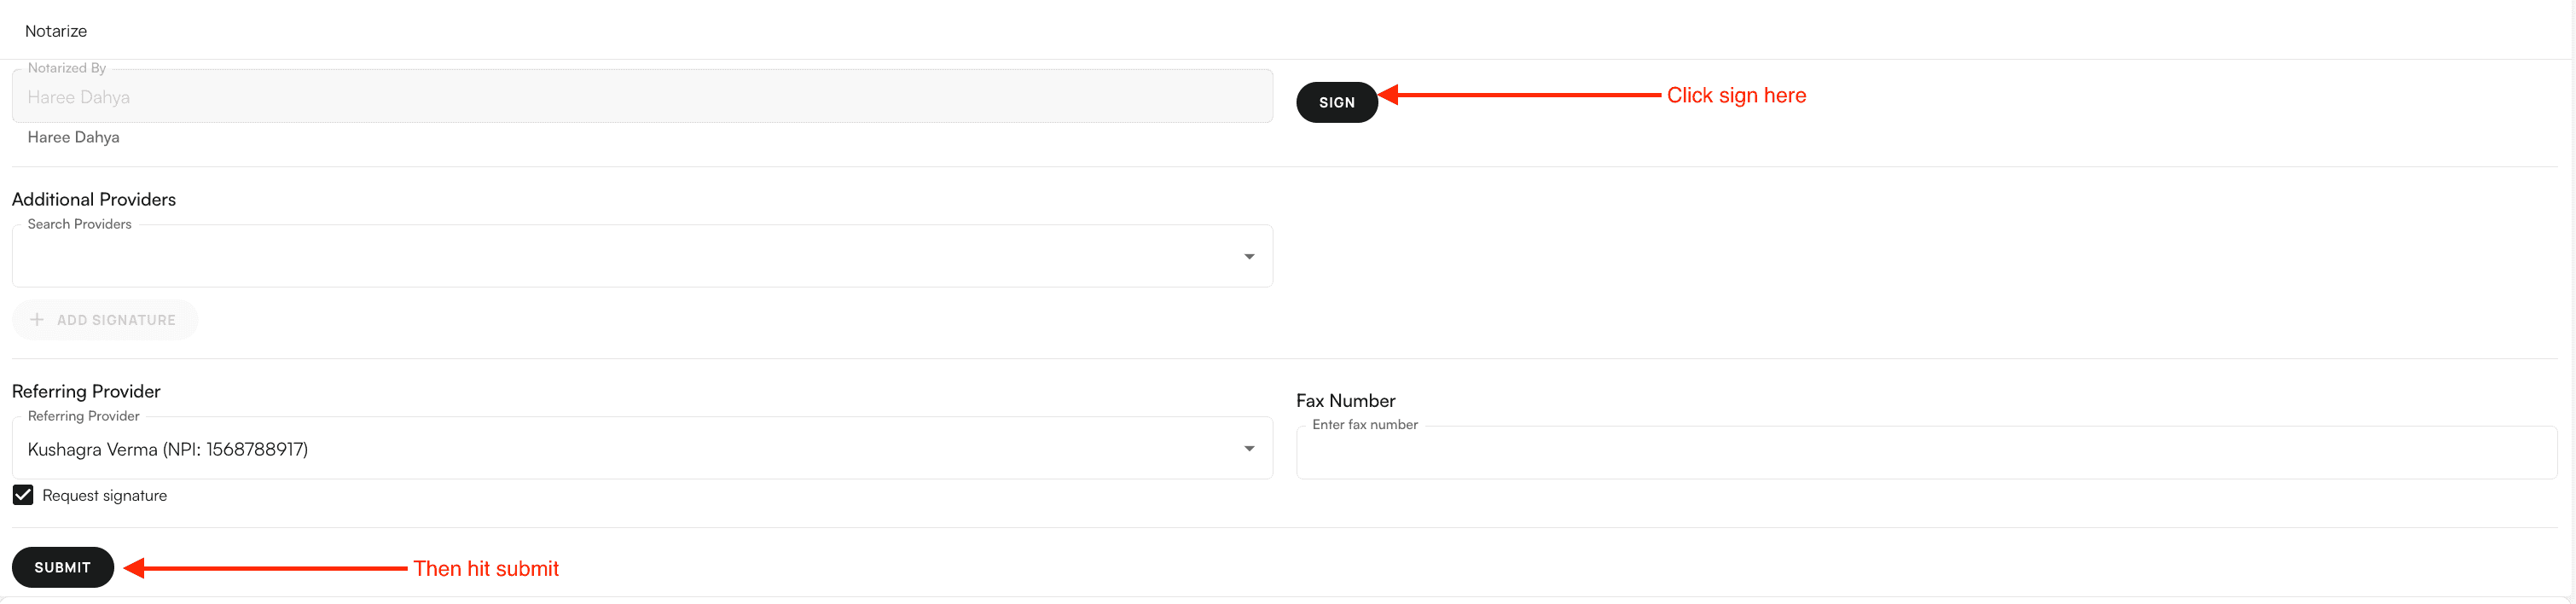
To add additional providers to co-sign the note: Navigate to the “Additional Providers” section and select your providers in the dropdown menu. If you’d like to fax the encounter to a referring provider to co-sign the note, select their name in the dropdown menu and enter their fax number. Make sure the “Request Signature” checkbox is ticked.

To fax the encounter note to an individual fax number, select “Send to individual fax number” and enter the fax number. Hit “Send Fax” when you’ve inputted that information.

Notarize and Submit
To close the encounter and submit it as a claim, sign the note under “Notarize” and click “Submit”